Archives

An Amazing Night For ‘The Blues’ & Potting On

Well I can only say that Monday night was amazing for Leicester, which is where I live ….. Mark Selby from Leicester, won his second World Snooker Championship and Spurs and Chelsea drew 2-2, which meant that Leicester City Football club were now ‘CHAMPIONS OF THE PREMIER LEAGUE’ (I never thought I would write that sentence on my blog).

SAM_2794

My family are big Leicester city supporters and Mr Thrift and my brother-in-law take my 85 year old dad and stepmum to all the home matches.  I also used to be a season ticket holder before our girls were born, in fact I still went to watch them when I was heavily pregant and I couldn’t fit through the turnstyles any longer and had to use the disabled entrance!

So early the next day we decorated the windows of our house with flags and posters.

The BBC news reported that on Monday evening the streets of Leicester were full of fans celebrating and from the minute the whistle blew to confirm LCFC were champions, I could hear people shouting “champions” and cars ‘hooting their horns’ into the early hours of the morning.

Myself and Mr Thift went down to the stadium the next day and there were still hundreds of people there celebrating, together with numerous TV cameras from around the world:

IMG_3649

We also met a ‘Vardy’ look-alike and had blue ice creams while we were there.

IMG_3654[1] IMG_3631

  The atmosphere in Leicester at the moment is amazing (especially as this is all so soon after discovering Richard III underneath a Leicester city car park last year). 

We are a multicultural city and every race and religion are celebrating together, as we are all so very proud to live in our city! 

.

.

In my garden this week:

.

The weather has gone from snow and hail showers to beautiful warm days and the Spring flowers are still looking stunning in my garden:

SAM_2791 SAM_2790

SAM_2789 SAM_2787

I started the week by planting some spring onions around my tomato plants in my greenhouse.  I am determined to use every single space in my garden possible to grow as many things as I can.

I started the spring onions in modules a few weeks ago as I find they germinate and grow better this way.  I put a pinch of seed in each module, but I don’t thin the seeds out as the onions will grow happily together and when I harvest them I pull up a ‘bunch’ at a time:

IMG_3594 IMG_3595

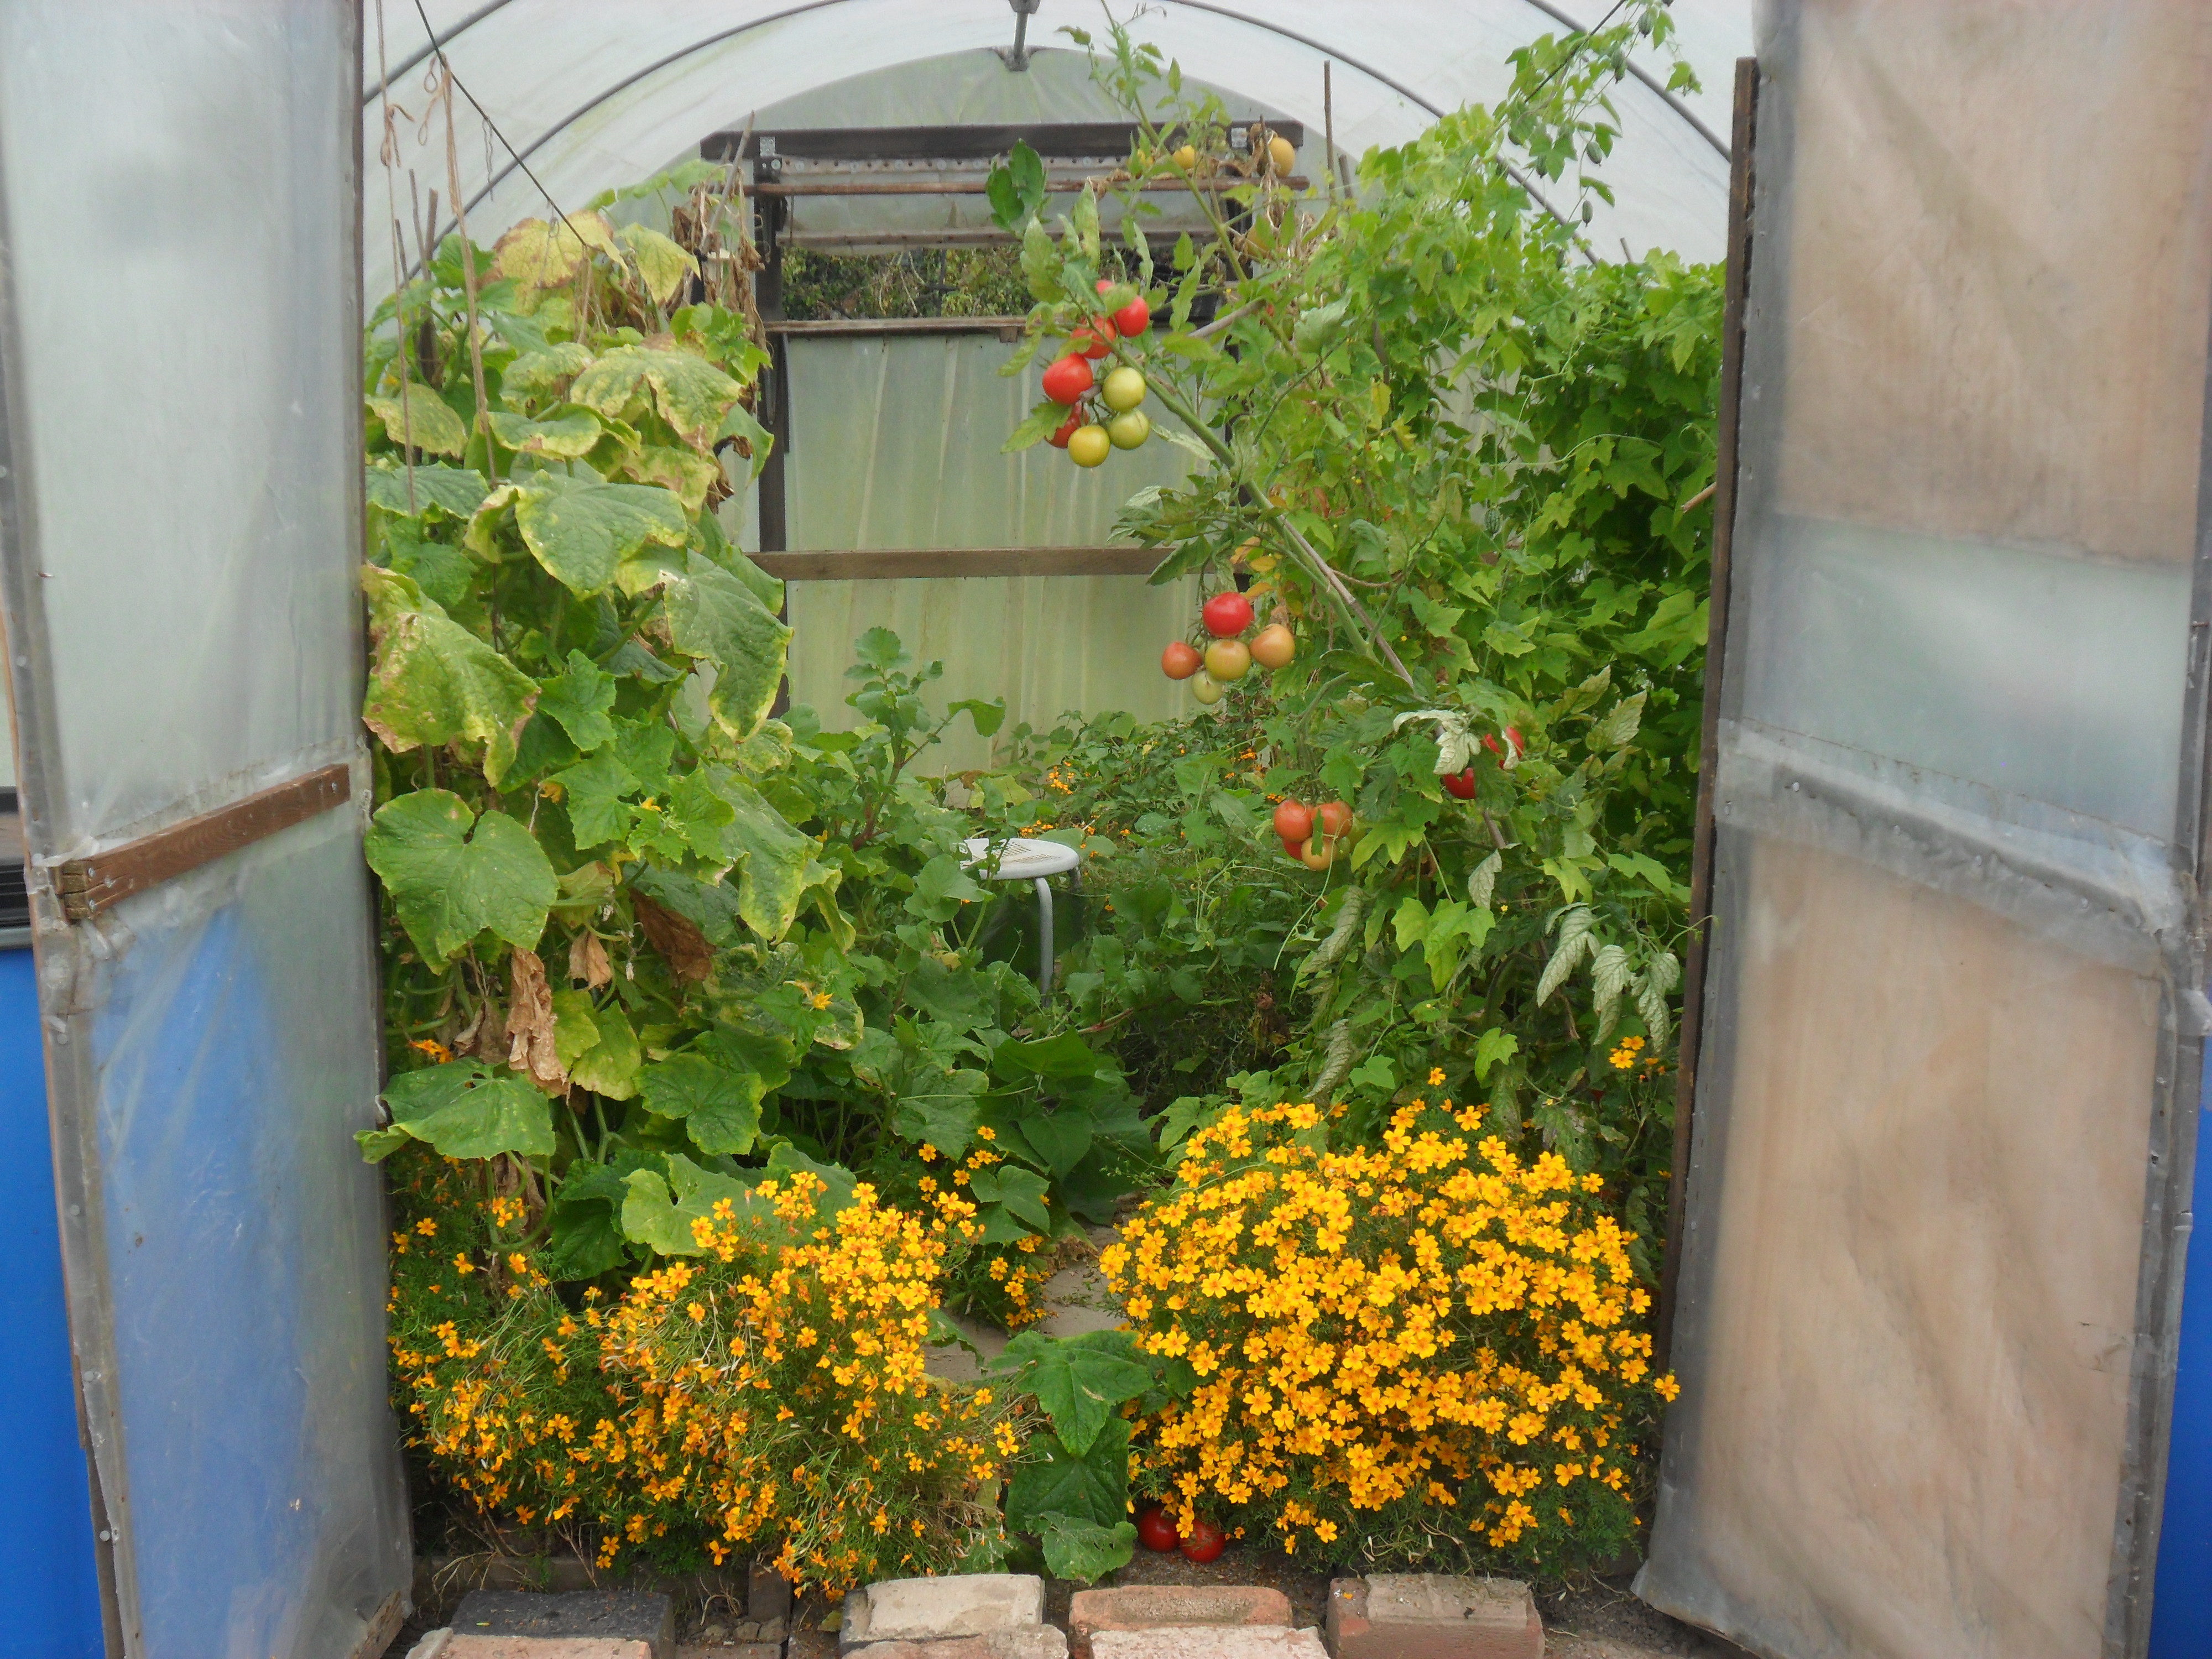
I also planted three more tomato plants in the greenhouse and sowed some radish in between them.  I added some marigolds that I had grown from seed, (marigolds emit a strong odour that repels greenfly and blackfly and they will also add colour to my greenhouse):

IMG_3624

I continued to plant peas this week.  I planted the rest of my climbing peas against our outhouse wall:

SAM_2753

And some dwarf peas in the new area of my garden that I created last autumn:

SAM_2743 SAM_2749

Also I found a small, empty spot that I had forgotten about, so I planted the remainder of my sweet peas here in a pot.  I will be dotting flowers all around my garden in the next few weeks, to attract as many beneficial insects as possible:

SAM_2785 SAM_2821

.

I have also been potting up some of my plants that have grown too big for their pots, but it is too early to plant them out (because there is still a risk of frost in my area until at least the end of this month).  I know they have grown too big for their pots as their roots have begun to grow out of the bottom:

SAM_2808

I have repotted my tegetes, antirrhinums, marigolds, thyme, chervil, dill, sage, oregano and my remaining greenhouse tomatoes.  I have grown all of these plants from seed, which I think has saved me a lot of money over all and I also enjoy growing things from seed too.

SAM_2803

As I was potting my tomato plants up I noticed that there were side shoots growing on the plants, so I ‘nipped’ them off using my finger and thumb.  You can tell which the side shoots are, as they always grow between the main stem and a leaf:

SAM_2811

I will be continually ‘nipping’ off the side shoots on all my tomatoes as they grow, as these sideshoots are unproductive and take energy from the main plant.

.

I also sowed some more seeds again this week…..I started with some mangetout as my youngest daughter and Mr Thrift LOVE these fried in a bit of butter.  Again, I used guttering to sow them into and I will keep them in my mini greenhouse until they germinate, as I seem to get a better germination rate this way:

SAM_2813

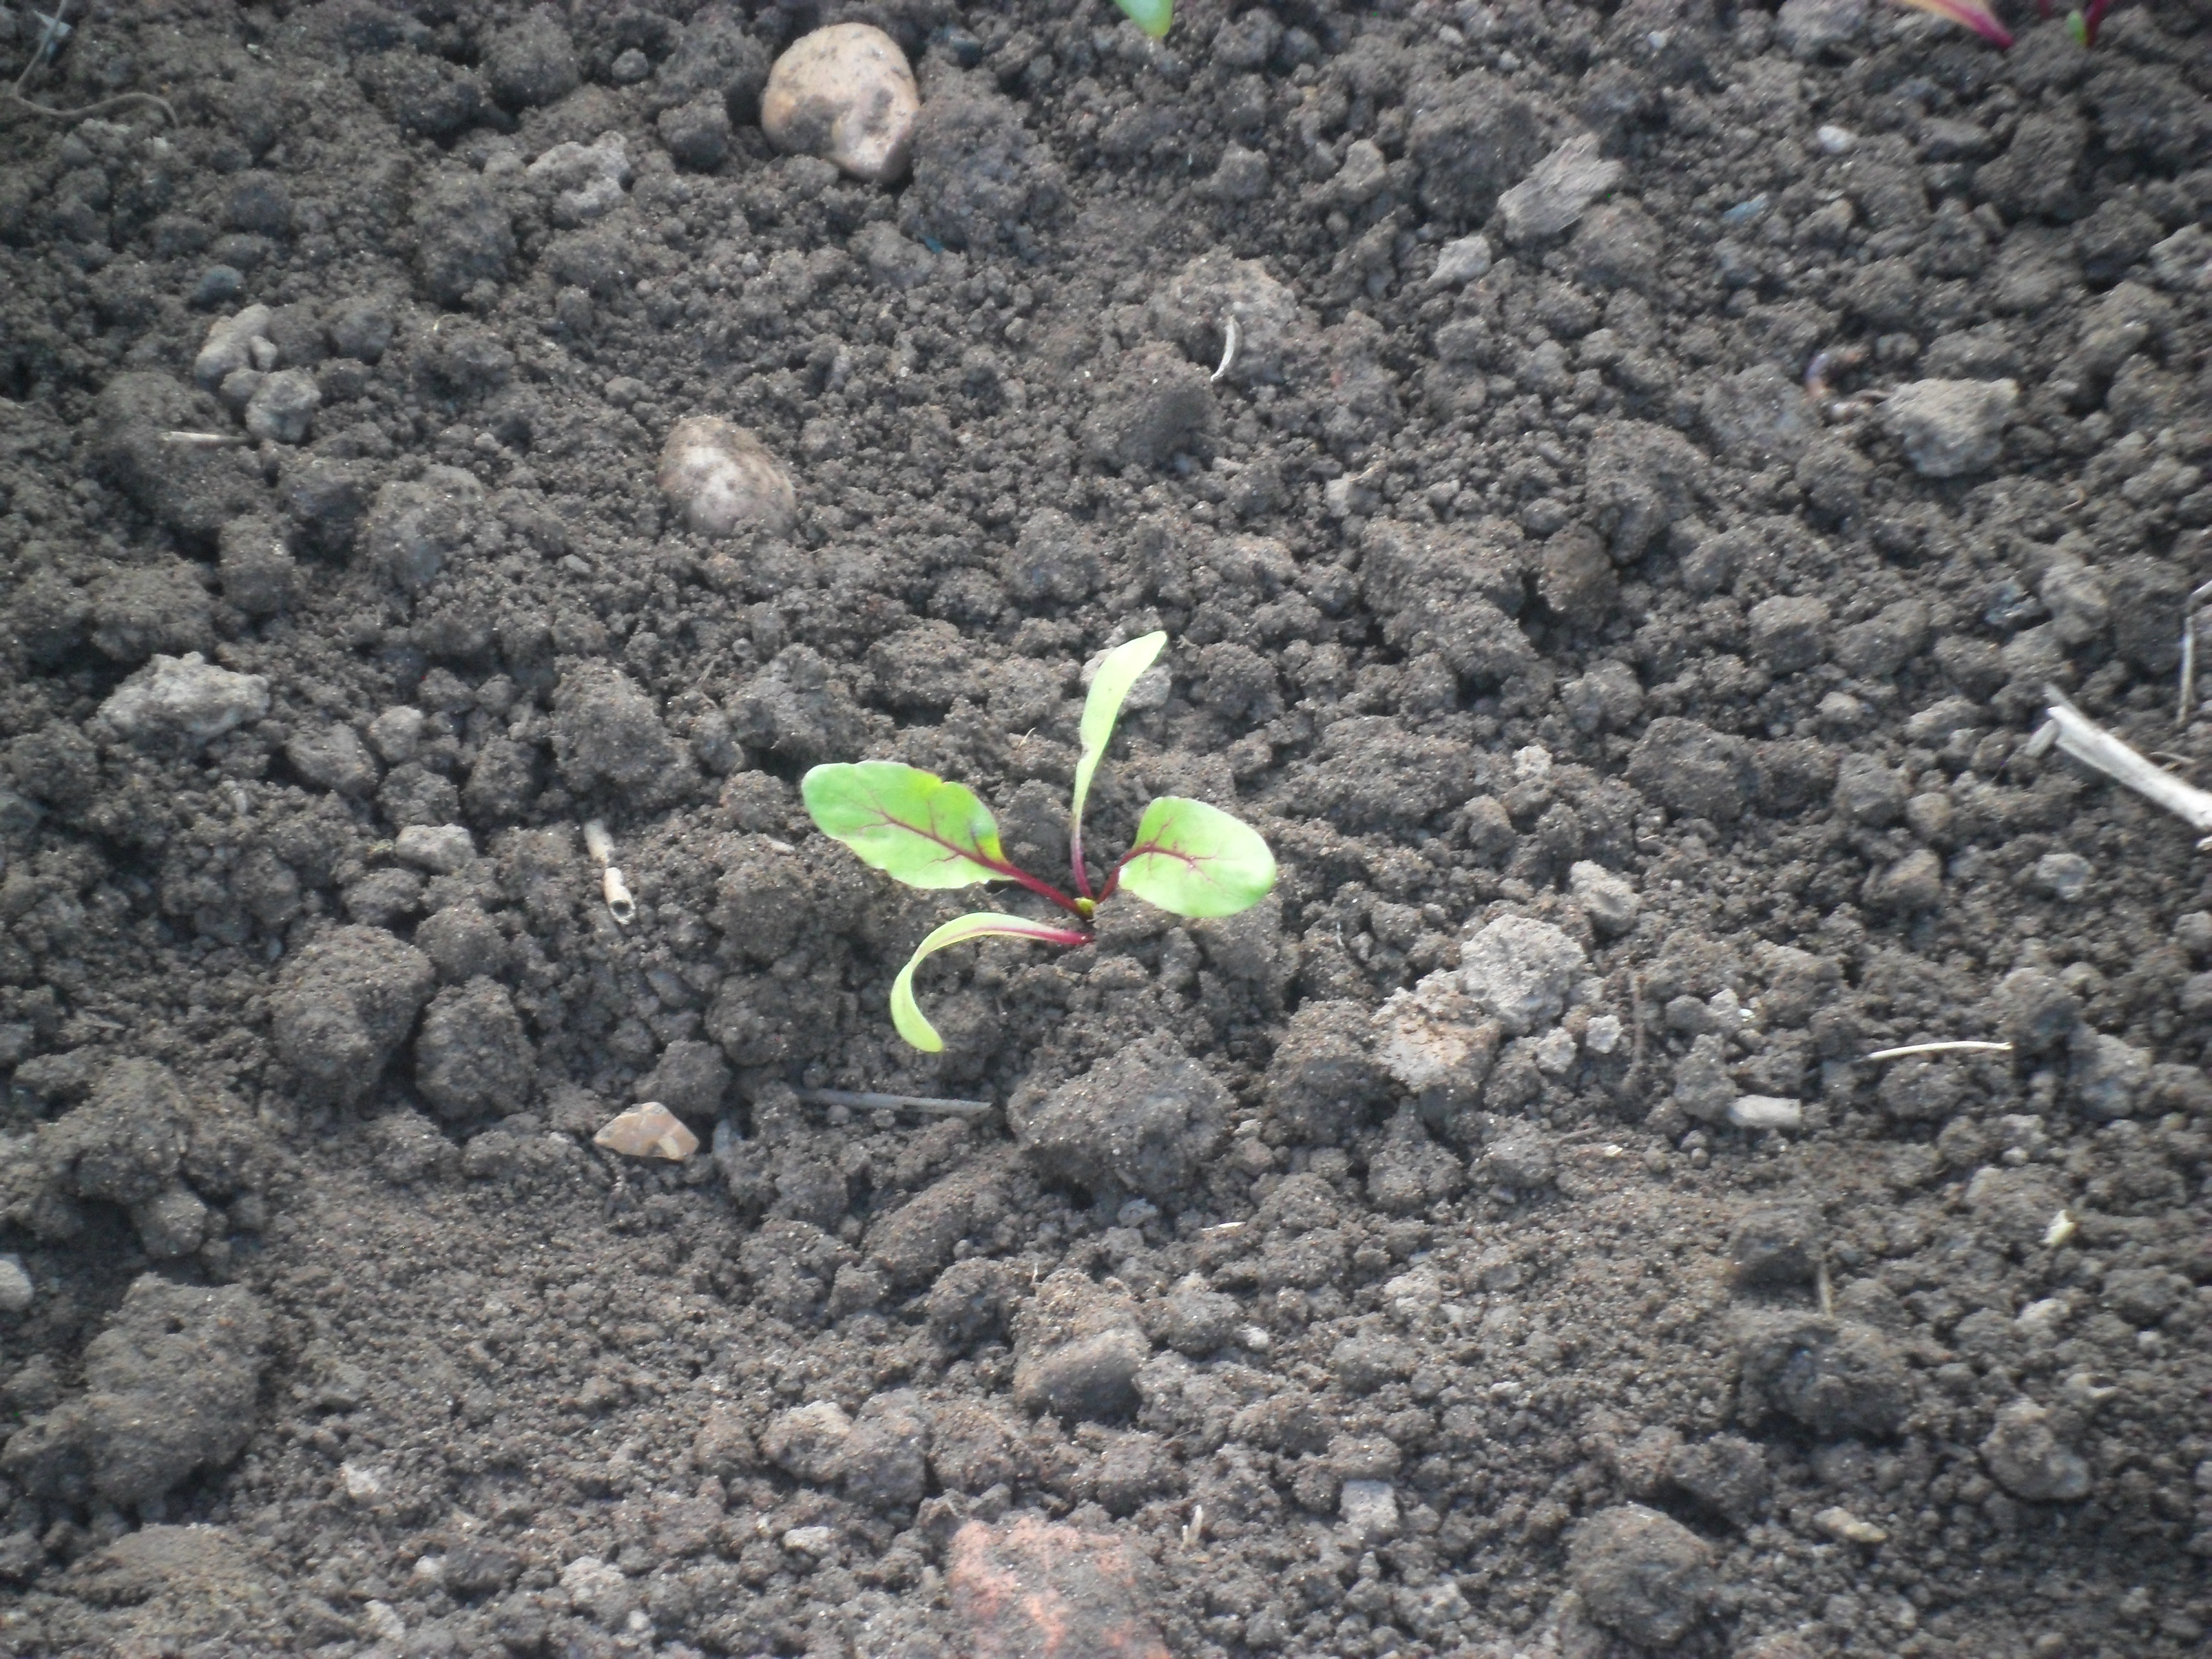
I also sowed some runnerbeans (for me, my mother-in-law and my dad), some frenchbeans (for me and my mother-in-law), outdoor cucumbers, kale, spring onions, sweetcorn, coriander, lettuce, beetroot, nasturtiums (to grow around my runnerbeans to attact the blackfly away from them) and wallflowers ready for next Spring.

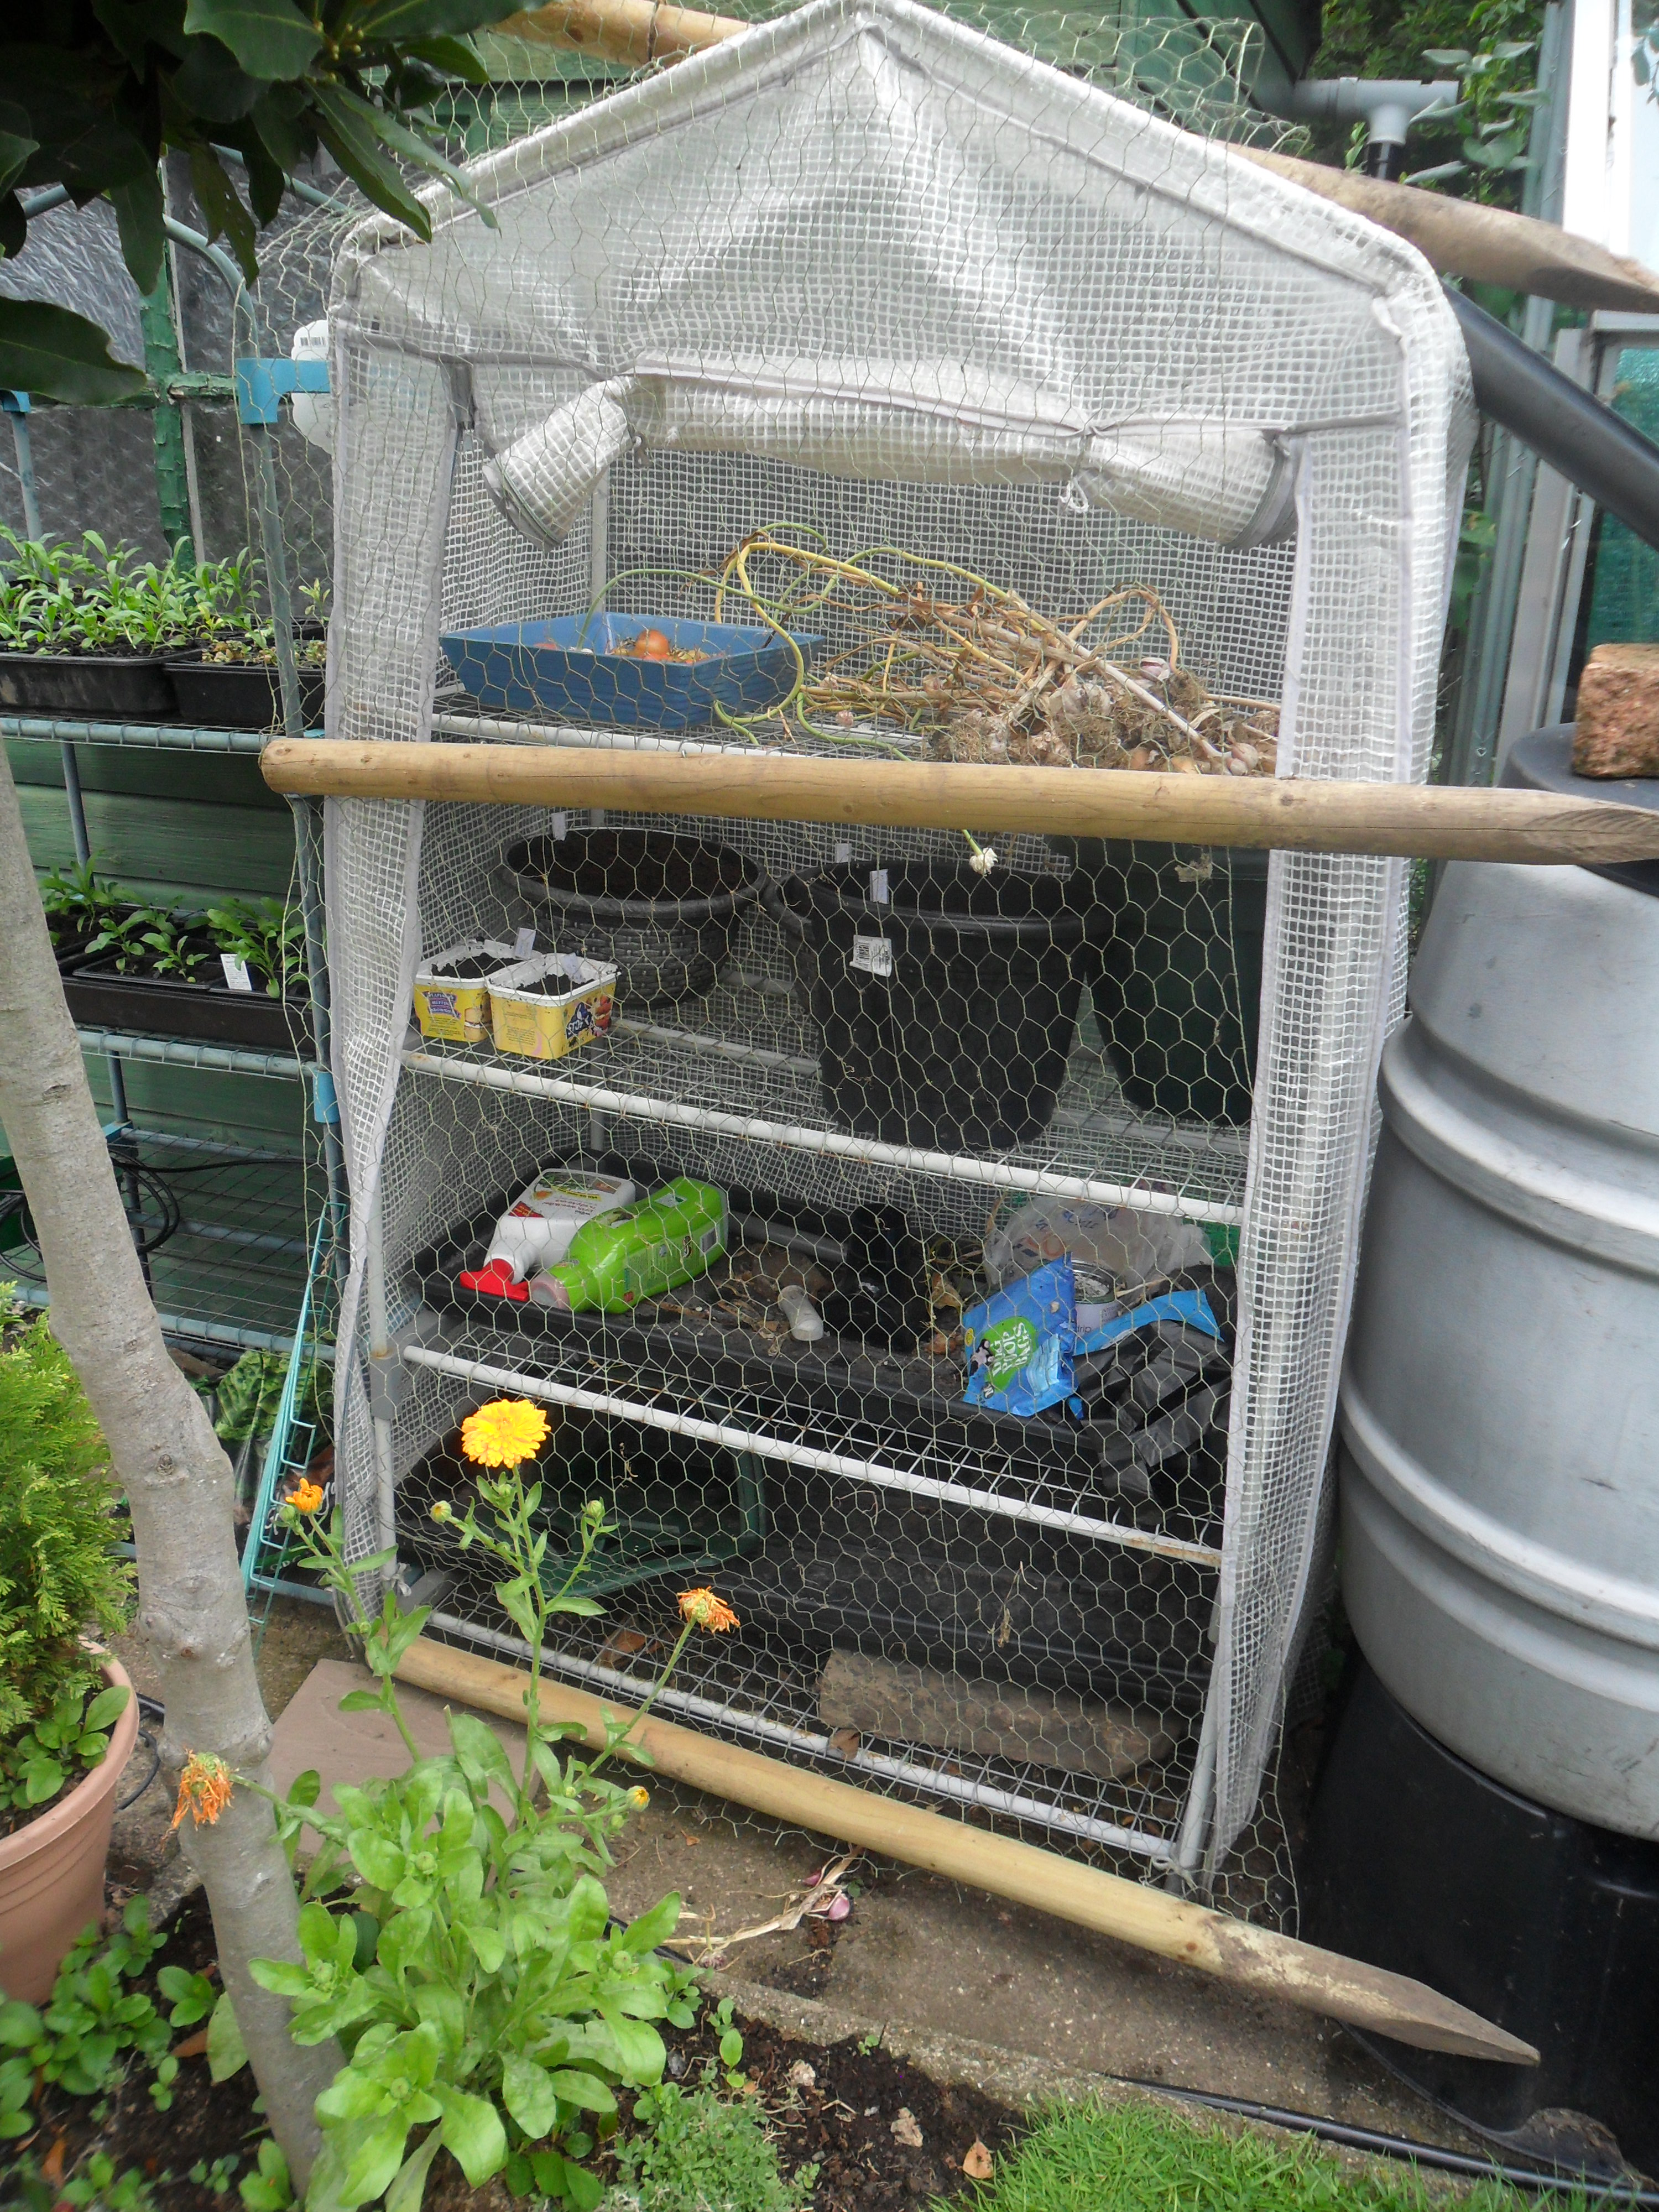
All of these seeds are sitting inside our kitchen waiting to germinate, as unfortunately my greenhouse is bursting at the seams now as you can see below:

  SAM_2819 SAM_2817

.

The last gardening job I did this week was to cover up the gravel board that broke when our fence blew down in November last year in front of our grass.  Unfortunately when our kind neighbour fixed the fence for us, he left this board broken (I’m not sure why but I guess it would have been too hard to replace it).

IMG_3627 IMG_3490

As the broken board was bowed I couldn’t just put a new gravel board in front of the broken one, so I brought a log roll to cover it up and I think it has done it’s job well:

SAM_2764

.

.

In the home this week:

.

At home this week I have brought back one of my old routines of baking bread rolls at the weekends for the week ahead:

SAM_2761

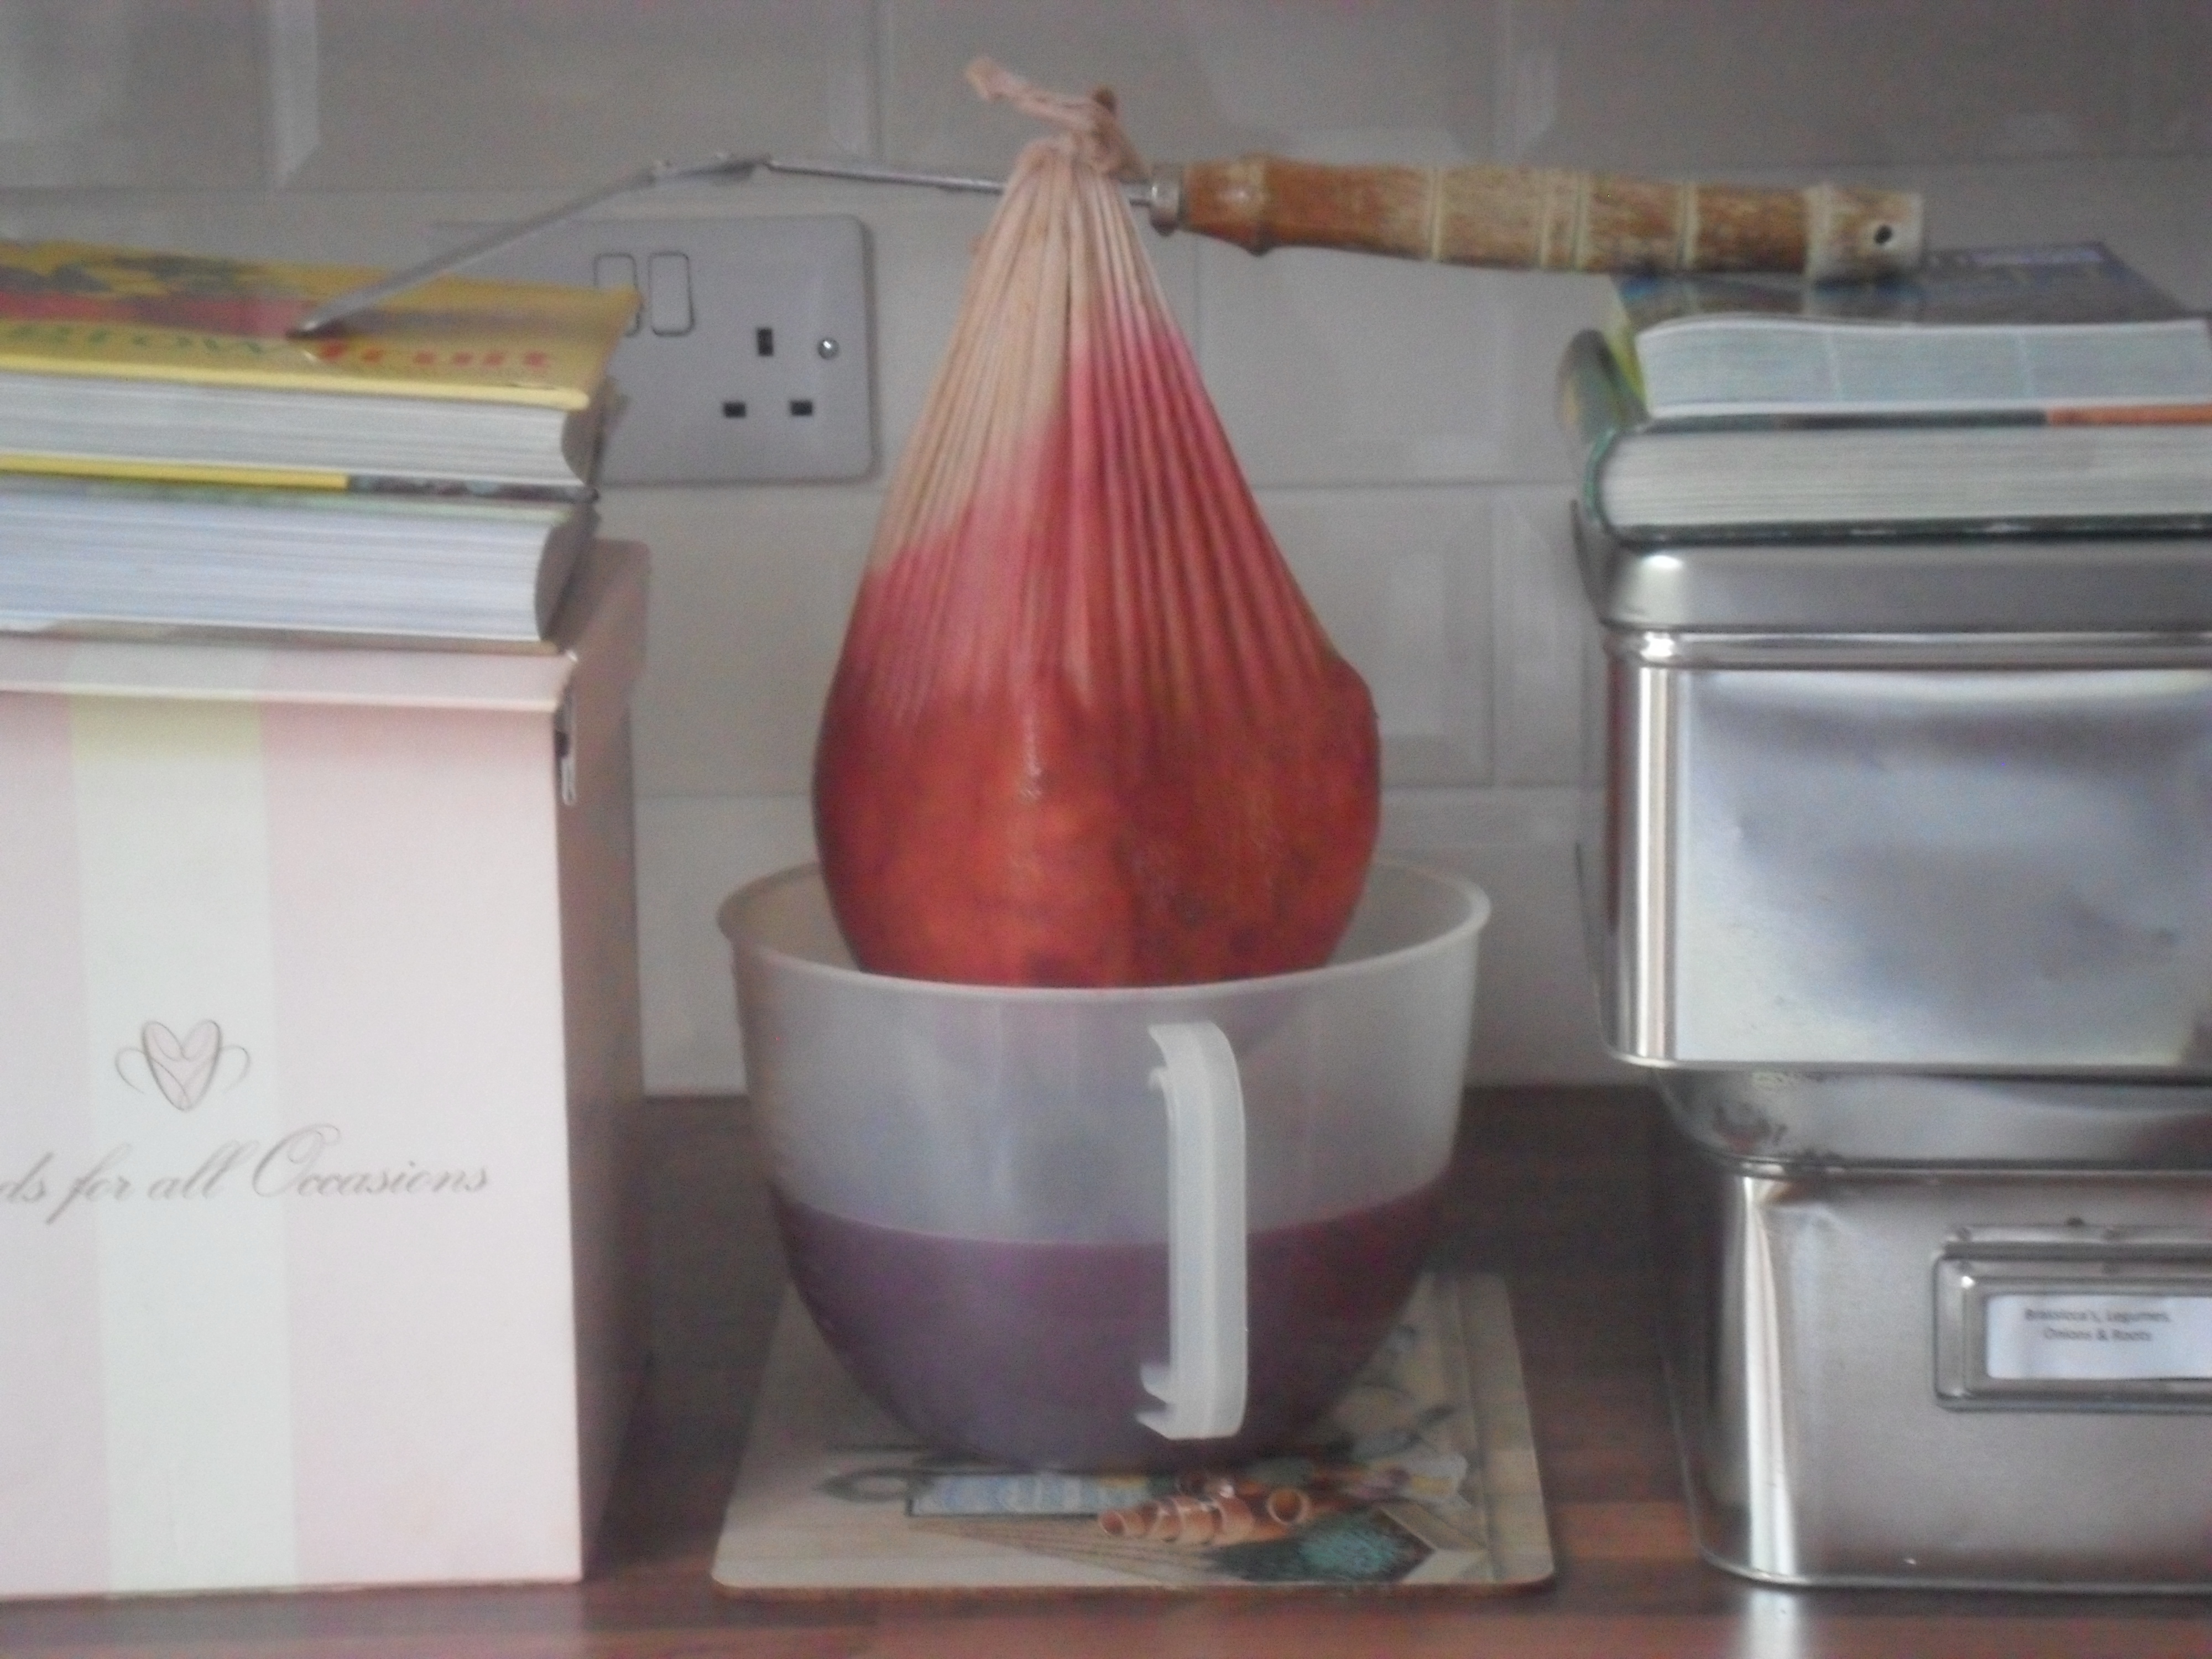
I then made some garlic bread for tea with the rolls I baked and my stored garlic.  I also made some extra to freeze for another time.  I made the garlic butter and spread it onto the rolls and then froze the rolls.  When I need garlic bread for tea, I will take out the frozen rolls that I need and cook them in foil in a pre-heated oven for 15 minutes, gas 6 / 200C / 400F.

SAM_2769 SAM_2765 SAM_2766 SAM_2793

.

I made a big batch of blackberry cordial as well (as my youngest daughter loves it and has been asking me to make it for months).  As my daughter is the only one that drinks it, I separated it into small usuable quanties and put it into the freezer, so I can take it out when I need it and then dilute it with water – this way it won’t get wasted:

SAM_2759

.

And finally I made some little fairy cakes with sultana’s – some to eat and some to freeze for another time:

IMG_3610

.

.

This week we have been having some lovely salads, using lettuce leaves and radishes from my greenhouse and chives from the garden:

SAM_2777 SAM_2778

SAM_2736

As I am being more organised I remembered to add defrosted sweetcorn and beetroot that I grew last year and froze.  I still have lots left in my freezer, so I must keep using it:

SAM_2772 SAM_2771

And finally I added coriander that I have been growing on my kitchen windowsill:

SAM_2775

And the salads have been tasting wonderful:

SAM_2792

.

This week I also starting picking a bit of rhubarb and stewing it for my breakfast.  I’ve added it to porridge, sultana’s and greek yoghurt and it really tasted nice:

SAM_2795 SAM_2798

Incidently, a lot of people think you can’t compost rhubarb leaves as they are poisonous….but you CAN compost them, as after a few months in your compost heap, the toxin level will have dropped so low that it won’t pose a threat:

SAM_2796

.

.

During the last week:

.

My sister and I took my mum out for ‘afternoon tea’ as it was her 85th birthday.  The tea room was in Syston and it cost us £9.95 each.  The tea room was beautifully decorated as you can see if you click on the link here.

My sister had a cake stand with dairy free goodies (as she is dairy intolerant) and my mum and I shared the one in the photograph below.  There was so much that they wrapped up the chocolate cakes so we could take them home…..it was delicious!

IMG_3616

.

Finally this week I took some plants to my nephew and his family to help him out, as he has made some deep raised beds and a coldframe out of wood for his garden.  He had done a really grand job on them and they look great.  He is in the process of growing his vegetables from seed and hopefully, my adoreable great nephews will get the gardening bug too:

SAM_2755

.

.

I have had some lovely times this week and to round it off, yesterday as I walked my dog in Bradgate Park I heard a ‘Cockoo’ for the first time in my life (they are quite rare birds now).  Recently I also heard a woodpecker in our local park for the first time too….so Judy is bringing more unexpected delights into my life everyday and I am so glad we adopted her from the RSPCA.

Judy with her football shirt on

Judy with her LCFC football shirt on

.

Well that’s it for this week.  I will be back next Friday as usual.

Have a great week!


A Problem With My Leeks….

This week nature has produced some beautiful sites.  It started with the most beautiful red morning sky last weekend:

IMG_1438

And then a covering of snow that made everything look very pretty:

SAM_2573 SAM_2577

 I’m very pleased to say that the snow disappeared as quickly as it came and this week and I managed to get into my garden to start my winter ‘clean up’ and start my preparation for the new growing season ahead.

I started by emptying the compost bags I had in my greenhouse as I want to clean my greenhouse in the coming week.  Nothing really grew very well in these bags, but I think this was due to my watering system overwatering the compost and the dreadful, dull weather we had last year.

IMG_3041

I spread the compost over two of my beds to help improve the condition of the soil:

IMG_3044

I started to put manure around my rhubarb too, but unfortunately I ran out of it so I need to but some more.  However I did manage to surround one of my rhubarb plants:

IMG_3054

I then cut down my old runnerbeans, leaving the roots in the ground as the nodules add nitrogen to the soil, which will be good for my brassica’s which will follow them:

IMG_3048

Next I cut the tops off my jerusalem artichokes which I grew in a large bottomless pot to contain the roots.  I will dig up them next week to see if I have managed to get a crop:

IMG_3049

So this area now looks better, though I do need to tidy my utility area behind:

IMG_3050

I also turned my attention to my leeks which have been very disappointing:

IMG_3005

As you can see from the photo above they have been targeted by the allium leaf miner and some of my leeks have started to rot.  I have written about the allium leaf miner here, it is a fairly new pest in this country and only appeared in Britain in 2002.

The allium leaf miner only ever affected my onions at the allotment which lulled me into a false sense of security, so I didn’t bother covering my leeks with environmesh…..but unfortunately they were were hit hard this year, so I will have to make sure I cover ALL of my alliums from now on.

leek

I took the photo above of the small brown pupae that I found in some of them to show you.  They are approximately 3-4 mm long, embedded into the stem.The pupae will overwinter in the plant or in the soil.  In the spring, the adults will emerge from the pupae and lay eggs and the first generation of larvae will then feed in April and May. The second generation is likely to feed in mid-September.

But I am pleased to say, some of my leeks were ok, so I did get a amall crop:

IMG_3002 IMG_3004

.

This week I also tidied a bed that I had covered with environmesh in the Autumn, to give a bit of protection for my summer lettuces.  The summer lettuces had been picked a long time ago and I thought there was nothing underneath, but to my surprise I found a row of winter radishes that I had sowed in late summer and completely forgotten about:

IMG_3058 IMG_3057

They have grown lovely and so I picked one straight away and later grated it into the salad we had for tea:

IMG_3060 SAM_2596

I had a quick weed around them and then put a cloche over them to give a bit of protection:

IMG_3059

I also picked some winter purslane (sometimes know as miners lettuce) that I had been growing in a pot in my greenhouse and also added it to our salad:

SAM_2595 SAM_2597

I love being able to pick winter crops to add to salads and I am very pleased that I have acheived this in my new kitchen garden, though I want to do a lot better for next winter.

.

I also sowed my first seeds this year, which I always find exciting:

SAM_2591

I planted overwintering broadbean (Aquadulce), which over the years I have found they grow best in pots planted this month and then transplanted in the spring.  I also sowed leeks and the remaining garlic cloves that I had left over and these wil sit happlily in my cold greenhouse for the moment.  I also sowed my peppers, but these will be kept inside a propagator in the warmth of my house for the time being.

.

This Week In The Home:

.

I sat and finally sorted my seed tin as it was in a bit of a mess.  I listed down exactly what seeds I have and I worked out exactly what I want to grow this year in my garden.

I now have a plan of exactly when I need to sow my seeds and what I still need to buy.

SAM_2587 SAM_2585

I am hoping to grow even more this year in my new improved small kitchen garden.

.

I then caught up with a few things for the freezer…..each are small things that help me a lot to save time:

My daughter wanted some chocolate chip cookies, so I made them and then froze them so that I can take just a couple out of the freeze each day, so she doesn’t eat them all at once:

SAM_2579

I sliced some lemons up and froze them on a plate, ready to put in a freezer pot when frozen.  This way we have a ready supply of lemon slices to add to water when we need a drink.  As the lemons are frozen they also cool your water down without having to use icecubes:

SAM_2583

I then made a double batch of white sauce.  I froze one of the sauces in a freezer bag after it had cooled down.  Next time I need a white sauce I will just defrost it and reheat it in the microwave.  This way it is easy to use it as it is, or just add parsley for a parsley sauce or cheese for a cheese sauce.

SAM_2582

I made and froze leek and potato soup in portions.  Again I can just defrost a portion and then reheat it in the microwave for my lunch:

SAM_2584

I made the leek and potato soup using the leeks that I dug up this week:

.

A Leek and Potato Soup Recipe:

.

800g potatoes peeled and chopped small

800g Leeks chopped

1700 ml vegetable stock

800mls hot milk

.

Add the potatoes, leeks and stock to a large pan:

IMG_3008 IMG_3009

Bring to the boil and then simmer, covered for approximately 30 minutes or until the vegetables are soft.

IMG_3011 IMG_3014

Heat your milk while you use a hand mixer to blend the vegetables to make them smooth and then add the hot milk to the pan.  Bring the soup back to the boil and continue to cook for 5 minutes, stirring all the time:

IMG_3015 IMG_3017

 Serve and enjoy adding salt and pepper to taste!

IMG_3024

.

Thank you for reading my blog today.  I will be back next Friday as usual.

Have a great week!

Catching Up & An Apple Cake Tray Bake Recipe

Before I start today I wanted to remind anyone that is interested, that my usual monthly blog post of

‘What To Do In The Kitchen Garden In November’ can be found here.

There is loads of information in this post e.g. weather conditions expected, what to sow / plant / harvest in November, jobs to do and pests / diseases that you may encounter this month.

I hope it helps someone out there.

SAM_2293

.

This week I have started to get back to normal after decorating my daughter’s bedroom a couple of weeks ago.  It has felt nice making bread and cakes again:

SAM_2232 SAM_2244 SAM_2233

.

I also caught up with a few jobs I have been putting off.

  I started by flushing my plug holes with bi-carb and vinegar to ensue they don’t start to block up.  It’s great for removing food, hair and soap scum from your pipes.  It’s very simple to do:

I put one tablespoon of bi-carb in the plug hole and then I added three tablespoons of white distilled vinegar and left it for a few minutes to fizz away:

SAM_2241 SAM_2242

I then flushed it all down with boiling hot water:

SAM_2243

.

I also finally brought in the tomatoes that were sitting in my greenhouse ripening.  I put them there at the beginning of October and they have ripened well:

SAM_2134 IMG_2801

I left a few on my kitchen window sill to continue to ripen and I have left some out for sandwiches and salads,

SAM_2281 SAM_2280

but I have also managed to make some more passatta to freeze:

SAM_2279 SAM_2282 SAM_2286

.

In my garden this week I started to use another batch of lettuces that I have been growing under environmesh….I pick the outside leaves of the lettuces so they continue to grow.  They should be fine growing outside under the environmesh for some time yet, before the harsh winter weather comes:

SAM_2283 SAM_2284

One thing I noticed in my garden is I have somehow managed to grow a clematis.  I do remember that a clemastis used to scramble through the large photinia bush I used to have in the corner, but I assumed this was killed off when I cleared the area at the beginning of the year.

When I first saw it growing in the summer I twisted the growth around my trellis as I really wasn’t sure what it was (though I did suspect it looked like a clematis) and this week it has begun to flower….better late than never:

SAM_2294 SAM_2295

I shall leave the plant where it is as it obviously wants to be there and I will prune it in February.

.

I also finally bottled up the wine I made a few weeks ago.  I had a little taste and it is lovely already, but hopefully as it matures it will get even better.  These bottles will be great in my Christmas hampers:

SAM_2297

.

My lovely sister dropped in this week with some apples from the tree in her garden, as she has had a bumper crop:

SAM_2248

I sorted the apples and I wrapped up those without blemishes in newspaper and placed them in a cool, dark place to store them through the winter:

SAM_2267 SAM_2269

I then decided to juice the remaining apples, so I started by washing the apples and then removing all the bad bits:

SAM_2269

Unfortunately there were rather a lot of bad bits and when I chopped the apples in half I found that loads of them were bad in the middle.  I’m not sure if they are bad due to ‘codling moth’ or wether it is the result of ‘mouldy core rot’:

SAM_2270 SAM_2271

However, I did get enough good apples to do a little bit of juicing:

SAM_2272 SAM_2273 SAM_2274

It was a shame about the rotten apples but the juice we did get was absolutely delicious:

SAM_2277

.

My sister also gave me a few bramley apples, so I made an Apple Cake traybake:

.

An Apple Cake Traybake Recipe:

.

500g Bramley apples peeled, cored and thinly sliced (leave in water to stop them going brown)

350g self raising flour

280g caster sugar

225g soft margarine or butter

4 eggs

1 tsp vanilla extract

2 tsp baking powder

2 – 3 tbsp demerara sugar to sprinkle over the top.

.

.

Preheat your oven to 180C / gas 4 / 350F and line a baking tray with greased, greaseproof paper.

Put the margarine, caster sugar, eggs and vanilla into a bowl and then seive the flour and baking powder into the bowl. 

SAM_2250

Mix until all the ingredients are combined and then add a little bit of water to the mixture if it doesn’t drop off the spoon easily.

SAM_2251

Spread half of the mixture into the lined baking tray and then arrange half of the apples over the mixture.

SAM_2252 SAM_2254

Put the rest of the cake mixture on top of the apples and then arrange the remaining apples again on top

SAM_2255

Sprinkle the apples with demerara sugar

SAM_2257

Bake for 45-50 minutes.  Ensure the cake is cooked by inserting a skewer….it is cooked when the skewer comes out clean.

SAM_2259

Leave to cool for ten minutes and then slice.

Serve hot or cold on it’s own or with cream or ice cream.

SAM_2264 SAM_2261

Enjoy!

.

Thank you for reading my blog today, I will be back next Friday as usual.

Have a good week!


Kitchen Garden Photos & A Christmas Chutney Recipe

I thought I would start my blog post by showing you a wonderful sand sculpture I came across this week outside the ‘Richard III’ visitors centre in Leicester.  Apparently it took a lady called Susanne Ruseler just seven days to create it…..what a talented lady!  I think it is wonderful and I found it purely by accident as I walked past:

IMG_2620

.

This week in my kitchen garden:

.

This week I turned my attention to sowing some winter seeds.

SAM_1821 SAM_1822

I sowed mizuna, winter lettuce, winter purslane, winter spring onions and corn salad.  I am a tiny bit late sowing these seeds, but hopefully they will be fine.

At the moment they are in my mini greenhouse, as I am trying desperately to keep the squirrels from them.  The squirrels are becoming a nuisence in my garden at the moment, as they keep digging holes to bury the monkey nuts that one of my neighbours insists on feeding them….it also sends Judy (my rescue dog) into a mad barking session each time they come in the garden, so I really need to think about this problem and come up with a solution.

But for now I have used some chicken wire to try and keep them away from my seeds:

SAM_1823

.

Also this week I noticed the ’60 day’ raab that I sowed three weeks ago was ready to ‘thin out’.  I used scissors as normal to cut away the seedlings that I didn’t want (this stops any root disturbance for the remaining seedlings).  I will need to thin them again at a later date, but for now I left plenty of them in case the slugs and snails decide to have a feast on some of them:

SAM_1785 SAM_1786

I have continued to harvest runner beans, tomatoes, beetroot, salads, spring onions and curly kale this week too:

SAM_1812 SAM_1810 SAM_1813

….And I noticed that my sweetcorn has really had a growth spurt and will soon be ready too:

SAM_1828

“Sweetcorn is ready to pick when the tassels at the end of the cobs turn brown and when you press your nail into a kernel the liquid comes out is milky”

.

The phacelia that a sowed a few weeks ago is growing nicely now.  I won’t thin the seedlings out as it is a green manure that I want to grow thickly to keep the weeds from germinating:

SAM_1832

I will chop down the phacelia before it sets seed and then dig it into the soil to add nutrients ready for next year’s crops.

.

The rest of the kitchen garden is doing well too and I thought I would be nice to show you some photos that I took this week:

SAM_1829

SAM_1833 SAM_1834 SAM_1835 SAM_1837 SAM_1840 SAM_1841 SAM_1842 SAM_1843

SAM_1844 SAM_1826

.

.

This week in the home…

.

This week has been a very busy week here in my kitchen:

I started by making some more dishwasher liquid as I had ran out.  I make it using soapnuts and it works really well in our dishwasher and it is really easy to make:

SAM_1820 SAM_1846

.

I also made a big portion of spaghetti bolognaise.  We had some for tea and then I managed to freeze four portions.  I always ‘pad out’ my spaghetti bolognaises with whatever vegetables I have to hand, so this one had carrot, runner beans and curly kale included in it.  I find the portions go further if I mix the spaghetti (or pasta) in with the sauce rather than layering the sauce on top:

SAM_1819

.

I then had a freezer disaster to sort out:

I don’t know if you remember, but a couple of weeks ago our small chest freezer broke and myself and my daughter had a mamouth cooking session to save the large quantity of vegetables that were in this freezer.

Unfortunately this week I had another ‘freezer disaster’…. the door of one of my other freezers was left open by accident.  Luckily again, there was no meat in this freezer as it was mainly full of allotment fruit, homemade cakes, scones and my bread rolls for the week ahead.

SAM_1809

I had been waiting for a spare few hours to make jams with the fruit that was left in my freezer, ready for my Christmas hampers, however this forced me to make them now instead of later.  So I spent a couple of days cooking yellow plum jam, gooseberry jam, strawberry jam and finally some plum and worcesterberry jelly….

SAM_1802 SAM_1806 SAM_1805 SAM_1803

On the positive side, nothing was wasted again and this has created a lot more room in my second freezer, though I am sad to say I now have no fruit or vegetables left from my old allotments……so I must work out how to grow even more fruit and vegetables in my new kitchen garden next year!

.

Beetroot from my new kittchen garden:

SAM_1797 SAM_1796

This week I also wanted to use up the beetroot and apples that I was given last week (together with my own beetroot), so I made some beetroot chutney:

SAM_1799 SAM_1818

.

……And I also wanted to use the remaining plums that I was given last week, so I made some ‘Christmas Chutney’ which uses cranberries and plums and a few lovely ‘christmas’ spices.  I have written the recipe below if anyone is interested.

  We will use some of the preserves that I have made, but a lot of them will be given at Christmas in the hampers that I make.

.

Christmas Chutney With Cranberries & Plums

.

500 grams courgettes chopped

500 grams plums halved with stones removed

400 grams granulated sugar

300 grams dried cranberries

600ml white wine vinegar

2 onions chopped small

1 tsp ground ginger

1 tsp ground cinnamon

1 tsp ground mixed spice

1 tsp salt

.

Add all the ingredients except the sugar to a large pan and bring it to the boil stirring all the time. Reduce the heat and simmer for 15 minutes stirring occasionally.

SAM_1777

Add the sugar and stir until it has dissolved and then simmer for a couple of hours or so, until the chutney is thick and chutney like.

SAM_1782

Pour the chutney into sterilised jars and store in a cool dark place for a minimum of three months to mature.

SAM_1804

Then enjoy it with cold meats and sandwiches at Christmas!

SAM_1784

.

Thank you for reading my blog today.  I will be back next Friday as usual.

Have a good week!

Seed Sowing & General Garden Jobs

I hope you all had a lovely Easter.  The weather here was beautiful on Easter Monday and we even dug out our BBQ, which is something we haven’t done for an awful long time…..maybe giving up my allotments will bring nice advantages like this.

My Easter Cake

My Easter Cake

.

This week I have been seed sowing again.  However I had to make some plant labels first.

I make plant lables by cutting up empty plastic milk bottles and they work a treat:

SAM_0693

I then sowed some spring onions, butternut squash, outdoor tomatoes, melon, basil, coriander, lettuce and parsley.

I keep some of my seeds in the greenhouse which is heated to 10C and some of them inside our house to germinate:

SAM_0696

I also sowed some climbing peas in toilet roll inners.  These are a variety called ‘peashooter’ which are quite expensive to buy, so each year I save some of my own seeds – these are seeds I saved last autumn.  The pea pods grow lovely and big and the peas are beautiful:

SAM_0697 SAM_7049

I also sowed my parsnip seeds in kitchen roll tubes.  I sow them this way so I get a good germination rate and lovely straight parsnips…I have tried lots of different ways to grow parsnips and this way is definately the best.

You can read all about growing parsnips this way here if you are interested.

SAM_0695IMG_2296

.

This week I decided to cover my onions and garlic to avoid the allium leaf miner, which is a relatively new pest in the Midlands.  It attacks all alliums and over the last couple of years it did quite a bit of damage to my onions at my allotment.  The alliums in my back garden may be protected as it’s pretty sheltered here away from the allotment, but as I have lots of enviromesh I thought I may as well cover my onions to protect them, just in case.

You can read all about the allium leaf miner here.

I made the cage for the environmesh exactly the way I used to at the allotment, using canes and bottles:

SAM_0698 SAM_0705

.

This week I also planted some lettuces.  I will keep them under glass until they are a little bit bigger as the nights are still cold at the moment.

SAM_0722 SAM_0726

I also planted out the spring onions that I sowed on the 18th March.  I always had problems getting my spring onions to germinate in my heavy clay soil and I found that by putting a few seeds in modules really helps.  I don’t bother to thin the onions out as the bunch will grow happily together until you are ready to pull them up:

SAM_0723

It’s lovely to see more and more things growing in my new kitchen garden.

.

.

Last week I tried to set up my first water butt, but I found it has a leak around the tap.  I fixed the leak last week and now it is finally set up and waiting for rain:

SAM_0710

This week I set up a second water butt next to my shed.  I spotted an old grey piece of guttering hanging from the back of my shed and so I hooked this up to some guttering to make a ‘makeshift’ channel to my waterbutt.  It looks a bit daft, but it will do the job for now:

SAM_0711 SAM_0712

.

Another job I finally got around to doing this week was to sort out the nets I brought back from my allotment.  I measured them and labeled them, so I would know at a glace which one I should use in the future.

SAM_0708SAM_0718

I also washed some of my environmesh and folded it up ready for use:

SAM_0707 SAM_0709

I managed to store them all in my storage boxes where I would normally store all my potatoes during the winter:

SAM_0719 SAM_0720

.

Now that my nets had been put away neatly, I was able to start to fill the large containers that I brought home from my old allotment plots.  I put as much rubble as I could in find in the bottom of each pot together with a bit of polystyrene that I found.  This will help with drainage and also reduce the amount of compost that I will need to use to fill each deep pot too.

I used the council green waste compost to half fill the pots (as this is only £2 for a large bag) and I will then buy some compost to top the pots up as this will have more nutrients in than the council green waste compost:

SAM_0721 SAM_0727

.

This week I also thinned the leeks that I sowed last month.  I don’t need too many this year so I will thin them out a bit more in a couple of weeks so I get nice, strong healthy plants.  The leeks are still very small as I only sowed them last month, which is later than I usually do, but I’m sure they will catch up:

IMG_2334

And finally this week I planted some Primroses in my new kitchen garden.  I love these plants as they look so beautiful in Spring with the daffodils, they are good for the bees and the plants grow year after year…..so I think they are a good plant to have in my kitchen garden:

SAM_0700 SAM_0716

.

Thank you for reading my blog today.  I will be back at my usual time next Friday.

I hope you have a good week.

A Cucamelon Review & Winter Salads

The mornings have been quite chilly this week, feeling very much like autumn is here.

On Wednesday we had some well needed rain overnight and when the sun came out in the early morning it was a beautiful sight, with rains drops glistening around the allotment.

SAM_0105

.

This week I have been concentrating on my polytunnel, getting it ready for winter.

The crops in my polytunnel had just about finished, except for a few tomatoes (which I will ripen at home) and some peppers and melons that were ready for picking:

SAM_0133

….and I mustn’t forget  the thousand ‘cucamelons’ dangling at me, ready to pick.

.

A Quick Cucamelon Review:

Every year I like to grow something different and this year I chose ‘cucamelons’ .  I had read different reports about them and came to the conclusion that they are a bit like ‘marmite’, you either love them or hate them….so I decided to grow them for myself.

  The fruits are grape sized and they are supposed to taste of cucumber with a hint of lime, but I am yet to taste one that actually had the hint of lime in it.  The cucamelon can be eaten whole or chopped up in salads.  The skin has the texture of a sweet pepper, so it has a bite to it….inside it is like a mini cucumber.

They were easy to grow in my polytunnel and after a slow start they started to take over, smothering my tomato plants that grew next to them, but I’ve got to say there were millions of fruits that just kept coming and coming and coming!

SAM_9802

Unfortunately my family didn’t like them and after forcing them at anyone that came into our house, I found that not many other people liked them either.   I didn’t think they were too bad, until I ate quite a few for tea one day and ended up with bad indigestion all night!

SAM_0103

Needless to say, I won’t be growing these again….but we live and learn.

.

Winter Salads:

Last month I sowed some winter salads ready for my polytunnel and they have grown quite well and were ready for planting.   However first I needed to clear the crops that were left in my polytunnel:

SAM_0101

One surprise I did find in my polytunnel when I was clearing it, was some carrots that I had completely forgotten about…and they had grown really well.  Carrots can be stored in compost at home until they are needed, but I know these carrots won’t last long in our house as everyone loves them.

SAM_0104

After I had cleared the crops, I forked the soil over and gave the soil a covering of homemade compost.  I also raked in some blood, fish and bone where I would be planting my salads:

SAM_0112 SAM_0119

The winter salads that I chose to grow were mizuna, winter lettuce, corn salad, rocket and perpetual spinach.  I also grew some beetroot as a trial, to see if I could use the small leaves over winter in salads (though I’m not expecting to grow a decent sized root).

SAM_0113

After planting the above crops I gave them a good watering and I must say the polytunnel did look different….another reminder that autumn is here:

SAM_0131 SAM_0132

One of the things I have learnt from bitter experience, whether you grow plants in a cloche, a greenhouse or a polytunnel, you need to provide ventilation during the autumn or winter months.  If you don’t then the humid conditions will be a breeding ground for grey mould, which will smother and kill your plants.  So on fine days I open the doors on my polytunnel throughout the winter months.

“Grey mould is caused by a fungus called ‘Botrytis cinerea’ which can infect plants at any time of the year.  It can enter a plant through a wound or infect a weak  plant under stress.  It will also infect healthy plants in humid conditions”.

.

At home this week I have continued to use up my ripening tomatoes to make soup and passata…

SAM_0041 SAM_0040

 …and I only have a few left to use now, which again shows me that Autumn is here and the wonderful harvest of summer is nearly behind us.

Now it’s the time that the Autumn harvest of pumpkins, butternut squashes, apples etc. begins.  The nights start to draw in and the leaves on the trees begin to fall.

SAM_0143

This is my favourite time of year when I start to reflect on my gardening year and work out what crops have been a success and which haven’t.  It’s the time of the year when things start to slow down slightly at the allotment, giving me time to breathe and admier the late summer flowers on my plot.

When I work my plot on a crisp Autumn morning it makes me feel glad to be alive.

SAM_0109

Thank you for reading my blog today.

I will be back next Friday at my usual time. 


Purple Bullace Jelly And Courgette Chutney

This week in my kitchen I have been busy using all the home grown produce that I have picked.  I always have a lovely sense of satisfaction when I use my organic fruit and vegetables, as I  know one hundred percent that no chemicals have been used to grow them and I think this also makes them taste better.

SAM_9823

.

This week my outdoor tomatoes have started to ripen and I have begun picking them daily.  They are a variety called ‘outdoor girl’ which are usually a little bit earlier than other outdoor varieties, however for some reason they are a little bit later than usual this year.

I am constantly checking for tomato blight as my tomatoes have only escaped once over the years.  You can see photos of tomato blight here, together with lots of information on what to do when you first notice it on your tomatoes, as some of your crop can be saved if you act quickly.

SAM_2649

.

With my first batch of tomatoes I made a big pot of tomato and basil soup, which we had for lunch with a loaf of warm, crusty homemade bread.  It was far nicer than any soup you can buy in a tin and it only cost me a few pennies to make as nearly all the ingredients were from my allotment.

You can find the recipe here.

SAM_9826 SAM_9786

.

I am also still using all of the courgettes that my plants are producing.  This week I made my favourite courgette chutney….

.

Courgette Chutney Recipe:

.

2 onions chopped

500g tomatoes chopped

500g courgettes diced

300ml white wine vinegar

2 cooking apples peeled and diced

250g brown sugar

2 teaspoons mixed spice

1 tablespoon of mustard seeds

Thumb sized piece of root ginger grated

4 garlic cloves crushed

.

Put all the ingredients in a large pan and bring to the boil slowly, stirring continuously.

SAM_9758 SAM_9760

SAM_9761

Simmer for 2 hours uncovered, until it is dark and looks like chutney.

SAM_9762

Pour into hot sterilised jars.

( To sterilise jars, pop them in an oven for five minutes, gas 4 / 180C / 350F )

SAM_9765

Leave for 3 weeks before eating.

.

.

This year at my allotment I had a bumber crop of strawberries.

SAM_9332

At this time of year I usually tidy the plants up a bit…. I remove the straw that I lay around the plants in the spring and put it into my compost heap.  I then cut the strawberries back to approximately 3 inches (8 cms) from the crowns.  It always looks harsh but they grow back really well.

SAM_9807

Cutting the strawberries back in this way helps the plant produce more fruit the following year, as the plant then puts all it’s energy into producing a strong root system.

SAM_9806 SAM_9805

This is the second year my plants have fruited so I am not keeping any runners, so I cut them all off.

  If I wanted to increase my stock I would just peg down the runners with a large stone or wire, so that the new plantlets are in contact with the soil.  When they have good roots on them at the beginning of September, I cut each runner from their parent and replant it where I want it to grow.  This way they are settled before the winter and produce fruit the following year.

.

Incidentally, I found this little fella under the old straw around my strawberries:

SAM_9804

I have been told he is a ‘death head hawk moth’ caterpillar.  He looks quite evil doesn’t he, but I left him alone as moths are hugely important for the food chain and some of them are great plant pollinators.

.

This week I have been picking ‘Cucamelons’.  It’s the first time I have grown them and they seem to have taken ages to become established….and now they are taking over my polytunnel!

SAM_9800 SAM_9801

When I was researching the cucamelon, I found some people loved them and some people hated them, so I thought I would try them for myself…..I’ve got to say I am somewhere in between.

I think they taste like a cucumber, but with a crunchy skin.  The plants have certainly given me a good crop, but after we all tried them, we decided we like normal cucumbers better….so this is one I won’t bother growing again (sorry James Wong).

However this year they will go to good use in salads, with a drizzle of olive oil, lemon juice and a pinch of salt:

SAM_9817

.

At this time of year I am thinking about storing my crops ready for the winter.  My potatoes have all been dried and they are now storing in sacks.

S

  My french beans are doing well at my allotment this year and I have been busy blanching and freezing them, together with the runnerbeans that I am still picking:

SAM_9794 SAM_9795 SAM_9796

.

If you have been reading my blog for a while, you will remember that this time last year I gave the old tree in my woodland area a real good prune as I don’t think it had been pruned for years.  I had been told by a couple of people that I would be better off chopping the tree down as it never has fruit on it….but I decided to give it a chance.

I prunned away approximately a third of all the dead, diseased and crossing branches and I will continue doing this every August until it is back to how it should be.

….And after just one year of pruning it has rewarded me with a bumper crop…..

SAM_8695 SAM_9757

The gentleman that rented the plot before me (my dear friend Eric) told me that the tree was not a damson tree, but he didn’t know what it was.  I think the tree is a ‘purple bullace tree’….I may be wrong, but it doesn’t really matter as the fruit makes a great fruit jelly…which I have been making this week, ready for my Christmas hampers:

.

A Wild Plum, Damson or Bullace Jelly Recipe:

.

First cut your plums in half just to make sure they haven’t been infected by the plum moth (discard any that have).  Don’t bother removing the stones. 

Put the plums into a maslin pan or a large jam making pan.

SAM_9787

Cover the plums half way up with water.

SAM_9788

Slowly bring the plums to the boil and then simmer until they are soft (approx. 15-30 mins).

SAM_9789 SAM_9790

Meanwhile, bring a pan of water to the boil and place some muslin or a clean tea towel into it and boil for 3 minutes.  Take it out of the water and wring it out and then leave to cool.

Tip the fruit into the muslin and let it drip overnight or for approximately 8 hours.  I find it easier to put the muslin over a colander that is already over a bowl, as it’s easier to pour the fruit into it.

In the picture below, you can see how I suspend my muslin bag over a bowl.  I have read that an upside down stool can be helpful to do this, but I have never tried it.

 SAM_9791

The next day put some side plates or saucers in the freezer to check the setting point of your jelly later on.

Measure the juice.  For every 1 pint of juice, measure 1lb of granulated sugar.   Put the juice and sugar back into a large pan and bring it to the boil slowly, over a low heat, until the sugar has dissolved.

Also, as I don’t use jam sugar I add two tablespoons of lemon juice for every one pint of juice.

SAM_9809

When you can see no sugar crystals on the back of your wooden spoon, turn the heat up and boil hard until the setting point has been reached.  This can take quite some time.

(I always continuously stir my jams and jellies to stop them from burning at the base of the pan, however I have never seen a recipe tell you to do this, so it’s up to you).

SAM_9810 SAM_9811

To check the setting point, put a small amount of jelly on a saucer from the freezer and wait for a few moments, push the jelly with your finger and if it wrinkles then the setting point has been reached, if not just continue boiling for a further five minutes and then check again.

SAM_9812

When the setting point has been reached, take the pan off the heat and leave it for fifteen minutes. If there is scum on your jelly, you can skim it off, but I just stir in a small knob of butter which does the same job.

SAM_9815

Sterilise some jam jars (gas mark 4 for 5 minutes)

Pour the jelly into the jars and seal with lids.

SAM_9816

Enjoy it for months to come!

SAM_9818

Thank you for reading my blog today.

I will be back next Friday at my usual time.

Strawberries And Cake

I thought I would start with a look in my greenhouse at home:

SAM_9290

The tomatoes and cucumbers are doing well and I have my first fruits forming.  I will now start to feed my plants with a high potash comfrey feed.  You can see from the photo above that I use old Blood, fish and bone tubs as pots for my plants.  I just drill a few holes in the bottom and use the lids as saucers to catch the excess water.

I am also still removing the side shoots from my tomato plants as they form.

SAM_9292 SAM_9291

.

The hanging baskets that I planted up myself at home are starting to flower well too and I will also be starting to feed these this week, with the same high potash feed that I use for my tomatoes and cucumbers.  Soon the flowers will cover the sides of the baskets and you won’t be able to tell that I used a ‘compost bag’ to line the basket.

SAM_9287 SAM_9293

.

As the weather has been lovely here this week I have managed to finish planting the majority of my vegetables at the allotment.

I planted some beetroot that I started off in newspaper pots:

SAM_9274SAM_9275

  I remember reading that beetroot doesn’t transplant very well, but it is fine when I grow it in newspaper pots as there is no root disturbance when I transplant them, as I plant the whole pot into the ground and it just decomposes.

Just in case anyone is unsure if this will work, below is a photo of some beetroot that is growing at my plot that I planted last month in a newspaper pot and as you can see it is growing well.

SAM_9279

.

In front of my beetroot I have planted my parsley plants.  I keep hearing that parsley is hard to grow, but again I never have a problem.  I sow a pinch of seed in newspaper pots filled with compost and they germinate well.  I just remove any extra seeds that germinate and then I transplant them again when they are big enough (I plant the newspaper pot into the ground as well).

SAM_9273

.

This week I also planted my swedes, kohl rab’s and turnips.  Again I’ve read swedes don’t like to be transplanted, so get around this by using newspaper pots and I have great success this way.

The birds love to eat these so I have built my usual cane and bottle cage around them:

SAM_9259 SAM_9260

.

I also planted my perpetual spinach plants.  I think perpetual spinach is such an under-rated plant.  It doesn’t ‘bolt’ like ordinary spinach does in the summer and it lasts for months and is hardy so it can be eaten in winter when there isn’t much else around….but most importantly it tastes nice like spinach and can be used in exactly the same way.  I love adding small, new leaves to salad and the larger leaves are great to cook with.

SAM_9261 SAM_9262

.

Also at my allotment, the pansies and violas are looking stunning now at the front of my plot.  These were all reduced a few weeks ago from Tesco and I paid just £3 for all of them.  I don’t usually like these plants and I only bought them to fill a patch before my own bedding plants were ready, but I think I have finally been converted as they look stunning:

SAM_9257

.

This week, I picked my first broad beans.  I love to open the first pod and eat the beans raw.

SAM_9265

I gave the above beans to my ‘in-law’, as they absolutely love broad beans too and I must say there are loads more nearly ready to harvest.

.

And we are having salads nearly every day now, as I have so many ‘webbs wonderful’ lettuces in my polytunnel and I have mixed salad leaves in my greenhouse at home, which is great.  I am also picking radishes and spring onions from my polytunnel.  I particularly like to add coriander to a bowl of salad, which I have also been growing in my greenhouse too.

SAM_9288

SAM_9055SAM_9289

SAM_9263

.

My strawberry harvest is going well too this week.  On Wednesday I managed to pick a whole carrier bag of strawberries (and I probably ate another bag while I was picking them lol).  There really is nothing like freshly picked juicy strawberries, that are warm from the sun.

SAM_9264

While I was wondering what to do with all the strawberries, I decided to try some of them with the homemade vanilla ice cream I made this week and it was delicious!…

SAM_9269

….And a few hours later my eldest daughter made this cake (which was even more delicious)….

SAM_9271

I felt like a queen, having a cake made for me.  Though I am going to have to stop eating all these lovely things if I don’t want to end up enormous!

.

.

Finally this week I made some ‘Dark Chocolate Rum Truffles’ and some ‘White Chocolate, Apricot and Brandy Trufffles’ for fathers day.  The recipes can be found here.

I think they make super presents and I would love to receive them.

“I always say a homemade present comes from the heart and not just the bank account and thats what makes it special” 

SAM_9282

.

So over all, it has been a productive week from the ‘Notjustgreenfingers’ household….and it’s been one of those weeks that I am glad to live the way we do.

SAM_9267

Thank you for reading my blog today.

I will be back next Friday at my usual time.

Have a good week!

Homemade Cleaners and Homemade Cabbage Collars

I don’t really know where to start today.  After I had a rest last weekend (as I felt under the weather) I have been working in ‘overdrive’ mode ever since and I have achieved such a lot.

  The rest obviously did me some good.

.

At home I made some more dishwasher liquid, using the soap nuts that I bought a few years ago.  I use the liquid for two washes and then I use a ‘value’ dishwasher tablet for one wash and this seems to stop the grease from building up inside the dishwasher.

You can read about how I make the liquid here.

SAM_9001 SAM_9004

I also made some more ‘multi-purpose vinegar spray’.  I use this to clean down my work surfaces in my kitchen, our table mats, my cooker hob, etc.  It is really cheap to make and it lasts ages, but more importantly I know what goes into it.

All I use is distilled white vinegar (which most supermarkets sell for approx. 45p a bottle), and a few drops of ‘Tea Tree Oil’ (which I buy from Wilkinsons).

Distilled white vinegar is great as it’s cheap to buy and cuts through grease and dirt and is antibacterial too, so it kills most germs.  It does smell when you first spray it, but the smell doesn’t linger and no one will know you have used it.

White vinegar is milder than malt vinegar and dries odourless.

I mix the vinegar with a few drops of Tea Tree Oil which has anti-fungal, anti-viral and anti-bacterial properties too.

This makes a fantastic natural multi-purpose cleaner and it lasts for ages:

SAM_8631

.

I also decided it was time to add a couple more shelves in my pantry, in the hope that I can store more food in there (instead of our bedroom, which isn’t very romantic).

I bought a couple of cheap shelves from B & Q, put them up in a couple of hours and then painted them with some leftover white paint that we had in our shed.

I am very pleased with them and I will fill them when I do my next ‘big’ shop:

SAM_9007 SAM_9006 SAM_9008

.

At the allotment the poached egg plants (Limnanthes) are looking beautiful lining my centre path.  They are providing a much needed early source of pollen for the bees and it is wonderful watching them.  There are also loads of ladybirds around the flowers, which is brilliant as they are such a beneficial insect to have around the plot, eating any aphids that come my way.

SAM_9010 SAM_9020

I don’t know if I mentioned this before, but at the beginning of the year I contacted Leicester City Council and asked them if I would be allowed to keep bees at my allotment.  As I have four plots, I have ample room and I had spoken to my allotment neighbour who thought it was a brilliant idea and he was quite happy for me to do this.

I wanted to make sure it was ok with the council (who I rent the plot from) before I spent money on a bee keeping course and equipment, as my garden at home is not big enough.

Unfortunately, Leicester City Council said I can’t keep bees at my allotment plot because bees are classed as ‘lifestock’ and the rules say that lifestock cannot be kept on their allotment plots, but more importantly to them – keeping bees would cause ‘health and safety’ problems.

I was dissapointed, but I felt there was nothing more I could do.

But to my surprise this week, I have found that some bees have now set up home in one of my leaf mould compost bins….I find this really amusing and I wonder what Leicester City Council would say to that?…..surely this causes a health and safety problem?

It’s nice to see that nature doesn’t bother with health and safety regulations….if it did then mankind would be in a mess!

SAM_9063

.

This week at my allotment I have been ‘earthing up’ my potatoes.  It is a job I hate as I find it really hard work….it’s the only time I wish I had the strength of a man!

‘Earthing up’ the potatoes helps to protect them from any late frosts and it also increases the length of underground stems that will bear potatoes. 

SAM_9027 SAM_9026

.

I have also been planting things at my allotment this week.

I planted red and white cabbages first:

SAM_9018

I make my own cabbage collars to avoid the cabbage root fly from laying eggs at the base of my plants.  The Larvae are white, headless and legless maggots and they feed on the roots of brassicas.  This will cause your brassicas to either grow weakly or just wilt and die.

The following year, cabbage root fly will emerge from the pupae which overwintered in the soil.  This is a good reason to rotate your crops each year.

Cabbage collars cost between £3 or £4 to buy a pack of 30.  To save money I make my own by cutting out a square of thick cardboard and then cutting a cross in the middle where the stem will go.  As the stem grows it can expand because of the cross in the middle.

 SAM_6270

I place each collar around the stem and it will stop the cabbage root fly from laying it’s eggs and eventually it will just decompose into the soil.

SAM_8993 SAM_9019

.

At the allotment this week I also planted the last of my peas and mange tout that I sowed into guttering on the 21st April.

The birds love the tops of pea shoots at my allotment, so I make sure that they can’t get to them.

SAM_9038

.

I also planted out some more spring onions and some beetroot that I started in newspaper pots…

SAM_9064 SAM_9028

…And a pumpkin plant that was getting a bit too big for it’s newspaper pot.  It is a bit early for planting out tender plants in this area, as it’s possible to get frosts here until the end of May.  However, I have planted it in my old compost area and surrounded it with glass for protection, so hopefully it will be ok:

SAM_9052

.

Another job I did was put a new sticky paper and ‘lure’ into my pheromone traps, in the hope that it will attract the male codling moths and plum moths.

SAM_9031 SAM_9032

You can read about the codling moth here.

SAM_9033

.

I also started planting in my polytunnel.  I raked in some blood, fish and bone over the new compost I added a week or so ago and as the ground was so dry I dug holes for the plants and filled them with water and let it drain away before planting into them.

SAM_9041

I planted four melons which are a variety called ‘Outdoor Wonder’.  I planted them last year in my polytunnel and they were a great success, so I thought I would have another go this year.

‘Outdoor Wonder’ can actually be grown outdoors but I thought I would have better results growing them in my polytunnel.

SAM_9042

Below is a photograph of one of the melons I harvested last year and they tasted lovely:

SAM_7388

.

I also planted my gherkins, peppers and basil…

SAM_9045 SAM_9046 SAM_9058

…and some more lettuces:

SAM_9053

.

Every year I like to try something different, e.g. last year I grew the melon I wrote about above and a couple of years ago I tried growing shark fin melons:

You can read about my shark fin melon plant here and here.

.

….And this year I have decided to have a go at cucamelons.

Apparently, they look like grape sized watermelons that taste like cucumbers with a hint of lime and they are supposed to be really easy to grow….I will let you know.

You can read about cucamelons here.

I sowed the seeds on the 10th April and I planted two of them this week in my polytunnel:

SAM_8769

SAM_9047 SAM_9048

I will let you know how they do in my polytunnel and if the ‘Thrift’ household likes the taste of them.

.

The polytunnel is fully planted for the moment, but I’m sure I’ll squeeze some more plants in somewhere as time goes by.

SAM_9054

.

I have been picking a few leaves from the salads in the above photograph and some radishes from my polytunnel and this week I picked our first spring cabbage.  I know it’s silly, but I still feel excited when I pick the first of each vegetable when it’s ready to eat.

SAM_9039

To finish off with, I noticed a couple of things at my allotment this week:

First my watercress that I sowed a couple of weeks ago has appeared.  You can read how I grow watercress in a pot here if you are interested.

SAM_9012

And secondly I have flowers on three out of four of the clematis I planted to climb up the old swings that are no longer in use.  They will be better in a couple of years when the plants are more established, but for now I am happy with a few flowers:

SAM_9023 SAM_9022 SAM_9021

.

Thank you for reading my blog today.

I will be back on Monday at my usual time.


Tomato Blight And Planting Winter Salads

I thought I would start today by telling you about a couple of things we did at the weekend:

On Monday it was my dad’s 82nd birthday.  It has been a long time since my family all got together, so I decided to throw him a surprise birthday party.  He thought he was just coming to our house for tea and loved it when our whole family appeared.

It was a really lovely evening.

My eldest daughter decorated the cake

My eldest daughter decorated the cake

.

Another thing that happened last weekend, was my husband and youngest daughter did a ‘Car Boot Sale’.  We had spent the whole of the last week having a massive clear out and decided we would try and make some money from all the things we didn’t want anymore.  It’s amazing how much ‘stuff’ you collect over the years isn’t it.  You can see it all in the photograph below:

OLYMPUS DIGITAL CAMERA

I am so very proud of them, as they made just over £90!  It just goes to show that one man’s junk is another man’s treasure.

We still had some things left at the end, so we took them down to our local charity shop the next day, in the hope that they would make some money out of it too.

.

A butterfly on our window, captured by my youngest daughter.

A butterfly on our window, captured by my youngest daughter.

.

This week I have been preparing for the long cold winter by sowing a few winter hardy salads to plant out in my polytunnel when I have some room.

I have sown a winter hardy lettuce called ‘Arctic king’ and  some winter hardy spring onions.  I also sowed some mizuna and corn salad as these were both so successful last year.  Lastly, I also sowed some perpetual spinach which will hopefuly be ready in early spring if I plant it under a cloche outside.

SAM_7205 SAM_7204

Mizuna and corn salad last year in my polytunnel over winter

Mizuna and corn salad last year in my polytunnel over winter

.

My allotment is still providing a feast of salads and vegetables everytime I visit it.

The runner beans are doing very well, even though they started to produce slightly later than normal.  This has had a knock on effect as I have noticed my french beans are nearly ready to pick now and I usually start to pick them when my runner beans have just about stopped producing.  So I will soon have double the amount of beans to harvest and freeze at the same time.

SAM_7190

.

My outdoor cucumbers are having a fantastic crop because the weather has been warm and I am picking them daily and giving them away as we just can’t eat the amount they are producing. The variety I am growing is ‘Burpless Tasty Green’ which I have found to be a reliable outdoor crop (though last year I only managed to get three or four cucumbers all in all,  due to the rotten weather we had).  The skins are a bit prickly so we peel them before we eat them and they taste lovely.

.

I picked my first kohl rabi of the year this week.  Again, they are a little late this year, but it was worth the wait.  Kohl rabi can be grated in salads or used in stews, soups or casseroles.  I don’t get to cook mine, as they are eaten the minute I bring them home.  My family love them peeled, chopped and eaten raw, dipped in salad cream.

SAM_7192 SAM_7191

.

You can see in the photo above that my outdoor tomatoes are finally starting to ripen.  They seem to have been ‘green’ for eternity this year.  When I get enough of them I will be making soup with them and lots of passatta to freeze and use over the winter.

So far my tomatoes are free from tomato ‘blight’, but I am checking them daily for signs.  Below I have written some information regarding tomato blight, which you may find interesting if you are growing your own tomatoes:

.

SAM_2649

Tomato blight

.

Tomato blight

.

Tomato blight is caused by the same fungus as potato blight.  It is called ‘Phytophthora infestans’, but it is more commonly known as ‘late blight’.  It is a windblown fungus that can travel long distances.  It spreads when the temperature is above 10C and the humidity is above 75% for two consecutive days, known as a ‘Smith Period’.   In the UK outbreaks can occur from June onwards and it is said to be usually seen in the south west first.

The disease is common on outdoor tomatoes, though tomatoes grown in a polytunnel or greenhouse have some protection from it, as the spores have to enter through doors and vents.

The early stages of blight can be easily missed and not all plants are affected at the same time, however it will spread rapidly.

Symptoms usually seen are brown patches that appear on the leaves and stems and spread very rapidly. The fruit will also turn brown. The underside of leaves can develop a downy white coating of spores in moist conditions.

The first signs of 'blight' on my tomato plants last year

The first signs of ‘blight’ on my tomato plants last year

.

What can you do to prevent blight?

.

You can grow varieties that are not so susceptible to blight e.g. ‘Ferline’ and ‘Legend’, but remember that some varieties can resist some strains of the fungus but not others.

I like to choose an earlier maturing variety that is ready to harvest before blight strikes, though the tomatoes are usually smaller.

Do not save seed from infected plants as it can survive in the seed and reproduce next spring. Instead, buy good quality seed from a reputable supplier.

Remove any potatoes that were left in the ground from the previous year as the pathogen over winters in rotten potatoes. 

Keep the plant foliage as dry as possible by watering in the morning and at the base of the plants.  Mulch will reduce the amount of watering needed.

Try to avoid brushing past tomato plants when they are wet as this can increase the likelihood of spreading the spores.

Space plants wide apart so the air can flow around the plants.

Keep monitoring your plants and act quickly if you see blight on them.

You can use a ‘bordeaux’ mix to control blight, but you need to spray before blight takes hold as it protects the foliage.  It also needs to be sprayed on your plants regularly so organic gardeners do not favour this method.

SAM_3761

.

 My tomato plants have blight, what can I do?

.

 If you catch it early you can strip the tomatoes from the plant and ripen them on a windowsill.  Be careful to check them every day as some of them may already be affected.

If you haven’t caught it really early, you can use the green tomatoes to make chutney, as provided they haven’t turned brown, the tomatoes are safe to eat.

Take up your blighted tomatoes plants straight away and dispose of them, so you don’t help to spread the spores to your neighbour’s plots.

 According to ‘Garden Organic’ the stems and leaves of affected plants can be added to your compost heap, as the spores won’t survive on dead plant material, but do not compost any blighted fruit as the spores survive in the seeds.

Tomatoes ripening on my windowsill last year

Tomatoes ripening on my windowsill last year

.

I hope this information has been of use to you.

I will be back on Monday at 4pm.

I hope you have a good weekend.