Archives

A Hard Post To Write…..

11/06/19 Update:

Since writing the post below an awful lot has changed.  Our dog is lovely and my daughters have grown into beautiful, wonderful adults.  I now have three allotment plots again, which I absolutely love.

Unfortunately I still do not have the time to write my blog at the moment, however I do have a facebook page and an instagram page for NOTJUSTGREENFINGERS and I will be posting photo’s etc so you can see my new plots.

Maybe one day things will change and I can go back to writing, but for now I will leave you with the blog post I wrote in August 2016:

********************************************************************8

My life has changed enormously since I started to write this blog four years ago when my daughters were just 12 and 14……they are 16 and 18 now and have turned into beautiful young ladies who we are very proud of.

Three years ago I lost one of my best friends to cancer and then two years ago my father-in-law passed away too.

After this I then had to give up my lovely four allotments in January 2015, due to family problems and our rescue dog, who turned out to be highly reactive and took up an awful lot of my time (and our money) to train.

SAM_3575

On top of this I have recently developed a lower back problem that is causing me a lot of pain when I bend.  I visited a physiotherepist and he said it is just ‘wear and tear’ and I should continue doing everything as normal, taking pain killers when I need to…..and this is what I have been doing.

.

The last few years have really been hard for our family, though I have tried to put a smile on my face and carry on as normal…. but things are now settling down in the Thrift household and life is finally beginning to calm down again.

SAM_3480

.

Time to be honest:

.

However recently I haven’t really felt myself, but I have struggled on regardless.  Quite often I have felt very drained of energy and tearful and I have been really struggling to sleep at night which doesn’t help.

Mr Thrift and I have come to the conclusion that either the last few years have finally caught up with me or it is simply that ‘time of life’ that all women my age go through….or a mix of both!  Either way I feel I need to sit back and relax a bit more and take some time out for myself, instead of my usual rushing around.

So for now I have decided to take a break from my blog for a few months (as it does take me quite a lot of time planning and writing it each week).

I really hope you don’t mind me making this decision, but hopefully it won’t be for too long.

.

.

A quick update before I go:

.

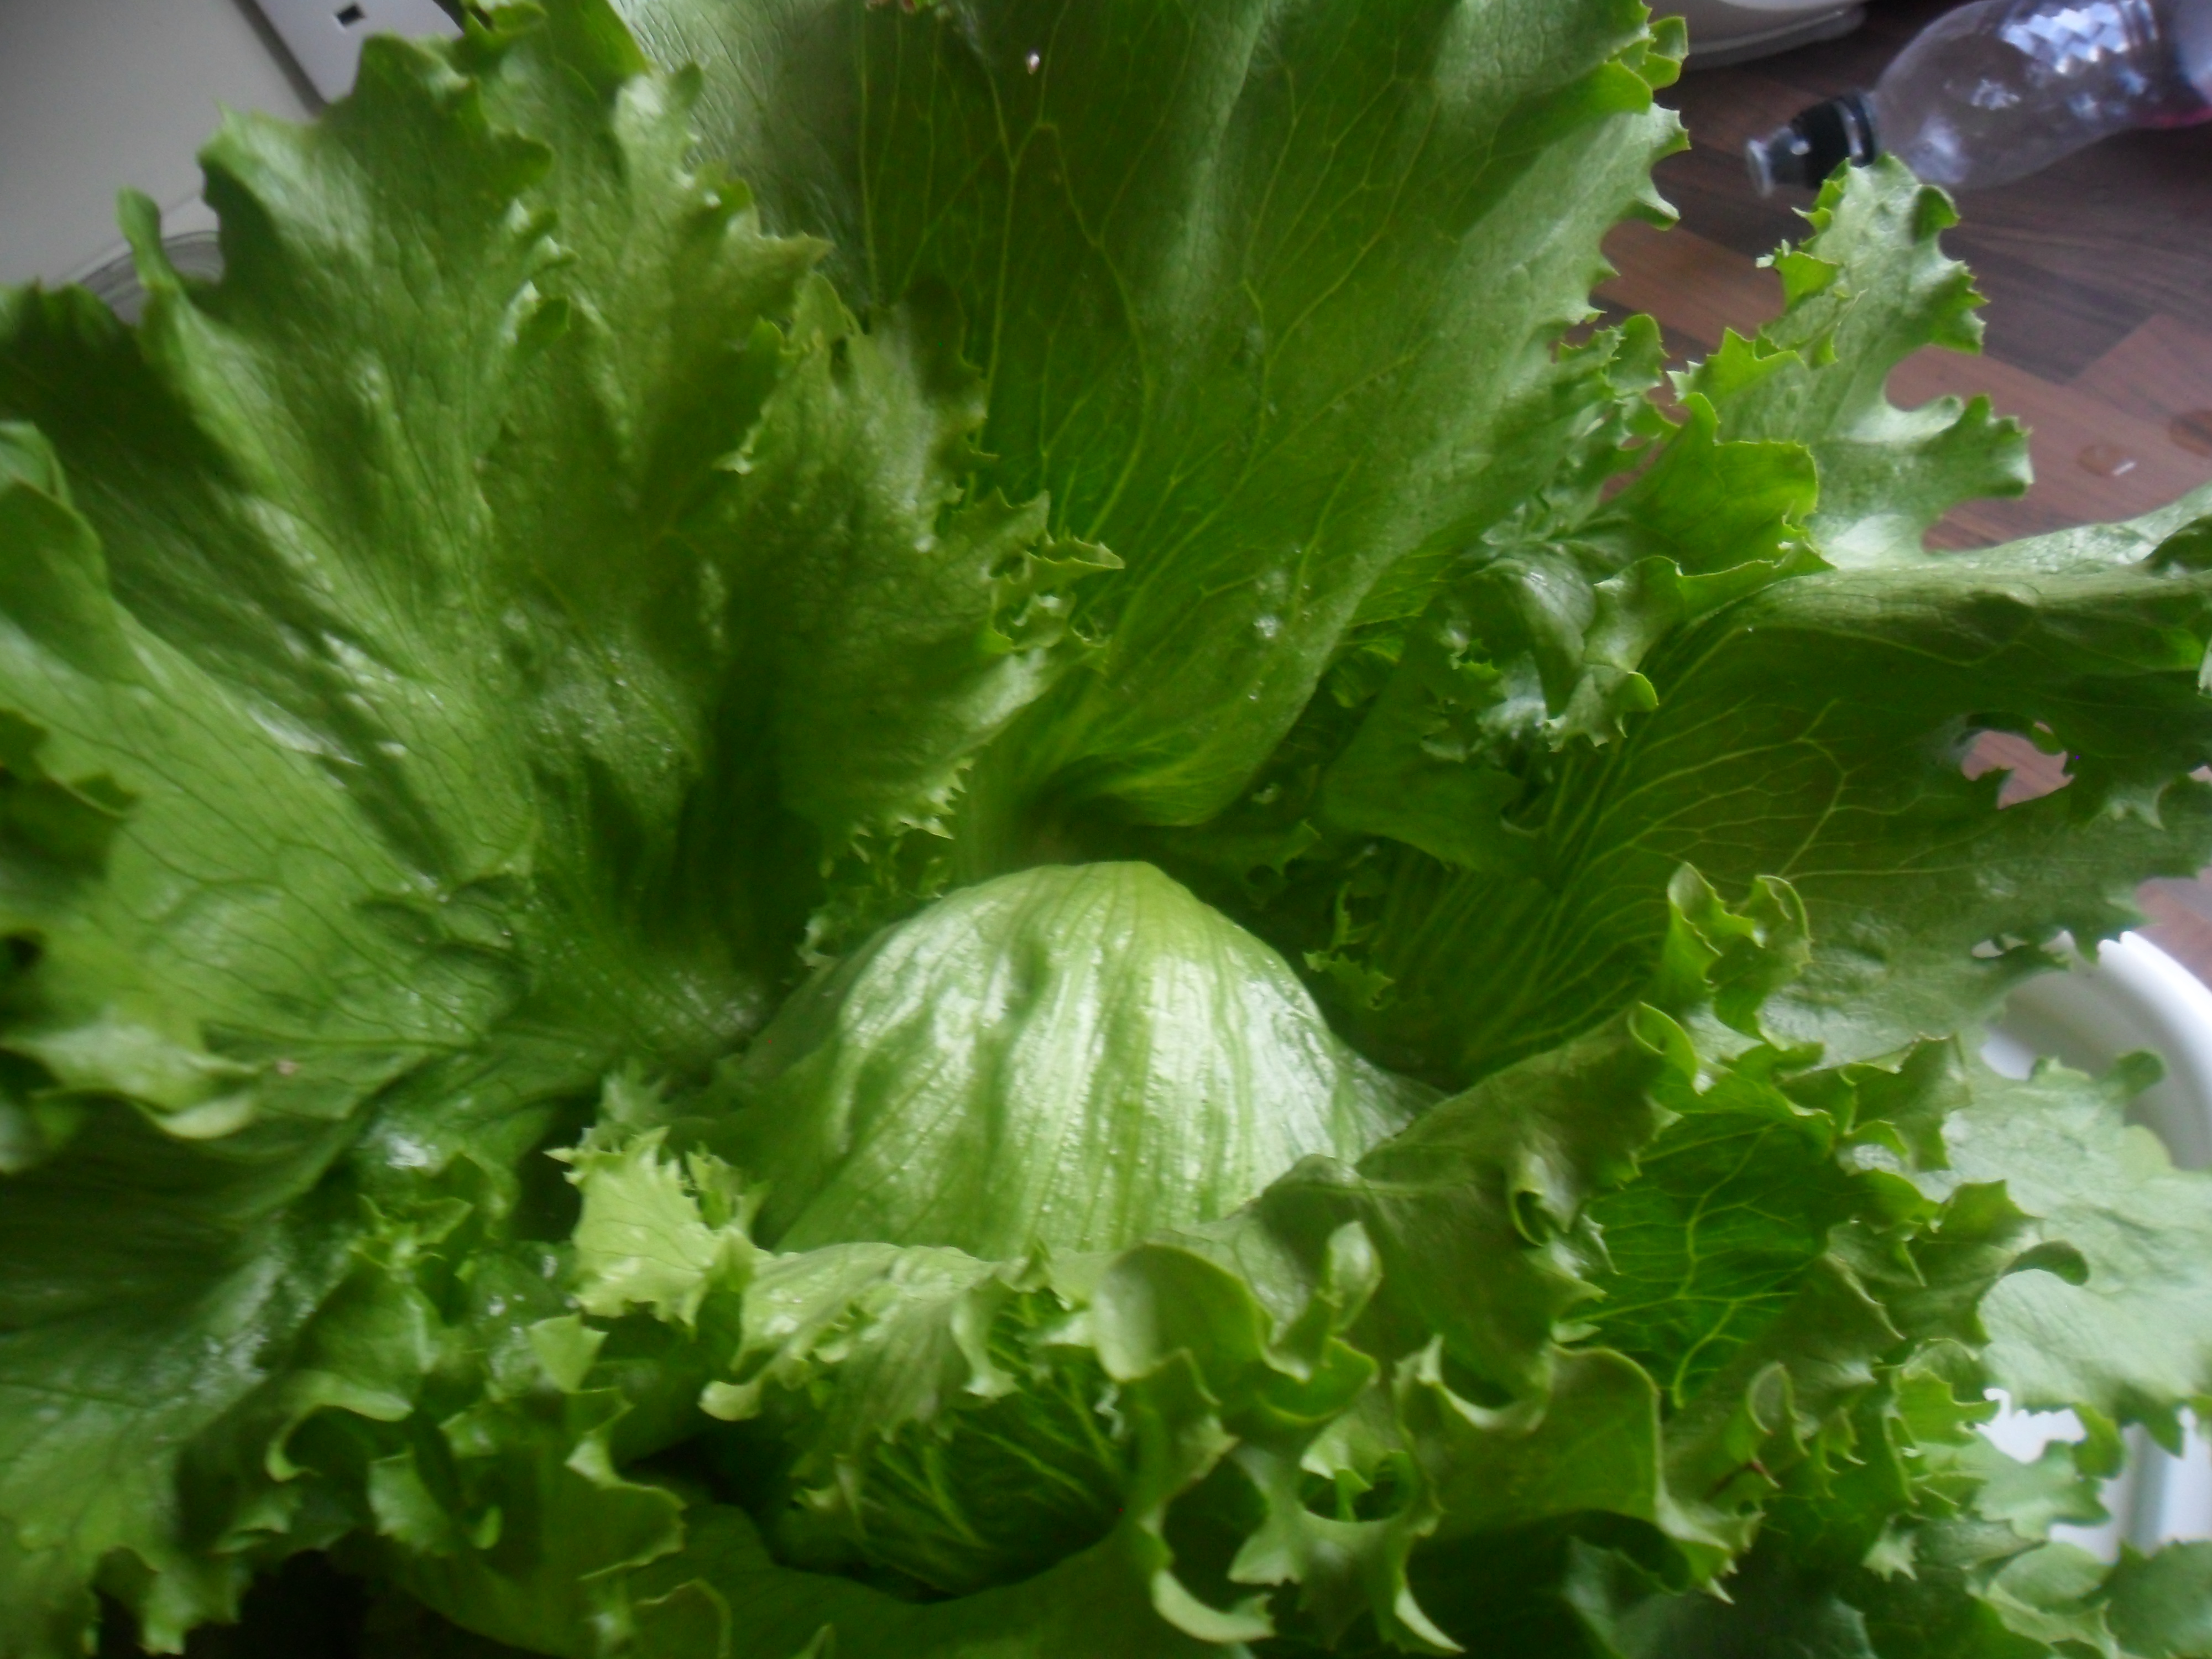
My kitchen garden continues to do well and I am harvesting fruit and vegetables every day in small amounts:

      SAM_3701

This week I have taken up my onions and I have had a great crop….I am very pleased with them:

SAM_3677 SAM_3678

My outdoor and indoor cucumbers are doing well too and we are picking them daily:

SAM_3705 SAM_3712

My beetroot, kohl rabis and cabbages are just about ready to pick:

SAM_3699 SAM_3703 SAM_3698

And so too is my one and only butternut squash that I grew in a pot this year:

SAM_3700

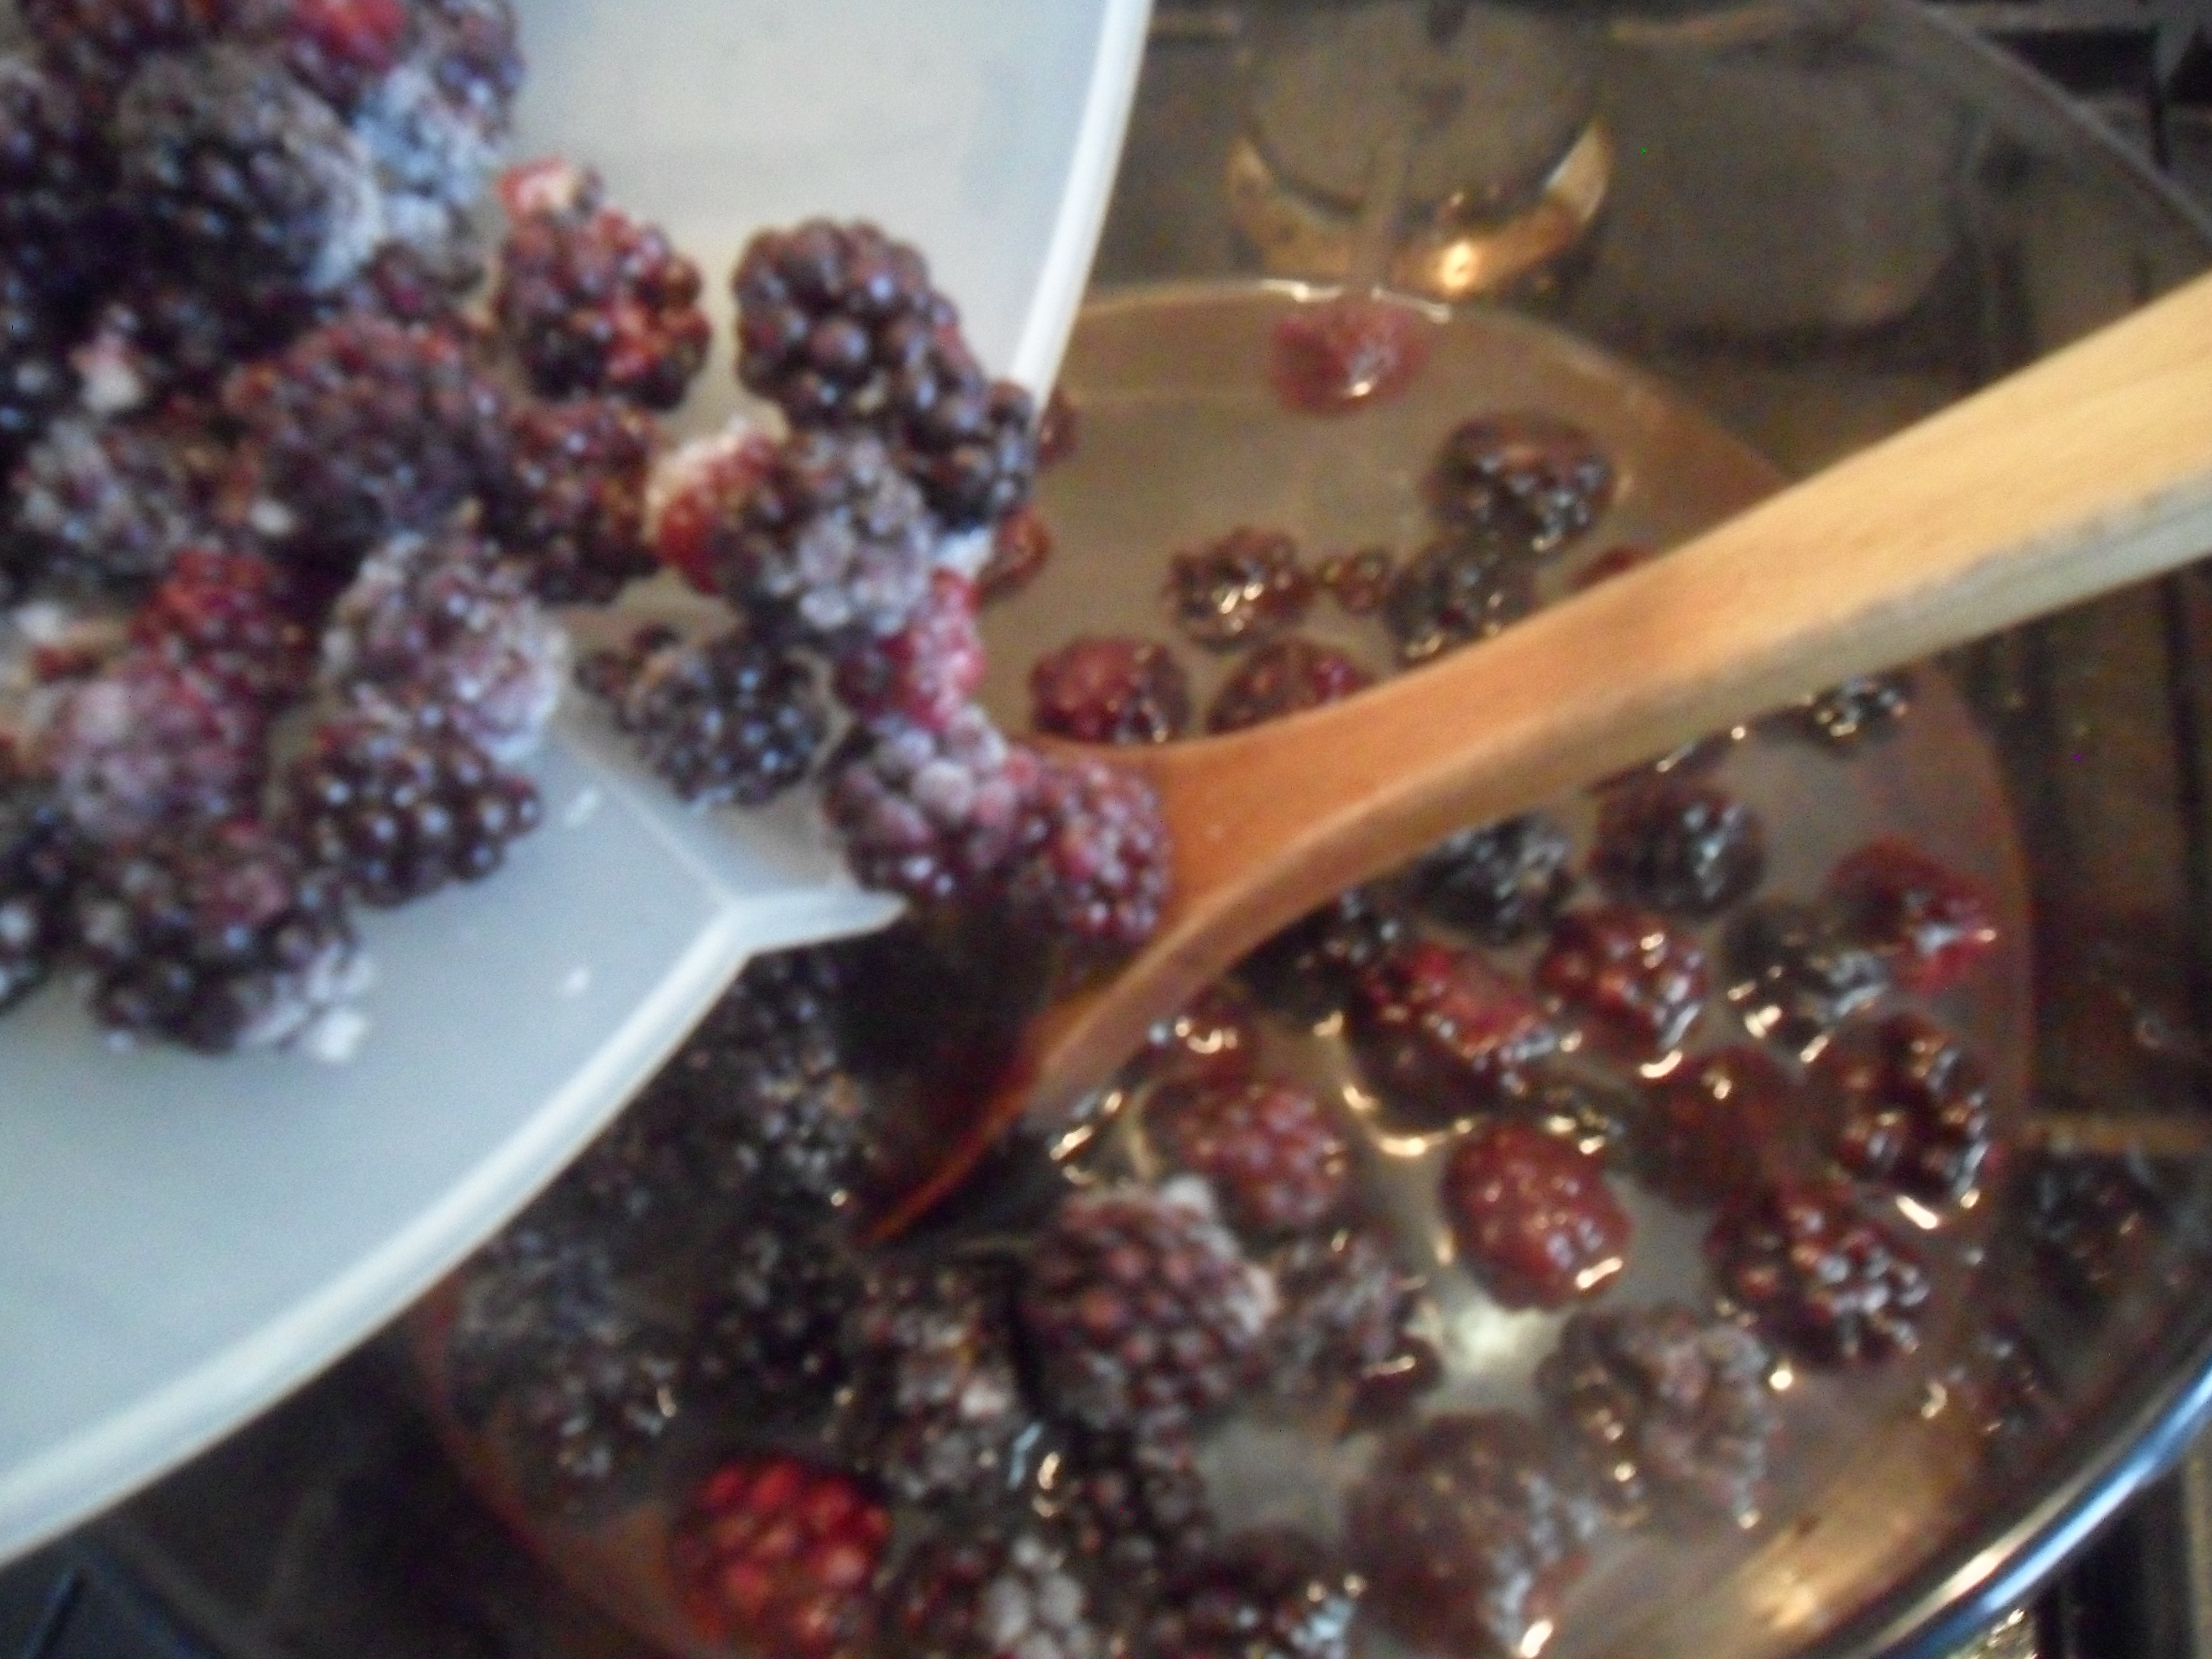
And I am picking raspberries, blueberries, tomatoes and runner beans almost daily:

SAM_3619 SAM_3658 SAM_3628 SAM_3688 SAM_3696

.

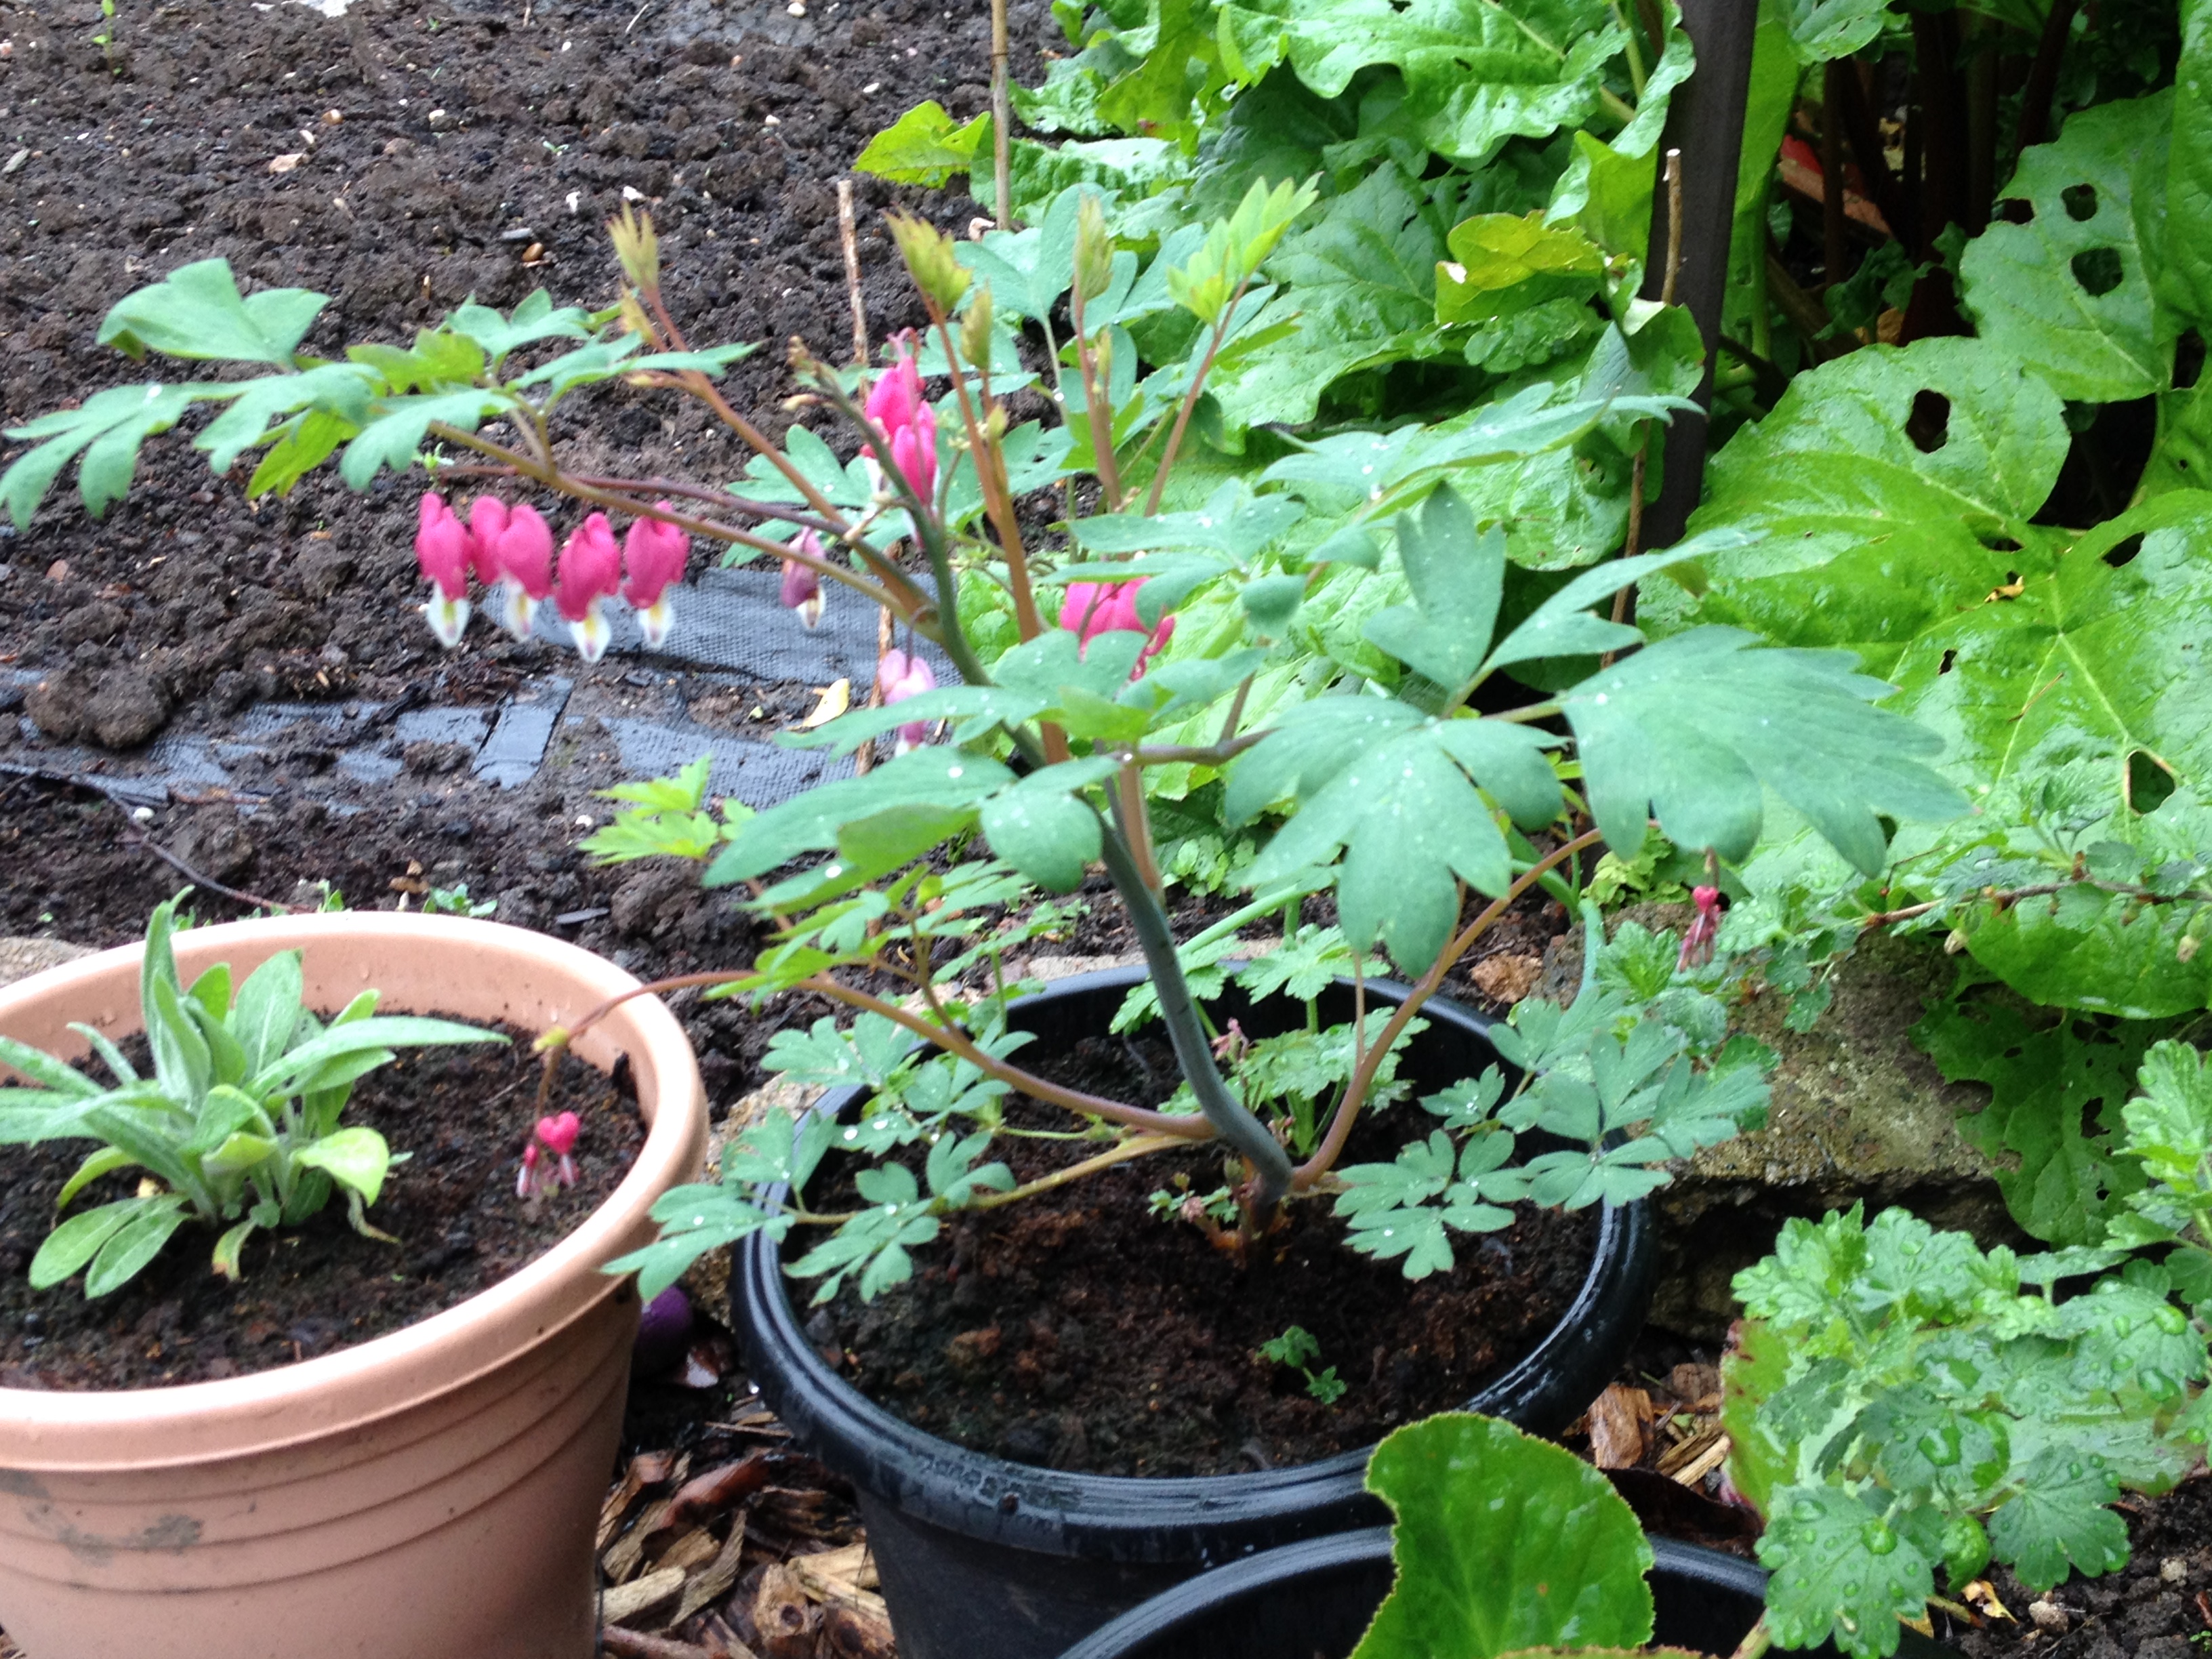
The flowers are doing well around the garden as well, which is great for beneficial insects that pollinate the crops…… it also looks very pretty and I’m hoping to spend more time enjoying it all:

SAM_3492 SAM_3580 SAM_3685 SAM_3687 SAM_3690 SAM_3695

SAM_3686 SAM_3702

.

.

And Finally…..Judy:

.

Lots of you ask about Judy our rescue dog.  In October 2014 we brought her home from the RSPCA – we were fourth owners and she had a hugh amount of problems that became apparent two or three weeks later.  The poor dog was scared of everything, but unfortunately it all came out as barking and lunging.

She reacted to traffic, men, bikes, birds, prams, the TV, men in hats, walking sticks, litter pickers, any little noise in the house etc. etc. but the worst thing of all was her reaction to other dogs….which caused many dog owners to shout and yell at me when their dogs approached Judy (even though she was on a lead and muzzled).

The two photos below were taken on her first week home with us in Oct 2014:

SAM_0225 SAM_0227

As you know we tried everything, kalm aid in her food, pheromone deffusers and collars and even doggie ‘prozac’ from the vets and nothing worked….until we found Steven Havers.

Steven trained me to deal with all of Judy’s insecurities and we will forever be in his debt as Judy has now turned into a wonderful dog, who we all love very much.

She hasn’t worn a muzzle for over a year now and over the last few months Judy has made lots of doggie friends and calmly socilises with them, sometimes in groups of ten or more dogs at a time.  She is now off-lead on the field in the park and nearly always comes back to me when I recall her……I am so proud of her and other dog walkers comment on how well she is doing nearly every day.

I am so glad we perservered and didn’t give up on her.

Judy now

Judy now

.

.

Well that really is it for the moment.

In the meantime I want to say a big thank you for your continued support over the last four years and I really hope you understand my reasons for taking a break.

Thank you for reading my blog today…….I hope to be back in a few months time.

Look after yourselves and enjoy the rest of the summer.

XXX

Nature Is Wonderful….

This week has been another week of sunshine and showers.  It has also been quite windy at times and I have had to tie up some of my peas and sweetpeas, as the wind blew them away from their supports…..though no harm was done as you can see in the photograph below:

SAM_3477 SAM_3479

I think nature has a way of dealing with all situations and the sunshine and showers are certainly helping my plants grow.  Rain is full of nitrogen so the garden is now looking lush and green.

SAM_3475

The sunshine and showers also produced the most spectacular rainbow in the sky (though my camera doesn’t really show the pure beauty of it as well as I would have liked).

SAM_3396

 Nature really is wonderful, but it is all too easy to take it for granted….I firmly believe that global warming is happening – every gardener has already seen the changes in the seasons – but it is so easy for us all to ignore and pretend it isn’t happening…..I know a lot of people think that it is a problem that just the goverment should be dealing with and yes I do think they should be doing more… however if we all did our own little bit e.g use our cars less, buy less ‘stuff’, recycle where possible, eat less meat, be mindful about using electricity, etc. then maybe it would make a difference.

I realise people won’t agree with me and I know how hard it is when you have children / teenagers in the house wanting ‘this’ and ‘that’, but every little bit we do (even the smallest things) will all add up.

SAM_3482

.

This week in the garden:

.

This week I finally got around to using the extra comfrey feed that I made last year.  I never got around to using it as I still had some left over from the first batch that I had made last summer.

I really expected it to stink as it had been there since last year, but amzingly it wasn’t too bad:

IMG_3860

I strained it through and old rag and I managed to get three bottles of comfrey feed to use on my fruit and flowers around the garden, as it is so high in potash.  It is particularly brilliant for tomatoes.

IMG_3858 IMG_3859

As my comfrey is still growing well, I started another bucket of comfrey tea off.  It only takes a couple of weeks to make, though I do tend to leave it stewing until it is needed:

IMG_3867

IMG_3869 IMG_3878

“To make comfrey tea all you have to do is fill a bucket with the comfrey leaves and stems and weigh it down with a brick and pour over cold water.  I cover it (to stop flies getting in) and leave for approx. two weeks. Be warned, by this time the smell is revolting!  Strain the comfrey tea liquid into another container and put the remaining comfrey in your compost bin.

To use it I put 2 cups of comfrey tea into a watering can and then fill it with water and give it a good mix”

   .

.

This week I noticed that my runner beans were flowering and they look very pretty.  However, I also noticed that they had climbed to the top of their supports, so I chopped the top of each plant off:

IMG_3866 IMG_3863

By nipping off the top of each plant, they will become bushier and produce more beans lower down.

.

Now that I had harvested my last spring cabbage, I decided to plant my curly kale seedlings….but first I decided to give the area a quick weed and remove the yellow leaves from the cabbages under the same net.  The yellowing leaves can harbor pests and diseases so it is always a good idea to remove them every so often:

 IMG_3870 IMG_3871

Incidentally the cabbages are growing well this year, probably to do with all the rain we have had:

SAM_3484

After this I raked in some blood, fish and bone and then planted three curly kale plants that I had grown from seed.  Hopefully if the plants grow ok then three plants will be enough for us over winter:

IMG_3873 IMG_3874

.

I also tied up my jeruselum artichokes as one of them had fallen down……they are planted in a bottemless deep pot, to stop them from spreading and it seems to be working:

IMG_3876 IMG_3877

.

Another job I finally got around to doing was to ‘prick out’ my wallflowers that I sowed a few weeks ago (they really should have been done by now).

SAM_3390 SAM_3391

If you look really closely at the photo on the right, you will see tiny holes on the leaves…..these holes are made by the flea beetle….

“The adult flea beetle eats the leaves of most brassica’s (including wallflowers) and their larvae will eat the plant roots.

Bad infestations can kill the plants, however this is unusual.  I have found that seedlings are more suseptable to flea beatles, so if my plants come under attack I feed them regularly with a seaweed fertliser until they grow bigger and stronger.

In my experience the flea beetle will set back your seedlings, but it is very rare they don’t recover with a bit of care”

.

I also transplanted the fox gloves I sowed a month or two ago, into bigger pots to grow on:

SAM_3386 SAM_3392

  Foxgloves (digitalis) and wall flowers are both biennial plants, which simply means they grow one year and flower the next and then die.  When my plants are big enough in autumn I will plant them in the ground where they will hopefully give me a good display next year.

.

Another job I did this week was to repair a bare spot on my lawn.  I raked over the area and then spread some grass seed that I had already mixed with compost.  I then covered it with my heavy plastic propagator lid to protect it from Judy (our dog) and I have made sure it has been well watered.

Hopefully the grass will grow well:

SAM_3394

.

I have also continued to tie up my outdoor tomato plants:

SAM_3486

And I have continued to dead head all the old flowers around my garden, so they produce lots more new flowers:

SAM_3490 SAM_3489 SAM_3487

.

.

This weeks harvest:

.

The strawberries are doing well considering it is their first year (I ignore the books and don’t remove the flowers the first year and I have always had good crops).  I have had two harvests this week:

SAM_3422 SAM_3448

The courgettes have finally decided to grow and I have picked two from my two plants this week:

SAM_3449

And I am still picking broad beans from the plants I sowed in January:

SAM_3441

I noticed that some of the pods were suffering from ‘Chocolate spot’, but the beans were fine inside:

SAM_3440

“Chocolate spot is a fungus that only affects broadbeans.  It leaves red-brown spots on the plants and the pods.  It usually affects plants in damp humid conditions, so if you have space you could put your plants further apart so air can circulate around.

In my experience chocolate spot rarely affects the beans inside the pods, so I actually ignore it and don’t do anything except give the plants a liquid seaweed feed to help them along”

I froze my broad beans to use over the winter when there isn’t too much around.  I always blanch them and then open freeze them on a tray until they are frozen….then I put them into a freezer bag:

SAM_3473

.

I have also been harvesting my peas.  I have been picking my dwarf peas and my climbing tall peas (which are an old fashioned variety called ‘peashooter’).  All my peas have done well this year and there are lots more still growing:

IMG_3879 SAM_3442

SAM_3444 SAM_3443 IMG_3880

It always amazes me that a whole basket of pea pods produce so few peas….but the peas are so sweet and delicious I can’t help growing them each year!

SAM_3425 IMG_3882 SAM_3445

My eldest daughter and Mr Thrift helped me to pick the pods this year and remove the peas…….I so love my family helping as it is a time we also chat about ‘this and that’ and laugh together.  I hope my daughters remember these time fondly when they are older.

I froze the peas in the same way I froze the broad beans….but I bet the peas won’t last until winter as we all love them!

Frozen broadbeans & peas

Frozen broadbeans & peas

I didn’t want to waste the pea pods so I made a ‘pea pod soup’, which my daughter loves.  You can find the recipe here

SAM_3430

I used rapeseed oil this time instead of olive oil, which made a darker soup…..it tasted the same but didn’t look quite so appertising so I will use olive oil again next time:

SAM_3431

.

This week I have noticed:

.

This week i have noticed my first raspberry on my ‘autumn’ raspberries (not sure why this one decided to grow early):

IMG_3857

My first mangetout are ready to pick (my youngest daughter has already spotted this and has been picking and eating them raw this week):

SAM_3481

My ‘mini’ pumpkin plants are covering the ground around my sweetcorn well – this keeps weeds down and the moisture won’t evapourate as quick if we get any more hot days:

SAM_3476

The dahlia tubers that I grew from seed last year and then overwintered in our brick outhouse, are starting to flower:

SAM_3480


And finally this week, I have noticed that the garden has lots of different types of bees and hoverflies visiting and this week I have spotted two different little frogs:

SAM_3492 IMG_3902

This is a wonderful site to me as it shows me that my organic gardening methods are working and the beneficial insects are now coming to my garden, helping my garden to become more and more productive by polinating my crops and eating the pests, such as slugs and snails etc.

.

Thank you for reading my blog this week.

I will be decorating our bedroom over the next week or two, so I have decided to take a two week break from my blog….I hope you don’t mind.

However I will be back on the 5th August as usual.

Have a great weekend.

XXX

My Kitchen Garden So Far This Year….

This week the weather hasn’t been good, but the plants in my garden have been loving the rain.

Other than tying my peas and tomatoes up and removing the odd sideshoots from my tomato plants, I haven’t really been able to do a lot in the garden.  I have also been trying hard not to do too much in the house this week, so I don’t disturb my two daughters as they are revising hard for GCSE / A-level exams.

So I thought it would be nice to give you a slide show of my kitchen garden, so you can see how it is doing at the moment.

For those who are reading my blog for the first time, I started my new kitchen garden in January 2015 after giving my four allotment plots up (due to family circumstances).  Previously my little garden was a mix of large shrubs and so I dug the whole lot up to start my new vegetable plot:

SAM_0233 SAM_0234

SAM_0249

.

You can see from the slideshow below that I have tried hard to fill every space possible in my kitchen garden and I am still growing plants from seed to replace any spaces that become available.  Also (as always) I have squeezed in as many flowers as possible to attract beneficial insects to my plot and I now  have four bug boxes to encourage them to stay in the winter.

I have tried to remember that our garden is a not an allotment, so I have also used flowers to make it as pretty as possible so my family enjoy being outside in the summer…..As well I made sure we have a small lawn for our dog to use, by removing a slabbed area in the garden last year.

In 2015 (my first year) I managed to grow far more than I expected in my small garden, however this year my garden is a lot more organised so I am hoping to grow even more…..though I can still see I have plenty of room for improvement…..but Rome wasn’t built in a day.

I hope you enjoy the photo’s.

 I will be back next Friday as usual.  Have a great week.

XXX

.

This slideshow requires JavaScript.

A Busy Week In The Garden

Well I can’t start today without mentioning the wonderful celebrations that went on in Leicester on Monday evening at ‘Leicester City’s Victory parade’.  I watched it all on the TV, but Mr Thrift was lucky enough to enjoy the parade at Victoria Park with my sisters and brother-in-laws, together with approximately 220,000 other people….this was absolutely amazing as Leicester City’s population is only 330,000!

Mr Thrift said the atmosphere was wonderful and it was an evening that he will always remember.  This event really did bring the city together.

IMG_1771

.

This Week In The Garden:

.

The nights have been cold this week in the garden so I have made sure that my tender plants have been under cover at night.  I will continue to keep a close eye on the weather forecast for now.

However, as the end of May is near I decided to plant a few things making sure they have adequate protection just in case there are still cold nights to come.

SAM_2864 SAM_2865

I started by planting out the runner beans I sowed three weeks ago in newspaper pots (they grow so quickly).  I put up some bean poles for them to climb up and then planted the beans.  I also planted some nasturtiums that I sowed two or three weeks ago from seed around the beans, as these attract the blackfly away from the beans – also if there are no blackfly around, I add the leaves to salads as they have a lovely mild peppery taste.

I then put some glass around the plants to give a bit of protection:

SAM_2867 SAM_2870

I then planted out my outdoor cucumbers which are a variety called ‘Burpless tasty green’ which I have been growing for a number of years. Over the years I have had fantastic crops of outdoor cucumbers in warm summers, but I have also had one or two years where the plants just sat and sulked in the cold, wet conditions…..I’m keeping my fingers crossed the weather is good for this years crop!

I support the cucumbers by tying them to canes as they grow….but for now I have given them some protection from the cold and slugs by covering them with old pop bottles until they are established:

SAM_2904 SAM_2905 SAM_2907

I have also used pop bottles to cover the parsley I planted this week, as these plants are still small.  I again grew the parsley in newspaper pots, as this stops any root disturbance to the plant and the newspaper just decomposes in the soil.

SAM_2884 SAM_2888

.

This week I also ‘squeezed’ in some beetroot into my plot (again sown in newspaper pots and covered in bottles for protection until they are established) ….

SAM_2885 SAM_2887 SAM_2890

.

I then planted my red cabbages which again I had grown from seed.  I made sure that I used my foot to firm around each plant as brassicas grow best in firm soil and then I put a home made cabbage collar around each plant to stop cabbage root fly from laying eggs at the base of the plants.

SAM_2913 SAM_2914

I then planted my swedes in an area next to my cabbages so I could put a net over the whole lot to stop the birds, as they LOVE to eat brassica leaves!

Just before I put the net over the brassicas I sowed a ‘catch crop’ of radish between the cabbages to make use of every spare piece of ground:

“A ‘Catch Crop’ is a crop that reaches maturity in a relatively short time, which makes use of the ground in between crops until they are established”

SAM_2915 SAM_2917

.

I also planted some spring onions that I grew from seed in a small area under my environmesh that was not being used, next to my garlic:

SAM_2891 SAM_2892

And I planted some khol rabi under my net in a space next to my Spring cabbage:

SAM_2908 SAM_2918

As my kitchen garden is small, I am determined to grow as much as possible in every spare bit of ground I can find….however I also want to make the area look attactive with flowers for me and for the beneficial insects.  These insects will in turn pollinate my crops and eat the pests that visit my garden.

So this week I planted some Calendula that I grew from seed:

SAM_2843 SAM_2844

Calendula is a hardy annual that I grew for years at my allotment and I also grew some last year in my new kitchen garden too.

My Calendula at my allotment

‘Calendula Alley’ at my allotment

Hoverflies, bees and butterflies all love the Calendula flowers and as an extra bonus, the petals are edible and look really pretty scattered into salads….so I think it’s always good to try and squeeze some of them into a vegetable garden somewhere:

SAM_1982

 .

This week my mangetout was ready to plant out.  I had sown it in guttering a couple of weeks ago and kept it in my mini-greenhouse until it had germinated, as I think I get a far better rate of seed germination this way:

SAM_2813

I decided to put the mangetout in my new planter as my polyanthus and cowslips had just about finished flowering.  I don’t know if you remember but I bought all fourteen plants from my local nursery in the middle of April for just 40p each…..and they have flowered continuously since then, so this was a real bargain:

SAM_2727

I moved each plant to a different place in the garden to flower again another year.  I then added a bit more compost and a handful of blood, fish and bone to the planter and then I planted the mangetout …. hopefully it will grow up the trellis at the back.

I will add more plants to the planter another day:

SAM_2871

.

Another job I did this week was to ‘thin’ my leeks once again as there seemed to be so many growing in the tray.  Hopefully they will grow stronger now there are less of them….I must remember not to sow them so thickly next year!

SAM_2835 SAM_2836

 I also ‘thinned’ my carrot seedlings which I am keeping in my greenhouse.  Normally it is best to ‘thin out’ carrot seedlings in the evenings to help prevent carrot rootfly, however as I thinned them out in the greenhouse then they will hopefully be ok.

I sowed these seeds far too thickly as the seed packet was a few years old and I thought most of them wouldn’t germinate….I was very wrong!

SAM_2850 SAM_2859

.

Back in March I sowed some ‘cut and come again’ lettuce in my greenhouse and we have had a good supply of salad leaves over the last month or so. However the supply of leaves was just about finished and so I decided it was time to pull them up together with the remaining radish that I had sown around the edge of the salad leaves.

SAM_2847 SAM_2846 SAM_2848

This made room for me to plant my remaining indoor tomatoes.  As you can see from roots in the photo below, the tomatoes were ready to be planted:

SAM_2849 SAM_2858

I also planted a couple of french marigolds next to the tomatoes as they are said to repel aphids and they look pretty too.

My greenhouse seems to be growing well at the moment and this week I noticed I have my first little cucumber growing.  I am being very careful not to overwater the cucumber plants as they don’t like to sit in wet compost.

SAM_2854 SAM_2855

I am still continually tying my cucumbers and tomatoes to their supports as they grow and I am removing side shoots from the tomatoes when I spot them.

I also had room to plant some lettuces in my greenhouse that I have been growing from seed….I am trying very hard this year to have a continuous supply of salads (as we eat such a lot):

SAM_2860

.

Around the garden this week I have been weeding as we had some nice dry days at the beginning of the week.  Unfortunately I have been finding a lot of bindweed growing in a particular bed so I have been digging out as much of it as possible.  Provided I keep removing the top of the bindweed after it emerges out of the soil, it will eventually exhaust itself and die – but this takes a long time.

SAM_2883

.

.

Improving our lawn area:

Finally this week I turned my attention to our lawn.  After using a ‘log roll’ a couple of weeks ago against our fence I found had a tiny bit of it spare, so I cut it in half with a saw and fitted it neatly around our bay tree:

IMG_3717 IMG_3716 SAM_2833

I was very pleased with the results.

.

I then decided to take off an inch of our lawn at the end, to make it easier to mow and keep tidy:

IMG_3721 IMG_3719

While I was doing this I found a ‘leather jacket’ so I took a photo to show you….

“Leatherjackets are the larvea of craneflies (daddy long-legs) that live in the soil.  They can be very damaging to lawns and can eat the roots and stem bases of small flower and vegetable plants.  There are usually more around after a wet autumn”

  For now I won’t do anything about the leatherjackets, but I will certainly be keeping an eye out for any damage in this area.

There is a lot of information about Leatherjacket damage on the RHS website here.

IMG_3723

.

We have now managed to stop yellow patches appearing on our lawn by pouring water on the grass every time Judy (our dog) goes to the toilet.

However at one end of our grass there are still some bare patches where Judy used to run around going mad at next doors dog when he came out.  Judy is a lot calmer now and so I decided to reseed these patches.

I covered the new seeded areas with whatever I could find to stop Judy from running over it…hopefully soon the seeds will germinated and then thicken up quickly:

SAM_2874

.

.

It has been lovely spending so much time in my garden this week, especially as Judy has been ‘calmly’ waiting for me, enjoying the sun……this is something that I never thought she would do, so I savour every peaceful moment of it:

SAM_2911

Thank you for reading my blog today.  I will be back next Friday as usual.

Have a great week!

XX

How To Avoid The Pea Moth & How to Harden Off Plants

I wanted to start today by saying a big ‘thank you’ to everyone that reads my blog and for all the lovely comments I receive each week.  It really is the comments that spur me on to continue writing.

Things changed in the ‘Thrift’ household when I gave my four allotments up last year, however your comments gave me the confidence to continue blogging about my new ‘kitchen garden’.

My blog will never win awards, but as long as people are reading and enjoying it, I will continue to write.

Thank you.

SAM_2789 SAM_2790

.

This Week:

The weather has gone from one extreme to the other over the last week or so….from hail and snow to hot, sunny days.  On Sunday morning I walked my dog early to avoid the heat and even then it was warm enough to walk around in short sleeves:

IMG_3676 IMG_3663

I always think the park looks beautiful in the early morning and I love to hear the birds sing at this time of the day…. they sing so loudly, as though they are excited about the day ahead.

I noticed the bluebells looking stunning in the dabbled shade under the trees and the ‘Cytisus scoparius’ (common broom) looking equally as impressive, in amongst the hawthorns that are in blossom at the moment:

IMG_3675 IMG_3673

I felt blessed to be walking around the park at this time of day on my own, as it felt magical.  I couldn’t help but feel lucky to be there and have the time to stop and enjoy it.

.

However the park looked completely different on Wednesday after twenty four hours of rain, but it still looked beautiful:

IMG_3709

.

In My Garden This Week:

.

As it has been warm this week I decided it was time to start to ‘harden off’ some of my frost tender plants that have been sitting in my greenhouse, by moving them in my colder ‘mini greenhouses’.

IMG_3693

“Hardening off” your plants allows them to adapt to outside conditions before they are planted in their final positions.  There are two ways to do this:

1) Put your plants in a cold frame and gradually open the window of the cold frame more each day until it is fully opened or

2) Put your plants outside for an hour or two for the first day and then gradually increase the time they spend outside each day afterwards.

The RHS suggest that hardening off plants properly takes approximately two to three weeks.

 .

This week I also started to put some of my homegrown bedding plants into pots so they can grow on and look pretty in the summer.  I used marigolds and dwarf dahlias:

IMG_3677

I also made up a couple of hanging baskets with the cherry tomato plants that I grew from seed:

IMG_3683

As with everything else, I will harden them off gradually and I will be bringing them back inside my greenhouse every night until all the risk of frost has passed.  This is usually the end of May in Leicester, however I am still very careful to watch the weather forecast even then, as a few years ago I lost all  of my outdoor tomato plants at my allotment in the first week of June!

.

This week I removed the glass from my climbing peas that I planted out in April, as they are now growing well:

IMG_3687

I tied some garden string around them to give a bit of support to help them climb.  I also draped some environmesh over the plants to stop the birds from eating them and give a bit of protection fron the pea moth (though I didn’t have quite enough to cover the sides, but it worked well like this last year):

IMG_3691 IMG_3692

 “Adult pea moths lays their eggs in May, June and July on pea plants.  Their caterpillars feed on the seeds that develop inside the pea pods and then drop to the ground in late summer to pupate……this is a good reason to rotate your pea crops each year.

You can reduce the damage of the pea moth by covering your plants with environmesh or fleece”

.

The tomatoes that I planted in my greenhouse are growing well now and I am continually ‘pinching off’ the side shoots that are appearing between the main stems and leaves….you can see in the before and after photos below:

IMG_3684 IMG_3685

.

The seeds that I sowed last week have started to germinate and I have moved them from my kitchen into my greenhouse to ‘grow on’ for a week or two before I also start to ‘harden them off’ ready to plant later this month:

IMG_3678 IMG_3679 IMG_3680 IMG_3681 IMG_3682

.

I noticed this week that the first geraniums are starting to bloom in my hanging baskets:

IMG_3699

And elsewhere in the garden the dwarf wallflowers that I sowed last year are giving a good display….

IMG_3696

….together with the two dicentras (bleeding hearts) that I replanted after finding them growing recently in my border (though I haven’t a clue how they got there):

IMG_3694 IMG_3695

 And finally in my garden my Azalea is beginning to flower.  My dad gave this plant to me when it was tiny – it came ‘free’ with some plants he ordered and he didn’t want it.  Over the last few years it has really flowered well:

IMG_3697 IMG_3698

.

.

This Week In The Home:

.

There is not much to tell you about this week except I have spent time altering the length of a new pair of curtains that my dad brought for his front room……unfortunately they were fifteen inches too long!…. (I’m not sure why he decided to buy this length of curtain).

After I altered them I decided to ring around a couple of well known shops to see how much they would charge for altering curtain lengths, just out of curiosity……I was quoted £35 by one and £40 by another!  It’s amazing how much you can save by learning a few basic sewing skills.

SAM_2824 SAM_2825

After altering the curtains I took them to my dad’s home and hung them up for him….but unfortunately they weren’t really wide enough either (which I didn’t realise before as dad had given me the measurements).  This meant I couldn’t gather them up very much at the top, but I did my best.  However, they didn’t look too bad in the end and dad seemed very pleased with them …. and that is all that matters!

IMG_3700 IMG_3702

.

That’s it for today.  Thank you for reading my blog.

I will be back next Friday at my usual time.  Have a great week!

Woodchip Paths & Christmas Decorations

Before I start today I wanted to remind anyone that is interested, that my usual monthly blog post of

‘What To Do In The Kitchen Garden In December’ can be found here.

Don’t be fooled into thinking there is nothing you can do this month……..

There is loads of information in this post e.g. weather conditions expected, what to sow / plant / harvest in December, jobs to do and pests and diseases that you may encounter this month.

I hope it helps someone out there.

SAM_5091.

.

This week in the home:

.

This week my youngest daughter turned ‘sweet sixteen’….how on earth did this happen so quickly?

We all had a lovely day together and my eldest daughter made a birthday cake, in the shape of a ‘Dairy Milk’ chocolate bar (my youngest daughter’s favourite food) and it was absolutely delicious!

SAM_2413

.

Unfortunately my step father is still not well, so this is taking up a lot of my time with phone calls, hospital visits and taking my mother shopping.  My mum and dad both remarried and so between Mr Thrift and I, we have three sets of elderly parents (though my father-in-law sadly died last year).  With two teenage daughters this means that myself and Mr Thrift are part of the ‘sandwich’ generation and recently I have felt quite run down from it all, especially as I have also spent the last year trying hard to train Judy, the RSPCA dog that we adopted on top of this (though we all adore her).

However, I have no choice but to carry on with things the way they are at the moment and I can only hope they will get better over time.

SAM_2430

.

So this week in the Thrift household we put our Christmas tree up, as decorations in the house always cheer us up.

As we now have a three piece suite in our front room it was hard to find a place for our trusty old Christmas tree.  After trying different places in the room we finally wedged it in the corner, however it looked very small and hidden by the furniture…..I came up with the idea of standing it on an old plastic box to give it some height, which I covered temporarily with one of the curtains I recently brought from a car boot sale (to cover two old reclining garden chairs that I was given).

SAM_2421

We put on some Christmas music and all four of us decorated the tree with a bit of singing and daft dancing in between.  All in all it was lovely afternoon and we all think the tree looks nice due to the box it stands on and you can actually see the tree lights twinkling outside our front window for the first time:

SAM_2423

We also decorated our stair banister in the hall with our old garland and I fixed our Christmas wreath to the front door.

SAM_2436 SAM_2433

We have used the same ‘artificial’ decorations for many years now and they still look good.

This year I decided to add to our decorations with a cheap garland I brought for the fireplace.  I have decorated it with some cones and I will add the slices of oranges I am drying on my radiator when they are ready too:

SAM_2432 SAM_2424

The room is looking beautiful now (except for the carpet that we still haven’t managed to save up for yet but we are trying to ignore it for the moment).

.

This week in the garden:

.

Last week I brought some primroses for 50p each as I thought it would brighten my garden in the dull December days ahead.  This week I planted three of them in a pot next to my back door and the rest I planted in a hanging basket outside our front door….and I am very pleased with them.

SAM_2403 SAM_2405

I love primroses as they flower each year and look beautiful.

.

This week I also tried very hard to finish my new vegetable patch.  I was going to ask Mr Thrift to help me to lay the final three slabs, but unfortunately I couldn’t complete my final two beds until they were laid…..so I decided to do it myself.  I’ve laid plenty of slabs on my own when I had my allotments so this didn’t bother me too much, though Mr Thrift did tell me off!

This meant I could then continue with the final two beds next to the slabs…

SAM_2425

I then created a very small area for a flower to be planted next year, using the edging stones I have spare:

IMG_2868

And I completed the edging next to the bed in front of the fence:

SAM_2420

I then used old weed suppressant to cover the new paths, using old pins from my allotment to secure it down:

SAM_2428

And then I brought some bags of woodchip from our local timber yard and covered the weed suppressant with it.  Over the years I have found that if you place woodchip on weed suppressant, it doesn’t rot down as quickly as it does if you place it directly on the soil.

Unfortunately I was a bag or two short of woodchip so I will have to make another trip to them before I can complete the paths in my new vegetable area.  However it is looking good so far:

IMG_2870 SAM_2429

After completing the paths next week I will start to concentrate on improving the soil.

But for the moment I am pleased how it is shaping up.

.

Thank you for reading my blog this week.  I will be back next Friday as usual.

Have a great week!

A New Area To Grow Veg & Wind Damage!

Unfortunately my step dad has been in hospital for another two nights this week, so I have spent a lot of time visiting him and looking after my mum too.  I would like to say things are looking better for him, but he is still not right.

So this week I haven’t spent too much time at home.  However I have amazingly made a start on the new area in my kitchen garden.

I managed to use the stepping stones that were in our old lawn, to make a small path to separate the new little flower patch (that I created last week) from my new vegetable area:

SAM_2332 IMG_2820

I also moved our old chair onto our new lawn, so I can sit on it in the Spring:

IMG_2821

Mr Thrift then helped me to finish laying the slabs around my greenhouse which wasn’t too bad to do, but then we needed to lay the slabs along the fence which wasn’t so easy.

The area along the fence had my raised bed in.  I had tried growing my strawberries in this bed and the ’60 day raab’ as well and neither were succesful.  I suspect the bushes along the fence were taking the moisture, so I decided this would be a good area to put my mini greenhouses.

First we pulled back the weed suppressant that had been covering the area.  I don’t know if you remember, I put the weed suppressant down in June to kill the lawn underneath it and then I planted my sweetcorn and tomatoes through it whilst the lawn was dying:

June 2015

June 2015

If you need any proof that weed suppressant works then here it is:

SAM_2338

 We unfortunately then had to empty the raised bed!…

SAM_2340 SAM_2341 SAM_2342

I also had a dustbin in the corner, which I had planted potatoes in back in the Spring.  We also emptied this out …..but  I had hoped for more potatoes than we actually got.  However, we had them for dinner and they did taste amazing!…I do think the lack of potatoes was probably due to lack of water as I did keep forgetting to water them as they were tucked away in a corner out of site:

SAM_2344 SAM_2345

We then laid the slabs together and moved the mini greenhouses and our water butt onto them and I was very pleased with the result:

SAM_2353

The next problem we had was to connect the water butt to the guttering that runs along our shed.  Unfortunately the back of our greenhouse is overgrown with bushes that we can’t get to and we came to the conclusion that if we fitted another piece of guttering there it would become clogged up with leaves etc which would either block it or enter our water butt:

SAM_2355

In the end we brought a a drain pipe and used it along the back of the greenhouse and hopefully this will work:

SAM_2357 SAM_2354

Unfortuantely now we had moved the mini greenhouses around the corner, I found we had a gap between the shed and my greenhouse which Judy our lovely dog could run down and bark at next doors dog.  So after much thought I went out and brought a slim water butt and used this to block the area off and catch the water that drains off my greenhouse in the process.

I managed to get the water to drain into the water butt from my greenhouse roof by improvising.  I used a bit of spare pipe and a bit of thick plastic and amazingly it works!

SAM_2349 SAM_2350

I then had a big clear up and moved all the rubbish and old bricks that had managed to appear in this area and then I started to clear some of the old plants ready for digging the area when I get time:

SAM_2333 SAM_2363

SAM_2362 SAM_2366

I also removed the Ivy that had become a nuisance on the fence….it was starting to grow between the boards and I felt it would cause damage to the fence.  Some bits of the Ivy were quite thick and you can see in the first photograph below how the roots grow to ‘stick’ to their supports…Ivy really is an amazing plant:

SAM_2361

SAM_2348 SAM_2365

I was very pleased with how the new area was starting to look, so I then took measurements so I could work out where to put my paths and how big my beds would be.

SAM_2372

But unfortunately on Tuesday night we had gales across the midlands and our fence blew down!

IMG_2827 IMG_2826

The fence is a shared boundary fence and luckily our neighbour is an ex-builder and is going to fix it for us as we have brought and paid for items to do this.

So unfortunately my new lawn is going to take a bit of a battering while it’s being fixed and I won’t be able to start digging yet, but at least the fence will be fixed quickly.

I hope the wind didn’t damage anything where you are!

.

Thank you for reading my blog today.  I will be back next Friday as usual.

Have a good week!

A Tour Of My Kitchen Garden & A Bradgate Park Dog Walk

Last weekend we took part in a ‘Bradgate Park dog walk’ with Judy our rescue dog.  This is what their website says about the walk:

“A chance for you and your dog to get out for a walk at Bradgate Park in the company of one of our Rangers who will talk about the history and wildlife of the Park while dog behaviourist Steven Havers gives tips on how to ensure that a walk in the park is a positive experience for you, your dog and any other people and animals you may meet.”

I have got to be honest and say the only reason we went was because Steven Havers is our dog trainer and I feel confident when he is around.  The last time we attempted to walk Judy on our own in Bradgate Park a few months ago, we ended up hiding up a hill behind trees as Judy reacted so much to each and every dog, regardless of how far away they were!…….but not this time.

IMG_0660 IMG_0656

At the start of the walk she barked a bit as there were lots of dogs, but after a few minutes she behaved really well and took time out to relax and have a lie down….I was so proud of her!

.

Bradgate park is beautiful and the views from ‘Old John’ are spectacular as it stands on Bradgate’s tallest hill and Leicestershire’s second highest point – some 690 feet above sea level:

SAM_1192

.

Old John:

This Folly or Prospect Tower was built in 1784 by the 5th Earl of Stamford. The circular stone tower replaced a former wooden windmill (which had been made unsafe in an earlier storm).

On the 31st October 1786 a huge open-air fire was built on the Hill by the 5th Earl of Stamford to mark the coming of age of his son, George Harry.  Legend has it that a bonfire timber burnt through, falling amongst the guests and accidentally killing an old retainer of the Bradgate Estate called John.

After the accident, the 5th Earl is reputed to have decreed that the Tower be named in affectionate memory of “Old John”. It is said that the stonework at the side of the Tower was altered so it looked like a handle – perhaps knowing the old man’s liking of ale, it was deliberately modelled to give the Tower its familiar beer tankard shape of today”

SAM_1190

You can read more about Old John here if you are interested.

.

.

This week in my kitchen garden:

.

This week I planted some Cosmos just behind the new wire fence that I put up last week.  Hopefully they will grow and look pretty later in the season and because they are behind the wire fence my daft dog won’t be able to destroy them.  Again I planted them through the weed suppressant:

SAM_1185

I also had four spare tomato plants which I planted in this area as well.

SAM_1187

As I said last week, I’m not sure how well these plants will grow as I haven’t prepared the soil in this area at all….I just dug a small hole for each plant and used a small amount of blood, fish and bone and filled the hole with compost…..it will be interesting to see the results!

SAM_1186

.

I also decided to give my old garden chair a face lift by buying a new piece of wood for it and giving it a new coat of paint.  It does need a second coat but it certainly looks better already:

SAM_1219 SAM_1220

.

.

My new kitchen garden:

Considering it is the first year of the garden, it is doing really well.  I thought today I would give you a tour:

SAM_1221SAM_1249

In the photo above you can see the whole kitchen garden with the new area in front that I created last week.

The new front area has mangetout, dwarf peas, a bag with potatoes growing in it, strawberries, sweetcorn and four tomato plants:

SAM_1222 SAM_1223

In my onion and root beds I have onions, garlic, parsley, parsnips, spring onions, beetrrot, radish and lettuce.  The lettuce will shortly be replaced with leeks:

SAM_1229 SAM_1230 SAM_1233

I have two beds with potatoes in – ‘Marfona’ a second early and ‘Desiree’ a late main crop potato:

SAM_1235

In my legumes beds I have broad beans, french beans, runner beans, climbing peas and lolla rossa lettuces:

SAM_1239 SAM_1240

SAM_1250 SAM_1236 

And in my brassica beds I have cabbages, curly kale, swedes, kohl rabi, outdoor cucumbers and two butternut squashes that will hopefully grow up my washing line post:

SAM_1241 SAM_1243

SAM_1242 SAM_1244

At the back of my plot I have herbs in pots and fruit trees (apple and pears) and I have autumn raspberries along the side fence:

SAM_1247 SAM_1245

On the shady side of the garden I have rhubarb, comfrey and jerusalem artichokes.

SAM_1230 SAM_1238

And at the front I have blueberries, red and black currants and a gooseberry bush too:

SAM_1231 SAM_1267

In my greenhouse I have cucumbers, tomatoes, radish, peppers, basil and two melons:

SAM_1224 SAM_1225 SAM_1226 SAM_1227

And elsewhere in the garden I have courgettes, patty pans, outdoor tomatoes, cherry tomatoes, corriander and two dwarf plum trees…..

SAM_1253 SAM_1255 SAM_1258SAM_1252

SAM_1254 SAM_1259

….and as usual I have squeezed as many flowers in as possible to attract bees and other beneficial insects to my plot:

SAM_1256 SAM_1261

.

I’m sure I have missed one or two things, but never mind I’ll write about them another time when I remember them.

So I am hoping over the next few weeks I will get some lovely crops, but for the moment we are enjoying some delicious salads:

SAM_1215 SAM_1216 SAM_1217

Thank you for reading my blog today.  I will be back on Friday at my usual time.

Have a good weekend!

Chewing Gum And A Homemade ‘Soup In A Mug’

I thought I would show you my daughters school trousers that she came home with this week….

SAM_0773

She had managed to sit in chewing gum at some stage during the day!….my heart sank.

I tried the usual advice of freezing the trousers, which I did overnight.  However, the chewing gum didn’t peel off in the morning at all as it was supposed to.  I had nearly given up when I read online to iron the chewing gum face down onto a piece of paper with a medium hot iron (no steam) ….the theory is the chewing gum sticks to the paper instead of the fabric when it is warmed up.

SAM_0774

So I just thought I would share this with you as it did actually work.  Though it did take me a long time and there is a tiny bit of residue on the trousers, but the trousers are thankfully now wearable again.

Afterwards

Afterwards

I hope this is useful for someone out there one day.

.

I don’t know if you remember Judy (our lovely little rescue dog) is very reactive to other dogs and goes mad when she sees one.  Unfortunately our next door neighbour decided to get a dog of their own in January and this has been causing us a big problem every time their dog is in the garden.

As there was only a wire fence between our gardens, our behaviourist advised us to block the end nearest our house off so both dogs can’t stare at each other, as in ‘dog world’ this is threatening behaviour.

So I used the weed suppressant I won last year to cover the wire.  Unfortunately it hasn’t really helped our dog and back in Febuary we were advised to block the other end of the wire fence off too.

The wire fence before

The wire fence before

So after much debate, this week we decided to give it a go and again I used weed suppressant (that I won) hung onto the wire fence with curtain hooks…and it looked awful!

Mr Thrift and I decided it was too awful to live with and so we bought some cheap brushwood to cover it.  We know that brushwood doesn’t last too long, but we are hoping it will last long enough for us to correct Judy’s behaviour…..though it hasn’t had an effect yet!  However after putting it up we actually now think the garden looks much better…what do you think?

After

After

.

Another job I finally managed to do, was the stepping stones in our grass (or what’s left of the grass).

Back in January when I cleared the shrubs at the back of our garden it was very wet and I was treading on the grass over and over, which made it extremely muddy.  We also then had workmen treading up and down the grass on the day it snowed in February, replacing the fence for us.  And to make matters worse, our dog runs up and down the grass, over and over again when next doors dog is out……so our poor grass has really taken a beating!

When it was muddy we bought some stepping stones that B&Q were selling off cheaply (as they only had a small amount left) and we just shoved them on top of the grass until the grass dried (or should I say until the ‘mud’ dried).

So I finally bedded them into the ground this week.  I know you are supposed to use sand underneath each slab, but I didn’t have any and just bedded them into the earth, but I’m sure they will be fine.

I just need the grass to re-grow now (but I doubt that will happen until we sort our dog out):

SAM_0776

.

This week I purchased two ‘garden tidy bags’ for £5.00.

Unfortunately my greenhouse has a solid concrete base and I wanted to grow more in there than I usually do, so I filled each bag with compost.

SAM_0785

One of the bags will have basil growing in it and the other I have already planted with my peppers:

SAM_0797

.

I have also been sowing seeds again.  I have sown spring onions, perpetual spinach, courgettes, patty pans and coriander.

SAM_0801 SAM_0800 SAM_0799

I also sowed swedes, in newspaper pots as they don’t like to be transplanted….when they are ready I plant the newspaper pot into the ground as well, so there is no root disturbance at all.

SAM_0798

Another vegetable I sowed was my dwarf peas and mangetout.  If you have been reading my blog since I started, you will know that I sow these in guttering, which I keep in my greenhouse until it has germinated.  This way I get a really good germination rate and it is easy to slide the plants off the guttering, provided I use only small lengths (you can read about it here if you are interested).

I use duct tape to seal each end of the guttering.

SAM_0802 SAM_0833

.

Around my new kitchen garden:

This week I noticed that the radish, beetroot and kohl rabi that I sowed directly into my soil, have started to germinate which is brilliant, however there is no sign yet of the baby turnips that I sowed at the same time:

SAM_0815 SAM_0816 SAM_0817

I have also found calendula growing in the pot where I planted my Jeruselum artichokes last month.  I thought I reconised the seedlings a few week ago, so I left them growing just to make sure.

I used some soil from my allotment in this pot, it was the soil I brought my J. artichokes home in and it obviously had some calendula seeds from my allotment.

SAM_0803 SAM_0804

I love free seeds, but I love these even more because they traveled home with me….so I have ‘pricked’ the seedlings out into new compost to grow on and plant somewhere special.

SAM_0805SAM_2281

.

Elsewhere around my new kitchen garden, the plants that I brought back from my allotment are growing well.

My rhubarb:

SAM_0812

My Globe artichokes:

SAM_0807

My black currants, white currants and gooseberries too:

SAM_0813

And I am really pleased with my autumn raspberries, as I have only two that are not growing out of the twenty three plants that I brought back home with me:

SAM_0821 SAM_0822

So things seem to be going ok so far.

.

This week I also managed another cut from the salad leaves in my greenhouse, that I sowed in March in plastic containers from the supermarket.  I also added some chives from my garden to the salad leaves too.  It feels so nice to be serving fresh, homegrown food to my family once again.

SAM_0788 SAM_0789

.

.

And Finally:

I thought I would share a bargain that Mr Thrift found a few weeks ago:

SAM_0790 SAM_0791

Carrot and swede, ready to use for just 10p per bag….he bought four bags.

I used one in my steamer and I’ve got to say it wasn’t very nice- I don’t know why, but it just didn’t taste nice.  So I froze the other four bags, not really knowing what to do with them.

A few weeks ago my daughter asked me to get her some packets of ‘soups in a mug’ for when she comes home from school and I have started to have the odd cup, so I decided to make my own with the carrot and swede:

.

Carrot and Swede Soup with Chili and Coriander:

4 x 500g bags of ready cubed carrot & swede

2 ¼ pints of vegetable stock

1 tablespoon olive oil

3 small onions

4 teaspoons of ground corianda

2 teaspoons of mild chili powder (add more if you like it hot)

Salt & pepper to taste

.

Put the olive oil and onions in a large pan and fry until soft.

Then add all the other ingredients into the pan and simmer until the carrot and swede are soft:

SAM_0792

Blend the soup with a hand blender or liquidiser until smooth:

SAM_0793

Divide the soup into ‘mug’ size portions and freeze.

I got ten portions out of my soup.

(I remove the plastic margarine pots when they are frozen, so the bags don’t take up so much room in my freezer)

SAM_0794

Defrost and then pop it into a microwave safe mug and microwave for 2 to 3 minutes on high.

Then serve your home made ‘soup in a mug’:

SAM_0796

Enjoy!

.

.

I hope you have enjoyed reading my blog today.  I will be back next Friday as usual.

I hope you have a lovely weekend!

Using Up Stored Crops & A Bargain

I wanted to start this week by showing you a bargain that I managed to spot last week.

Our front room has been a bit of a mess since the builders finished our new kitchen in December 2013.  The builders moved our fireplace from the old sitting room to the front of our house and the builders also had to knock a hole through the wall, for our supporting ‘steel’ to rest on (as they knocked our chimney breast down to make more room in our new kitchen).

So we have been saving like mad to complete our front room, as we need the electrics sorting in there and the walls replastering too.  As you can see in the photograph below, we also need a new carpet (the carpet was already old when we moved into our house twelve years ago):

SAM_0622

Our settee and arm chair has also seen better days now and the removeable covers have torn in various places where the material had worn thin over the years too.  The settee also caused lots of daft arguements in our house, as three people are always squashed on the settee whilst the fourth person had the comfy arm chair, so we really needed a ‘three piece’ suite instead:

SAM_0589

So as you can imagine, our front room is going to be an expensive room to sort out.

My Bargain:

I nipped into town last week and had a quick look in a few charity shops as I was looking for a vase.  Unfortunately I couldn’t find a vase, but when I popped into the British Heart Foundation charity shop I found an absolutely lovely three piece suite for £165!  It was in really good condition and the price even included a matching pouffe.

Mr Thrift came back to the shop later that day (with me) to see the suite and we decided there and then to have it.  We paid £20 extra to have it delivered and it is now in our front room:

SAM_0593

The cream cushions are from our old settee, but it will save me having to buy any new ones for the moment.

We really don’t mind having a second hand suite when it is in such good condition and to be honest it was exactly what I would have chosen if I had brought a brand new suite.

So we are very pleased with our bargain, as this has saved us approximately £1500 and our local council has picked up our old settee and taken it away for free.

.

Mothers day.

I had a lovely mothers day this year and my daughters gave me some lovely presents.  My youngest daughter made me laugh though, as she made me a book mark to replicate the one she made for me when she was eight years old.  I have always treasured this bookmark, like it is the crown jewels (which has always made my daughters laugh) and Mr Thrift even laminated it so it didn’t rip…..but now I have a new one (though I will still treasure the old one).

SAM_0598

.

This week I decided I wanted to make our kitchen a little bit more ‘homely’, so I ordered a ‘Home Sweet Home’ wall sticker from ebay for £11.49.

It was quite easy to put up, except I used masking tape to make sure it was straight before I stuck it onto the wall.  Unfortunately when I removed the masking tape a bit of the paint came off the wall too, so I also had to ‘touch up’ the paintwork afterwards.

I think the wall sticker looks really lovely and it does make the kitchen look a bit more homely too:

SAM_0615 IMG_2304

.

.

My Seeds So Far:

This week I have been pricking out my seedlings and I have now moved them into my heated greenhouse, as there are too many for my kitchen.

SAM_0602

I now have the following things growing :

Greenhouse tomatoes, greenhouse cucumbers, lettuce, onion sets, white and red cabbages, corianda, mixed salad leaves and a tray of lobelia.

SAM_0608 SAM_0605 SAM_0604 SAM_0607

SAM_0610SAM_0606

I also have a couple of sweet peppers that have just poked their heads through the compost.

My garlic and broad beans are now ready to be hardened off, so I have moved them into my cold mini greenhouse:

SAM_0612SAM_0611

My onion sets have started to grow now too and I will also move these into my cold mini greenhouse in a few days:

SAM_0603

.

Cooking At Home This Week:

This week I have been busy trying to use up some of my stored fruit and vegetables.

I have made a blackberry cordial with frozen fruit from my freezer:

SAM_0616 IMG_2306

 I have made tomato and basil soup with the tomatoes I put in my freezer last summer (incidentally, I froze the tomatoes whole without cooking them, as I knew I would be using them for soup):

SAM_0618SAM_3234

I visited my mum on Mothering Sunday and I thought it would be nice to take some strawberry muffins to share with my mum and sisters.  I used frozen strawberries from my freezer.

The muffins turned out very tasty, but I have just realised I haven’t put the recipe on my ‘recipe index’ , so for now I’ll just show you a photograph of them and I will post the recipe on my blog another time:

SAM_0599

I also made some parsnip crisps with one of my few remaining parsnips that I dug up recently from my allotment, before I gave my plots up:

IMG_2296 IMG_2297

And I decided it was time to do something with the pumpkin that I had been storing in my bedroom over winter (very romantic I know).

I chopped it up and froze most of it on trays (so it doesn’t stick together when I bag it up):

SAM_0613 SAM_0620

I did however keep some of the pumpkin back and I made a nice pumpkin and orange cake to share with two of my old friends who came to lunch today:

SAM_0617SAM_0626

.

So it’s been another busy week in the ‘Thrift’ household.

I will leave you with a photograph of my flowers.  I never did get a vase when I went charity shopping, so I used half of an old lemonade bottle instead to put my flowers into…..I don’t think it looks too bad after all.

IMG_2308[1]

Thank you for reading my blog today, I will be back next Friday as usual.

I hope you have a good weekend.