Archives

Nature Is Wonderful….

This week has been another week of sunshine and showers.  It has also been quite windy at times and I have had to tie up some of my peas and sweetpeas, as the wind blew them away from their supports…..though no harm was done as you can see in the photograph below:

SAM_3477 SAM_3479

I think nature has a way of dealing with all situations and the sunshine and showers are certainly helping my plants grow.  Rain is full of nitrogen so the garden is now looking lush and green.

SAM_3475

The sunshine and showers also produced the most spectacular rainbow in the sky (though my camera doesn’t really show the pure beauty of it as well as I would have liked).

SAM_3396

 Nature really is wonderful, but it is all too easy to take it for granted….I firmly believe that global warming is happening – every gardener has already seen the changes in the seasons – but it is so easy for us all to ignore and pretend it isn’t happening…..I know a lot of people think that it is a problem that just the goverment should be dealing with and yes I do think they should be doing more… however if we all did our own little bit e.g use our cars less, buy less ‘stuff’, recycle where possible, eat less meat, be mindful about using electricity, etc. then maybe it would make a difference.

I realise people won’t agree with me and I know how hard it is when you have children / teenagers in the house wanting ‘this’ and ‘that’, but every little bit we do (even the smallest things) will all add up.

SAM_3482

.

This week in the garden:

.

This week I finally got around to using the extra comfrey feed that I made last year.  I never got around to using it as I still had some left over from the first batch that I had made last summer.

I really expected it to stink as it had been there since last year, but amzingly it wasn’t too bad:

IMG_3860

I strained it through and old rag and I managed to get three bottles of comfrey feed to use on my fruit and flowers around the garden, as it is so high in potash.  It is particularly brilliant for tomatoes.

IMG_3858 IMG_3859

As my comfrey is still growing well, I started another bucket of comfrey tea off.  It only takes a couple of weeks to make, though I do tend to leave it stewing until it is needed:

IMG_3867

IMG_3869 IMG_3878

“To make comfrey tea all you have to do is fill a bucket with the comfrey leaves and stems and weigh it down with a brick and pour over cold water.  I cover it (to stop flies getting in) and leave for approx. two weeks. Be warned, by this time the smell is revolting!  Strain the comfrey tea liquid into another container and put the remaining comfrey in your compost bin.

To use it I put 2 cups of comfrey tea into a watering can and then fill it with water and give it a good mix”

   .

.

This week I noticed that my runner beans were flowering and they look very pretty.  However, I also noticed that they had climbed to the top of their supports, so I chopped the top of each plant off:

IMG_3866 IMG_3863

By nipping off the top of each plant, they will become bushier and produce more beans lower down.

.

Now that I had harvested my last spring cabbage, I decided to plant my curly kale seedlings….but first I decided to give the area a quick weed and remove the yellow leaves from the cabbages under the same net.  The yellowing leaves can harbor pests and diseases so it is always a good idea to remove them every so often:

 IMG_3870 IMG_3871

Incidentally the cabbages are growing well this year, probably to do with all the rain we have had:

SAM_3484

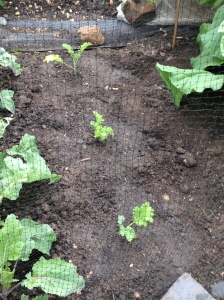
After this I raked in some blood, fish and bone and then planted three curly kale plants that I had grown from seed.  Hopefully if the plants grow ok then three plants will be enough for us over winter:

IMG_3873 IMG_3874

.

I also tied up my jeruselum artichokes as one of them had fallen down……they are planted in a bottemless deep pot, to stop them from spreading and it seems to be working:

IMG_3876 IMG_3877

.

Another job I finally got around to doing was to ‘prick out’ my wallflowers that I sowed a few weeks ago (they really should have been done by now).

SAM_3390 SAM_3391

If you look really closely at the photo on the right, you will see tiny holes on the leaves…..these holes are made by the flea beetle….

“The adult flea beetle eats the leaves of most brassica’s (including wallflowers) and their larvae will eat the plant roots.

Bad infestations can kill the plants, however this is unusual.  I have found that seedlings are more suseptable to flea beatles, so if my plants come under attack I feed them regularly with a seaweed fertliser until they grow bigger and stronger.

In my experience the flea beetle will set back your seedlings, but it is very rare they don’t recover with a bit of care”

.

I also transplanted the fox gloves I sowed a month or two ago, into bigger pots to grow on:

SAM_3386 SAM_3392

  Foxgloves (digitalis) and wall flowers are both biennial plants, which simply means they grow one year and flower the next and then die.  When my plants are big enough in autumn I will plant them in the ground where they will hopefully give me a good display next year.

.

Another job I did this week was to repair a bare spot on my lawn.  I raked over the area and then spread some grass seed that I had already mixed with compost.  I then covered it with my heavy plastic propagator lid to protect it from Judy (our dog) and I have made sure it has been well watered.

Hopefully the grass will grow well:

SAM_3394

.

I have also continued to tie up my outdoor tomato plants:

SAM_3486

And I have continued to dead head all the old flowers around my garden, so they produce lots more new flowers:

SAM_3490 SAM_3489 SAM_3487

.

.

This weeks harvest:

.

The strawberries are doing well considering it is their first year (I ignore the books and don’t remove the flowers the first year and I have always had good crops).  I have had two harvests this week:

SAM_3422 SAM_3448

The courgettes have finally decided to grow and I have picked two from my two plants this week:

SAM_3449

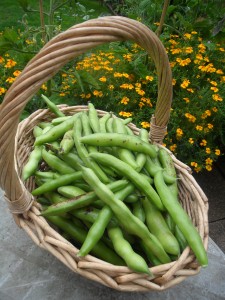
And I am still picking broad beans from the plants I sowed in January:

SAM_3441

I noticed that some of the pods were suffering from ‘Chocolate spot’, but the beans were fine inside:

SAM_3440

“Chocolate spot is a fungus that only affects broadbeans.  It leaves red-brown spots on the plants and the pods.  It usually affects plants in damp humid conditions, so if you have space you could put your plants further apart so air can circulate around.

In my experience chocolate spot rarely affects the beans inside the pods, so I actually ignore it and don’t do anything except give the plants a liquid seaweed feed to help them along”

I froze my broad beans to use over the winter when there isn’t too much around.  I always blanch them and then open freeze them on a tray until they are frozen….then I put them into a freezer bag:

SAM_3473

.

I have also been harvesting my peas.  I have been picking my dwarf peas and my climbing tall peas (which are an old fashioned variety called ‘peashooter’).  All my peas have done well this year and there are lots more still growing:

IMG_3879 SAM_3442

SAM_3444 SAM_3443 IMG_3880

It always amazes me that a whole basket of pea pods produce so few peas….but the peas are so sweet and delicious I can’t help growing them each year!

SAM_3425 IMG_3882 SAM_3445

My eldest daughter and Mr Thrift helped me to pick the pods this year and remove the peas…….I so love my family helping as it is a time we also chat about ‘this and that’ and laugh together.  I hope my daughters remember these time fondly when they are older.

I froze the peas in the same way I froze the broad beans….but I bet the peas won’t last until winter as we all love them!

Frozen broadbeans & peas

Frozen broadbeans & peas

I didn’t want to waste the pea pods so I made a ‘pea pod soup’, which my daughter loves.  You can find the recipe here

SAM_3430

I used rapeseed oil this time instead of olive oil, which made a darker soup…..it tasted the same but didn’t look quite so appertising so I will use olive oil again next time:

SAM_3431

.

This week I have noticed:

.

This week i have noticed my first raspberry on my ‘autumn’ raspberries (not sure why this one decided to grow early):

IMG_3857

My first mangetout are ready to pick (my youngest daughter has already spotted this and has been picking and eating them raw this week):

SAM_3481

My ‘mini’ pumpkin plants are covering the ground around my sweetcorn well – this keeps weeds down and the moisture won’t evapourate as quick if we get any more hot days:

SAM_3476

The dahlia tubers that I grew from seed last year and then overwintered in our brick outhouse, are starting to flower:

SAM_3480


And finally this week, I have noticed that the garden has lots of different types of bees and hoverflies visiting and this week I have spotted two different little frogs:

SAM_3492 IMG_3902

This is a wonderful site to me as it shows me that my organic gardening methods are working and the beneficial insects are now coming to my garden, helping my garden to become more and more productive by polinating my crops and eating the pests, such as slugs and snails etc.

.

Thank you for reading my blog this week.

I will be decorating our bedroom over the next week or two, so I have decided to take a two week break from my blog….I hope you don’t mind.

However I will be back on the 5th August as usual.

Have a great weekend.

XXX

‘Hardening Off’ & Homemade Yoghurt

I love May in the garden as all the new shoots growing are so fresh, green and vibrant.

In my garden at home the dicentra is flowering, the euphorbia looks stunning and my hardy geraniums are beginning to flower too.  The wall flowers I transplanted from my old allotment are still looking stunning as well, giving the bees some welcome ‘spring’ pollen.

SAM_0954 SAM_0953 SAM_0952 SAM_0940

This year however, it has felt like we have been having ‘April showers’ and ‘March winds’ in between some beautiful sunny ‘May days’…..with global warming I expect we will see more strange weather patterns over the coming years.

Nevertheless I have been harding off my plants ready for the threat of any frost to pass (usually at the end of this month where I live).

My hanging baskets and pots sit out all day now and are growing well….

SAM_0942 SAM_0948

…And some of my plants are harding off on my table in the day time and are brought inside in the evening….

SAM_0946

….And some are left in my cold frame all day and I close it at night:

SAM_0951

.

Hardening off plants:

“Hardening off” plants allows them to adapt to outside conditions before they are planted in their final positions.  There are two ways to do this:

1) Put your plants in a cold frame and gradually open the window of the cold frame more each day until it is fully opened or

2) Bring your plants outside for an hour or two for the first day and then gradually increase the time they spend outside each day.

The RHS suggest that hardening off plants properly takes approximately two to three weeks and Monty Don from Gardeners World says one week…..I usually aim for two weeks.

.

Whatever stage of ‘hardening off’ you are at, it is important to keep checking the weather forecast in your area, as frost tender plants need to be brought in at night (or covered over) if a frost is forecast.

***************

.

In my greenhouse this week:

You will remember last week that one of the cucumbers that I grew from seed died due to ‘stem rot’  (cucumbers are suseptible to this when you over water them so I only have myself to blame).

SAM_0886

This week I went out and bought a replacement from my local nursery for 60p and planted it in a tub next to my remaining cucumber grown from seed:

SAM_0930 SAM_0931

This week I also planted the basil that I sowed from seed on the 5th April, into it’s final growing place in my greenhouse next to the peppers that I also grew from seed on the 3rd March.

SAM_0933 SAM_0935

  The bags they are growing in were bought from the supermarket as ‘garden tidy bags’, so it was a cheap way to grow crops in my greenhouse (which has a concrete floor).

.

I have also planted my melons in larger pots, ready for them to grow.  When they are bigger I am hoping to train them along the top of my greenhouse, over my tomato plants.  Incidentally the melons were sown in newspaper pots so it was very easy to transplant them without any root disturbance, as I planted the newspaper pot straight into the compost:

SAM_0929

.

Another job was to transplant my butternut squash plants into larger pots.  I will leave them in the greenhouse for a few days and then I will also start to harden these off ready for planting out at the beginning of June:

SAM_0932

.

Finally in my greenhouse, I noticed the first tomato on one of my plants…..this means it is time to start the feeding once a week.  Previously at my allotment I would use a homemade ‘comfrey feed’ which is high in potash which is great for fruit and flowers….(you can read how to make a ‘comfrey feed’ here).  Unfortunately as I transplanted my comfrey only a couple of months ago, it isn’t ready to use yet, so I will be using a commercial organic tomato feed.

SAM_0955

.

.

Outside my greenhouse in my kitchen garden:

This week I have been planting my courgettes in the large pots I brought back from my allotment.  You may remember I planted some lettuce plants around the edges of the containers and they are doing well.  Hopefully the lettuces will be fully grown before the courgettes need the space:

SAM_0926 SAM_0928

At the moment I am keeping them covered with the glass, just to give them an extra bit of heat to get them growing well.

.

I have again thinned out the leeks that I sowed way back in March.  This is later than I normally sow my leeks and they are still small, so I am using the area where they will eventually be grown, to plant my lettuces.  I am growing them in succession so we have a good supply to eat over the summer months:

SAM_0950 SAM_0936

As you can see in the photograph above, I covered the first lettuces that I planted to protect them from the pigeons (they used to eat the lettuces at my allotment if they weren’t covered).  This time I decided to not cover the newly planted lettuces to see what happens in my new kitchen garden – I will be watching the pigeons carefully!

.

Finally in the garden this week I planted the cherry tomatoes that I sowed on the 5th April.  They are a variety call ‘Minibel’ which are supposed to be suitable for pots, containers and baskets….so I have taken their word and planted them in a hanging basket….I will let you how I get on over the weeks:

SAM_0949

.

.

At Home This Week:

This week I have had a big sort out of my three freezers.  I am not sure if I will still be using all three of them in the future, but at the moment they are still full of homemade goodies and homegrown fruit and vegetables.

I make sure I check what is in my freezers regularly as this helps when I plan my meals and it makes sure that everything is used and not forgotten about.  Just incase anyone is interested, I wrote and article about freezing crops here.

One of my three freezers

.

I managed to get some ‘whoopsied’ brussells and banana’s this week from the supermarket, so I also froze the brussells for another day and I made a couple of banana cakes to slice and freeze too and I also made some banana and chocolate lollies.  I will share the recipes with you another time.

 SAM_0945 SAM_0944

I also make rolls to freeze for the week ahead.  I bake the rolls as usual and when they are cool I slice them in half and then pop the rolls in the freezer.  This way I can take a roll out of the freezer in the morning and pop the filling inside and it will defrost in my familys lunchboxes ready for them at dinner time.

SAM_0924

.

I also use my freezer for homemade ice cream too.  I made some nice and easy vanilla ice cream this week (the recipe is here).  You don’t need an ice cream maker to make ice cream, but it does take the hard work out of it….I bought mine from a charity shop for just £10 and it had never been used and was still in the box when I purchased it.

SAM_0917 SAM_0918

.

This week we had family round for Sunday lunch.  I made a nice Rhubarb and Ginger cake for pudding, thanks to My friend Jeff who has brought me some rhubarb from his allotment and the wonderful person that left some Rhubarb on my doorstep when I was out last Saturday …I still haven’t managed to find out who it was, so if you are reading my blog this week – thank you.

Unfortunately my rhubarb in my new kitchen garden isn’t ready to eat, as it takes a year or two for it to establish properly before it can be picked.

The recipe for the Rhubarb and Ginger cake is here and it went lovely with a spoonful of the homemade vanilla ice cream:

SAM_0919

.

Finally this week I made some plain yoghurt.  I haven’t made yoghurt for a while and Mr Thrift likes to take it to work for his lunch, so I dusted my yoghurt maker down and finally made some.

A few years ago I was given an Easiyo Yoghurt maker.  You can see a similar one here.  The idea of an Easiyo Yoghurt maker is to use sachets of the Easiyo yoghurt mixes which you buy.  I don’t do this, as I think they are expensive and I like to make mine from scratch.

.

This is an easy way to make yoghurt:

.

You will need skimmed milk powder

UHT Milk

A yoghurt starter (see below)

.

The first time you make yoghurt, you will need to buy a small amount of ‘live’ natural yoghurt, or ‘probiotic’ natural yoghurt.  This will give your yoghurt mix, the bacteria that it needs to make yoghurt.  Each time you make your own yoghurt, save 3 heaped tablespoons of yoghurt ready to start your next batch of homemade yoghurt.  Your starter can be frozen until needed.  I do this up to four or five times only, as the bacteria seems to weaken each time.

Put 3 heaped tablespoons of skimmed milk powder into your yoghurt maker canister.  Half fill the canister with UHT milk and give it a good shake.

Put 3 heaped tablespoons of ‘Yoghurt starter’ into the canister.

Top up the canister with UHT milk and give it another good shake.

Put boiling water into the Easiyo flask and then add the canister.

 Put the lid on and leave for approximately ten hours.

Take the canister out of the Easyio flask and then put it in the fridge to finish setting.

I then save 3 heaped tablespoons of the yoghurt and pop it in the freezer as a ‘yoghurt starter’ for the next time I make it.

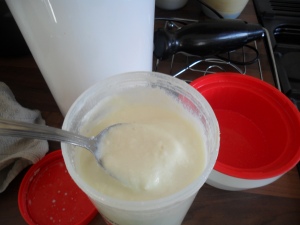
SAM_0943

Enjoy the yoghurt plain, or with fruit mixed in.

.

Thank you for reading my blog today.  I will be back next Friday as usual.

Have a good weekend!

Completing Planting And A Bumper Harvest

I have so much to write about today, as I have been working so hard at my allotment this week.  I wanted to finish planting all my crops before the long school holidays begin, in exactly one weeks time.  The schools here in Leicestershire break up earlier than the rest of the country.

I started by planted some more perpetual spinach:

SAM_6807

….And some more spring onions.  I sow my spring onions in modules as I always had a very bad germination rate when I sowed them straight into the ground (though I don’t know why as they are supposed to be an easy plant to grow).  By sowing a few seeds in each module, I find it almost guarantees a high germination rate.  I don’t thin the spring onions either, I just plant them as they are when they are ready:

SAM_6805 SAM_6806

In the right hand photograph above, you can just see the newly planted spring onions and you can see the ones I planted out three or four weeks ago growing nicely behind.

.

I also planted out my spring broccoli, curly kale and some more khol rabi.  All of the brassicas were planted in firm soil which I had dug and manured last autumn.  I also walked over the area before planting.

SAM_6769 SAM_6768 SAM_6776

As the ground was dry when I planted the brassicas out, I dug a hole for each plant and filled it with water.  When the water had drained away, I then planted them.  This allows the water to go deep into the ground to encourage the roots to also grow deep to find the water.  It also helps to stop the water from evaporating quickly after planting.

SAM_6774

I also planted some quick growing turnips too, but you may have to enlarge the photograph below to see them:

SAM_6777

All my brassicas have nets over, to stop the dreaded pigeons eating them.

While I was working in my brassica patch, I removed any yellowing leaves from my remaining spring cabbages. This will help to stop the build up of any pests or diseases lurking in them.  These cabbages were planted a month after my first spring cabbages and they are now starting to heart up nicely, so I will start to use these now.

SAM_6772 SAM_6773

.

I have now officially ran out of room in my brassica beds and so I can finally say I have finished my summer brassica planting:

SAM_6779

.

This week I cut my comfrey down.  I prefer to cut my comfrey down before it flowers, but I just wasn’t quick enough this month.  If you have been reading regularly, you will know that I have already made comfrey tea this year (which incidentally is a wonderful high potash fertiliser used for all fruit and flowers e.g. it is a great tomato feed).  You can read how to make comfrey tea here.

SAM_6788 SAM_6792

I have also added a vast amount of comfrey to my compost bins already this year.  So when I cut it down at this time of the year, I lay it down between my main crop potatoes instead.  This acts as a mulch to help to stop water evapourating from the ground and also helps to stop annual weeds from germinating.  When the comfrey breaks down, I just dig it into the ground to add nutrients to the soil.

I think comfrey is a wonderful plant!

SAM_6789

.

This week  I also cleared my old perpetual spinach that had ran to seed and planted my french beans in it’s place:

SAM_6786

I cleared my broad beans in my polytunnel that had finished producing beans:

SAM_6793

And I cleared my poached egg plants that had finally finished flowering either side of my path.  I transplanted some self seeded calendula plants in it’s place, though it looks quite bare at the moment it will soon grow and look pretty and be a bonus for the bees:

SAM_6754 SAM_6771

Another thing I have started to do is to ‘nip’ the tops of my runnerbeans off as they reach the top of their supports.  This helps the plants to ‘bush out’ further down and produce more beans:

.SAM_6795

.

This week’s harvest:

Plants have been growing slowly due to the cold spring we have had.  However, the plants are finally now producing and I seem to be having a bumper harvest.

I’ve started to pick my outdoor broadbeans this week and I have needed to pick them every other day:

SAM_6739 SAM_6760

I have found my peas are just great, even though they a month behind.  My back has ached just picking them:

SAM_6809

So too is the mangetout (even though some are a little larger than I would have liked, as I didn’t notice they were ready):

SAM_6799

My potatoes taste delicious (especially with a knob of butter) and we are eating lots of lettuces, watercress and spring onions….I love summer so much.

SAM_6794

And my strawberries…well what can I say other than it really is a bumper crop and I’m picking carrier bags full every two days:

SAM_6804 SAM_6736 SAM_6766

.

Of course the down side is that I had to defrost my freezer ready for all the fruit and vegetables that I have been bringing home….

SAM_6783

.,….but it will be worth it when we are still tasting ‘summer’ in the long cold winter months.

SAM_6798 SAM_6797

I hope you enjoyed reading my blog today.

I will be back on Monday with some Jam making tips.

Hope you have a good weekend.

Laundry Liquid, Planting Leeks And Training ‘Cordon’ Tomatoes

It’s Friday already and I’m not sure where the week has gone to.

I started the week by making some of my homemade laundry liquid.  I’ve been using homemade laundry liquid to wash my clothes for quite some time now and it washes well and is so much cheaper than shop bought wash powders and liquids.  Infact, a few months ago I worked out that it cost me approximately £1.75 to make and I managed to get 71 washes out of it, which worked out to be a staggering 2.5p per wash. I challenge any of the supermarkets to beat that!

SAM_6596

I really don’t know where I got the recipe for homemade laundry liquid from, it was somewhere on the net, so I can’t take any credit for it. As it’s been some time since I last wrote how to make it on my blog, I thought I would write the recipe again for anyone who didn’t see it the first time around.  It only takes about fifteen minutes to make, but I think it’s time well spent:

.

Laundry Liquid

1 cup of soap flakes

½ cup Soda Crystals (also known as washing soda)

½ Cup Borax (in the UK it is a substitute of borax which works well)

1 ½ litres of water

SAM_3621

Put the above ingredients into a saucepan and heat, stirring until the soap flakes have dissolved.

SAM_3623

Pour the mixture into a very large bucket and then add a further 8 litres of cold water.

SAM_3625

Stir and then pour into containers, leaving space at the top so you can easily shake the container before you use it.

SAM_3634

You only need approximately a quarter of a cup of washing liquid for each wash.

SAM_6601

I use old plastic milk containers to store my liquid in. The recipe makes just over 10 litres of liquid which I found was enough for 71 washes.

One thing to remember is you won’t see lots of bubbles when it washes, but this doesn’t matter. Wash powders that you buy actually have bubbles added, not because they are needed, but because people think their clothes aren’t washing properly if they don’t see bubbles.

.

Tomatoes

SAM_6594

This week I removed most of my staging from my greenhouse, so I could put my tomatoes and cucumbers neatly, as it was getting a bit cramped in there.  I have four tomatoes called ‘Moneymaker’ and four of a heritage variety called ‘Wladecks’.  The heritage variety is a beefsteak tomato.  I also have two cucumber plants.

As the above plants grow, I tie them to the canes that I have put in the pots, to help support them.

Just in case you haven’t grown tomatoes before, it is very easy.  There are two different types of tomato, a ‘bush’ tomato and a ‘cordon’.

I am growing a’ cordon’ and it is trained up a support, by tying it to the support as it grows,   Also, side shoots will grow between the leaf stem and the main stem (called the leaf axil) and all you need to do is ‘pinch out’ the side shoots as they begin to grow (which means removing it by pinching it off using your thumb and finger nails).  There is a photograph of a side shoot below:

SAM_6592

The only other thing to do is to feed your tomato plants regularly after you can see your first tiny tomato has formed and started to grow.  Also keep the plants well watered and you will have lovely tomatoes soon.

SAM_2975

.

Planting Leeks

One of the jobs I did at my the allotment this week was to clear the kale that I left to flower for the bees, as it had just about finished flowering.  I put it all in my compost heap, as the thick stems will eventually rot down, though it does take quite some time.

SAM_6606 SAM_6608

I then dug the area over and raked in some blood, fish and bone, ready to plant my leeks.

I sowed the leeks back in January, so I was very careful not to drop them when I transported them to my plot (as I did with my sweetcorn last week).

My dad taught me how to transplant leeks and just in case you are reading this and you have never grown leeks before, I thought I would show you how I do it:

First I use a dibber to make a hole approximately 15cm deep.

SAM_6627

Then I cut the end of the roots off each leek.  This was done in the past as it was thought to stimulate the roots into growth, but I have read that it doen’t really make a difference.  I still do this, simply because I find it helps to make it easier to push the leek into the hole that you have made with your dibber.

SAM_6629

I push the leek into the hole I made with the dibber (sometimes it’s easier to twist the leek to get the roots to go down into the hole).

SAM_6631

Plant the leeks 15cm apart, in rows 30cm apart.

You don’t need to backfill the hole with soil, just water each leek and let the water settle the soil around the roots.

I don’t do anything more to my leeks, except weed around them.  They sit happily over winter too.

SAM_6632

.

.

Just to finish off with today, I thought I would show you my beautiful oriental poppies that have just begun to flower this year:

SAM_6611

I hope you enjoyed reading my blog today.

I will be back on Monday at approximately 4pm.

My Back Garden And My Allotment Too

I have finally taken some time this week to do some weeding in our back garden.  Unfortunately, I don’t spend as much time as I should in our back garden as i’m always at my allotment.  So the garden really has to look after itself.

SAM_6438

We are very lucky as our house isn’t overlooked and there is a lovely view from my daughters bedroom window:

SAM_6441

You can see from the photo above that the lilac tree is in full flower.  I love lilac trees, they remind me of the first house I owned, as it had one in the back garden too.

If you look closely at the photo below, you can see my ‘clematis montana’ climbing through the photinia ‘red robin’.  I planted the clematis about five years ago and I had forgotten all about it until I spotted it this week.

What a lovely surprise:

SAM_6440

 .

This week at my allotment I have been earthing up my potatoes.  I have twelve rows to do altogether and as I find it such hard work I earth up one row a day:

SAM_6420

.

I planted some spring onions that I have grown in modules.  I always had a problem getting spring onion seed to germinate in my heavy clay soil, so now I grow them in modules filled with compost.  I put a small pinch of seed into each module and I don’t bother to thin the seedlings out, as the spring onions grow in a bunch.

When the spring onions are large enough, I transplant them:

Spring onions transplanted next to my garlic

Spring onions transplanted next to my garlic

.

This week I have planted my runner beans.  I sowed the seed at the beginning of May and I have been hardening the plants off.  As it is still quite cold for this time of year, I have put old panes of glass around them to give a bit of protection.

If you have been reading my blog for a while, you will remember I dug trenches in the autumn and filled them with all my old peelings, etc until they were full and then I covered them over with soil again.  My runnerbeans were planted exactly where the trenches were, so this soil will now hold the moisture and runner beans like to grow in moist soil.

The runnerbeans I planted this week

The runner beans I planted this week

A runnerbean trench

My runner beans trench in autumn

.

As my comfrey was coming into flower, I cut it all down and added it to my compost bins.

Comfrey is a fantastic compost activator and anything that speeds up compost making, is good to me.  What is even better is, it is free!  You can read about growing comfrey and making ‘comfrey tea’ here.  (Comfrey tea is a fabulous organic feed that is high in potash, which means it is good for fruits and flowers e.g. tomatoes)

SAM_6416 SAM_6417

.

I also chopped some of my chives down this week.  My daughter used to love chives so I dedicated a whole bed to them….yes you have guessed it…she doesn’t like them now, a typical teenager!

I haven’t dug them up as we still use loads of them and the flowers are so pretty and the bees love them.

I have three rows altogether and I find if I chop them down after they have flowered, then they start to re-grow again.

As my three rows were about to flower, I decided to chop two rows down and leave the middle row for the bees.  I will chop this after the flowers have gone over, so I can stagger the crop.

SAM_6408

Just before I did this, I managed to take a photo of the female blackbird that has been following me around for the last couple of months at my allotment.  She must have a nest nearby.  She comes so close to me sometimes that she makes me jump.  She doesn’t seem scared of me at all, which is unusual for a blackbird.

My blackbird friend

My blackbird friend

.

I repotted my mint a few weeks ago and I finally planted the pot back into the ground.  I find it is better to keep mint in a pot as it helps to stop the plant from taking over, as it does spread rather a lot.

I have two mints, a normal mint and an apple mint.  I also planted an oregano plant that my local garden centre was giving away free a few weeks ago:

SAM_6422

.

I have given my strawberry patch a good weed this week.  These strawberries are three years old now, so I I have planted some new ones in a different place.  Strawberries usually only last three to four years, as their yields become less after this time due to a build up of pests and diseases.

My daughter loves strawberry jam, so I grow loads.

They are flowering well now.  I will shortly buy a bale of straw and put it all around the fruit.  The straw acts as a mulch, so the fruit isn’t sitting on cold wet soil and it also helps to keep the weeds down.  I will then net the plants so the birds don’t eat all the lovely fruit.

SAM_6435

One of the last jobs I have done this week, is to refill a plum moth trap on my big old plum tree.  The picture below shows the sticky paper that trapped all the plum moths last year.  As you can see there is obviously a problem on this tree:

SAM_6418

.

To finish off I thought I would show you a few pictures of my woodland area.  This area was part of my fourth plot that I took over in January 2012 and it was covered in overgrown couch grass.  I covered the area in weed suppressant straight away to kill the couch grass and by autumn it had worked well.  From then on, I planted loads of bulbs and transplanted different flowers that I had.  Afterwards, I covered the whole area in leaves to suppress any weed seeds from growing.

This is how it looks today:

SAM_6427

The bulbs have nearly all finished flowering now, but there are still a few around.  I have noticed it’s now the turn of the aquilegia’s, together with my wallflowers and the English bluebells (that I bought in the autumn with my birthday money).  I’m very pleased with my woodland area so far, but it still has a long way to go:

SAM_6428 SAM_6431 SAM_6432 SAM_6430

.

Thank you for reading blog today.

I will be back on Monday.

A Plant Sale, Comfrey Tea And An Easy Chocolate Traybake Recipe

I hope you all had a good weekend.

Today I thought I’d start by saying a big “welcome” to people that have recently followed my blog.  I noticed yesterday that I have over three hundred followers and I feel very privileged to have this many.  Thank you to all of you that read my blog, I hope I will continue to write things of interest for you.

I love receiving feedback and questions, so please feel free to leave comments on my blog.  If there is anything that I can help you with e.g. any questions about something I’ve written about or any non-related gardening questions etc, please do not be afraid to ask…after all, if you don’t know the answer then I will guarantee there will be lots of other people that don’t know the answer too.

.

The appletree at my allotment

The apple tree at my allotment

.

And now for some sad news….

groundwork

 Last week I received the very sad news that ‘Groundwork Leicester and Leicestershire’ had ceased trading and was set to go into voluntary liquidation.

Groundwork was based in offices at Western Park, in Hinckley Road, Leicester, next door to the city council’s Eco House, which it also manages and which is currently closed.

Groundwork Leicester and Leicestershire was an environmental charity which worked with schools and other organisations to promote a greener lifestyle.  It has closed with the loss of 26 jobs.  This is what the Leicester Mercury said about them:

“Since 1987, the Leicester charity – previously called Environ – has helped thousands of people, organisations and businesses improve their neighbourhoods, learn skills, improve their job prospects and create a greener county.

One of its key areas has been helping students and young people get into work. It also helped to manage the Bikes4All and Allotments4All initiatives.

It has worked with various organisations including councils, schools and universities as well as local and regional businesses.”

You can read the full article in the Leicester Mercury here.

SAM_3147

My friend Rob Carter was regrettably one of the 26 people.  Rob ran the ‘Organic Gardening Course’ that I talked about last year on my blog.  He is one of the most knowledgeable organic gardeners, that I have ever met and what he doesn’t know about gardening, really isn’t worth knowing.

Rob was planning a plant sale this month and volunteers have been helping him to grow plants in readiness.  Even though Rob has lost his job at Eco House, he is still going ahead with the plant sale, which I think is admirable.  Volunteers (including myself) will be there to sell the plants we have grown, all in peat free composts and will answer any questions you have about the plants.

So if you are in the area on Sunday, please consider visiting the sale for cheap, good quality flower and vegetable plants.  After all, unless a miracle happens, this will be the last sale.

SAM_6360

                                      .                  ​

Better news now… this weekend I harvested my first ever asparagus.  I know there isn’t much here, but I’ve waited three years to get a crop and hopefully there will still be some more to come.

It tasted wonderful with a knob of butter melted over it.

SAM_6356

.

My comfrey is growing well now, so a few days ago I made some comfrey tea so it will be ready in a couple of weeks.

SAM_6313

Comfrey tea is a wonderful organic fertiliser which is high in potash and free to make.  The deep roots of the Comfrey plants absorb the potassium from the subsoil. Therefore it is great for using on most fruits and flowers.  I use it so much that I have a water butt that I use purely for comfrey tea.

All I did was collect a few leaves and stalks and wrapped them up in an old net with a rock to weigh it down.

SAM_6314

I tied it securely and lowered it into my water butt and covered it in water.

SAM_6317

I put the lid back on the water butt and I will leave it now for at least two weeks before I use it.

You can find more information about this wonderful plant and how to grow it here.

.

Another job I managed to do at my allotment, was to put some chicken wire on my daughters’ old swing.  I moved the swing a couple of months ago, so you can walk under it, along my central path.

I then planted a Clematis Montana, so it can grow up and over it.  Hopefully, it will be covered in flowers next spring and look beautiful:

SAM_6355

.

Finally, it’s been a while since I posted a cheap and easy cake recipe on here.  So below is a very simple tray-bake (I try to make sure all my recipes are easy to make).

This cake is ideal if you have kids coming for tea, or to freeze ahead ready for packed lunches.  If you freeze them, slice the cake into squares and put them into the freezer on a tray.  Put them into a bag or container when they are frozen, so they don’t stick together.  This way it is easy to take one piece of cake out of the freezer in the morning and pop it into the kid’s lunch boxes still frozen, as they will defrost in no time:

.

A Quick And Easy Chocolate Tray-Bake Recipe:

.

6 oz. of Margarine

6 oz. Caster sugar

6 oz. Self raising flour

3 Eggs

1 Tablespoon Cocoa powder

1 Teaspoon of baking powder

Cooking chocolate and sprinkles to decorate.

.

Preheat the oven Gas Mark 4 / 350F / 176C

Lay a piece of greaseproof paper over a tray, approximately 9 x 12 ½ inch in size.

Sieve the flour, baking powder, cocoa powder into a bowl.

SAM_6329

Add the caster sugar, eggs and margarine.

SAM_6330

Mix all the ingredients until they are combined. Add a little bit of water if needed, to achieve a good dropping consistency (i.e. it drops off the spoon easily).

SAM_6333

Smooth the mixture over the greaseproof paper in the tray and cook for approximately 25-30 minutes.

SAM_6334

When it is cooked, slide the greaseproof paper off the tray and onto a cooling tray and leave to cool.

SAM_6335

When cooled, melt some cooking chocolate in the microwave and spread over the cake and use sprinkles or whatever you want over the top to decorate.

SAM_6337

Slice when the chocolate has set.

SAM_6340

Thank you for reading my blog today.

I will be back on Friday at approximately 4pm.