Archives

Homemade Christmas Gifts…

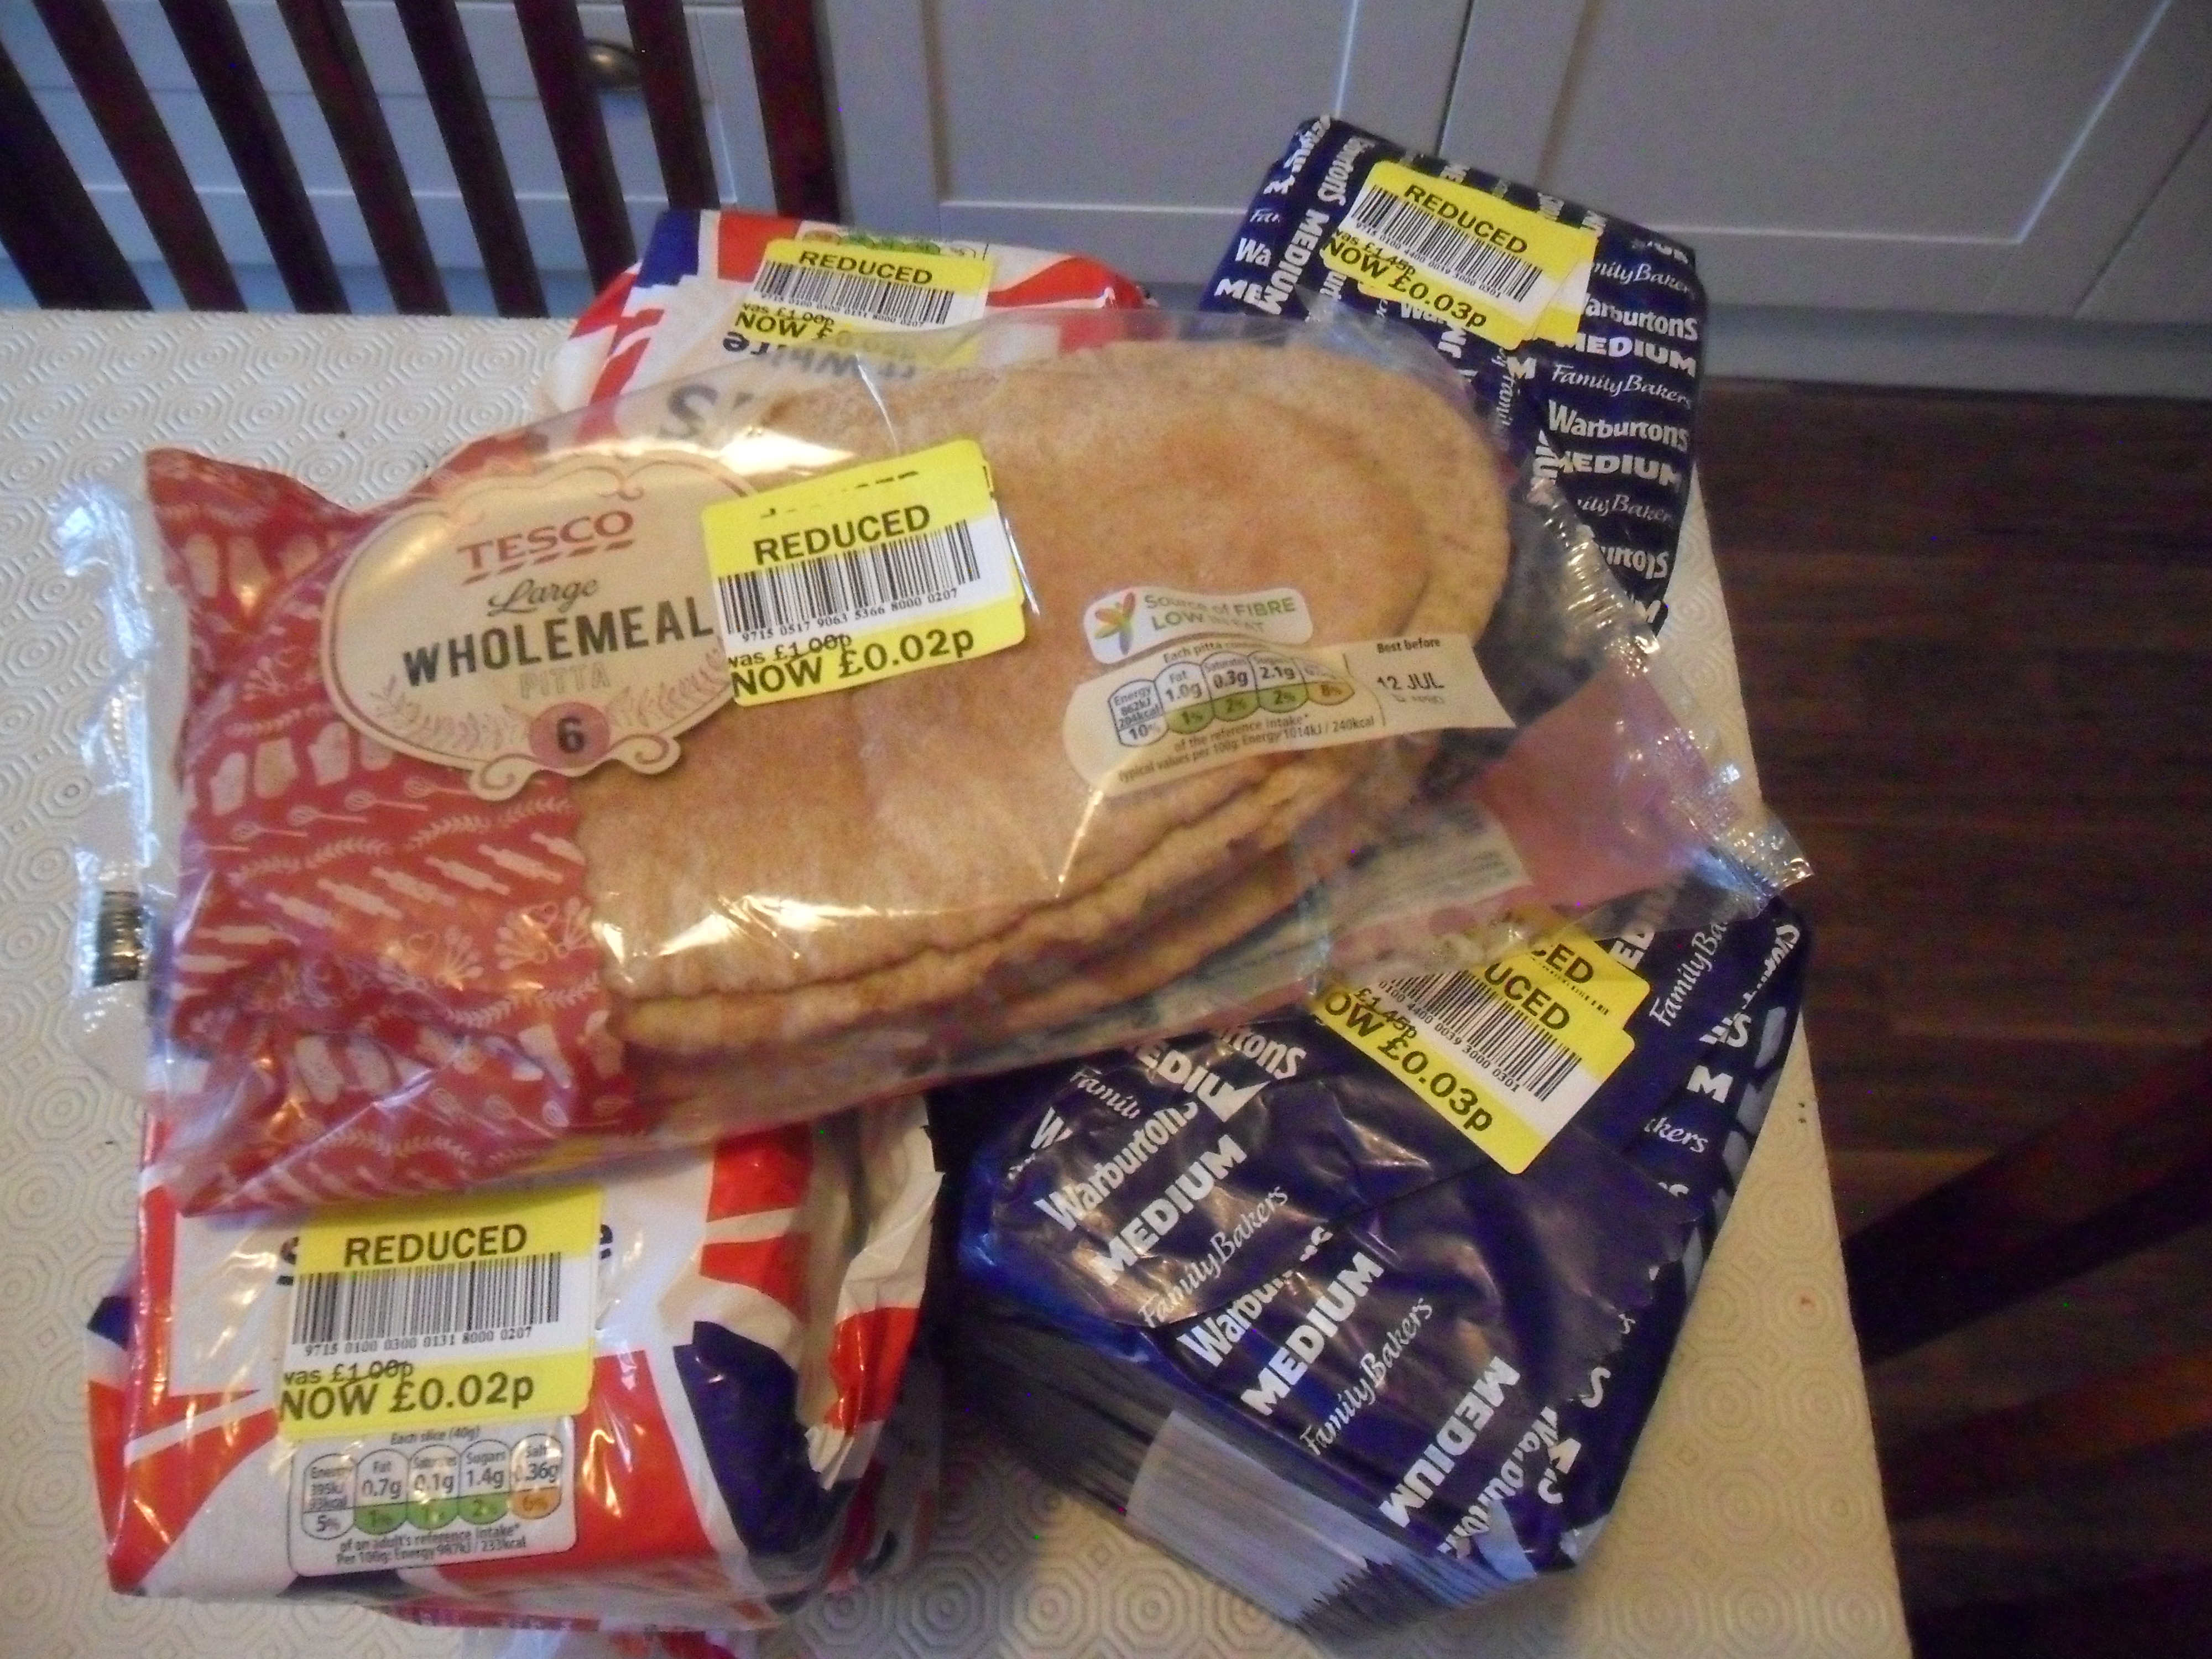
This week I have been busy again.  I started the week by making another batch of laundry liquid.  It still amazes me how much I save by making my own liquid and it only takes about fifteen minutes to make approximately three months worth (and I wash a full load every day).

SAM_2461 SAM_2463

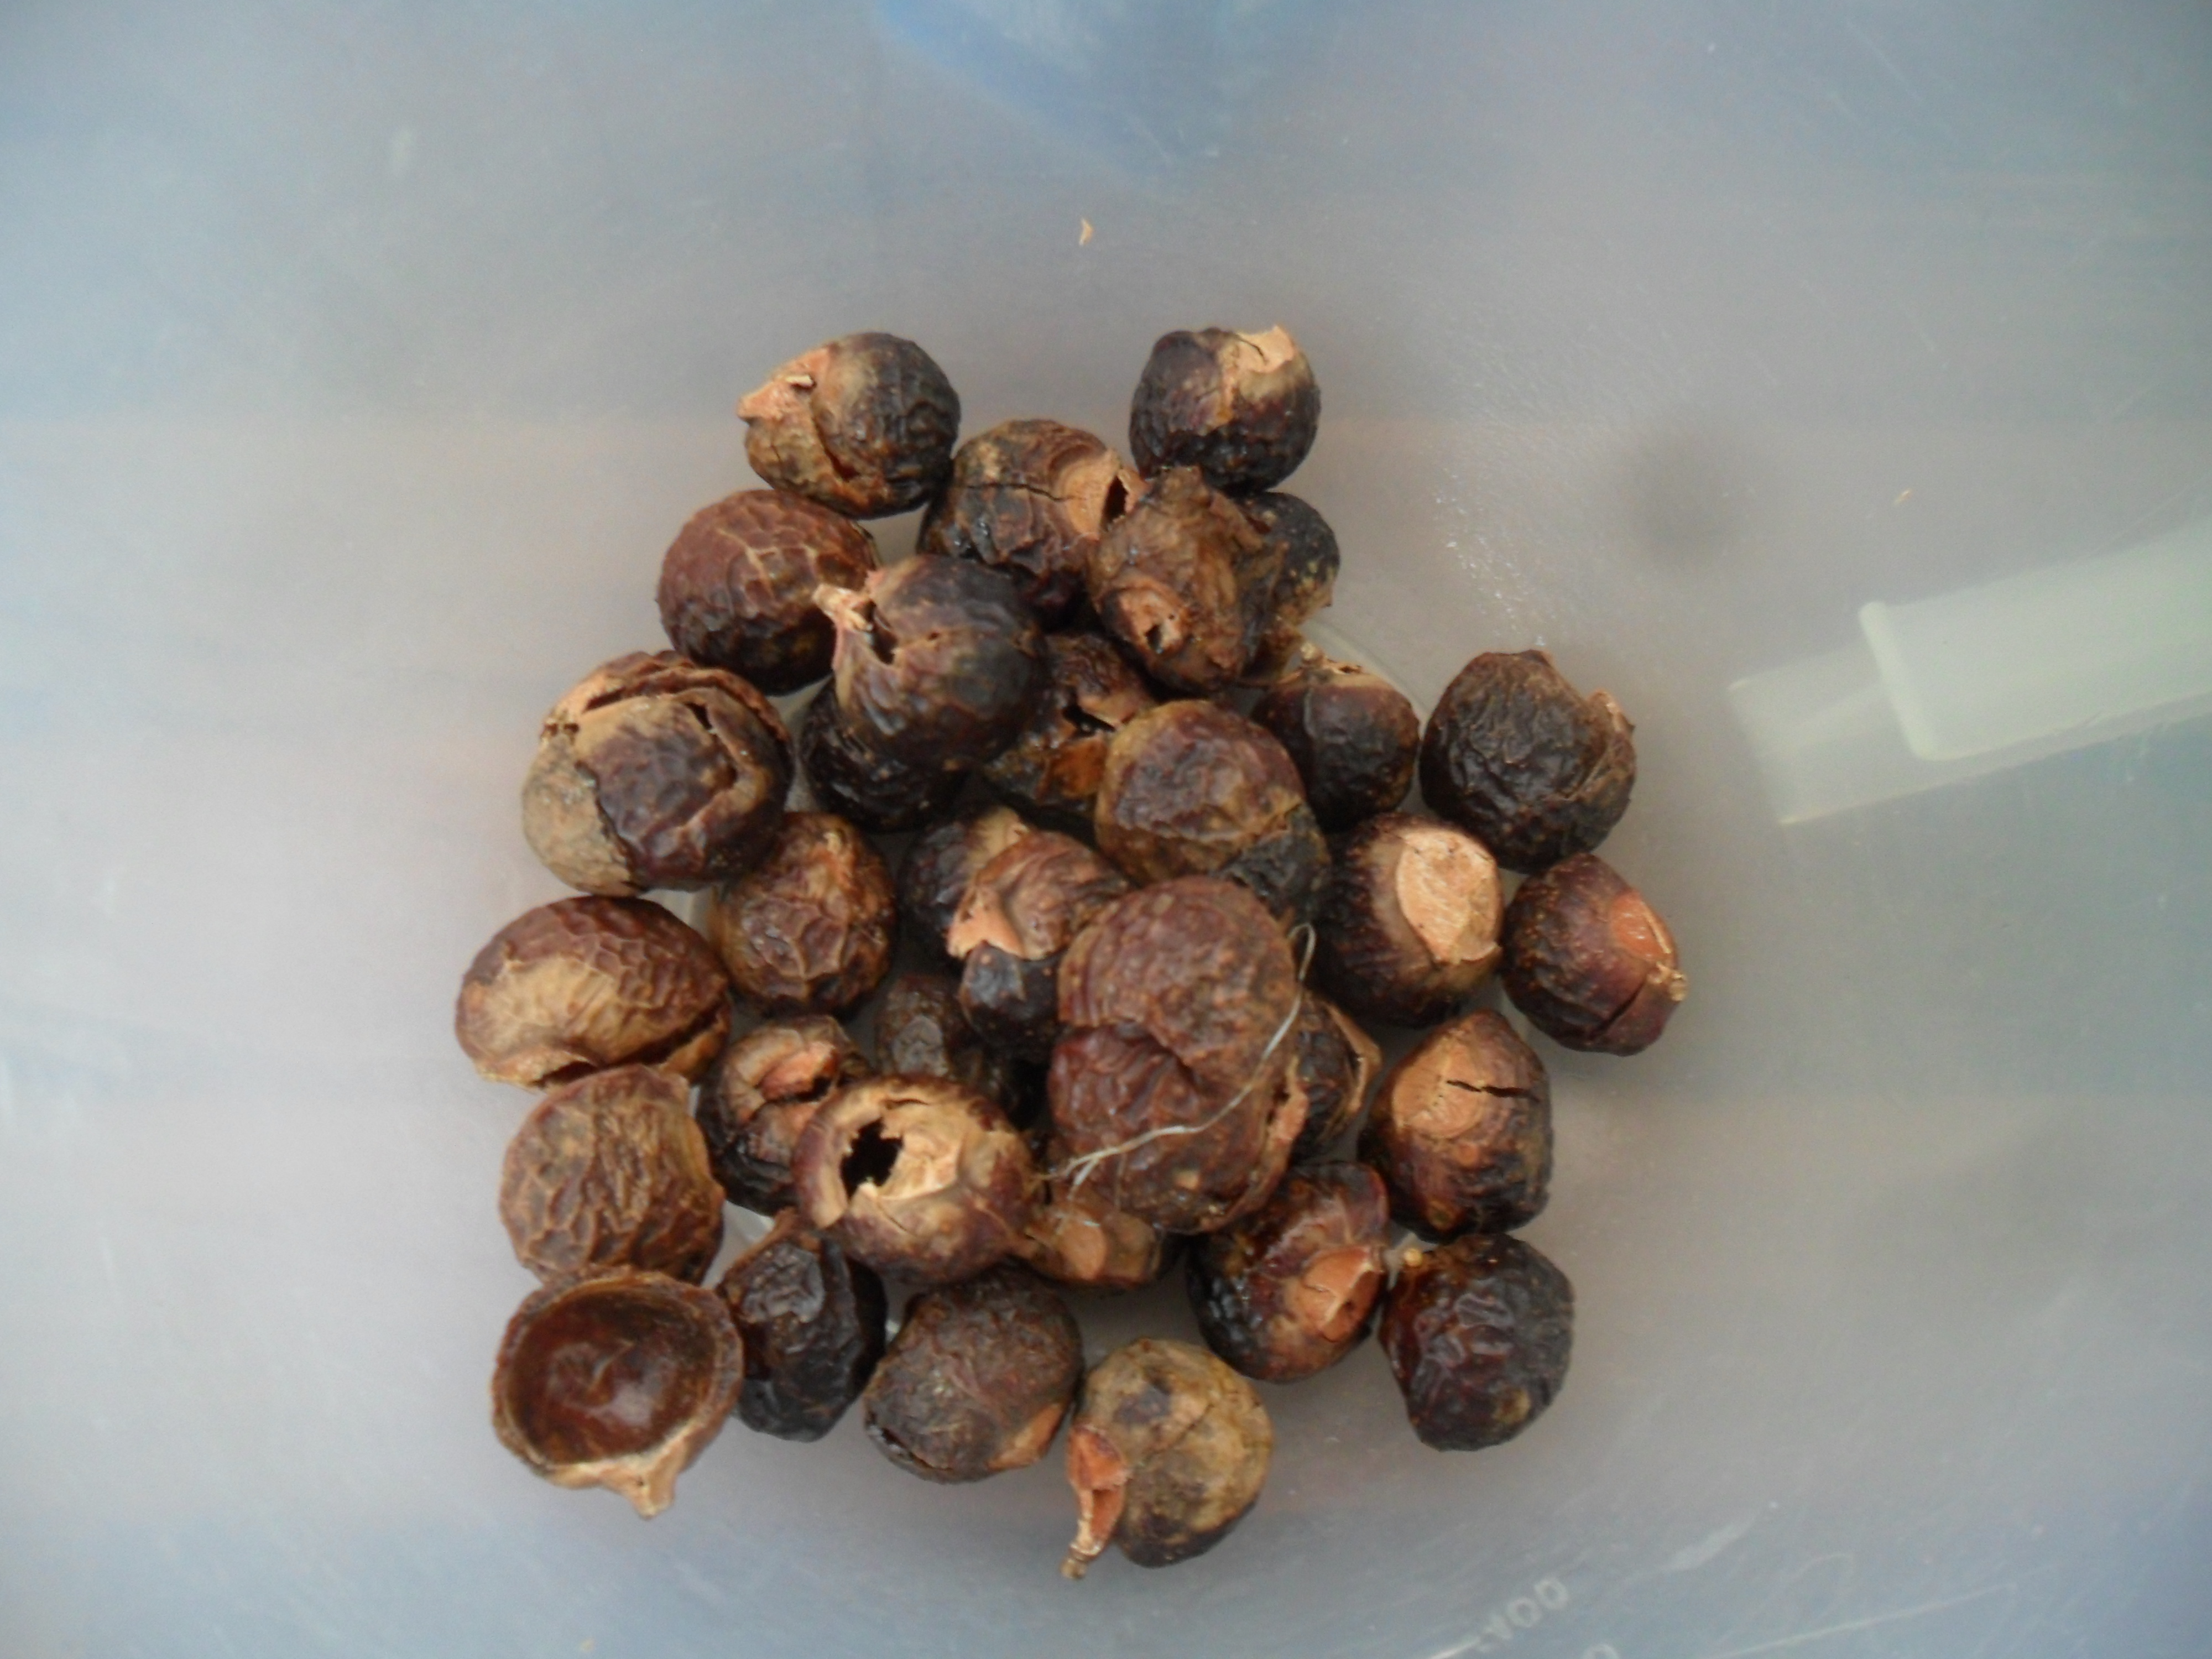
I also made some more dishwasher liquid too, using soap nuts:

SAM_2470

And I topped up my homemade multipurpose kitchen spray too, using white vinegar and a few drops of teatree oil.  The vinegar cuts easily through grease and dirt and the teatree oil turns it into an antibacterial spray.

SAM_2465

All of the above things help me to save money around the home and I don’t use any nasty chemicals either.

.

In the garden:

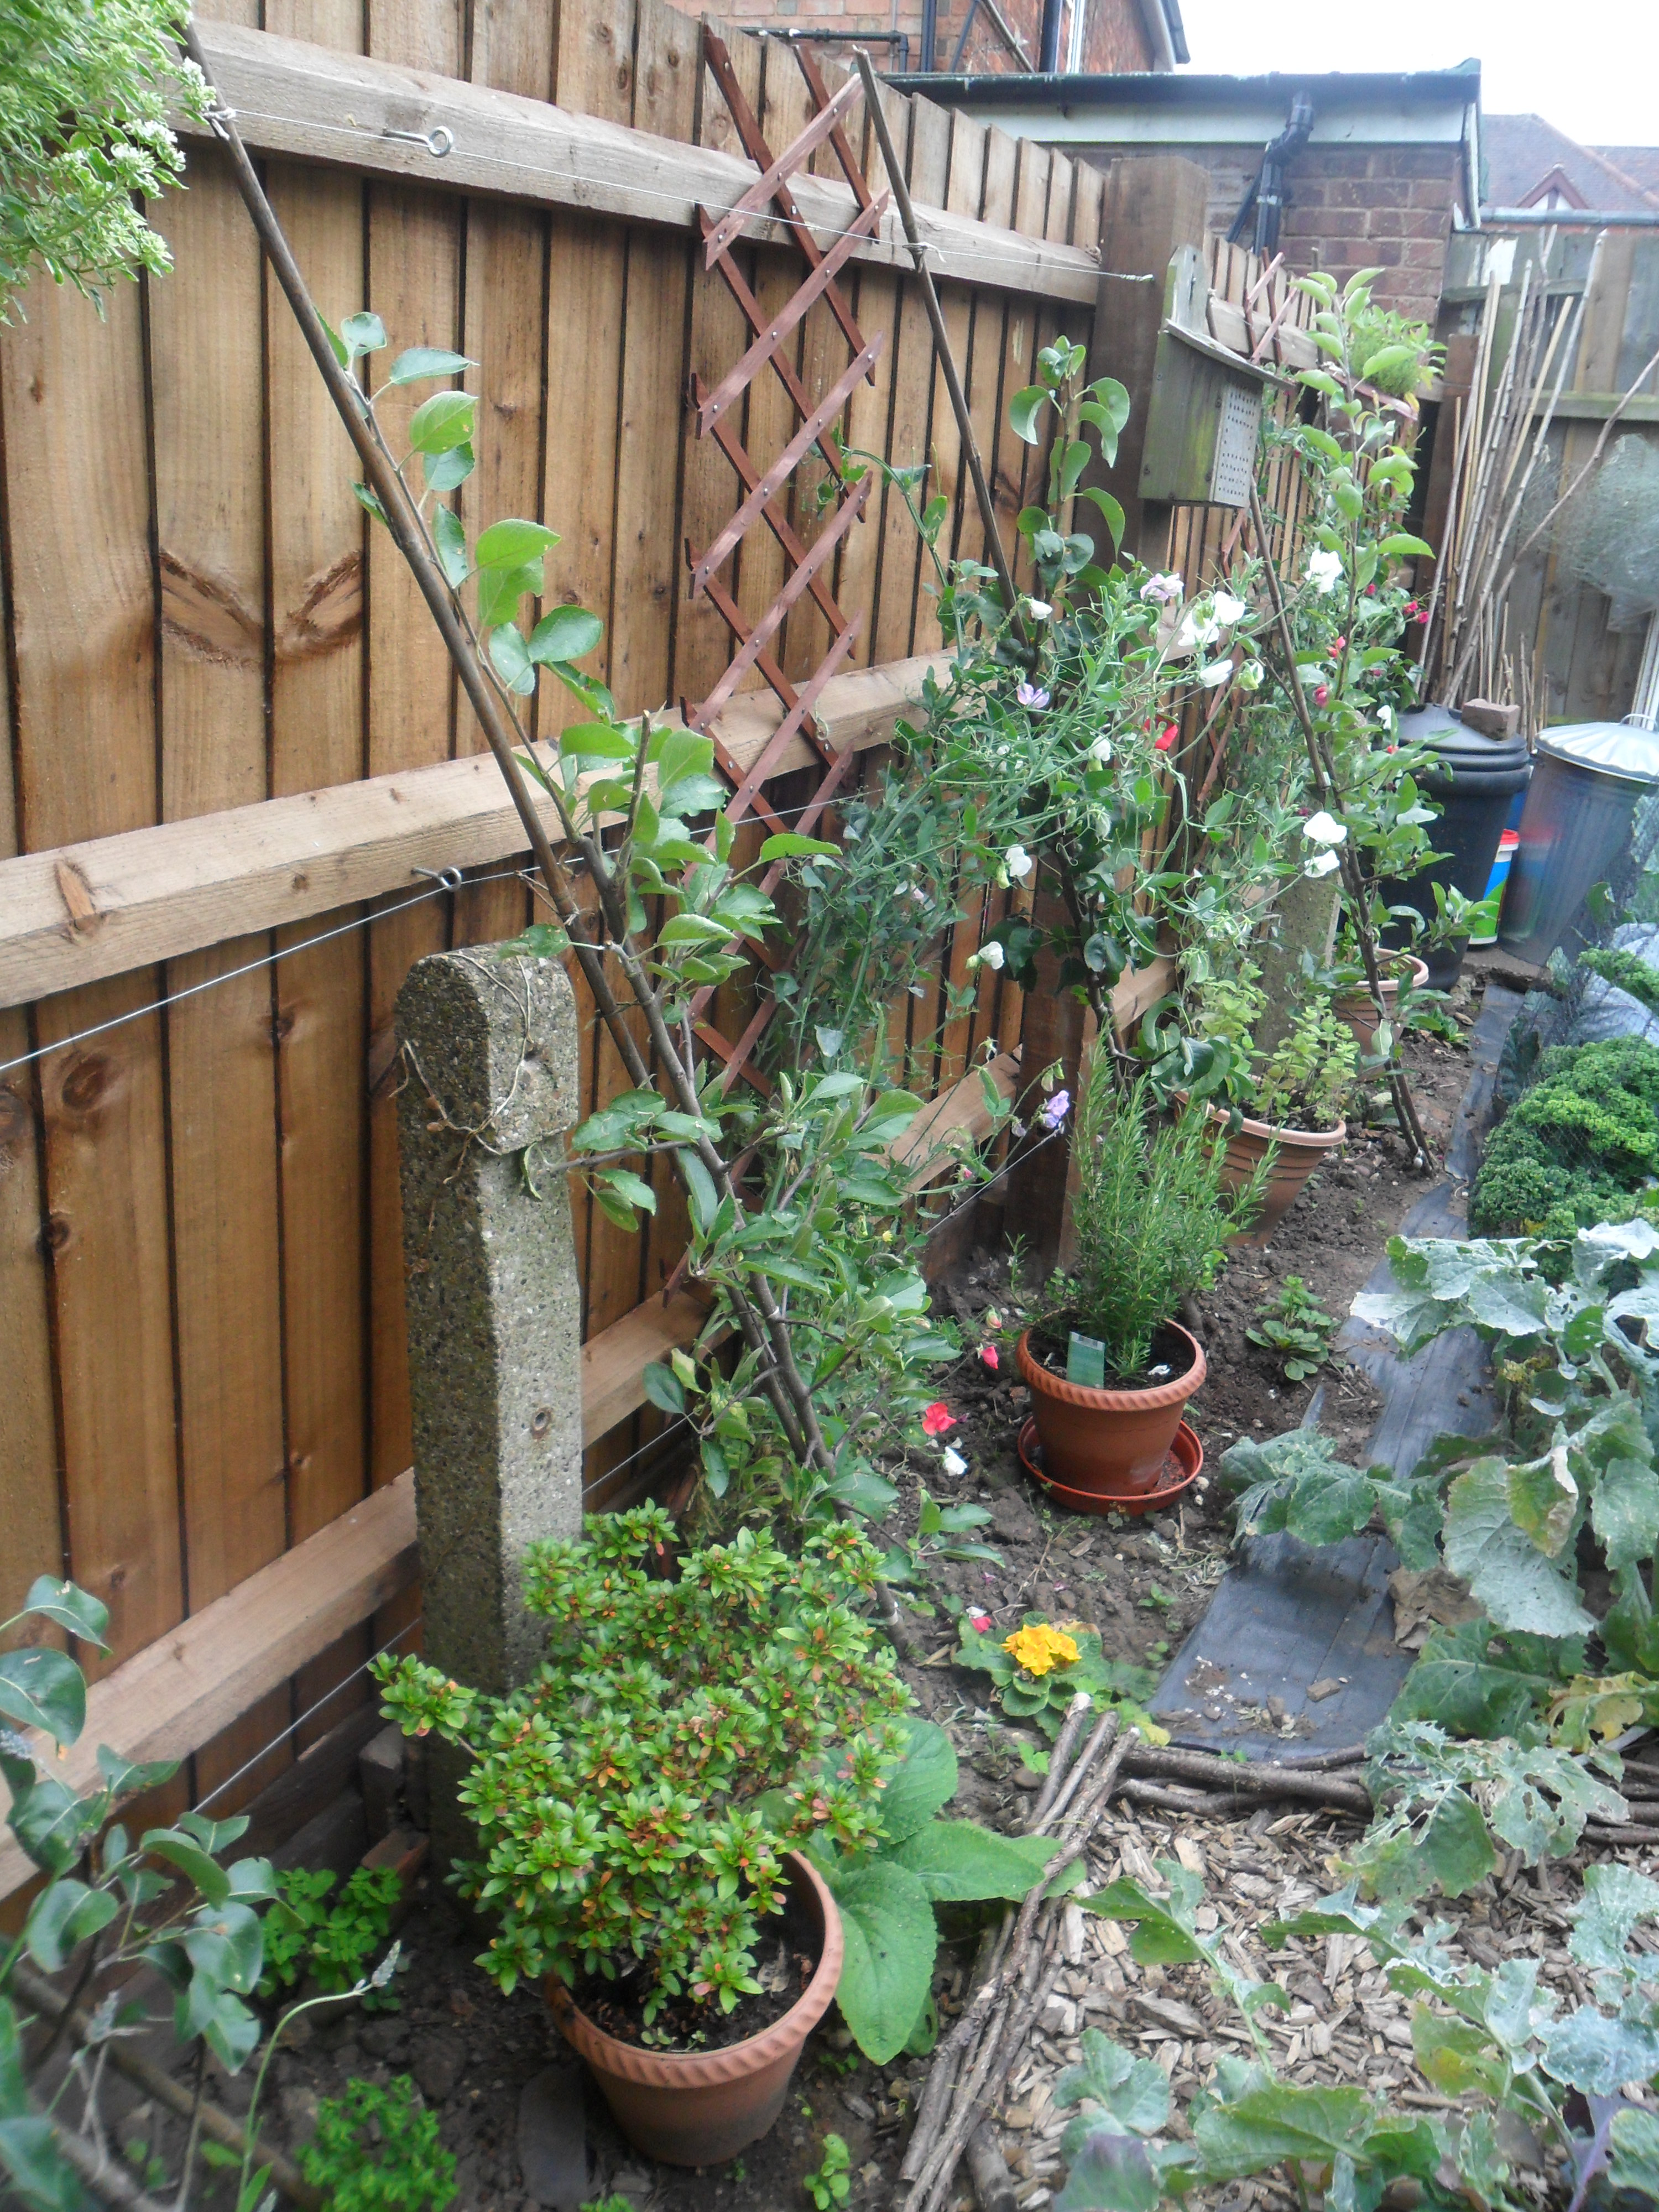
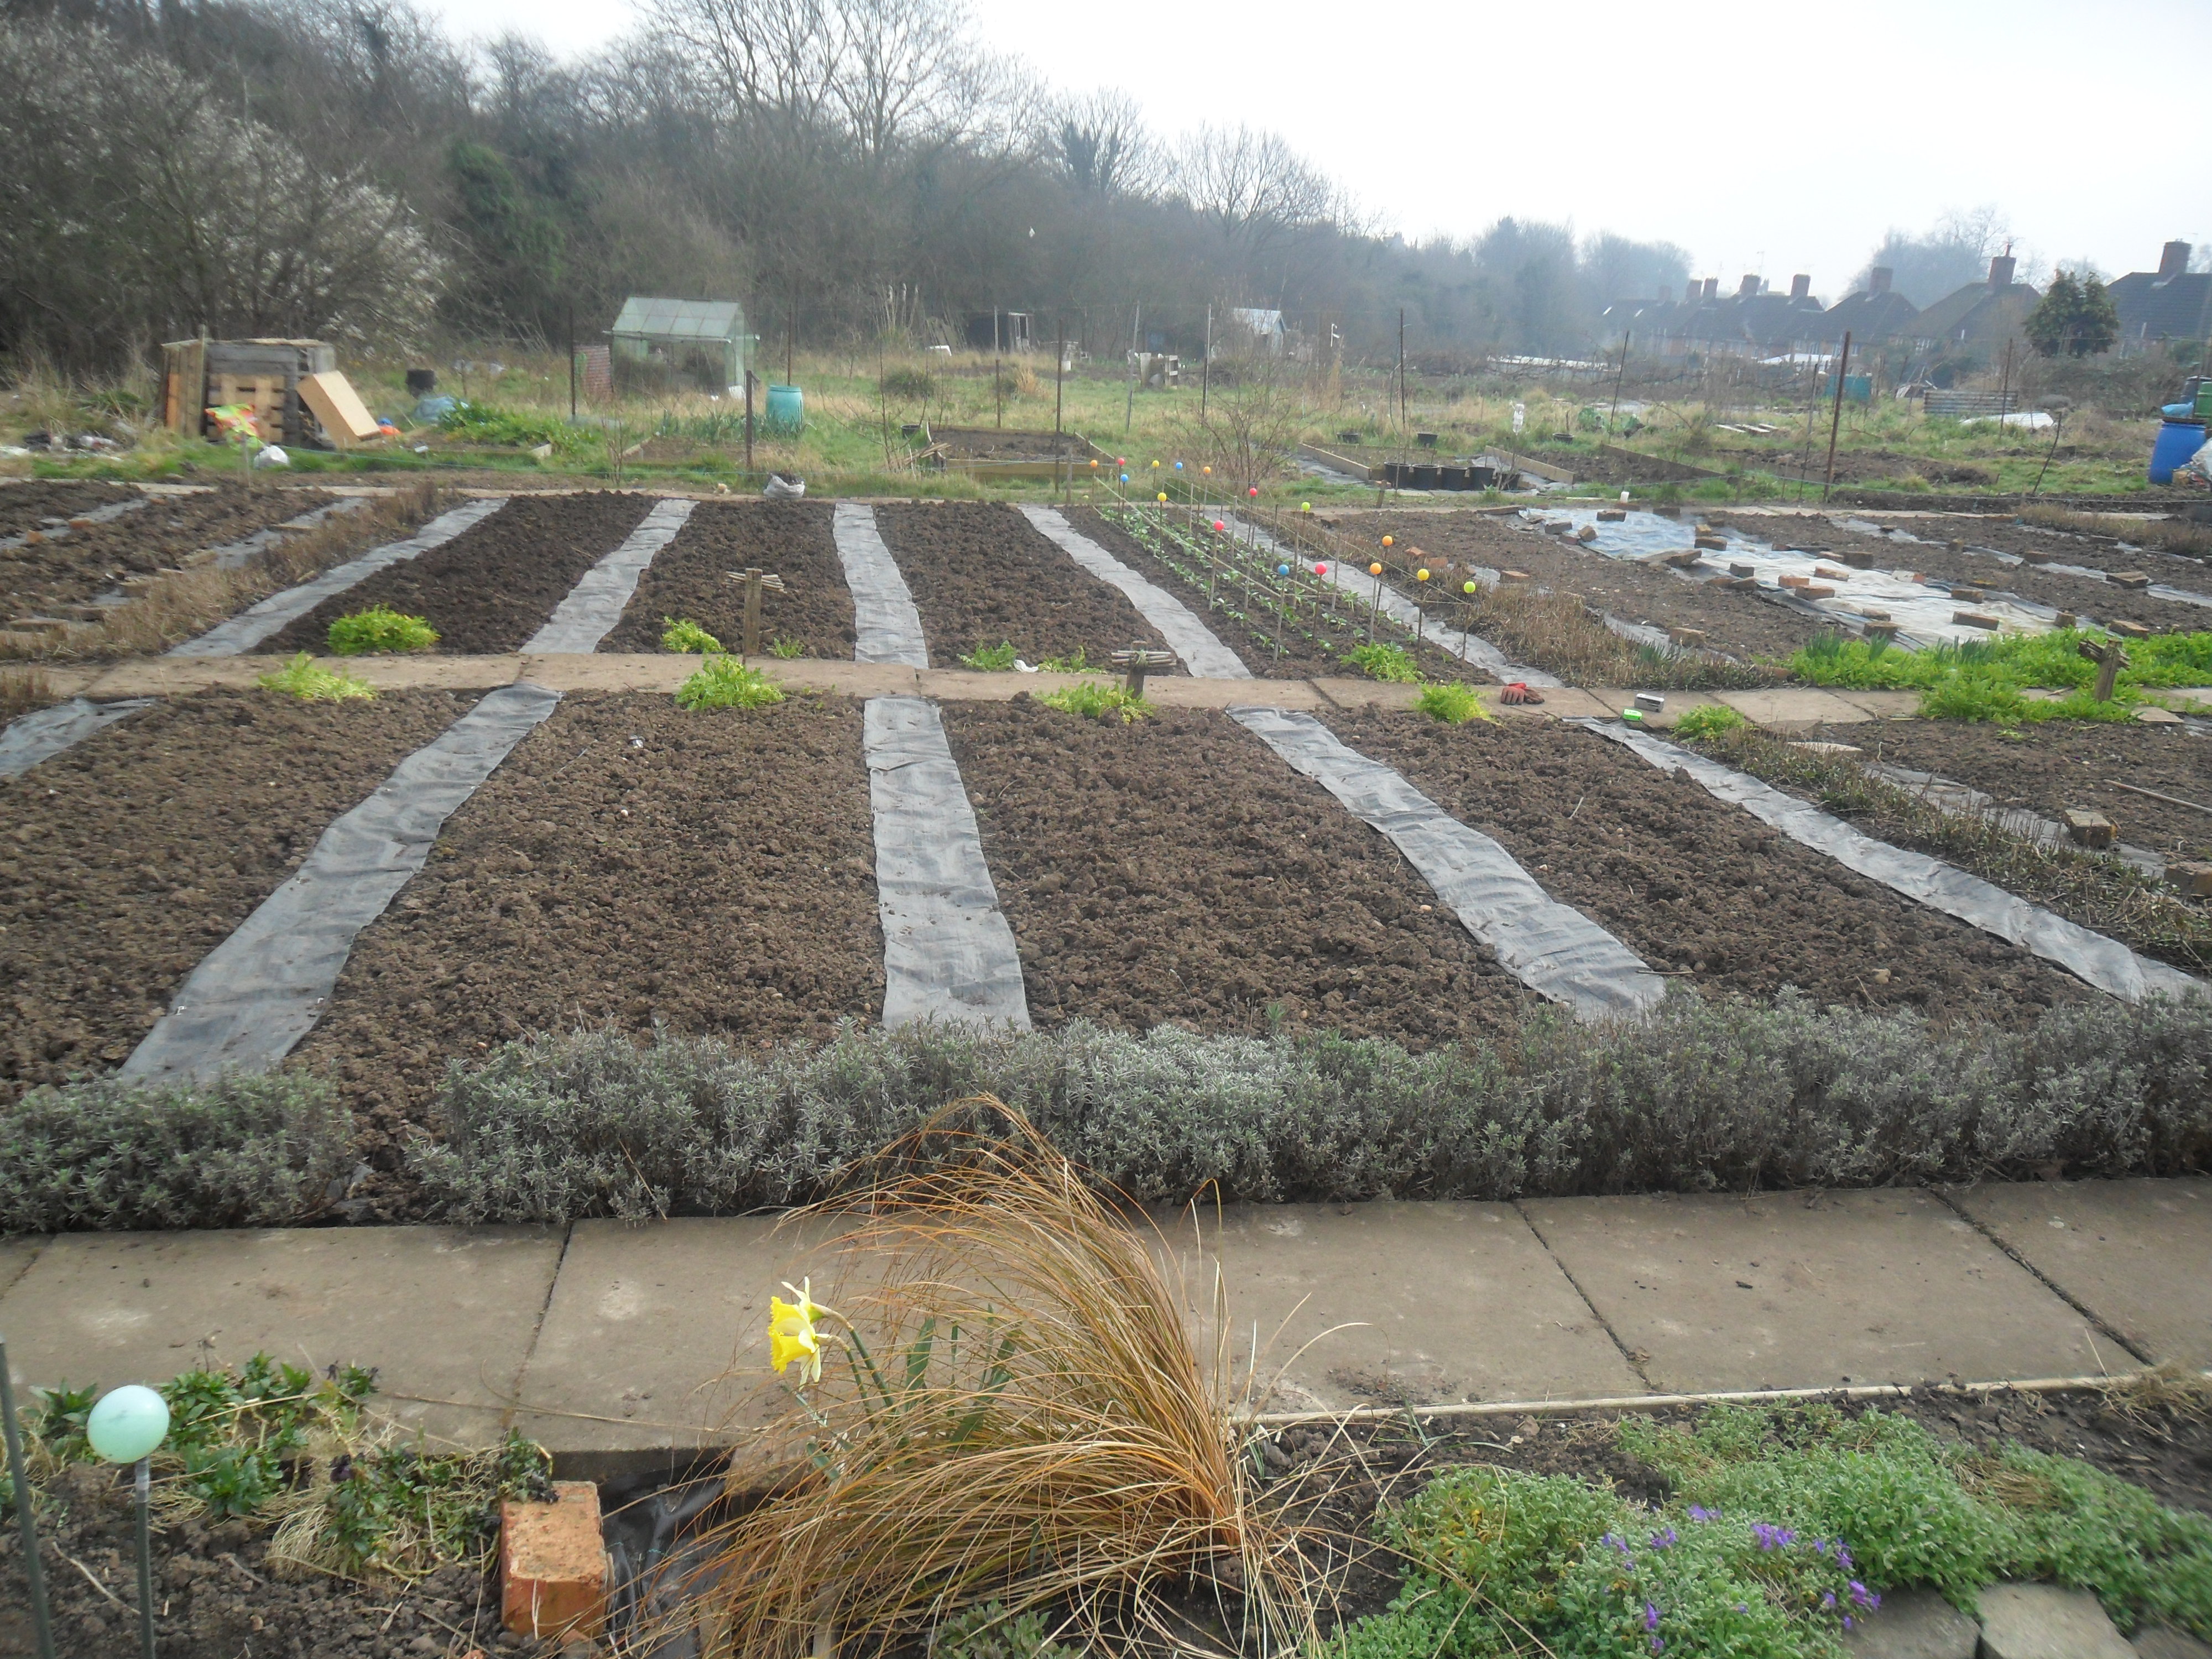
I also managed to buy another bag of woodchip to complete my the paths in the new area in my kitchen garden:

IMG_2869 IMG_2873

I then brought a couple of bags of soil conditioner to spread over two of my beds (I will buy some for the other beds another day):

IMG_2886 IMG_2885

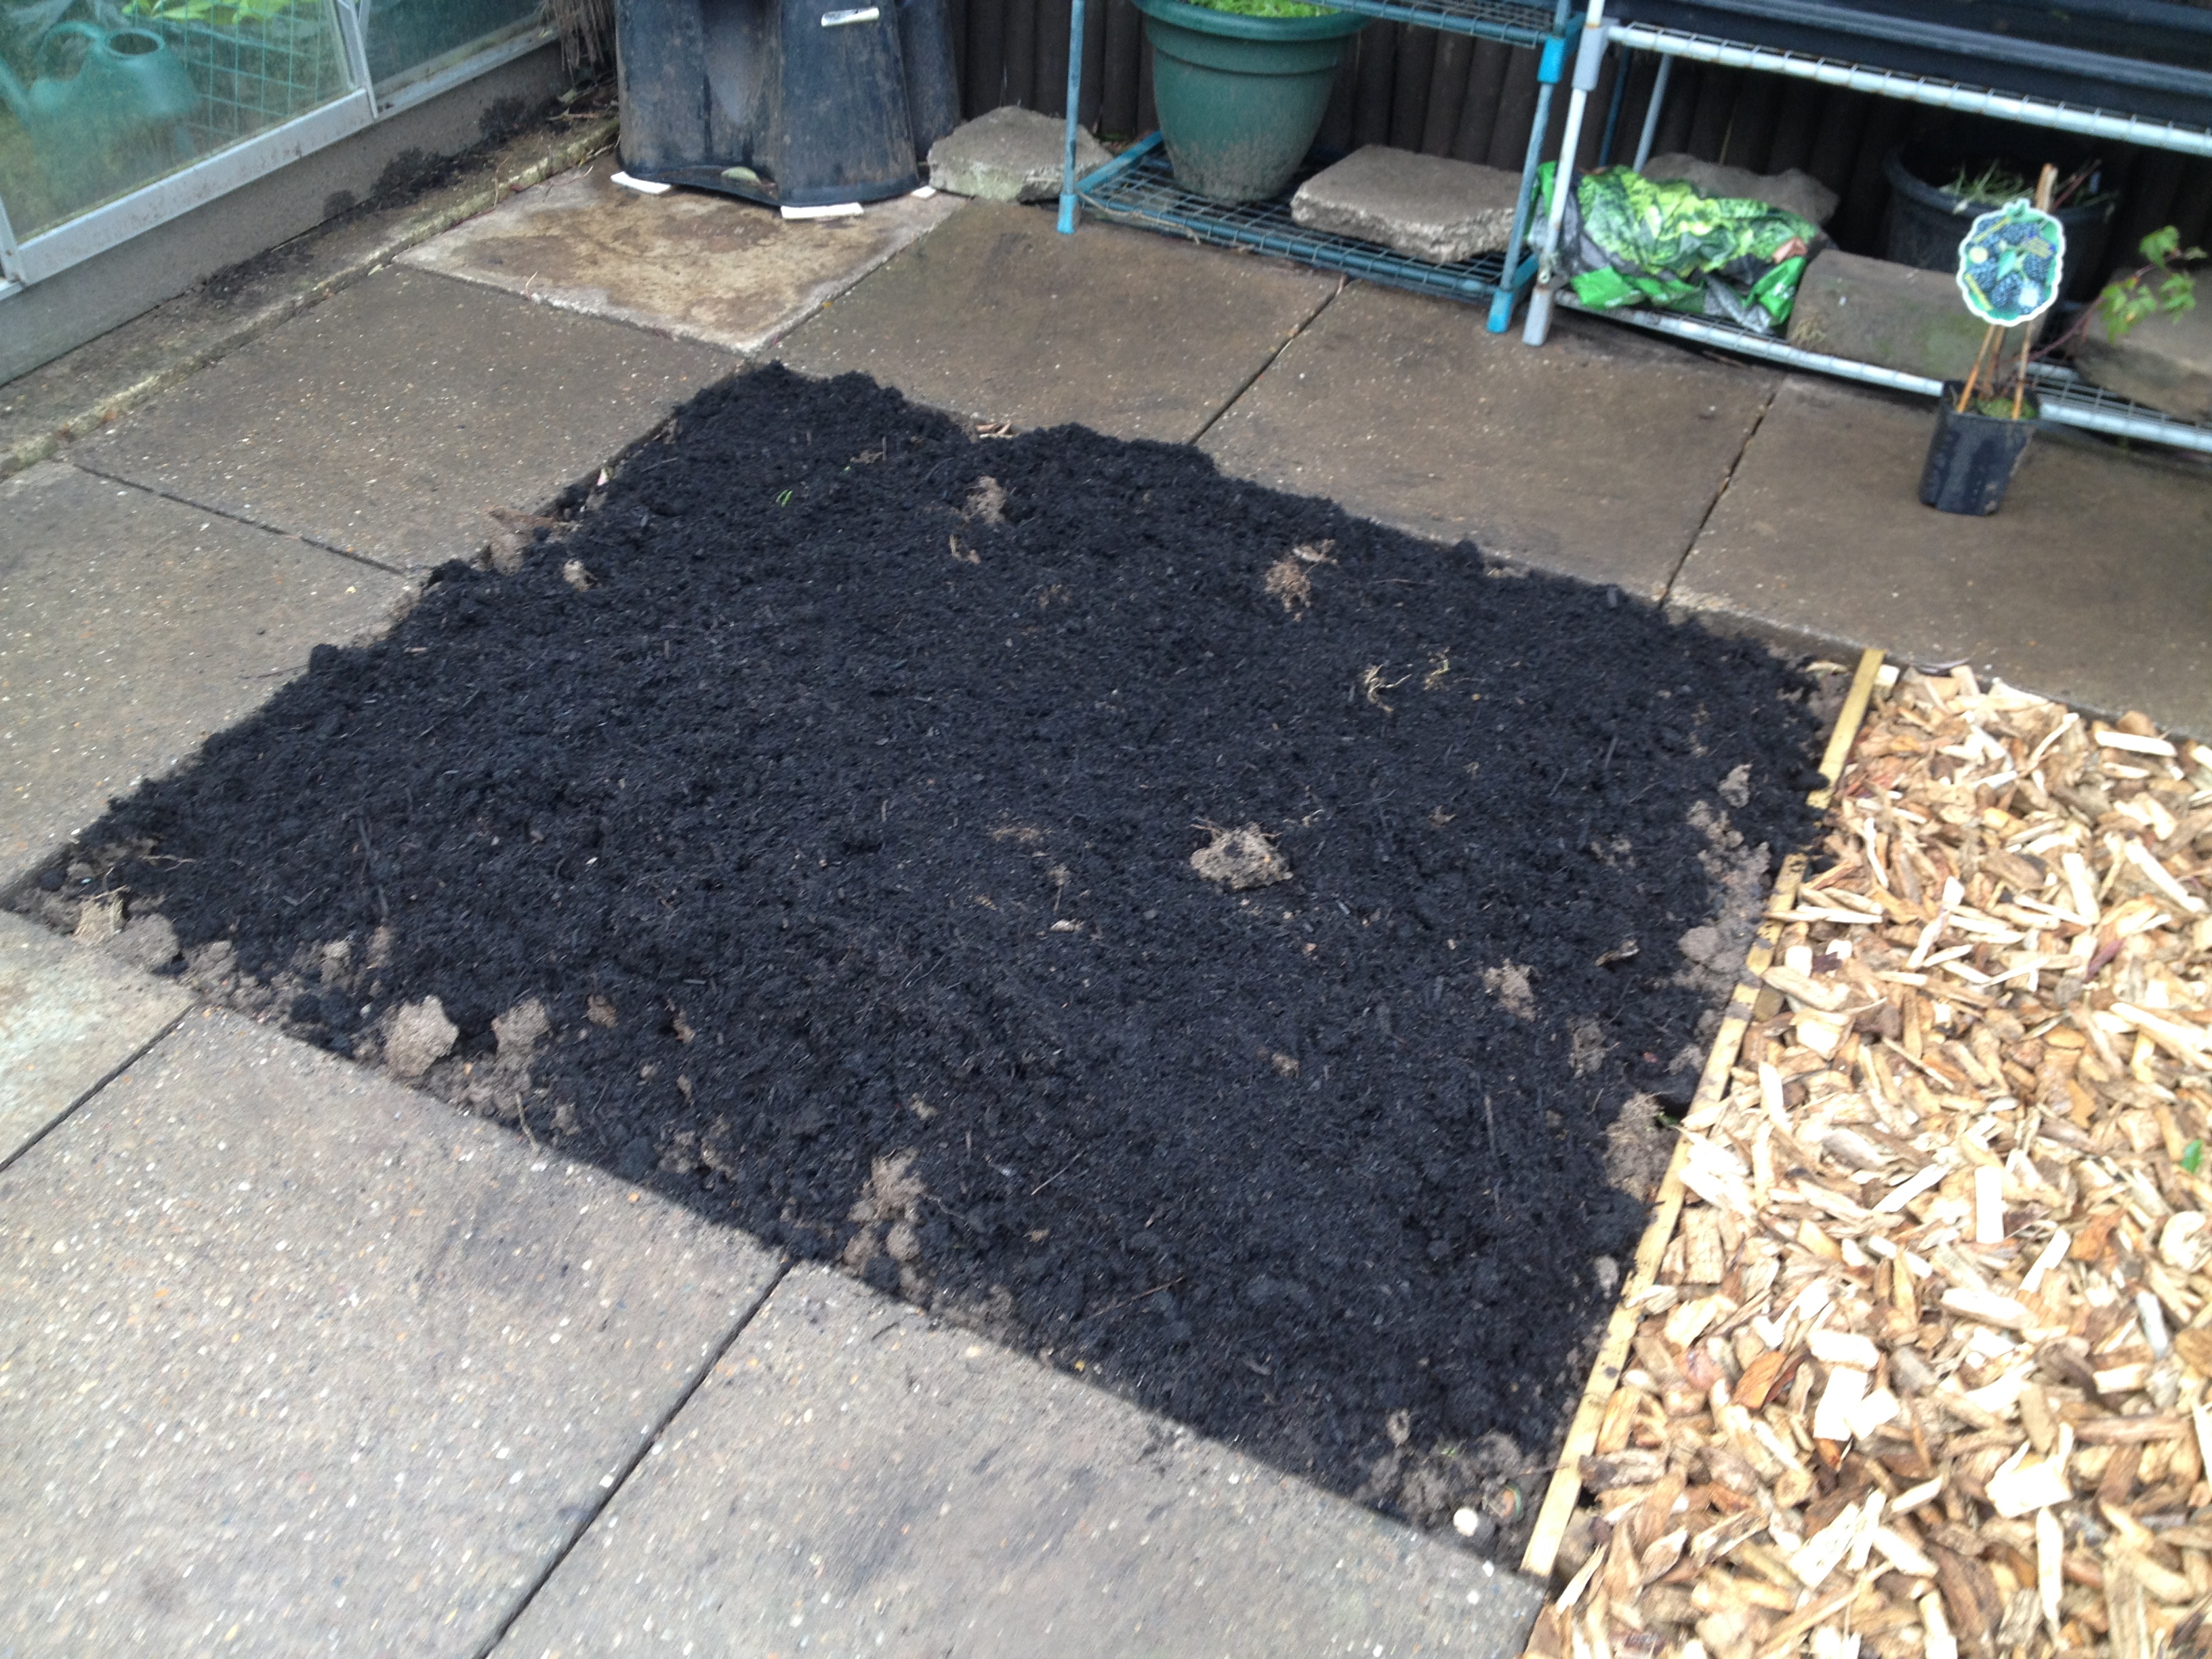
I have left the soil conditioner on the top of the soil so the worms can do the hard work for me over winter.  I have also covered the two beds with weed suppressant to prevent weeds from growing and to also prevent the winter rain from leaching the nutrients out of the soil:

IMG_2889

I am already looking forward to growing crops in this area next Spring.

.

Preparations For Christmas:

.

Well Christmas is nearly here and this week I have been turning my attention to Christmas presents.

On Saturday I talked to BBC Radio Leicester about Christmas presents on a budget:

You can listen to the interview here if anyone is interested.  The interview starts 11 mins into the show.

I love chatting to Radio Leicester and they always make me feel very welcome.  I hope this comes across in the interview.

One of the things I talked about was homemade presents.  I love homemade presents as I always say they are “from the heart and not just the bank account”.  I took in three homemade presents to show (and taste) and explained that they are far cheaper to make than buy and by making them yourself you can have far nicer presents for far less money:

SAM_2457

The present on the right looks like a Christmas pudding and my daughter made these for all her friends and teachers last year and kindly made this one for me to take to the radio show.  It is a chocolate orange with maltesers stuck on with melted chocolate and she melted white chocolate over the top (to look like cream) and she put a little bit of plastic holly on the top.  She wrapped it in cellophane and it looked fantastic.

The box in the middle had homemade truffles in.  I love homemade truffles as they are so easy to make and look and taste really good:

SAM_2455 SAM_2454

.

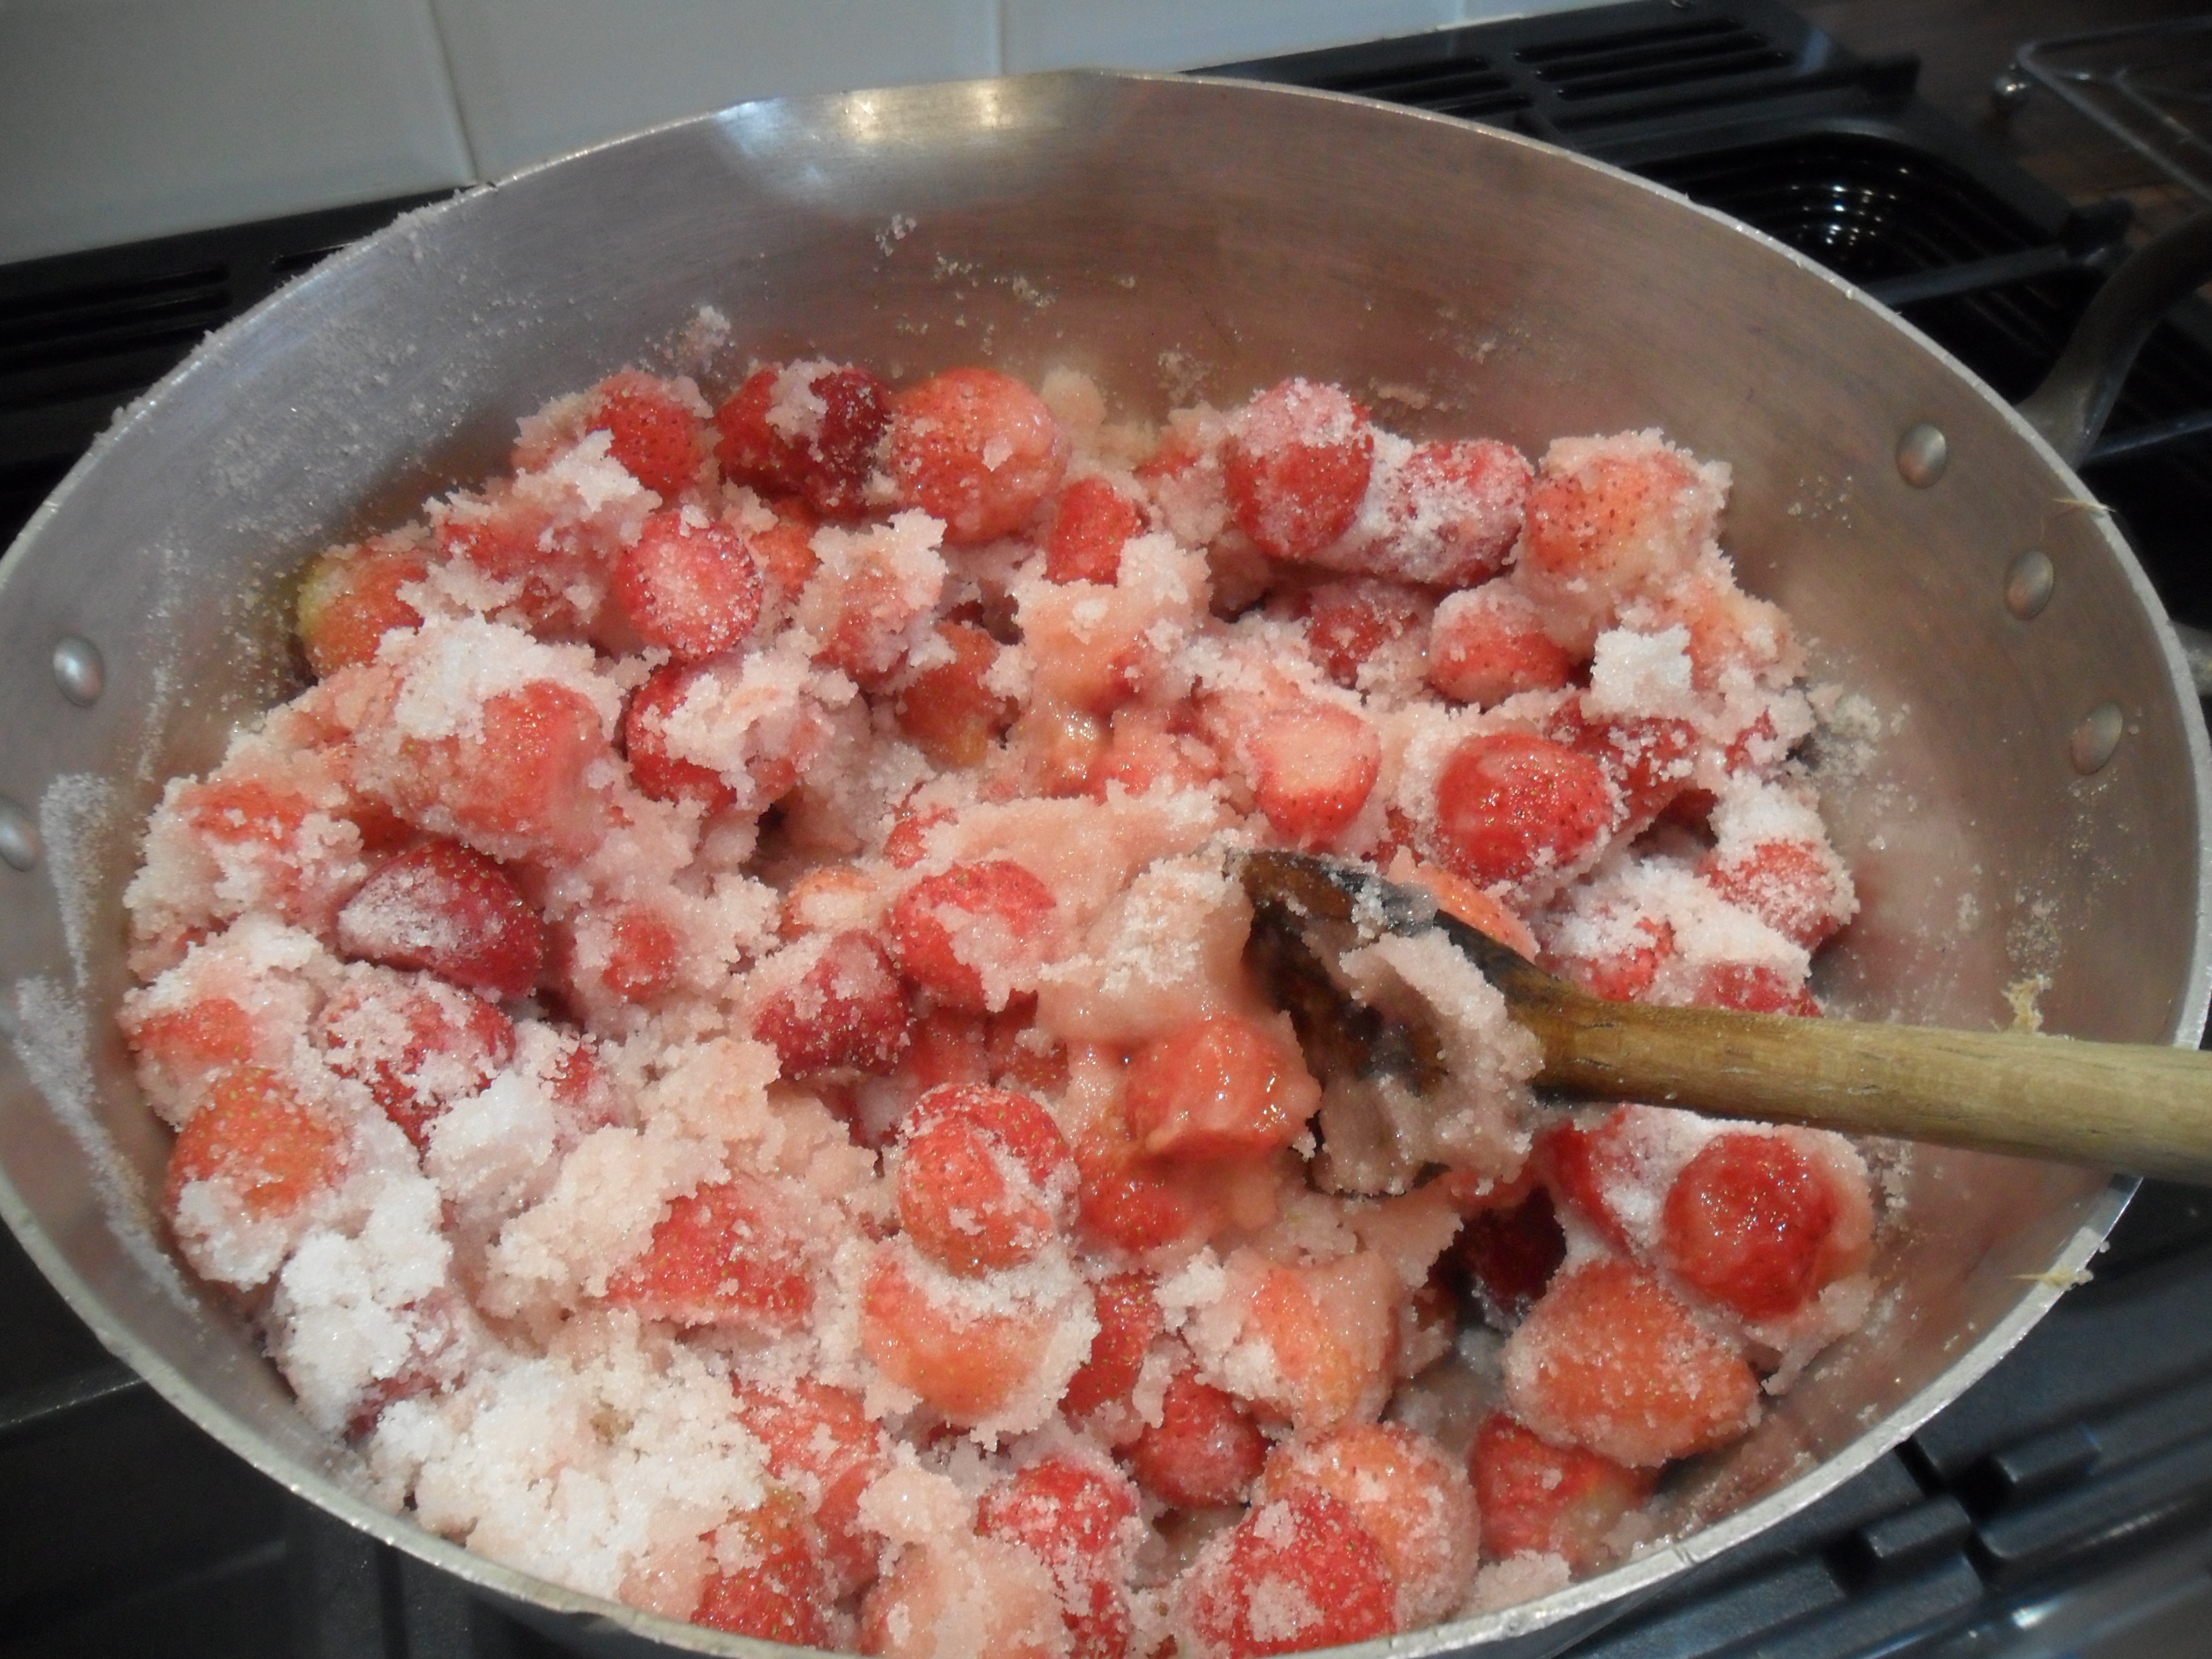
I also took in a present of which contained cubes of chocolate with cranberries and sultana’s and this is how I made it:

First I melted a bar of my favourite chocolate in a bowl over a pan of gently simmering water stirring all the time…

SAM_2439

When the chocolate had melted I added some cranberries and sultana’s and mixed them until they were fully coated in the chocolate (you can use anything you enjoy e.g. smarties, maltesers etc)…

SAM_2443

I then poured the mixture into a tin / container that was lined with clingfilm (you can use silicone bakeware too if you have it)….

SAM_2444 SAM_2446

I then left the chocolate mixture to set (don’t put it in the fridge).

When it was set I took it out of the mould and removed the clingfilm….

SAM_2448

I drizzle some melted white chocolate over the top and again left it to set…

SAM_2449

When it was set I chopped the chocolate into cubes and wrapped it in cellophane….

IMG_2878

Top chefs will tell you that the chocolate should be ‘tempered’ to keep the shine on the chocolate, but if you slowly melt the chocolate and keep it away from the fridge whilst setting, I don’t think you need to for this.

.

.

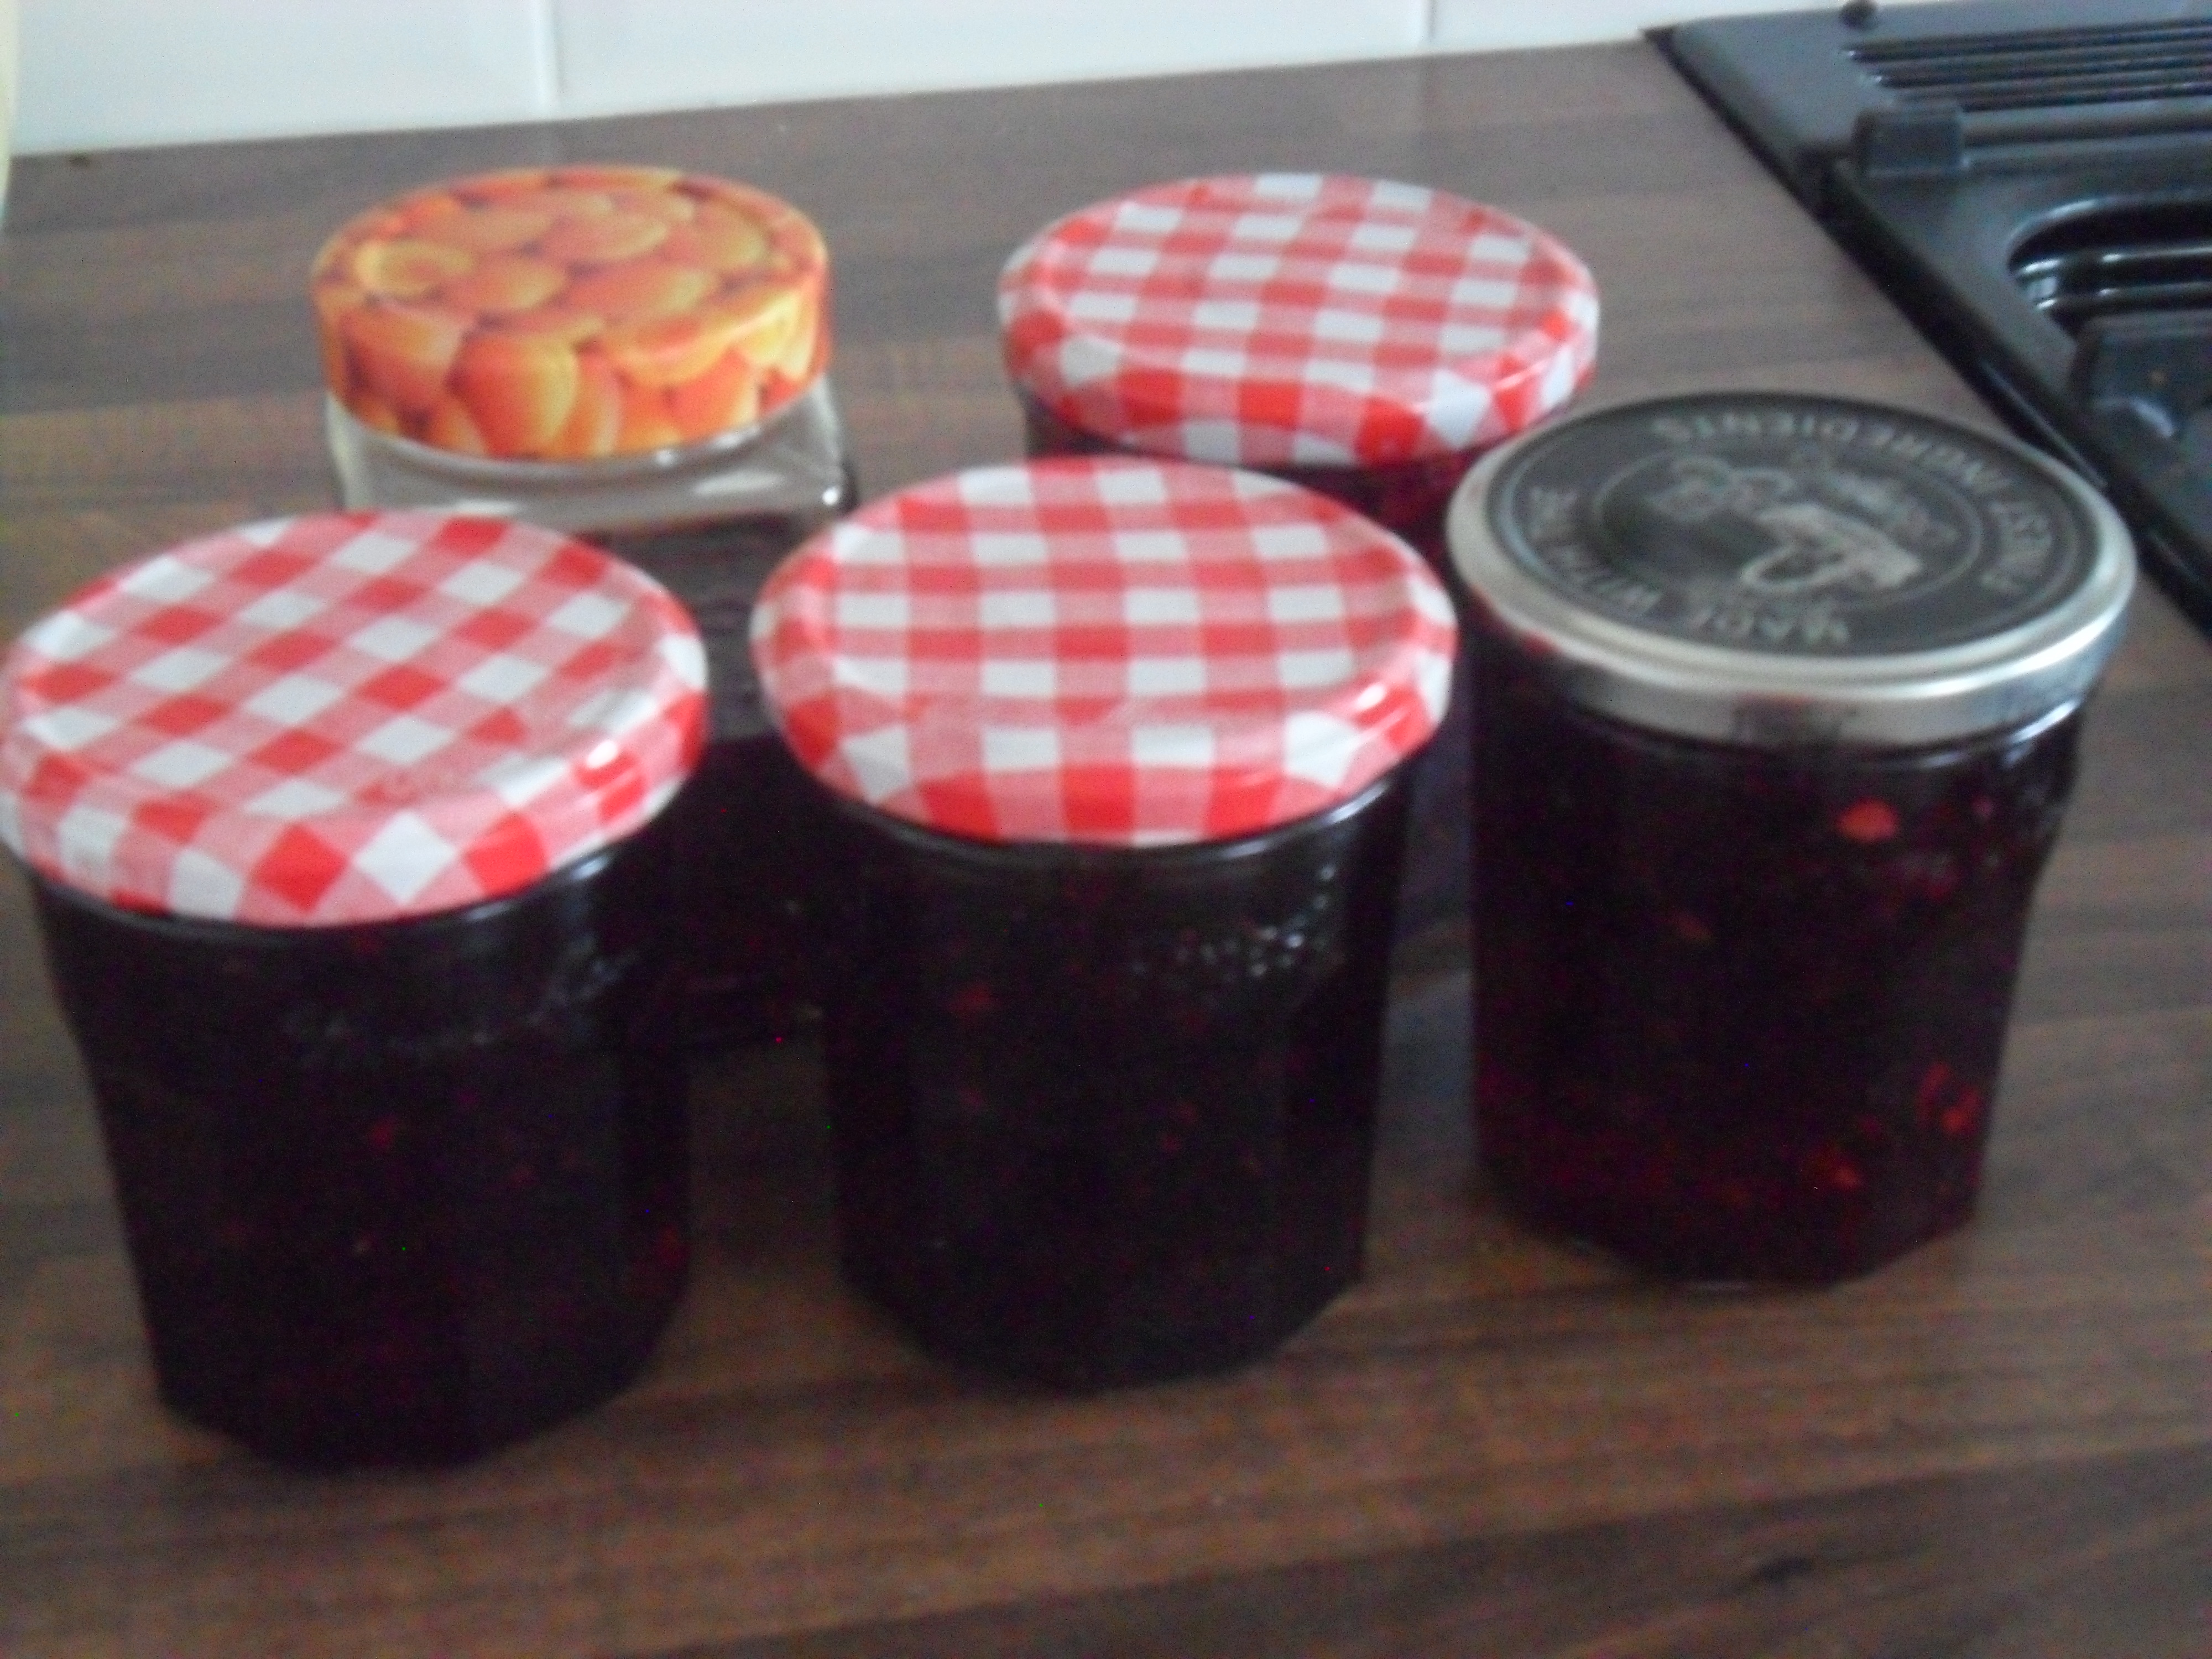
This week, as Christmas is near I turned my attention to my Christmas hampers.  I started by covering my homemade jars of jams and chutneys with a pretty pieces of tissue paper, tied with a bow:

SAM_2467 SAM_2466

And then I wrapped a few surprises (including my homemade wine) to also go into my hampers too and then I started to put them altogether:

SAM_2473 SAM_2477

I am very pleased with the result, though I do still have two hampers to do.

.

I also made three mini Christmas cakes this week and a full sized cake too.  The Christmas cake recipe I use is very easy and can be eaten straight away, without having to continually ‘top it up’ with brandy.  The recipe is here.

SAM_2468 SAM_2471

I like to give the mini Christamas cakes to our parents, as they are just the right size for them to enjoy.

I decorated the mini cakes and wrapped them in cellophane and I think they look great and I would be very pleased to receive one….so lets hope they like them:

SAM_2488 SAM_2489

Just incase you are wondering, I brought my roll of cellophane approximately three years ago on-line and I still have loads left.

SAM_2479

  I checked this week and you can buy a 100 meter roll of clear cellophane for about £12 (incl. delivery).

.

mrs-claus[1]

.

Before I finish today I wanted to show you a lovely couple of chocolate logs that my daughter made last week for her friends at school…..apparently they all enjoyed it.   The recipe is here.

Each chocolate log costs approximately £1.50 to make and tastes delicious……to buy a supermarket ‘finest’ chocolate log it costs £3 and I bet it wouldn’t be as nice!

IMG_2871

I also want to show you some wonderful cakes that one of my daughters friends made to take into school too this week:

SAM_2482 SAM_2481

I think the cakes look wonderful and it just shows what you can do with a little bit of imagination!

“Homemade really is from the heart and not just the bank account”

.

Thank you for reading my blog today.  I will be back next Friday as usual.

Have a great week!

My Harvest & A Freezer Breakdown

I wanted to start my blog today by saying well done to my eldest daughter for her AS level results that she received yesterday.  She has had a very difficult year (which I won’t go into here) but dispite this she achieved a ‘B’ in English language/literacy,  a ‘B’ in psychology and a ‘distinction-star’ in hospitality……..we are extremely proud of her!

SAM_1636

——————————————-

.

This week I visited Haddon Hall and gardens with my lovely sisters and had a wonderful day out.  This was my eldest sisters Christmas present to us all….it was such a treat!

IMG_2559

The website says:

“Described by Simon Jenkins in “1000 Best Houses” as “the most perfect house to survive from the middle ages”. Set in the heart of the beautiful Peak District National Park, parts of the house date from the 12th Century, sitting like a jewel in its Elizabethan terraced gardens, and overlooking the River Wye.

Film-makers flock to Haddon Hall to use it as a location. The house and grounds have played host to no less than three versions of “Jane Eyre”. Screen credits also include “Elizabeth”, “Pride & Prejudice” and “The Other Boleyn Girl” and “The Princess Bride”, the cult classic movie in which Haddon Hall becomes Prince Humperdinck’s Castle and village”

I enjoyed looking around the house as it was so interesting and the gardens were lovely too:

IMG_2586 IMG_2559 IMG_2562 IMG_2595 IMG_2568

They had lavender lining their path in one area and the bees loved it.  It reminded me of the lavender path I used to have at my allotment as it smelt so wonderful as you brushed past it:

(The photo on the left is Haddon Hall and the photo on the right is my old allotment)

IMG_2570SAM_6843

.

In my kitchen garden this week:

.

This week I noticed that my sweet peas are being attacked with greenfly, so I spent a happy half an hour squashing them between my fingers…..as an organic gardener I prefer not to use sprays.

  I think it has been a particularly bad year for aphids this year, so hopefully next year we will have a bumper year for ladybirds, as this usually happens.

SAM_1612

There is some fabulous information and advice on the RHS website regarding aphids here if anyone is interested.

.

Everywhere around my kitchen garden seems to be doing well, though the ground has been really dry.  This has caused some of my spring onions to go over a bit quicker than normal, so I pulled them up.  I don’t want to waste them, though I don’t think they are good enough for our salads, so I have decided to pickle them like ‘silver skin pickles’.

SAM_1614 SAM_1615

My outdoor cucumbers are growing well now and my leeks and spinach have put on a growth spurt:

SAM_1600 SAM_1595 SAM_1599

 I also had a surprise this week as I found that a patty pan that I had given up on, is growing.  I put three seeds in my big tub between my two courgettes after my previous sowing in pots didn’t germinate.  Two seeds germinated and the slugs destoyed them and I thought the third seed hadn’t germinated until I found it this week.

I removed a couple of leaves from the courgettes either side of it, to allow the light to get through to the little plant.  It maybe too late to get a harvest of patty pans now, but if we have a mild couple of months I may be lucky:

SAM_1608

.

This week I dug up the last of my ‘2nd early’ potatoes which were a variety called ‘marfona’ (I still have my ‘desiree’ main crop left in the ground).

At my allotment I would always start to dig up my 2nd early potatoes in July, as I used to plant so many potatoes (early and main crops).  This way I could spread the harvest over July and August as I always found digging up my potatoes such hard work.

Obviously it is really easy in my small kitchen garden, so I have just dug the potatoes when we needed them for a meal and I have got to say I am really surprised and pleased with the size some of them have grown, as they have been in the ground longer than I would normally leave them in:

SAM_1635

In place of the potatoes I decided to grow some green manure.  I gave the soil a good rake and sowed some phacelia.  My seed packet is quite old now so I’m not sure if the seeds will even germinate, but I thought it was worth a try….I will have to wait and see.

SAM_1625SAM_1626

.

“Phacelia tanacetifolia is good for sowing between March and September and it takes between one and three months to grow depending on growing conditions.  It is a green manure that tolerates most soils.

If you leave phacelia to flower, it is a beautiful lavender colour that the bees absolutely love, which is why I used to grow it in my wildflower area at my old allotment.  The one drawback is that if you leave it to flower it self seeds like mad.  I will chop it down and fork it in before it flowers, so it doesn’t grow and become a weed to me next year”

SAM_2401 SAM_2403

.

I also sowed some seeds in the area where I pulled up my strawberries last week.  I sowed ‘Broccoli raab ’60 days’ which apparently are quick growing broccoli-like shoots that grow on dwarf plants.  I have never grown this before but the seeds were free with a magazine so I thought I would give them a go:

SAM_1628 SAM_1629

.

I also gave my apple and pear trees a summer prune.  I am growing them as cordons so this first prune was to encourage the shape I want the trees to grow into:

SAM_1602

 .

This week I have been harvesting runnerbeans, outdoor tomatoes, frenchbeans, spring onions, potatoes, courgettes, parsley, a few peas and my first red cabbage of the year (that I couldn’t resist picking):

SAM_1616 SAM_1609 SAM_1607 SAM_1603 SAM_1594 SAM_1622 SAM_1635 SAM_1615

So overall I am very pleased with the produce my small kitchen garden is producing each week.  Next year I will be looking at ways to increase my harvest and hopefully my fruit bushes will produce more in their second year too.

SAM_1630 SAM_1631

.

This week at home:

.

I started the week by making some more laundry liquid.  

Just before our holiday last month I ran out of my homemade laundry liquid and I bought a box of supermarket brand washing powder to tied me over until we got back and this is what I have been using since then.  I must say, I don’t think it washed any better than the laundry liquid I make (and mine is much cheaper) and also, my eldest daughter started to complain that the new wash powder was making her skin itchy!

Next time I will make sure I am more organised and won’t run out of it just before a holiday!

SAM_1586 SAM_1588

.

This week I also cooked and pickled the beetroot that I harvested last week and we are looking forward to eating it soon:

SAM_1584 SAM_1585

.

Finally this week, our old chest freezer unfortunately stopped working.  Thankfully it was the freezer that I just kept my vegetables in and it was only a quarter full.  I have been trying to use up the contents of this freezer for a while so I could switch it off completely and just use the other two freezers that we have.

SAM_1576

I don’t know how long it hadn’t been working for, but everything was half defrosted and there was a puddle at the bottom of the freezer!

So myself and my daughter set about trying to save as much of the half frozen vegetables as possible.

We made a massive pot of tomato pasta / pizza sauce with vegetables to freeze in portions, I cooked lots of the vegetables in my steamer to freeze in portions and then reheat in curries and my daughter made a big pot of creamy, thick, vegetable soup to freeze in portions.  I also filled my slow cooker with vegetables in gravy to again freeze in portions so I could reheat it for a lunchtime meal.  I also cooked the sweetcorn I had left and froze it in portions so I could defrost it and add it to salads:

SAM_1579 SAM_1580

Luckily I still had room in my other two freezers for the things we made:

SAM_1581 SAM_1582 SAM_1583

We managed to use nearly everything in the freezer, so really we were very lucky that hardly anything was wasted….and the soup was delicious!

.

SAM_1590

.

I hope you enjoyed reading my blog today.  I will be back next Friday as usual.

Have a good week!

A Frugal Week And A Mixed Fruit Jelly Recipe

To start with I thought I would mention a report that I read this week from the Soil Association, which I thought was interesting:

My allotment this week

My allotment this week

It states that “new research has found that there are significant differences between organic and non-organic food.  It states that new research from Newcastle University, published on Tuesday 15 July, in the British Journal of Nutrition, has shown that organic crops and crop-based foods – including fruit, vegetables and cereals – are up to 60% higher in a number of key antioxidants than their non-organic counterparts”

A rather large cucmber from my polytunnel

A rather large cucumber from my polytunnel

“In other countries there has long been much higher levels of support and acceptance of the benefits of organic food and farming: we hope these findings will bring the UK in line with the rest of Europe, when it comes to both attitudes to organic food and support for organic farming.”

I have got to say, this is something I have suspected for a long time, especially as organically grown fruit and vegetables taste much nicer too.

If you are interested in the report you can read it here.

From my allotment this week

From my allotment this week

.

It’s been a very frugal week in the ‘Thrift household this week.  I am still picking as much as possible from my allotment….fruit, peas, salads, etc. and now my courgettes plants have started to produce too.  Mr Thrift is looking forward to his first ‘cheesy courgette scones’ of the year:

SAM_9490

I also picked my first shallots this week and pickled a couple of jars of them.  As a family, we love pickled onions.

When I pickle onions, I don’t use a salt water brine as I think this softens the onions.  I use a method that my dad taught me – I cover them in only salt overnight, to draw the water out.  This gives a nice ‘bite’ to your pickled onions.  You can see my dad’s method here if you are interested.

SAM_9511 SAM_9517 SAM_9525

I’ve also been using up leftovers from my freezer.

I made a ‘leftover Chicken and veg pie’, which is just leftover chicken and leftover vegetables mixed together in a white sauce and topped with pastry.  I love using leftovers to make a new meal.

SAM_9475 SAM_9476

When I make a pastry I always make double and freeze it ready for next time.

Also, after I have put the top on my pie I always have a bit of spare pastry, so I roll it out and put a bit of jam in it and make a small jam pasty for a treat.  My youngest daughter loves them and they can be eaten hot or cold.

SAM_9471 SAM_9472 SAM_9474

.

I have also been making some more laundry liquid using soap flakes, borax substitue and soda crystals this week.  You can find the recipe here if you are interested.  It takes just 10-15 minutes to make and it lasts for weeks.

I find it is great for every day washing and the last time I worked it out a few months ago, it cost me approximately £1.75 to make…. I managed to get 71 washes out of it, so this worked out at a staggering 2.5p per wash….the supermarkets can’t beat that!

SAM_9520

.

As I write today, I am also in the middle of making some more dishwasher liquid out of soap nuts as I find this saves a lot of money too (though I do still use a supermarket dishwasher tablet every third wash to stop the build up of grease in my dishwasher).

You can read how I make the dishwasher liquid here.

SAM_9521 SAM_9523

.

The final frugal thing I have to tell you about, was a very frugal find at our local Tesco store.  We popped in for milk and we found a crate of bread that was ‘whoopsied’ (yellow stickered).  The dates were two days away on the Warburtons bread and one day away for the Hovis bread and they were selling them off for 3 pence and 2 pence, so we bought some for the freezer, together with some wholemeal pitta bread for just  2 pence too!

It’s nice to make my own bread but at those prices I couldn’t resist buying it!

SAM_9513

It was quite strange as there was no one around but us looking at the bread and we felt like we were naughty teenagers gigling as we put it through the self-scan checkouts, lol.

.

This week at my allotment I have been picking worcester berries and dessert gooseberries (which look very similar) and white currants, red currants and a few blueberries.

SAM_9484

The blueberries were eaten by my eldest daughter within two minutes of bringing them home, however I used the rest of the fruit to make a mixed fruit jelly.

Jellies are easy to make but they do take longer than jams, as you need to let them strain over night.  I think it is worth the effort as it tastes delicious and it has no seeds in it.

.

A Mixed fruit Jelly Recipe

SAM_9487 SAM_9488 SAM_9486 SAM_9485

.

First I top and tailed the gooseberries and worcester berries and removed the stalks from the currants (I use a fork for this as it’s easier this way):

SAM_9493

I put all the fruit into my maslin pan (together with some frozen currants that I had leftover from last year).  I covered half the fruit with water and then brought the pan to the boil and simmered the fruit until it was soft (approx 15-20 mins).

SAM_9494SAM_9495

Meanwhile,  bring a pan of water to the boil and put some muslin or a tea towel in to it and boil for 3 minutes.  Take it out of the water and wring it out and then leave to cool.

Tip the fruit into the muslin.  I find it easier to put the muslin over a colander that is already over a bowl, as it’s easier to pour the fruit into it.

SAM_9496

I then I tie the muslin up over the bowl so the juice can drip down and I remove the colander.  MAKE SURE YOU DON’T SQUEEZE THE MUSLIM OR YOUR JELLY WILL BE CLOUDY.

Leave it to drip overnight or for approximately 8 hours.

SAM_9497

In the morning I measure the liquid and poor it back in my clean maslin pan.  I also put some clean saucers into my freezer to test the setting point of the jelly later on.

For every pint of liquid I have, I add one pound of normal granulated sugar and 2 tablespoons of lemon juice into the pan.

I then stir the mix over a very low heat until all the sugar has melted and there are no sugar chystals on the back of my spoon:

SAM_9498

I then boil the syrup hard stirring all the time until setting point is reached

SAM_9499

(To check the setting point has been reached, put a small drop of jam on one of the side plates from the freezer.  After a few moments, push the jelly with your finger and if it wrinkles it’s ready.  If it doesn’t wrinkle, continue boiling hard for another five minutes and test again).

SAM_6824

When the setting point is reached, take the pan off the heat and leave it for fifteen minutes.  If there is scum on your jelly, you can skim it off, but I just stir in a small knob of butter which does the same job.

SAM_9500

Sterilise some jam jars (gas mark 4 for 5 minutes)

Pour the jam into the jars and seal with lids.  I use the jars that have a sealable lid (i.e. the jars that jam is sold in, at the supermarket).  This way you don’t need to worry about wax discs to create a seal.  As the jam cools, the lids ‘pop’ and make you jump.

SAM_9501

Enjoy!

.

Thank you for reading my blog today.

I will be back next Friday as usual.

Back To Basics & Making My Own Cleaning Products.

This weekend I spent a happy hour checking our finances were in order.  I regularly make sure that I have entered every little purchase to make sure we know exactly where every penny has gone to.  This helps us to save money in the long term as we can see if there are any problem areas that we need to concentrate on.

Unfortunately we are not perfect and one thing I noticed this time, is we are starting to visit the shops more and more often.  Each time is for something I have forgotten to buy on my ‘big’ shop at the beginning of the month.  This wouldn’t be quite so bad if we just bought what I needed, but the supermarkets are clever and we nearly always come out with an extra something that we don’t really need and it uses up more of our food budget.

Recently, I have been working so hard on my allotment (due to being poorly in Autumn) that I have started to take shortcuts when I come home and I have been making ‘easier’ meals and not sticking to my meal plans.  So I know this is at the root of the problem and this has got to stop and it’s back to strictly keeping to a meal plan for us.  Luckily I have just about ‘caught up’ with my winter jobs at my allotment, so hopefully I can get back to normal now.

SAM_8557.

Regular visitors to my blog will know that one thing I do regularly to save money, is to make laundry liquid.  On Saturday I ran out of my last batch of liquid, so I made some more.

I prefer to wash our clothes using homemade laundry liquid, as I know what goes into it….I suffer quite badly with excema and I used to find that shop-bought powers and liquids always made my excema worse.  My homemade laundry liquid doesn’t seem to affect me all, which is great and it is really really easy to make.

The laundry liquid only takes 10-15 minutes to make and it lasts for weeks.  It is great for every day washing and the last time I worked it out a few months ago, it cost me approximately £1.75 to make and I managed to get 71 washes out of it.  This works out at a staggering 2.5p per wash….the supermarkets can’t beat that!

The recipe for the liquid is here.

SAM_8627

I use old ‘pop’ bottles to store the liquid in, which I label and keep under my sink.

.

This weekend I also made some more dishwasher liquid using ‘soapnuts’:

I know there will be people reading my blog today who use them regularly for washing clothes, but unfortunately I didn’t think they washed our clothes very well even though I followed the instructions to the letter and I did try using them various times before I decided to give up.

So my soap nuts sat unused for ages, but I couldn’t bare to throw them away as I had paid good money for them.

Picture 030

In January I discovered that you can use soapnuts to make a dishwasher liquid and this is something I have been trialing since January and I have found it works really well.  When my stash of soap nuts finally run out, I will definately buy some more.

SAM_8028

  I find that if I use the liquid in my dishwasher every wash, then grease builds up inside my dishwasher, so I have found that it works best if I use it for two washes and then wash once with a shop-bought dishwasher tablet once and then use the dishwasher liquid twice etc.  This way it still saves me quite a bit of money.

You can find how to make it here.

My Dishwasher Liquid

My Dishwasher Liquid

.

Incidentally,  I also topped up the rinse aid compartment in my dishwasher this week.  Again I don’t buy a shop-bought rinse aid, I use white distilled vinegar which is very cheap to buy from your local supermarket and works just as well.

SAM_2526

.

Another thing I did at the weekend was to make some more ‘multi-purpose vinegar spray’.  I use this to clean down my work surfaces in my kitchen, our table mats, my cooker hob etc.  Again it is really cheap to make and it lasts ages, but more importantly I know what goes into it.

All it is made of is distilled white vinegar (which most supermarkets sell), with a few drops of ‘Tea Tree Oil’ (which I buy from Wilkinsons).

Distilled white vinegar is great as it’s cheap to buy and cuts through grease and dirt and is antibacterial too, so it kills most germs.  It does smell when you first spray it, but the smell doesn’t linger and no one will know you have used it.  White vinegar is milder than malt vinegar and dries odourless.

I mix the vinegar with a few drops of Tea Tree Oil which has anti-fungal, anti-viral and anti-bacterial properties too.

This makes a fantastic natural multi-purpose cleaner and it lasts for ages:

SAM_8631

.

I use a lot of ‘old fashioned’ cleaning methods as I like the thought of not using chemicals and saving money at the same time.  I wrote about all the ‘old fashioned cleaning methods’ I could think of here if anyone is interested.

I find that I feel rather smug now when I see people with expensive chemical cleaners and washing powders in their trollies, knowing that I wash and clean for a faction of what they are paying.

My cleaning cupboard consists of only a few things that clean eveything in my house…and that’s the way I like it..

SAM_2503.

Thank you for reading my blog today.

I will be back on Friday at my usual time.

Christmas Decorations In The ‘Thrift’ Household

This week has been a lovely, creative week for me, but very busy.

.

I started off by making my laundry liquid as I had ran out of the shop bought box that I had to buy when the builders were here.

Incidentally, I never use the amount it says to use on the box, I only ever use half the amount to make it last longer and it always washes well and this saves me money.

SAM_7775

I prefer to wash our laundry using my homemade laundry liquid as I know what goes into it and it is really really easy to make.  It only takes 10-15 minutes to make up a batch and it lasts for weeks.  It is great for every day washing and the last time I worked it out a few months ago, it cost me approximately £1.75 to make and I managed to get 71 washes out of it.  This works out at a staggering 2.5p per wash….the supermarkets can’t beat that!

SAM_7776

I’ve stored my laundry liquid in old ‘pop’ bottles as they fit nicely under my new sink.

You can find the recipe I use for my laundry liquid here.

.

I nipped into the supermarket as well this week and found a lonely pack of bananas in the ‘whoopsie’ aisle for 10p.  They were all nice and yellow except a couple which had started to turn brown (which was probably why no one wanted them)… so I bought them.

After we ate the yellow ones, I made a lovely banana cake with the others.  You can find the recipe I used here.

SAM_7853 SAM_7856

.

I’ve also finally got round to writing and sending my Christmas cards.  I bought my cards in the 2011 New Year sales, for a fraction of the price that they were before Christmas.  They don’t take up much space and it saves me a bit of money.

To save time, I have a Christmas card list that I print off from my computer every year.  The list tells me exactly who I need to send Christmas cards to and if I have any extra people to send cards to I just update the list ready for the next year.  It makes writing the cards so much easier.

SAM_5052.

I also made some strawberry jam this week ready for my hampers.  I didn’t get chance to make it over the summer as I was packing things away ready for the building work, so all my fruit was washed and put straight into the freezer.  I am hoping to make some other things for my hampers during the next week as well.

SAM_7854 SAM_7860

.

I started to put up the Christmas decorations this week too (except the tree, as we are still waiting for our fireplace to be installed).  Our old faithful cheap and cheerful door wreath was looking a bit sad as it had lost it cones, so I replaced them with some more and it looks much better now:

SAM_7849

I hung up our trusty old garland along our stairs too.  I bought this approximately fifiteen years ago from Wilkinsons and it still looks as good as new and makes the hall look lovely and Christmassy when you first come in the house:

SAM_7847

.

Also this week, I continued using my bargain charity shop material that I used to make my curtains and my kitchen Roman blind.  For those reading this that don’t know, it only cost me £16 for 10 meters (a piece four meters long and another piece that was six meters long) and it was brand new, never used…I still can’t get over what a bargain it was, I suppose one mans rubbish is another mans gold.

I have now re-covered our old (and stained) seat pads for the chairs around our table and I am really pleased with the result:

SAM_7770 SAM_7781

And I have managed to make a table cloth and eight napkins out of the remainder of the material.  So I am very pleased as my kitchen looks very co-ordinated now and I don’t think anyone would know that the whole lot cost me just £26 to make (£16 for the material and heading tape and a further £10 for all the other bits,  for the Roman blind and for the cotton).

SAM_7825

.

With some of the little off-cuts I still had left, I made some bows for my Christmas table wreath.  They were really easy to make, I just followed  some instructions that I found on ‘You Tube’  here.  I think they turned out well:

SAM_7793

.

I love Christmas decorations that are made out of things that you can pick from your garden at this time of year, so I went out into mine to collect some holly, bay and conifer leaves.

While I was there I noticed there are some lovely sights in the garden at this time of the year:

SAM_7701 SAM_7700

I even discovered that our Lavatera still has flowers on and my Vinca has a flush of flowers on too:

SAM_7697 SAM_7695

I made a couple of ‘sprays’ with some of the bits I collected and tied them with a spare ‘off cut’ of material I had and hung them in my kitchen.  I was very pleased with the result (especially as it cost me nothing to make them):

SAM_7805 SAM_7806

  .

I then began to make my Christmas Table Wreath.

I openly admit that I’m not very good at flower arranging.  In fact, I was the only Brownie that just ‘scraped’ a flower arranging badge due to ‘Brown Owl’ stepping in and rearranging it all for me.  My arrangement was so bad.

Last year I made my first table wreath and I was very proud of it and couldn’t believe how easy it was to make. So this week I made this years wreath.

.

How To Make An Easy Christmas Wreath:

.

I bought an oasis ring from Wilkinson last month for approx. £4.50

I used bits of old ribbon last year and material bows as above this year

Pine cones from my local park

Shrubs from the garden

(I used conifer and bay this year and Viburnum tinus last year)

Large paper clips or florist’s wire)

.

I started by soaking the oasis ring upside down in water for about 5 minutes, until the bubbles stopped coming out of it.  I have read that you should not press the oasis ring down, as this will cause air bubbles to enter the foam, creating dry spots.

0295958_m[1]

I cut the foliage in lengths of approximately 10cm and striped the leaves so there was about 4cm of stem to push into the oasis.

SAM_5428

I layered the shrubs into the oasis by pushing the stems in at a slight angle, starting at the bottom.

SAM_7817

I kept building the foliage up, so eventually the oasis couldn’t be seen.

SAM_7818

Use big paper clips stretched out or florists wire to secure the ribbons and the pine cones to the oasis.

SAM_7823SAM_7824

I have read that it is best to mist the wreath with water each day so it doesn’t dry out

(I’ve got to admit I didn’t do it last year and my wreath lasted ages).

SAM_7844

I’m very pleased with my table wreath again this year and as an extra bonus, the bows match my table cloth.

.

Finally this week, I sliced some oranges to make ‘old fashioned’ Christmas decorations.  I put the slices on a piece of greaseproof paper and then put it on the top of my radiator.  I have read that they will dry this way without having to use your oven, so I thought I will give it a try.

SAM_7796 SAM_7814

I’ll let you know how I get on with them and if it works.

SAM_7841

Thank you for reading my blog today.

I will be back on Monday at my usual time.

Completing Planting And A Bumper Harvest

I have so much to write about today, as I have been working so hard at my allotment this week.  I wanted to finish planting all my crops before the long school holidays begin, in exactly one weeks time.  The schools here in Leicestershire break up earlier than the rest of the country.

I started by planted some more perpetual spinach:

SAM_6807

….And some more spring onions.  I sow my spring onions in modules as I always had a very bad germination rate when I sowed them straight into the ground (though I don’t know why as they are supposed to be an easy plant to grow).  By sowing a few seeds in each module, I find it almost guarantees a high germination rate.  I don’t thin the spring onions either, I just plant them as they are when they are ready:

SAM_6805 SAM_6806

In the right hand photograph above, you can just see the newly planted spring onions and you can see the ones I planted out three or four weeks ago growing nicely behind.

.

I also planted out my spring broccoli, curly kale and some more khol rabi.  All of the brassicas were planted in firm soil which I had dug and manured last autumn.  I also walked over the area before planting.

SAM_6769 SAM_6768 SAM_6776

As the ground was dry when I planted the brassicas out, I dug a hole for each plant and filled it with water.  When the water had drained away, I then planted them.  This allows the water to go deep into the ground to encourage the roots to also grow deep to find the water.  It also helps to stop the water from evaporating quickly after planting.

SAM_6774

I also planted some quick growing turnips too, but you may have to enlarge the photograph below to see them:

SAM_6777

All my brassicas have nets over, to stop the dreaded pigeons eating them.

While I was working in my brassica patch, I removed any yellowing leaves from my remaining spring cabbages. This will help to stop the build up of any pests or diseases lurking in them.  These cabbages were planted a month after my first spring cabbages and they are now starting to heart up nicely, so I will start to use these now.

SAM_6772 SAM_6773

.

I have now officially ran out of room in my brassica beds and so I can finally say I have finished my summer brassica planting:

SAM_6779

.

This week I cut my comfrey down.  I prefer to cut my comfrey down before it flowers, but I just wasn’t quick enough this month.  If you have been reading regularly, you will know that I have already made comfrey tea this year (which incidentally is a wonderful high potash fertiliser used for all fruit and flowers e.g. it is a great tomato feed).  You can read how to make comfrey tea here.

SAM_6788 SAM_6792

I have also added a vast amount of comfrey to my compost bins already this year.  So when I cut it down at this time of the year, I lay it down between my main crop potatoes instead.  This acts as a mulch to help to stop water evapourating from the ground and also helps to stop annual weeds from germinating.  When the comfrey breaks down, I just dig it into the ground to add nutrients to the soil.

I think comfrey is a wonderful plant!

SAM_6789

.

This week  I also cleared my old perpetual spinach that had ran to seed and planted my french beans in it’s place:

SAM_6786

I cleared my broad beans in my polytunnel that had finished producing beans:

SAM_6793

And I cleared my poached egg plants that had finally finished flowering either side of my path.  I transplanted some self seeded calendula plants in it’s place, though it looks quite bare at the moment it will soon grow and look pretty and be a bonus for the bees:

SAM_6754 SAM_6771

Another thing I have started to do is to ‘nip’ the tops of my runnerbeans off as they reach the top of their supports.  This helps the plants to ‘bush out’ further down and produce more beans:

.SAM_6795

.

This week’s harvest:

Plants have been growing slowly due to the cold spring we have had.  However, the plants are finally now producing and I seem to be having a bumper harvest.

I’ve started to pick my outdoor broadbeans this week and I have needed to pick them every other day:

SAM_6739 SAM_6760

I have found my peas are just great, even though they a month behind.  My back has ached just picking them:

SAM_6809

So too is the mangetout (even though some are a little larger than I would have liked, as I didn’t notice they were ready):

SAM_6799

My potatoes taste delicious (especially with a knob of butter) and we are eating lots of lettuces, watercress and spring onions….I love summer so much.

SAM_6794

And my strawberries…well what can I say other than it really is a bumper crop and I’m picking carrier bags full every two days:

SAM_6804 SAM_6736 SAM_6766

.

Of course the down side is that I had to defrost my freezer ready for all the fruit and vegetables that I have been bringing home….

SAM_6783

.,….but it will be worth it when we are still tasting ‘summer’ in the long cold winter months.

SAM_6798 SAM_6797

I hope you enjoyed reading my blog today.

I will be back on Monday with some Jam making tips.

Hope you have a good weekend.

Laundry Liquid, Planting Leeks And Training ‘Cordon’ Tomatoes

It’s Friday already and I’m not sure where the week has gone to.

I started the week by making some of my homemade laundry liquid.  I’ve been using homemade laundry liquid to wash my clothes for quite some time now and it washes well and is so much cheaper than shop bought wash powders and liquids.  Infact, a few months ago I worked out that it cost me approximately £1.75 to make and I managed to get 71 washes out of it, which worked out to be a staggering 2.5p per wash. I challenge any of the supermarkets to beat that!

SAM_6596

I really don’t know where I got the recipe for homemade laundry liquid from, it was somewhere on the net, so I can’t take any credit for it. As it’s been some time since I last wrote how to make it on my blog, I thought I would write the recipe again for anyone who didn’t see it the first time around.  It only takes about fifteen minutes to make, but I think it’s time well spent:

.

Laundry Liquid

1 cup of soap flakes

½ cup Soda Crystals (also known as washing soda)

½ Cup Borax (in the UK it is a substitute of borax which works well)

1 ½ litres of water

SAM_3621

Put the above ingredients into a saucepan and heat, stirring until the soap flakes have dissolved.

SAM_3623

Pour the mixture into a very large bucket and then add a further 8 litres of cold water.

SAM_3625

Stir and then pour into containers, leaving space at the top so you can easily shake the container before you use it.

SAM_3634

You only need approximately a quarter of a cup of washing liquid for each wash.

SAM_6601

I use old plastic milk containers to store my liquid in. The recipe makes just over 10 litres of liquid which I found was enough for 71 washes.

One thing to remember is you won’t see lots of bubbles when it washes, but this doesn’t matter. Wash powders that you buy actually have bubbles added, not because they are needed, but because people think their clothes aren’t washing properly if they don’t see bubbles.

.

Tomatoes

SAM_6594

This week I removed most of my staging from my greenhouse, so I could put my tomatoes and cucumbers neatly, as it was getting a bit cramped in there.  I have four tomatoes called ‘Moneymaker’ and four of a heritage variety called ‘Wladecks’.  The heritage variety is a beefsteak tomato.  I also have two cucumber plants.

As the above plants grow, I tie them to the canes that I have put in the pots, to help support them.

Just in case you haven’t grown tomatoes before, it is very easy.  There are two different types of tomato, a ‘bush’ tomato and a ‘cordon’.

I am growing a’ cordon’ and it is trained up a support, by tying it to the support as it grows,   Also, side shoots will grow between the leaf stem and the main stem (called the leaf axil) and all you need to do is ‘pinch out’ the side shoots as they begin to grow (which means removing it by pinching it off using your thumb and finger nails).  There is a photograph of a side shoot below:

SAM_6592

The only other thing to do is to feed your tomato plants regularly after you can see your first tiny tomato has formed and started to grow.  Also keep the plants well watered and you will have lovely tomatoes soon.

SAM_2975

.

Planting Leeks

One of the jobs I did at my the allotment this week was to clear the kale that I left to flower for the bees, as it had just about finished flowering.  I put it all in my compost heap, as the thick stems will eventually rot down, though it does take quite some time.

SAM_6606 SAM_6608

I then dug the area over and raked in some blood, fish and bone, ready to plant my leeks.

I sowed the leeks back in January, so I was very careful not to drop them when I transported them to my plot (as I did with my sweetcorn last week).

My dad taught me how to transplant leeks and just in case you are reading this and you have never grown leeks before, I thought I would show you how I do it:

First I use a dibber to make a hole approximately 15cm deep.

SAM_6627

Then I cut the end of the roots off each leek.  This was done in the past as it was thought to stimulate the roots into growth, but I have read that it doen’t really make a difference.  I still do this, simply because I find it helps to make it easier to push the leek into the hole that you have made with your dibber.

SAM_6629

I push the leek into the hole I made with the dibber (sometimes it’s easier to twist the leek to get the roots to go down into the hole).

SAM_6631

Plant the leeks 15cm apart, in rows 30cm apart.

You don’t need to backfill the hole with soil, just water each leek and let the water settle the soil around the roots.

I don’t do anything more to my leeks, except weed around them.  They sit happily over winter too.

SAM_6632

.

.

Just to finish off with today, I thought I would show you my beautiful oriental poppies that have just begun to flower this year:

SAM_6611

I hope you enjoyed reading my blog today.

I will be back on Monday at approximately 4pm.

Homemade ‘Wraps’, Laundry Liquid, The Allium Leaf Miner And Seed Sowing Continued.

The Allium Leaf Miner

If you read my blog on Friday, you will know that last week, I dug up my remaining leeks and froze then.

SAM_5895 - Copy

While I was preparing them, I found something interesting that I thought I would share with you.

I found an Allium Leaf Miner, so I took a photograph to show you.

OLYMPUS DIGITAL CAMERA

Plants affected by the allium leaf miner tend to rot, from the damage it has caused on the plant. If you look closely on the picture above, you can see the small brown pupae, 3-4 mm long, embedded in the stem.

This is a pest that was only detected in Britain in 2002. It has been spreading rapidly since and spread to many places in the Midlands for the first time two years ago.

The allium leaf miner isn’t choosy which allium it attacks. Alliums include onions, leeks, garlic and shallots.

Last year I lost quite a few of my overwintering onions to the Allium Leaf Miner, so this year I covered them in environmesh, though it would cost too much to cover all the alliums I grow at my allotment, so I’ll have to hope for the best.

You can read all about the Allium Leaf Miner here.

.

SAM_5834 - Copy

Seed Sowing:

The seeds I sowed on the 25th February have now all germinated and are growing well:

SAM_5900 SAM_5898 SAM_5899 SAM_5906SAM_5905

From left to right, I have Celeriac, greenhouse tomatoes, lobelia, lettuce, cabbage and cauliflowers.

The celeriac, tomatoes and lobelia are sitting on my windowsill inside my house and the cabbages, cauliflowers and lettuce are sitting on a heated mat in my cold greenhouse.

.

The seeds I grew on the 9th January are also doing well now too:

SAM_5897 SAM_5912 SAM_5901

From left to right I have peppers, basil, broadbeans and onions.

The broadbeans are in my cold greenhouse (as they are an overwintering variety), and the rest are sitting on my windowsill inside.

Finally, the shallots I planted in paper pots on the 6th February, have all rooted and some are beginning to sprout:

SAM_5904

So far, my seed sowing is going well.

SAM_5852 - Copy

.

Laundry liquid:

I was running short of my homemade laundry liquid this week, so I made some more.

SAM_5833

I love this liquid as it saves us so much money and it is really easy to make.

You can read how to make it here.

SAM_5913

.

Homemade Wraps:

Today I thought I’d show you how I make homemade ‘Wraps’.

Homemade wraps are brilliant as they are so so easy to make and I have worked out that they cost just 15 pence to make…this is just under an incredible 2 pence per wrap!

The cheapest wraps I have managed to find are currently 12.6 pence per wrap, so it’s definitely cheaper to make them.

SAM_5872

.

 Homemade Wraps:

250g plain flour

1 tablespoon of olive oil

150ml warm water

.

Sift the flour into a bowl.

In a separate jug, add the olive oil to the warm water, then add this mix to the sieved flour and stir well until it all comes together into a ball.

SAM_5866

Knead the ball for approximately 5 minutes.  Add a little bit extra flour if the ball is too sticky.

Divide your dough ball into 8 pieces.

SAM_5867

Heat a frying pan until it is very hot and then turn down to a medium heat.

While the pan is heating, sprinkle some flour onto your work surface and roll out a dough ball into a rough circle shape.

SAM_5871

Put into the frying pan (with no oil) and cook for approximately 1 minute, then turn and cook for a further minute on the other side.

(Be careful not to overcook or the wraps will break when you fold them).

SAM_5873

Leave to cool on a cooling tray.

SAM_5874

.

How to fold a wrap:

.

Half fill the wrap with your desired filling

SAM_5876

(in the picture I used mayonnaise, cheese and salad, but you can put whatever you normally put in your sandwiches).

Fold the top, three quarters of the way over the bottom

SAM_5878

Fold the left side over the right side and turn the wrap over.

Then you have a perfect, homemade wrap…..Enjoy!

SAM_5879

I’ll be back on Friday.

Thank you for reading my blog today.

Laundry Liquid And The Water Has Gone

Yesterday I mentioned that the dike that had once flowed through my four allotments had flooded again.  You can see this in the picture below.

Today I’m very pleased to say it had dried up completely, so my panic is over…for now.

 I really feel for all those people that have had their properties flooded in the UK, due to the constant rain we have been having.  It’s hard to believe now, that there were hose pipe bans around the country in the spring time.

.

This morning I made some more laundry liquid as I had used the last drop that I had left.

I love the laundry liquid I make, as it is so cheap.  I use soap flakes, borax substitute (as you can no longer buy borax) and Soda Crystals.

You can find the recipe I use here.

As I said previously, I can’t take the credit for this recipe as I found it on the internet a long time ago and I haven’t got a clue where I found it.

The last time I made my laundry liquid was the 21st September.  I kept a careful note of how many washes this batch of laundry liquid actually did, so I could report this back to you.   I have worked out that I managed to get 71 washes out of my laundry liquid.

I have looked hard to find the cheapest laundry liquid that I could find in Tesco and it appears to be ‘Daisy’ which is £2.39 for twenty eight washes.  This works out at 8.5p per wash.

My laundry liquid cost me approximately £1.75 to make and that is a staggering 2.5p per wash.  I challenge the supermarkets to beat that.

It took me about fifteen minutes to make, but I think it was time well spent.

Thank you for reading my blog today.

New Allotment Paths and Laundry Liquid

For the last few days I have been working on the top half of my 4th allotment plot.  This is what it looked like in January when I took the plot on:

The tree in the middle is a plum tree.

The previous plot holder, Eric, had tried to grow vegetables under the tree, but he told me that nothing grew properly as it was just too dry and shady under there.

After I had strimmed the couch grass and weeds in January, I covered it all with weed suppresant.

Last year, my dad had given up his allotment, as it was just too much for him. He asked if he could have a little bit of my plot to work.  I thought this was a wonderful idea, as I can’t think of anything better than having my dad growing his vegetables with me, as I think the world of my dad.

So in April, I dug a patch at the front of the plot, removing all the weeds and added loads of compost.

Dad has grown leeks, runner beans, onions, lettuces and squash this year.

I have been worrying about the weed suppressant around dad’s patch, as I have bricks and old pieces of wood holding it down and I have worried that dad would trip over them.

So this week, I have used old pieces of wood, to make the edge for two paths and I have laid weed suppressant in between them.  Next week I will be visiting our local council to buy some wood chips to put over the weed suppressant.

The bricks etc are just there to stop the weed suppressant from blowing away in the wind.  They will be removed when I put the wood chips down.

In the photo below, you can see I have also put wood around the edges of the tree.  I have decided that this area is going to be a woodland area and I will continue to work on it over the next few weeks.

I removed the weed suppressant from around the tree this week and you can see that all the couch grass and weeds have been killed.

I have some bulbs to plant and I will be on the lookout for some cheap woodland plants or plants that I can take cuttings from, to fill this area.

.

Laundry Liquid

For a while now I’ve been making laundry liquid to wash my clothes.  Today I made some more, as I had run out.

It washes well and is so much cheaper than shop bought wash powders and liquids.

I really don’t know where I got the recipe from, it was somewhere on the net, so I can’t take any credit for it.

This is how I make it:

.

1 cup of soap flakes

½ cup Soda Crystals (also known as washing soda)

½ Cup Borax (in the UK it is a substitute of borax which works well) 

1 ½ litres of water

Put the above ingredients into a saucepan and heat, stirring until the soap flakes have dissolved

Pour the mixture into a very large bucket and then add 8 litres of cold water.

Stir and then pour into containers, leaving space at the top so you can easily shake the container before you use it.

.

You only need approximately a quarter of a cup of washing liquid for each wash.

.

I use old plastic milk containers to store my liquid in.  The recipe makes just over 10 litres of liquid.

The above amount will last quite some time and washes well.

You won’t see lots of bubbles when it washes, but this doesn’t matter.  Wash powders that you buy actually have bubbles added, not because thay are needed, but because people think their clothes aren’t washing properly if they don’t see bubbles.

Thank you for reading my blog today.