Archive | August 2013

Preserving And Storing Crops – Part Two

Today I thought I would write about freezing our excess crops.

Last Friday I wrote about ‘Simple Living In The Modern day’.   The freezer is a modern day appliance that makes life a lot easier for us, as we now have the luxury of being able to bulk buy, cook ahead, batch bake and preserve our excess crops (or bargains from the supermarket).

One of my three freezers

One of my three freezers

.

The first electric freezers were manufactured in 1945, but I remember it wasn’t until the 1970’s that my family had one.  I remember at this time, ‘freezer centres’ sprung up all over the place.  This revolutionised the way we preserve our food, as we can now store most crops in our freezers.  In fact we have three freezers that are usually fit to busting at this time of the year.

    The only two drawbacks with freezers after paying for the freezer in the first place, is they run on electricity, which costs money and if they lose power for long periods (i.e. in more rural areas in winter) the food inside will perish. 

I find the amount I save by using my ‘A- rated’ freezers to preserve my crops, outweighs how much it costs to run them and I am lucky that we live in a town as so far we haven’t lost power for more than a few hours at any time.

.

In event of a power failure, a full freezer should stay frozen for up to 24 hours, provided you don’t open it to check, as warm air will speed up the thawing process.  A half full freezer should stay frozen for up to 12 hours, but it’s important you check your own freezer manual.

.

Another one of my freezers

Another one of my freezers

.

Freezing is easy as most vegetables just need ‘blanching’ for a minute or two before freezing.  I always thought that blanching increased the length of time you can store the produce (though I know not everyone blanches their vegetables before freezing and they seem to be fine).  However, after researching this I have found the following on ‘Wiki Answers’:

“Blanching slows or stops the action of enzymes. Up until harvest time, enzymes cause vegetables to grow and mature. If vegetables are not blanched, or blanching is not long enough, the enzymes continue to be active during frozen storage causing off-colours, off-flavours and toughening.”

I have now learnt something new.

.

As regards to fruit, I never blanch my excess fruit and we have fruit all year round to add to yoghurts, ice-creams, pies etc. though it must be noted it does go soft and a bit mushy when it’s defrosted but it’s fine to eat.  The only exception to this is apples as they go brown if you freeze them without blanching (though I have frozen bags of un-blanched crab apples, washed, top and tailed ready for crab apple jelly and they work fine).


My Fruit freezer

My Fruit freezer

.

How to blanch vegetables:

…Add your vegetables to a pan of boiling water and then bring the water back to boiling point again and then boil the vegetables for the recommended time (usually 1 or 2 minutes depending on size and particular vegetable).  Drain the vegetables and immediately plunge them into very cold water, to stop the cooking process.

(I have a freezer book that tells me how long to blanch each vegetable for, but you can find the recommended blanching times on the internet these days).

SAM_2804

.

What Is Open Freezing?

This is a way to stop all the vegetables in a freezer bag from sticking together in one great big lump, so it’s easy to remove a few at a time e.g. a portion of peas when you need them.

 When you have blanched your vegetables, lay them on a tray and freeze them.  When they are frozen, remove them from the tray and pop them into a freezer bag/container and put them back into your freezer.

Open freezing

Open freezing currants

.

.

A Few Of My Top Tips For Freezing Fruit And Vegetables:

.

Nearly every fruit and vegetable can be frozen in some way or another, it’s just a matter of finding out what works best for you.

.

  • Courgettes can be frozen ready sliced, by open freezing them and then bagged up ready to add to spaghetti bolognaise, pasta sauces etc. or they can be grated and bagged up in 340g bags, ready to add to cheesy courgette scones.
Open freezing courgettes

Open freezing courgettes

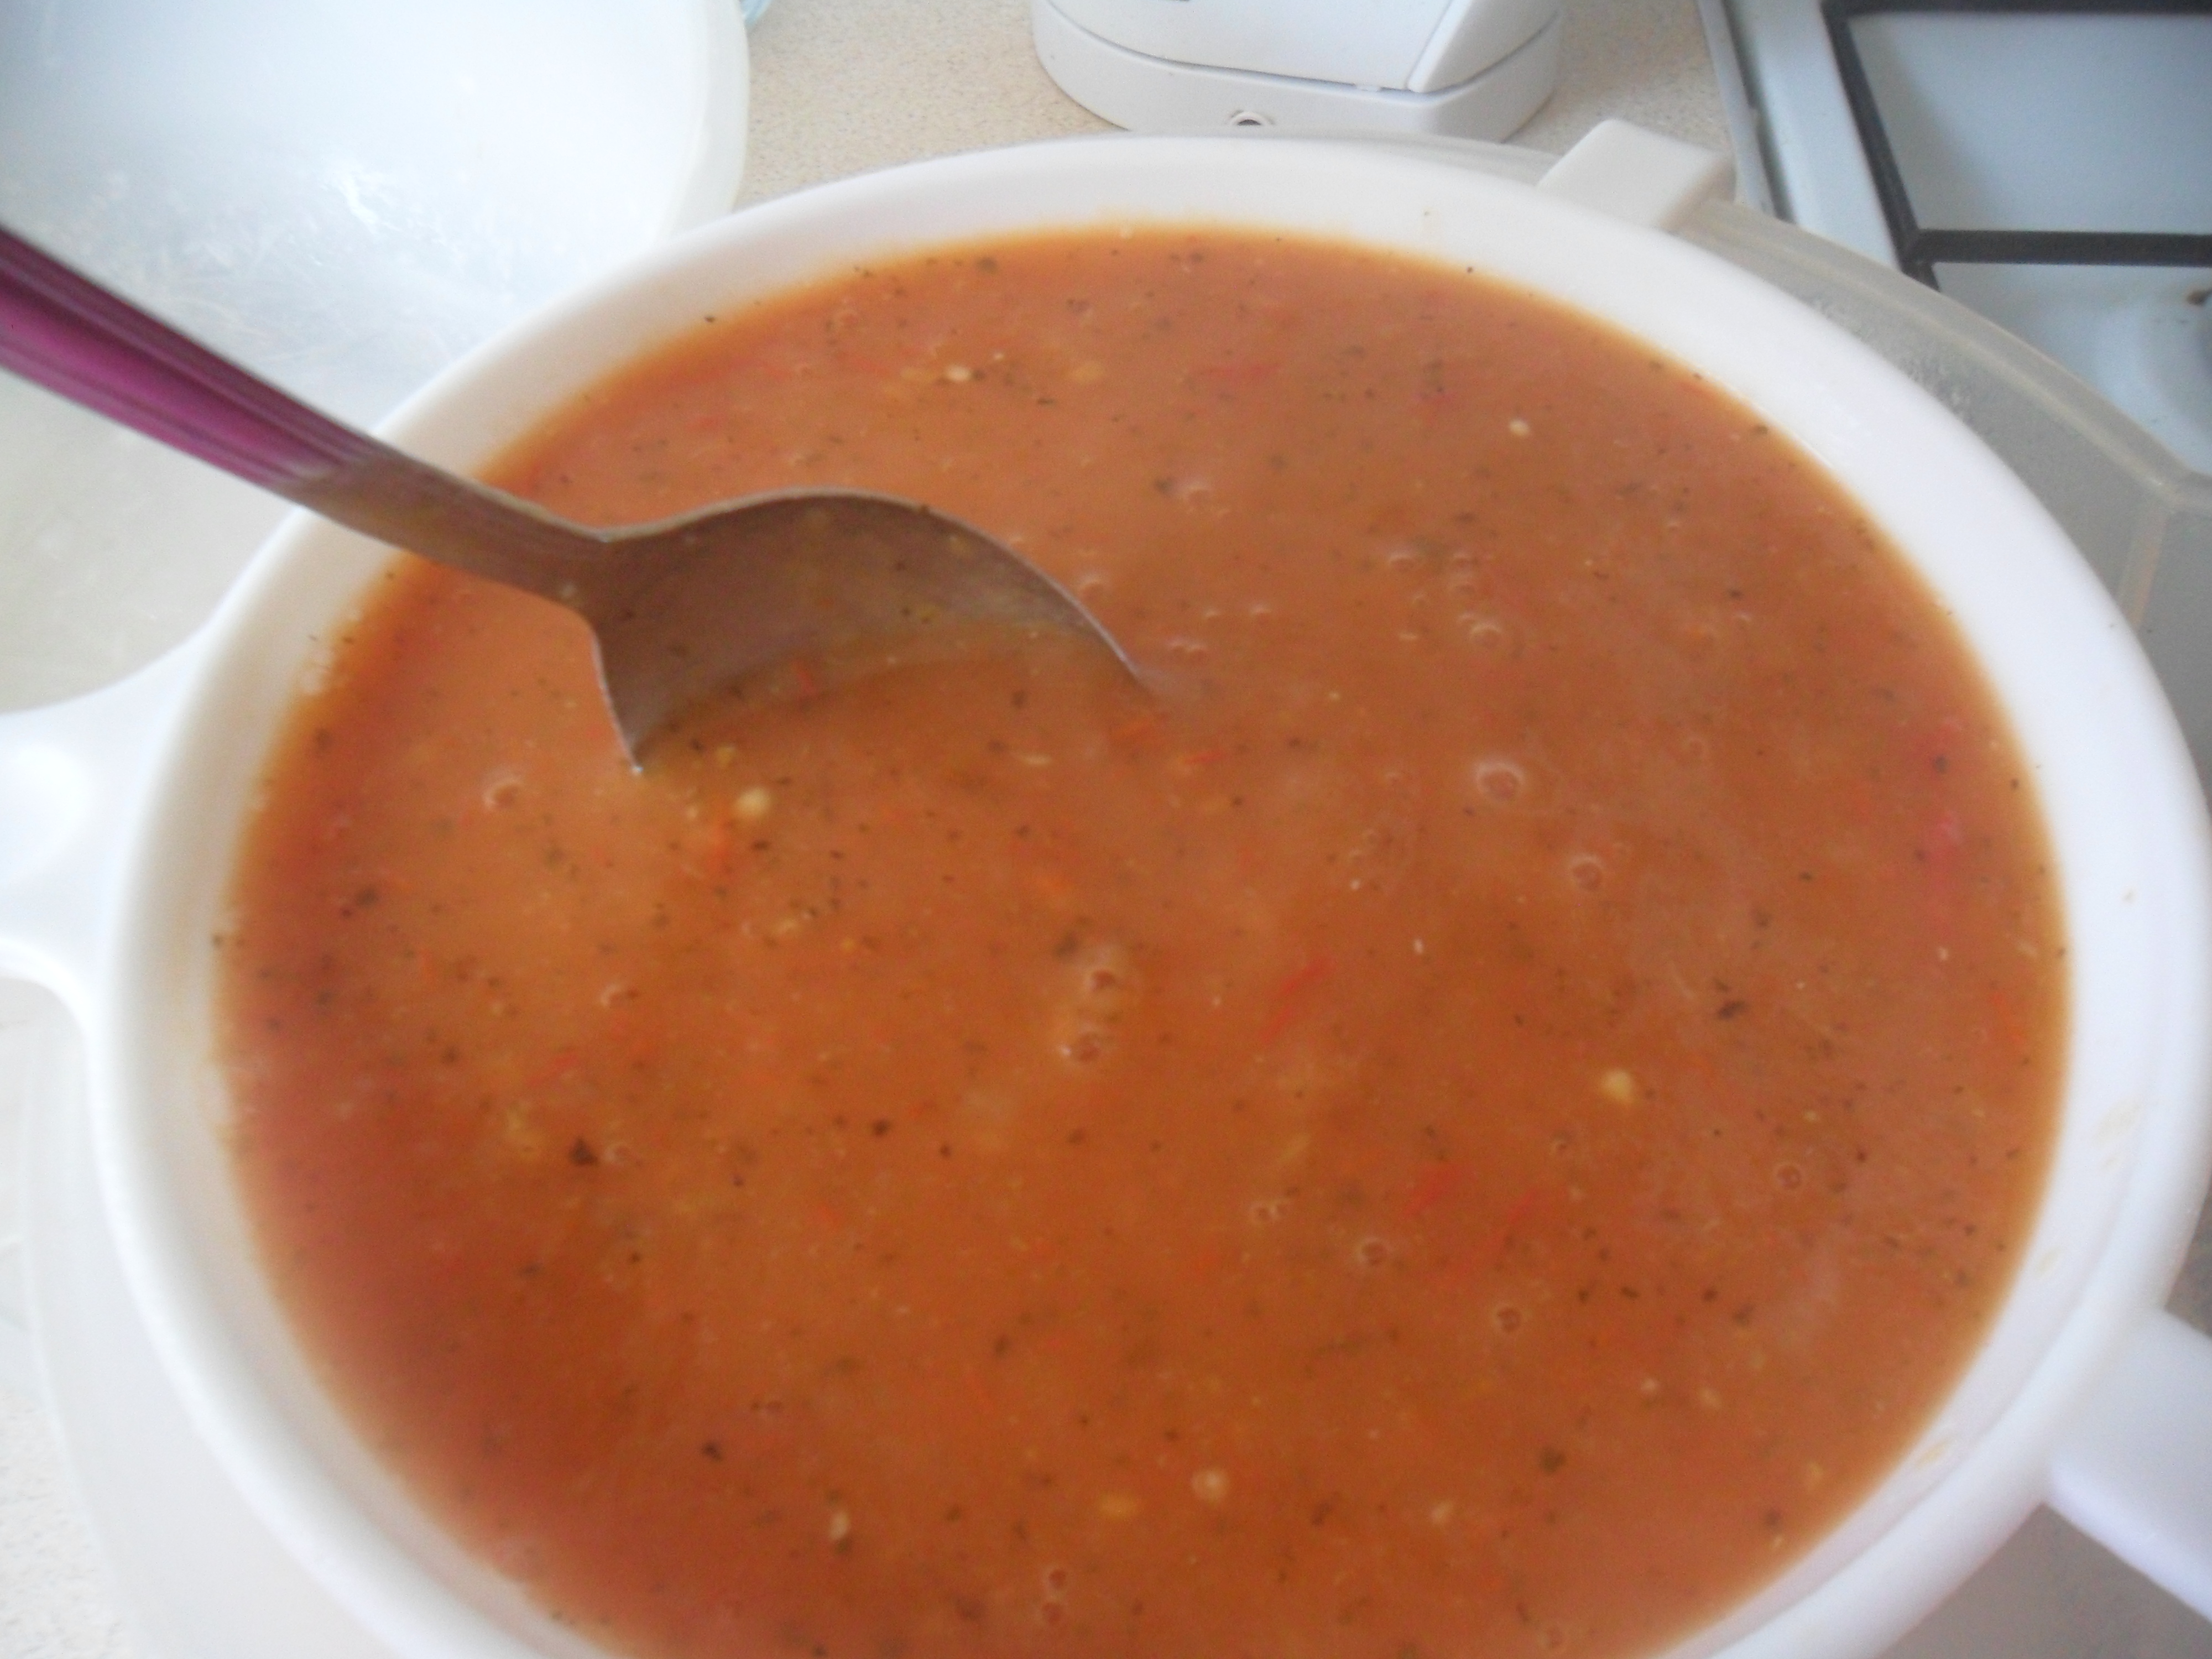
  • Tomatoes can be frozen in bags (without blanching), ready to make tomato soup at a later day.  I just wash them and chop them in half and bag them up in the weight required for your recipe.
A bag of tomatoes ready for soup

A bag of tomatoes frozen ready for soup

  • Tomatoes can also be cooked with a little bit of water and then ‘blitz’ with a liquidizer to make a tomato sauce to use in pasta sauces, spag bogs etc. instead of using shop bought passata.  I freeze this in ready weighed out portions of 500 grams and I just defrost it before using.

SAM_7263 SAM_7314

  • I find pumpkin is better to cook first and freeze in bags ready weighed out.  This way it can be added to soups and cakes etc. and it takes up far less room.

SAM_3636

.

When I need to dig up my winter crops (i.e. my leeks and parsnips) to prepare the soil for my next crops, I freeze them:

  • I wash and slice up my leeks and bag them up (again in useable quantities) and then freeze them.  Leeks and onions can make other things in your freezer smell, so I do wrap them up well in newspaper first, to prevent this.

Picture 086

  • I wash and peel my parsnips and cut them ready for ‘roasting’.  I then open freeze them, without blanching and then pop them into a freezer bag.  They are great to use straight from frozen and make Sunday lunch easier to cook.

SAM_5099

  • I also quite often freeze excess fruit the day I pick it (e.g. Strawberries, gooseberries, currants, plums, rhubarb etc.).  I use the fruit to make jam when I have more time in the winter, by adding the frozen fruit straight into the pan.

SAM_6804

  • Sweet corn is delicious when it has been picked and eaten within the hour.  I blanch my sweet corn whole and freeze it in bags of four or five corn on the cobs.  It is lovely to eat this in the depths of winter.

SAM_3336

  • I Trim off the leaves of parsley and wash them.  I put the lot in a freezer bag and freeze.  I use it from frozen by crumbling it into my meals as I cook them.

SAM_7210

  • Just before my Jerusalem artichokes start to sprout in March/April time, I freeze them.  I wash and cut them ready for ‘roasting’.  I open freeze them, without blanching and then pop them into a freezer bag.  They are great to use straight from frozen and again they make Sunday lunch easier to cook.

SAM_5814 SAM_5249

  • I slice my cooked beetroot and open freeze and then pop it into bags ready for use.  This gives an alternative to pickled beetroot and can also be used in a chocolate beetroot cake. 
Beetroot ready to freeze

Beetroot ready to freeze

  • I use my freezer to freeze individual plastic bottles of apple juice that I press myself.  It’s easy to pop a bottle in my daughters lunchbox in the morning and it defrosts by lunchtime, keeping her lunch box cold until then:

SAM_2918 SAM_2921

.

I can honestly say the only fruit or vegetables I haven’t frozen in some way or another is cucumbers and lettuce as they don’t freeze very well.  Although cucmbers and lettuce can be used in a gardener’s soup, which so far I haven’t tried to make yet, but with the amount of cucumbers I picked yesterday, I may just have a go!

SAM_7267

.

I couldn’t be without our freezers as they make my life so much easier to store my excess produce.  I wonder if anyone reading this has any top tips for freezing excess fruit and vegetables too?  If so I would love you to hear from you.

On Monday I will be writing my usual monthly post ‘What to do in the kitchen garden in September’ and I will follow this next Friday with ‘Preserving And Storing Our Crops – Part 3’.

Tuesdays harvest

Tuesdays harvest

Thank you for reading my blog today.

I will be back again on Monday at the usual time.

Preserving And Storing Crops – Part One

Today and on Friday, I thought I would talk about how I preserve and store my crops.

.

We all plant our seeds and nurture our plants, until they grow big enough to start producing a wonderful harvest and this year really has been a wonderful harvest.

SAM_6847

After we have picked and eaten as much as we possibly can, what do we do with the rest so it doesn’t go to waste and end up in the compost bin?

SAM_6670 SAM_7235 SAM_3761 SAM_7190

.

Preserving And Storing Crops.

Years ago, if you didn’t preserve your crops then you would possibly starve.  Today it isn’t so life threatening to do this, as we have supermarkets to fill our food gaps.  However, the food has usually flown thousands of miles to get to us and doesn’t really taste as nice, as it has been bred for its long shelf life rather than its taste.

I love growing vegetables for my family and I know it’s far cheaper to grow my own fruit and vegetables rather than buy them from the supermarket.  I also know that the produce that I harvest are grown organically without the use of pesticides, so it makes sense to preserve and store my produce, ready for use over the winter.

I do buy the odd vegetable in the winter, but mostly I use produce that I have stored, preserved, or I dig up the winter vegetables at my allotment.

SAM_2380SAM_3705 - Copy


During July, August and September I spend most of my days picking, digging up, preserving and storing my crops.  It gives me a huge sense of satisfaction to be as self-reliant as possible and I feel such a pleasure when my family are eating the food I have grown.

.

So How Do I Store And Preserve The Crops I grow?

SAM_7260

.

Nature:

Firstly, the most natural way to store my vegetables is to leave them to nature.  Crops that are frost hardy such as leeks, parsnips, cabbages, kale, Jerusalem artichokes, celery and spinach will sit happily in the soil over winter until I need them.

  I understand that carrots, beetroot and swedes can also be left in the ground over winter if you mulch them with straw, but when I tried this they suffered a lot of slug damage, so I don’t store them like this anymore.

Picture 134

.

Storing:

Some crops are better lifted and stored.  A good example of this is potatoes as the longer you leave them in the ground, the more slug holes you seem to have in them.  Years ago, root crops would have been stored in a ‘clamp’ in the garden, which is an inexpensive way of insulating the crop.  You can still use this method if you want to.  You can read about ‘clamps’ here.

I prefer to store some of my vegetables in a dark, dry, frost free place.

S

Garden ‘Cushion Boxes’

 After I have dug up my potatoes I leave them out to dry for a few hours on the soil, turning them once.  I then put them into sacks to store them.  I keep them in boxes (which are actually cushion boxes from B&Q) and even though the temperature has been below freezing for quite a length of time in the last few winters, my produce has been fine.  However, I do live in a town and I’m not sure if these boxes would remain frost free in a rural area.

My potatoes drying in the sun

My potatoes drying in the sun

Early potatoes don’t store as long as main crop potatoes, so we use them first.  Also any that have slug holes or blemishes are eaten first too, as these just don’t store well either.

TIP:  Don’t store potatoes in plastic bags as the humidity will rot them and do check the potatoes for any signs of rotting every so often, as one rotten potato will rot the a whole sack if you don’t notice it.

SAM_2745SAM_7265

.

I also store carrots, beetroot and swedes in my ‘cushion’ boxes.  It is easy to store them and very convenient to pop outside to get something to prepare for dinner.  I lift the vegetables and twist off the tops and then put them into a wooden box on top of a layer of compost (you can use sand for this too).  I make sure the vegetables aren’t touching and then I cover them with compost.  This way they store beautifully over the winter.

Picture 060

When my onions and shallots are ready, I lift them and dry them on racks under cover for two or three weeks.  Books tend to tell you to lift them and leave them on the ground for two weeks in full sun…but when do we ever have two weeks of full sun in the UK?  After two or three weeks I put the onions in nets and again I put them in my ‘cushion boxes’.

SAM_7241 SAM_7239

.

SAM_4156

I also store my apples over winter. Early varieties of apple don’t store very well, so I store the apples from my later variety of apple trees.  All I do is wrap each apple up individually in newspaper and stack them in a box.  Again I check them every so often as one bad apple can destroy the whole box.

SAM_4147

.

Finally, winter squashes can be stored for approximately six months in a well ventilated place.  The RHS recommend that winter squashes are kept between 10C and 15C.  I keep mine in our bedroom on top of our chest of draws on a tray, which I know is not the most romantic thing to do, but the squashes last for ages as it’s the coolest room in our house.

SAM_5937 S

Before storing winter squashes it is important to ‘cure’ your squash.  All this means, is to leave them outside in the sunlight after you have cut them from the plant, for a week to ten days (more if possible).  Ensure you cover them or take them indoors if a frost threatens.  I cure mine in my greenhouse, which gives them some protection.

SAM_3636

.

I think I’ve written enough for today, so on Friday I’ll continue to write about freezing and preserving our produce.

I hope you have enjoyed reading this post.

“Simple Living In The Modern Day”

This week I watched the first episode of the new series of the ‘Great British Bake Off’ (BBC Two on Tuesday Evenings).  I don’t watch many programs on TV, but I enjoyed the last series so I made a special effort to watch it.

For those who have never seen this program, the contestants bake the most amazing cakes, biscuits, breads and desserts that all look stunningly perfect and Mary Berry and Paul Hollywood taste and judge their heavenly creations.

At the end of the program I made a comment to my youngest daughter that I would love to bake as well as the contestants on the program and she replied “you always bake a perfect chocolate cake”, which is not quite true but it made me feel nice and gave me a warm feeling inside.

I then began to think about ‘baking’ and ‘cooking from scratch’….

SAM_2816

‘Afternoon Tea’ at our house

I enjoy baking and cooking meals from scratch and I feel it is part of living a ‘simpler life’.  I love the contented feeling I have when I see my family happily eating the food I have produced for them.  The meals I cook are not always perfect and I sometimes have the odd burnt bits on top, or some cakes may slope to one side, but as long as the things I cook are within our budget, healthy, taste nice and fill empty stomachs, then I have achieved what I set out to do.

I know most people just do not have the time to cook meals from scratch or even ‘want’ to cook meals from scratch, but I enjoy it and love the challenge of feeding my family healthily on a tight budget, which is why I took on my allotments.  My allotments enable me to provide my family with organic fruit and vegetables, which we wouldn’t ordinarily be able to afford.  It took me a while to get into the swing of growing my own food, but now it is second nature and it is something I really enjoy.

SAM_2380 SAM_2763

Between 1st January 2011 and 31st December 2011, when I was cultivating three plots (I have four plots now), I worked out how much money I saved by growing my own fruit and vegetables during the year.  When I picked any fruit or vegetables I weighed them the same day and worked out how much they would have cost me if I’d bought the ‘value’ (not organic) version  from my local supermarket and made a note of this on a spreadsheet.  I picked the cheapest priced fruit and vegetables to work the cost out, as this is what I would have to buy if I didn’t grow it myself, even though my vegetables were grown organically.

By the end of the year I had picked and used £1454.53 of fruit and vegetables and this didn’t include things which you just can’t buy from the supermarkets e.g. patty pans, kohl rabi and fresh gherkins.  So I decided it definitely pays to ‘grow your own’.

SAM_7235 SAM_7209

By growing my own fruit and vegetables I know that no pesticides have been used to grow them and by using basic ingredients to cook from scratch, I nearly always know what my family are eating.

SAM_2357 SAM_2693

Cooking from scratch is a skill I learnt over time, by reading cookery books, blogs and looking up recipes on the internet.  Years ago my friends used to call me the ‘packet mix queen’ as I never cooked anything myself.

SAM_2811 SAM_2813

I learnt to cook because I had to, as money was so tight, but it’s something I really enjoy doing now.  All the recipes I use are not difficult and can be made easily.

When my confidence grew,  I followed this by learning how to preserve my fruit and vegetables, use leftovers and then I started to batch bake.  Finally I learnt to make my own laundry liquid here and clean using old fashioned cleaning methods, using lemons, olive oil and white vinegar, which avoids using harsh chemicals.

I have written about old fashioned cleaning methods here.

The above things all helped to save money.  I am still learning new things as I go along today.

SAM_2500

My blog title today is ‘Simple living in the modern day’:-

I think my generation have the best of both worlds, as in the past cooking from scratch and cleaning would take all day to do.  We now have the advantage of modern day appliances that make cooking and cleaning much easier.  We have bread makers, microwaves, washing machines etc.  which all make light work out of the things that would have taken our ancestors a long time to do, but we also have the benefit of their experience and knowledge too.

SAM_3635

Through reading blogs on the internet I have realised that there are a lot of people out there that want to live more simply in our modern day world and I’m hoping that simple living blogs like mine will help people to take their first steps towards this way of life, enabling them to leave empty ‘materialistic’ lives behind them.

SAM_2355 SAM_7224

We started living this way because of necessity (we chose to live on one wage so I could stay at home with our children).  My children are now 15 and 13 years old and yes I could have gone back to work a long time ago, but we chose for our life to continue in the same ‘simple’ way, as we think this way of life is the best way of life for us.

The journey hasn’t always been easy, but now we can see and reap the rewards.

SAM_2384

Thank you for reading my blog today.

I will be back on Monday at 4pm.

An Onion Trial, Tomato Soup And Freezing Parsley

Hi all, I hope you had a good weekend.

Since the New Year, I have only been blogging twice a week and I am finding it really hard to cover everything I actually do in just two posts a week.  So I try and cover as much as possible, but I do miss out a lot, so I would like to apologise for that.  If there is anything you would like me to write about, or anything that puzzles you, please let me know.

.

SAM_7234

.

The weather was good here yesterday, so I managed to dig up two more rows of potatoes and dry them ready for storing.  These potatoes are a variety called ‘Piccasso’ which I have grown a lot over the years.  They are great for roasting, mashing and baking and I find they boil and hold their shape well.  So they are a good all rounder, which are great for storing over the winter.

My potatoes drying in the sun

My potatoes drying in the sun

.

A couple of weeks ago, I took up my over-wintering onions.   This is a job I usually do in July, but this is another crop that was behind due to the cold spring we had.

My over-wintering onions last year didn’t do very well at all, due to an attack of the ‘allium leaf miner’.  So in autumn last year, I planted seed sown over-wintering onions (rather than sets), in the hope that they would grow stronger than the sets I usually plant.  I also covered them in environmesh to protect them.

My onions growing under environmesh

My onions growing under environmesh

.

The allium leaf miner is a pest that was only detected in Britain in 2002.  It has been spreading rapidly since and spread to many places in the Midlands for the first time two years ago. 

The allium leaf miner isn’t choosy which allium it attacks.  Alliums include onions, leeks, garlic and shallots.

You can read more about the pest here.

.

I am really pleased with the results, as none of them suffered from the allium leaf miner and this year I have lovely, large onions, which are now drying in my mini greenhouse ready for use:

My onions drying in my mini-greenhouse

I will use my over-wintering onions first, as they don’t store for as long as summer onions do.  I usually chop them up and freeze them, ready to use when my summer onions have ran out.  However, as it’s been such a good growing year, I am struggling with space in my freezers.

.

Yesterday, I also managed to pull up my summer onions.  I planted a variety of onions this year so I could compare them and find out if one variety was more resistant to the allium leaf miner than the others, as my summer onions also suffered badly last year from this new pest.

  I sowed some seeds back in January called Bedfordshire Champion and in March I planted two different varieties of onions sets, one variety called ‘Sturon‘ and another called ‘Turbo‘.  Incidentally, both of these onion sets have been awarded the RHS Award of Garden Merit (AGM).

My onion patch at the beginning of July

My onion patch at the beginning of July

The results (drumroll please)…..

I didn’t suffer very badly this year at all with the allium leaf miner, even though my summer onions weren’t covered in environmesh.  However, a few onions were affected on all three varieties, so I can safely assume that the allium leaf miner is not fussy about which onion variety it chooses and it didn’t make a difference whether the onion was grown from a seed or sets.

I don’t know yet which onion I prefer, as I need to taste them first and I would like to see how well they all store over the winter.  But on first impressions, it’s definately ‘Sturon‘ that has given me the biggest onion.

I have now set out my onions to dry for a few weeks, ready for storing over the winter:

SAM_7239 SAM_7240 SAM_7241

.

Last week I sowed a green manure called ‘Phacelia’ and I am pleased to say that it has germinated and growing well now.  I like using this particular green manure as I don’t need to worry about my rotational beds as it isn’t a brassicca, legume, allium or part of the potato family.  I usually sow it at this time of year in any areas that become available.

SAM_7197SAM_7237

.

‘Phacelia tanacetifolia’ is good for sowing between March and September and it takes between one and three months to grow depending on growing conditions.

It is a green manure that tolerates most soils, which is why I chose it, as I have a heavy clay soil.

If you leave phacelia to flower, it is a beautiful lavender colour that the bees absolutely love, which is why I grow it in my wildflower area.  The one drawback is that if you leave it to flower it self seeds like mad.

As I am sowing it as a green manure, I will chop it down and fork it in to the soil before it flowers, so it doesn’t grow and become a weed to me next year.

Phacelia in flower

Phacelia in flower

.

I just thought I would tell you about the winter salads that I mentioned on Friday’s blog post.  I am amazed to tell you that the winter lettuce (arctic king) and my mizuna have germinated in just four days!  I am amazed by this.  These will go into my polytunnel when I have a space in a few weeks time:

SAM_7242

.

I’ve been busy in my kitchen this week too, blanching and freezing my crops.  One of the things I have frozen is my parsley.  I don’t bother drying it, as I only really use it in a handful of recipes, including homemade garlic bread (you can find the recipe here).

It is really easy to freeze parsley:

SAM_7208

Start by chopping all the leaves off the stalks and wash them

SAM_7209

Leave the  leaves to drain so the leaves are not too wet when you freeze them.

Pop the leaves in a freezer bag and put the bag in your freezer.

SAM_7210

Use the frozen parsley straight from the bag.  You will find it crumbles easily ready for use when it is frozen.

.

.

SAM_2975

My tomatoes are ripening well now, both inside my greenhouse and outdoors at my allotment:

SAM_3761

I decided it was time to make my tomato soup as my daughter loves it.  This is how I make it:

.

Tomato and Basil Soup

.

1400g ripe tomatoes cut in half

2 medium onions chopped

2 medium potatoes chopped small

2 tablespoons of olive oil

550ml of vegetable stock

2 garlic cloves chopped

3 teaspoons of dried basil

Salt and pepper to taste

 .

Gently heat the olive oil in a large pan, add the onion and potato and soften for approximately 15 minutes, without it all browning.

SAM_7215

Add the tomatoes and cook for a couple of minutes.

SAM_7216

Add the stock, garlic and basil.  Cover and simmer for 25 minutes.

SAM_7218

Use a hand blender to blend the soup roughly and then pass the whole lot through a sieve to extract the seeds.  Throw away the contents of the sieve.

SAM_7219 SAM_7221 SAM_7222

Re-heat the soup and serve.

SAM_7224

.

I hope you have enjoyed reading my blog today.

I will be back on Friday at approximately 4pm.

Have a good week!

Tomato Blight And Planting Winter Salads

I thought I would start today by telling you about a couple of things we did at the weekend:

On Monday it was my dad’s 82nd birthday.  It has been a long time since my family all got together, so I decided to throw him a surprise birthday party.  He thought he was just coming to our house for tea and loved it when our whole family appeared.

It was a really lovely evening.

My eldest daughter decorated the cake

My eldest daughter decorated the cake

.

Another thing that happened last weekend, was my husband and youngest daughter did a ‘Car Boot Sale’.  We had spent the whole of the last week having a massive clear out and decided we would try and make some money from all the things we didn’t want anymore.  It’s amazing how much ‘stuff’ you collect over the years isn’t it.  You can see it all in the photograph below:

OLYMPUS DIGITAL CAMERA

I am so very proud of them, as they made just over £90!  It just goes to show that one man’s junk is another man’s treasure.

We still had some things left at the end, so we took them down to our local charity shop the next day, in the hope that they would make some money out of it too.

.

A butterfly on our window, captured by my youngest daughter.

A butterfly on our window, captured by my youngest daughter.

.

This week I have been preparing for the long cold winter by sowing a few winter hardy salads to plant out in my polytunnel when I have some room.

I have sown a winter hardy lettuce called ‘Arctic king’ and  some winter hardy spring onions.  I also sowed some mizuna and corn salad as these were both so successful last year.  Lastly, I also sowed some perpetual spinach which will hopefuly be ready in early spring if I plant it under a cloche outside.

SAM_7205 SAM_7204

Mizuna and corn salad last year in my polytunnel over winter

Mizuna and corn salad last year in my polytunnel over winter

.

My allotment is still providing a feast of salads and vegetables everytime I visit it.

The runner beans are doing very well, even though they started to produce slightly later than normal.  This has had a knock on effect as I have noticed my french beans are nearly ready to pick now and I usually start to pick them when my runner beans have just about stopped producing.  So I will soon have double the amount of beans to harvest and freeze at the same time.

SAM_7190

.

My outdoor cucumbers are having a fantastic crop because the weather has been warm and I am picking them daily and giving them away as we just can’t eat the amount they are producing. The variety I am growing is ‘Burpless Tasty Green’ which I have found to be a reliable outdoor crop (though last year I only managed to get three or four cucumbers all in all,  due to the rotten weather we had).  The skins are a bit prickly so we peel them before we eat them and they taste lovely.

.

I picked my first kohl rabi of the year this week.  Again, they are a little late this year, but it was worth the wait.  Kohl rabi can be grated in salads or used in stews, soups or casseroles.  I don’t get to cook mine, as they are eaten the minute I bring them home.  My family love them peeled, chopped and eaten raw, dipped in salad cream.

SAM_7192 SAM_7191

.

You can see in the photo above that my outdoor tomatoes are finally starting to ripen.  They seem to have been ‘green’ for eternity this year.  When I get enough of them I will be making soup with them and lots of passatta to freeze and use over the winter.

So far my tomatoes are free from tomato ‘blight’, but I am checking them daily for signs.  Below I have written some information regarding tomato blight, which you may find interesting if you are growing your own tomatoes:

.

SAM_2649

Tomato blight

.

Tomato blight

.

Tomato blight is caused by the same fungus as potato blight.  It is called ‘Phytophthora infestans’, but it is more commonly known as ‘late blight’.  It is a windblown fungus that can travel long distances.  It spreads when the temperature is above 10C and the humidity is above 75% for two consecutive days, known as a ‘Smith Period’.   In the UK outbreaks can occur from June onwards and it is said to be usually seen in the south west first.

The disease is common on outdoor tomatoes, though tomatoes grown in a polytunnel or greenhouse have some protection from it, as the spores have to enter through doors and vents.

The early stages of blight can be easily missed and not all plants are affected at the same time, however it will spread rapidly.

Symptoms usually seen are brown patches that appear on the leaves and stems and spread very rapidly. The fruit will also turn brown. The underside of leaves can develop a downy white coating of spores in moist conditions.

The first signs of 'blight' on my tomato plants last year

The first signs of ‘blight’ on my tomato plants last year

.

What can you do to prevent blight?

.

You can grow varieties that are not so susceptible to blight e.g. ‘Ferline’ and ‘Legend’, but remember that some varieties can resist some strains of the fungus but not others.

I like to choose an earlier maturing variety that is ready to harvest before blight strikes, though the tomatoes are usually smaller.

Do not save seed from infected plants as it can survive in the seed and reproduce next spring. Instead, buy good quality seed from a reputable supplier.

Remove any potatoes that were left in the ground from the previous year as the pathogen over winters in rotten potatoes. 

Keep the plant foliage as dry as possible by watering in the morning and at the base of the plants.  Mulch will reduce the amount of watering needed.

Try to avoid brushing past tomato plants when they are wet as this can increase the likelihood of spreading the spores.

Space plants wide apart so the air can flow around the plants.

Keep monitoring your plants and act quickly if you see blight on them.

You can use a ‘bordeaux’ mix to control blight, but you need to spray before blight takes hold as it protects the foliage.  It also needs to be sprayed on your plants regularly so organic gardeners do not favour this method.

SAM_3761

.

 My tomato plants have blight, what can I do?

.

 If you catch it early you can strip the tomatoes from the plant and ripen them on a windowsill.  Be careful to check them every day as some of them may already be affected.

If you haven’t caught it really early, you can use the green tomatoes to make chutney, as provided they haven’t turned brown, the tomatoes are safe to eat.

Take up your blighted tomatoes plants straight away and dispose of them, so you don’t help to spread the spores to your neighbour’s plots.

 According to ‘Garden Organic’ the stems and leaves of affected plants can be added to your compost heap, as the spores won’t survive on dead plant material, but do not compost any blighted fruit as the spores survive in the seeds.

Tomatoes ripening on my windowsill last year

Tomatoes ripening on my windowsill last year

.

I hope this information has been of use to you.

I will be back on Monday at 4pm.

I hope you have a good weekend.

What Do You Do With Hundreds Of Courgettes?

I always look forward to the first courgette of the year as it means summer really is here.  I get excited watching it grow, waiting for the day I can pick it:

SAM_2741 SAM_2742

When I do pick it, I nearly always use it in a lovely courgette, onion and cheese omelette and we always comment on how lovely it is to have the courgettes at last, as it seems such a long time since we last picked them the year before.

SAM_2629

The first couple of weeks are like a ‘courgette honeymoon’, as it’s so lovely to use them in our summer meals.

Every day I check for more courgettes on my plants and the plants keep producing them.  They just keep coming…

SAM_7075

…and coming…

SAM_2627

…and coming…

SAM_2246

…and coming!

In fact by mid-summer they seem to be laughing at me and ‘popping out’ overnight from where they have been hiding and every basket of goodies havested at the allotment has a least a couple of courgettes in:

SAM_7119 SAM_7097 SAM_3398 SAM_3968 SAM_2763

.

So what on earth can you do with all the courgettes that you pick?

.

I have read quite a few articles in books and magazines on this subject, but half the recipes I’ve read are not really realistic for everyday meals, or are really time consuming recipes (and I haven’t got too much time to cook the courgettes as I’m too busy picking them).

So I thought I would talk about what I do with the millions of courgettes that I grow:-

.

I use courgettes in everyday meals like pasta bolognaise, curries and chilli’s…

Pasta Bolognaise

Pasta Bolognaise

.

I also use them in pies like my Chicken, Courgette and Broccoli Pie.  You can find the recipe here.

Chicken, Courgette and Broccoli Pie

Chicken, Courgette and Broccoli Pie

.

Courgette Frittata’s are nice too.  The recipe is here.

Courgette Frittata

Courgette Frittata

.

I also add them in the Pasta / Pizza Sauce recipe I make.  After it is cooked I whizz the sauce up with my stick blender and no one ever knows and then I use my sauce as normal.  You can find my pasta / pizza sauce recipe here.

SAM_2440

.

Courgette chutney is one of my favourite chutneys.  I use this recipe, but replace the scallopini’s (patty pans) with courgettes.  It keeps for ages and is lovely served with cold meats and on sandwiches.

Courgette Chutney

Courgette Chutney

.

I also use courgettes to make savoury scones.  Cheese and courgette scones are absolutely delicious and can be frozen ready to pop into lunch boxes in the morning, before work and school.  The recipe for cheese and courgette scones is here.

Cheese and Courgette Scones

Cheese and Courgette Scones

.

One of the favourite things I make with courgettes is a Chocolate Courgette Tray Bake Cake.  No one ever knows the cake has courgettes in and this way the kids get a few extra vitamins, without realising it.  The recipe is here.

Chocolate Courgette Tray Bake Cake

Chocolate Courgette Tray Bake Cake

.

One other thing I do with my courgettes is to freeze them.  I have a bag of sliced courgettes and diced courgettes which I open freeze on trays before bagging up, so they don’t stick together.  I never blanch my courgettes first and they always seem to be ok for use over the winter.

I also bag up grated courgettes in the exact quantities ready to make the courgette cheese scones.  This way I can just take a bag out of the freezer the night before, to defrost ready to make the scones.

Courgettes sliced and diced ready for freezing

Courgettes sliced and diced ready for freezing

.

Finally, I use the courgettes in different soups.  A particularly nice soup is a Courgette, Potato and Cheese soup.  The recipe is below:

.

Courgette, Potato And Cheese Soup

.

500g potatoes, peeled and chopped into small pieces

1 pint of vegetable stock

1 kg of courgettes, washed and chopped into small pieces

1 bunch of spring onions, washed and sliced small

100g grated cheese

Salt and pepper

Ground nutmeg to serve.

.

Put the potatoes into a large pan, cover with the vegetable stock and bring it to the boil.  Simmer for 10 minutes.

Add the courgettes and simmer for a further 15 minutes, stirring occasionally.

SAM_7104 SAM_7105

Put a few spring onions aside to garnish the soup when you serve it.  Put the remaining spring onions in the pan and simmer for a further 5 minutes.

SAM_7103 SAM_7106

Add the cheese, stirring it until it has melted.

SAM_7107

Take the pan off the heat and use a stick blender or liquidiser to smooth the soup.

SAM_7108 SAM_7110

Return the pan to the heat and bring back to the boil, adding salt and pepper as required.

Serve the soup with a sprinkling of ground nutmeg and garnish with the remaining spring onions.

SAM_7112

.

I hope you enjoyed my blog today.  If you do anything different with your courgettes, it would be lovely to hear from you, so please leave a comment at the bottom of this post.

I’ll be back on Friday at 4pm.

Have a good week.

Holidays And A Good Harvest

It’s lovely to be back blogging again and I have so much to tell you, but equally I have had a lovely break.

At the beginning of the school holidays we went to Scarborough and had a wonderful time.  We stopped in a Travelodge again for six nights and it cost us just £230 for two adults and two children with breakfast included…..what a bargain!

We were so lucky with the weather, as it was really hot the week we were there and we spent every day on the beach.  The sea was so calm and clear, we could even see little fishes swimming around in it.  With the heat, it felt like we were abroad.

SAM_7007 OLYMPUS DIGITAL CAMERA OLYMPUS DIGITAL CAMERA OLYMPUS DIGITAL CAMERA OLYMPUS DIGITAL CAMERA SAM_7024

.

My friend at my allotment watered my polytunnel for me while I was away and he did a grand job, but I must say I was worried about my other crops as it was so hot and I had told him not to bother watering them, but they all seemed to be ok.  I was very pleased that I had planted my runner beans on top of a runner bean trench, that I had filled with old peelings, etc. during the winter, as this would certainly have helped to retain the moisture.

My Runnerbean Trench

My Runnerbean Trench

You can read how I made my runner bean trenches here.

.

Since we came back from our holiday I have been frantically harvesting all my crops at the allotment.  What a difference a year makes!  This time last year it was really wet and crops were struggling to grow, but this year is a bumper year for most things, though I have found that some things are still behind due to the cold spring we had e.g. pumpkins, butternut squashes and my early apples.

.

I’ve tried to remember to take photos of the things I harvested over the last couple of weeks, but I did keep forgetting.  So here are the few pictures that I did take:

SAM_7097 SAM_7099 SAM_7095 SAM_7096 SAM_7088 SAM_7089 SAM_7091 SAM_7076 SAM_7074 SAM_7069 SAM_7050 SAM_7049 SAM_7047 SAM_6906 OLYMPUS DIGITAL CAMERA OLYMPUS DIGITAL CAMERA

.

Remember the ‘cauliflower stomp’ I do before I plant my cauliflowers, to tread the ground down so it is firm (as this helps to stop cauliflowers from ‘blowing’)…. I thought I would show you proof that it works:

I'm very proud of my cauliflowers

I’m very proud of my cauliflowers

.

My runner beans have been doing well too.  I thought I would show you a picture of some of the beans the plants have produced as I think they are amazing.  One of them measured nearly 15 inches, which I know isn’t a prize winner, but I think it’s great for every day runner beans.  This variety is called ‘Enorma’, which is supposed to be one of the most successful exhibition runner beans, which has been given the R.H.S. Award of Merit.  I can see why, as they not only grow to a good length but they also taste delicious :

SAM_7156 SAM_7170

I don’t know if you remember, I planted Nasturtiums next to my runner bean plants, as blackflies prefer Nasturtiums to the beans.  My runner beans are showing no sign what so ever of blackflies, but the nasturtiums are covered.  This shows that companion planting really does work, as I really don’t need to spray my runner beans with any pesticides:

SAM_7155

.

My second early potatoes were ready when I got back from holiday, so I dug them up and brought them home.  Early potatoes won’t store as long as late varieties, so I make sure we eat them first.  As I couldn’t stay too long at my allotment, I brought them home and laid them on my table to dry out and then I put them in sacks ready to store until we use them:

SAM_7159

I noticed my early potatoes did have a lot of slug holes again, though they can still be used.  I wonder if there were so many slugs around in the soil after last year, that we are bound to see lots of holes?  I would love to hear how your potatoes are and if your earlies have also suffered from slug holes?

.

My flowers have been beautiful this year too and have the added bonus of attracting beneficial insects onto my plot:

SAM_7148 SAM_7140 SAM_7150 SAM_7151 SAM_7152 SAM_7149 SAM_7122 SAM_7123 SAM_7048 SAM_6907

It’s been a pleasure taking some cut flowers home too:

OLYMPUS DIGITAL CAMERA OLYMPUS DIGITAL CAMERA

.

The only job I have really done at the allotment over the last few weeks other than watering and picking, is to plant a few more lettuces in my polytunnel, to keep us from running out:

SAM_7137

I’m really amazed I managed to get them to fit in my polytunnel as it’s full to bursting point inside of it:

SAM_7138

.

I still have so much to share with you, but I think I better finish for today.

I really hope you have enjoyed reading my blog.  I will be back on Monday as usual.

What To Do In The Kitchen Garden In August

When I first started to grow vegetables I needed help to work out what I should be doing each month at my allotment.   I found that there was lots of bits of information scattered between internet sites and books and it used to take me a long time to find the information I actually needed.  I really needed it all to be in one place, so I could look it up easily, to establish what to do each month.

I therefore thought it would be useful to have this information altogether in one place. So for the benefit of UK gardeners, at the beginning of each month, I write a list of things to be done during the month and any useful information I can think of.

It is worth remembering that different parts of the UK have different weather conditions e.g. the last frost is expected earlier in the south than the north.

My Wildflower Patch

My Wildflower Patch

.

August:

August is usually the month of plenty.  You should come home with a good harvest at every trip to your plot.

Holidays are a problem in August as plants will usually need watering when you are away, especially in polytunnels and greenhouses.

SAM_2380

Vegetables to harvest:  Runner beans, french beans, cabbages, curly kale, courgettes and marrows, patty pans, spinach, swiss chard, cauliflowers, carrots, beetroot, sweetcorn, tomatoes, chillis, peppers, onions, potatoes, salad leaves and lettuces, radish, celery, cucumbers, spring onions, kohl rabis, globe artichokes, aubergines, swedes, turnips and the last of your peas, broad beans, garlic and shallots.

Herbs to harvest:  Parsley, basil, mint, chives, coriander, lavender, borage

Fruit to harvest:   Plums, greengages and yellowgages, peaches if you have them, tayberries, blueberries, late season cherries, the first blackberries, autumn raspberries, early apples and some pears and the last of your currants.

Blackberries

.

Vegetables and salads to sow:

Turnips, swiss chard, perpetual spinach, winter radish, kohl rabi, Japanese onions, spring cabbage, carrots, chicory, lettuces and salad leaves, rocket, spring onions.

SAM_6996

.

Things to plant:

Transplant your winter/spring cauliflowers into their final positions, plant new strawberry plants or as soon as your strawberry runners have rooted (approx. 3 or 4 weeks after pegging them down).

SAM_2629

.

Jobs to do in August:

Harvest crops regularly from your plot, especially runner beans, french beans and courgettes, which are notorious for growing at an amazing speed.

Hoe weekly, as this keeps all the weeds down as it stops weed seeds from becoming established and will weaken perennial weeds too.

Spread homemade compost around plants whilst the soil is moist, this will stop weed seeds germinating and it will also keep the moisture in.

Dry out garlic, onions and any remaining shallots by either lifting them and laying them in the sun or by spreading them out onto wire racks to dry.

My garlic drying

My garlic drying

.

Pinch out the top of climbing french beans and runner beans, as this prevents them becoming top heavy and helps the plants bush out below.

Water bean plants regularly in dry weather.

Pinch off the top of outdoor tomatoes once four or five trusses have developed as this will concentrate the plants energy into producing the fruit below.  Continue to nip off the side shoots that keep appearing between the main stem and leaf stems.  Keep feeding weekly and checking for blight.

Continue tying up tomatoes, cucumbers and peppers as the fruits can become heavy as they develop.

Earth up and support spring broccoli and brussels as they grow to help support them during winter winds.

Sow green manures as beds become empty.

Keep feeding pumpkins and squashes.

SAM_2572

Keep propagating strawberries from runners.

Summer prune gooseberries and currants once all the fruit has been picked.

Prune summer fruiting raspberries by cutting all the canes that had fruit on this year.  Tie in all the new canes.

Continue to tie in non-fruiting blackberries canes.

Prop up branches of fruit trees that are being weighed down by fruit.

Summer prune espaliers, cordons and other fan trained fruit trees.

Continue pruning the side shoots of grapevines and removing some of the foliage so the fruit can ripen in the sun.

SAM_2512

.

August’s Pests And Diseases:

Carrot flies are laying their eggs again this month.  Protect with fleece or environmesh.

Be vigilant and pick off caterpillars on brassica leaves if you find them.

Slugs and snails are still a nuisance so they still need controlling in whatever method you choose.

A Slug Eating My Pumpkin

Powdery mildews can be a problem in dry, warm summers and can be found on peas, courgettes, squashes and cucumbers.

  Make sure you water regularly.  A fungicide spray may help but as an organic gardener I choose not to use this.

Check for blackfly on runner beans, french beans, globe artichokes etc.  I choose to rub them off between my finger and thumb, but if you are a bit squeamish use a soft soap.

Remove fruit infected by brown rot on apples, pears, plums and quinces and destroy it.

‘Blight On Tomatoes’

Watch out for late blight on your tomatoes and potatoes.

Water tomatoes regularly so they don’t succumb to blossom end rot or splitting.  Ensure you water them at the base of the plant to avoid ‘ghost spot’ (pale rings on their skins that sometimes turn yellow or orange, though the fruit can still be eaten).

A tomato with ‘Ghost Spot’

.

I hope you will find the above information helpful.

I will be back on Friday at 4pm.

Thank you for reading my blog today.