Archives

A Chicken and Parsnip Stew & A Fruit Loaf Recipe

I thought I would start today by letting you know that Judy, (our lovely rescue dog) has made a full recovery after her illness last week and she is back to her normal, cheeky ways.

SAM_2558

We all absolutely love Judy to bits and I am so glad we didn’t give up on her like the previous three owners did.  Though I have got to be honest, when our previous ‘dog behavourist’ told us she was untrainable last February, we were very close to giving up….she had so many problems e.g. barked all the time at home, barked and lunged at dogs, people, cars, bikes, lorries, washing machine, birds etc. etc.

Nearly a year later, she still has one or two things she doesn’t like, but she is getting so much better as time goes by, thanks to our wonderful dog trainer Steven Havers.

.

Curtains for my daughter:

.

IMG_2733

I’m not sure if you remember a couple of months ago I decorated my youngest daughter’s bedroom.  I struggled to find any ready made curtains that she liked, to finish off the bedroom.  So in desparation I took her to a material shop and she found some fabric she liked, so I bought it promising to make her curtains after Christmas.

SAM_2508

The curtain material and new furniture in her bedroom was a present for her birthday and Christmas, but because of this I was a bit concerned that she wasn’t going to have many presents to actually open on Christmas day.  So during December, while she was at school I worked really hard to make the curtains so I could wrap them up for her to open on Christmas day.

She was very surprised when she unwrapped them and I must say I am very proud of them now they are up:

IMG_2909

I also had a bit of material left so I managed to make a couple of cushions for her too, which I also wrapped up for her to open on Christmas day:

IMG_3037

.

Over the Christmas holidays I decided it was time to catch up with one or two jobs that I had been putting off…..

  I started by clearing our loft and it was amazing how much rubbish we had up there.  I have since sold one or two bits on ebay and given away some other things…..but most of it was thrown away.  But the attic looks better now.

IMG_2959 IMG_2956

I also went through my bills folder…..again there was a lot in there that I didn’t need to keep.  Myself and Mr Thrift looked at every bill we pay to see if we could possibly reduce it….unfortunately we are quite ‘bill savvy’ so we didn’t manage to make any savings, but it’s good to check every so often.

IMG_2960

.

.

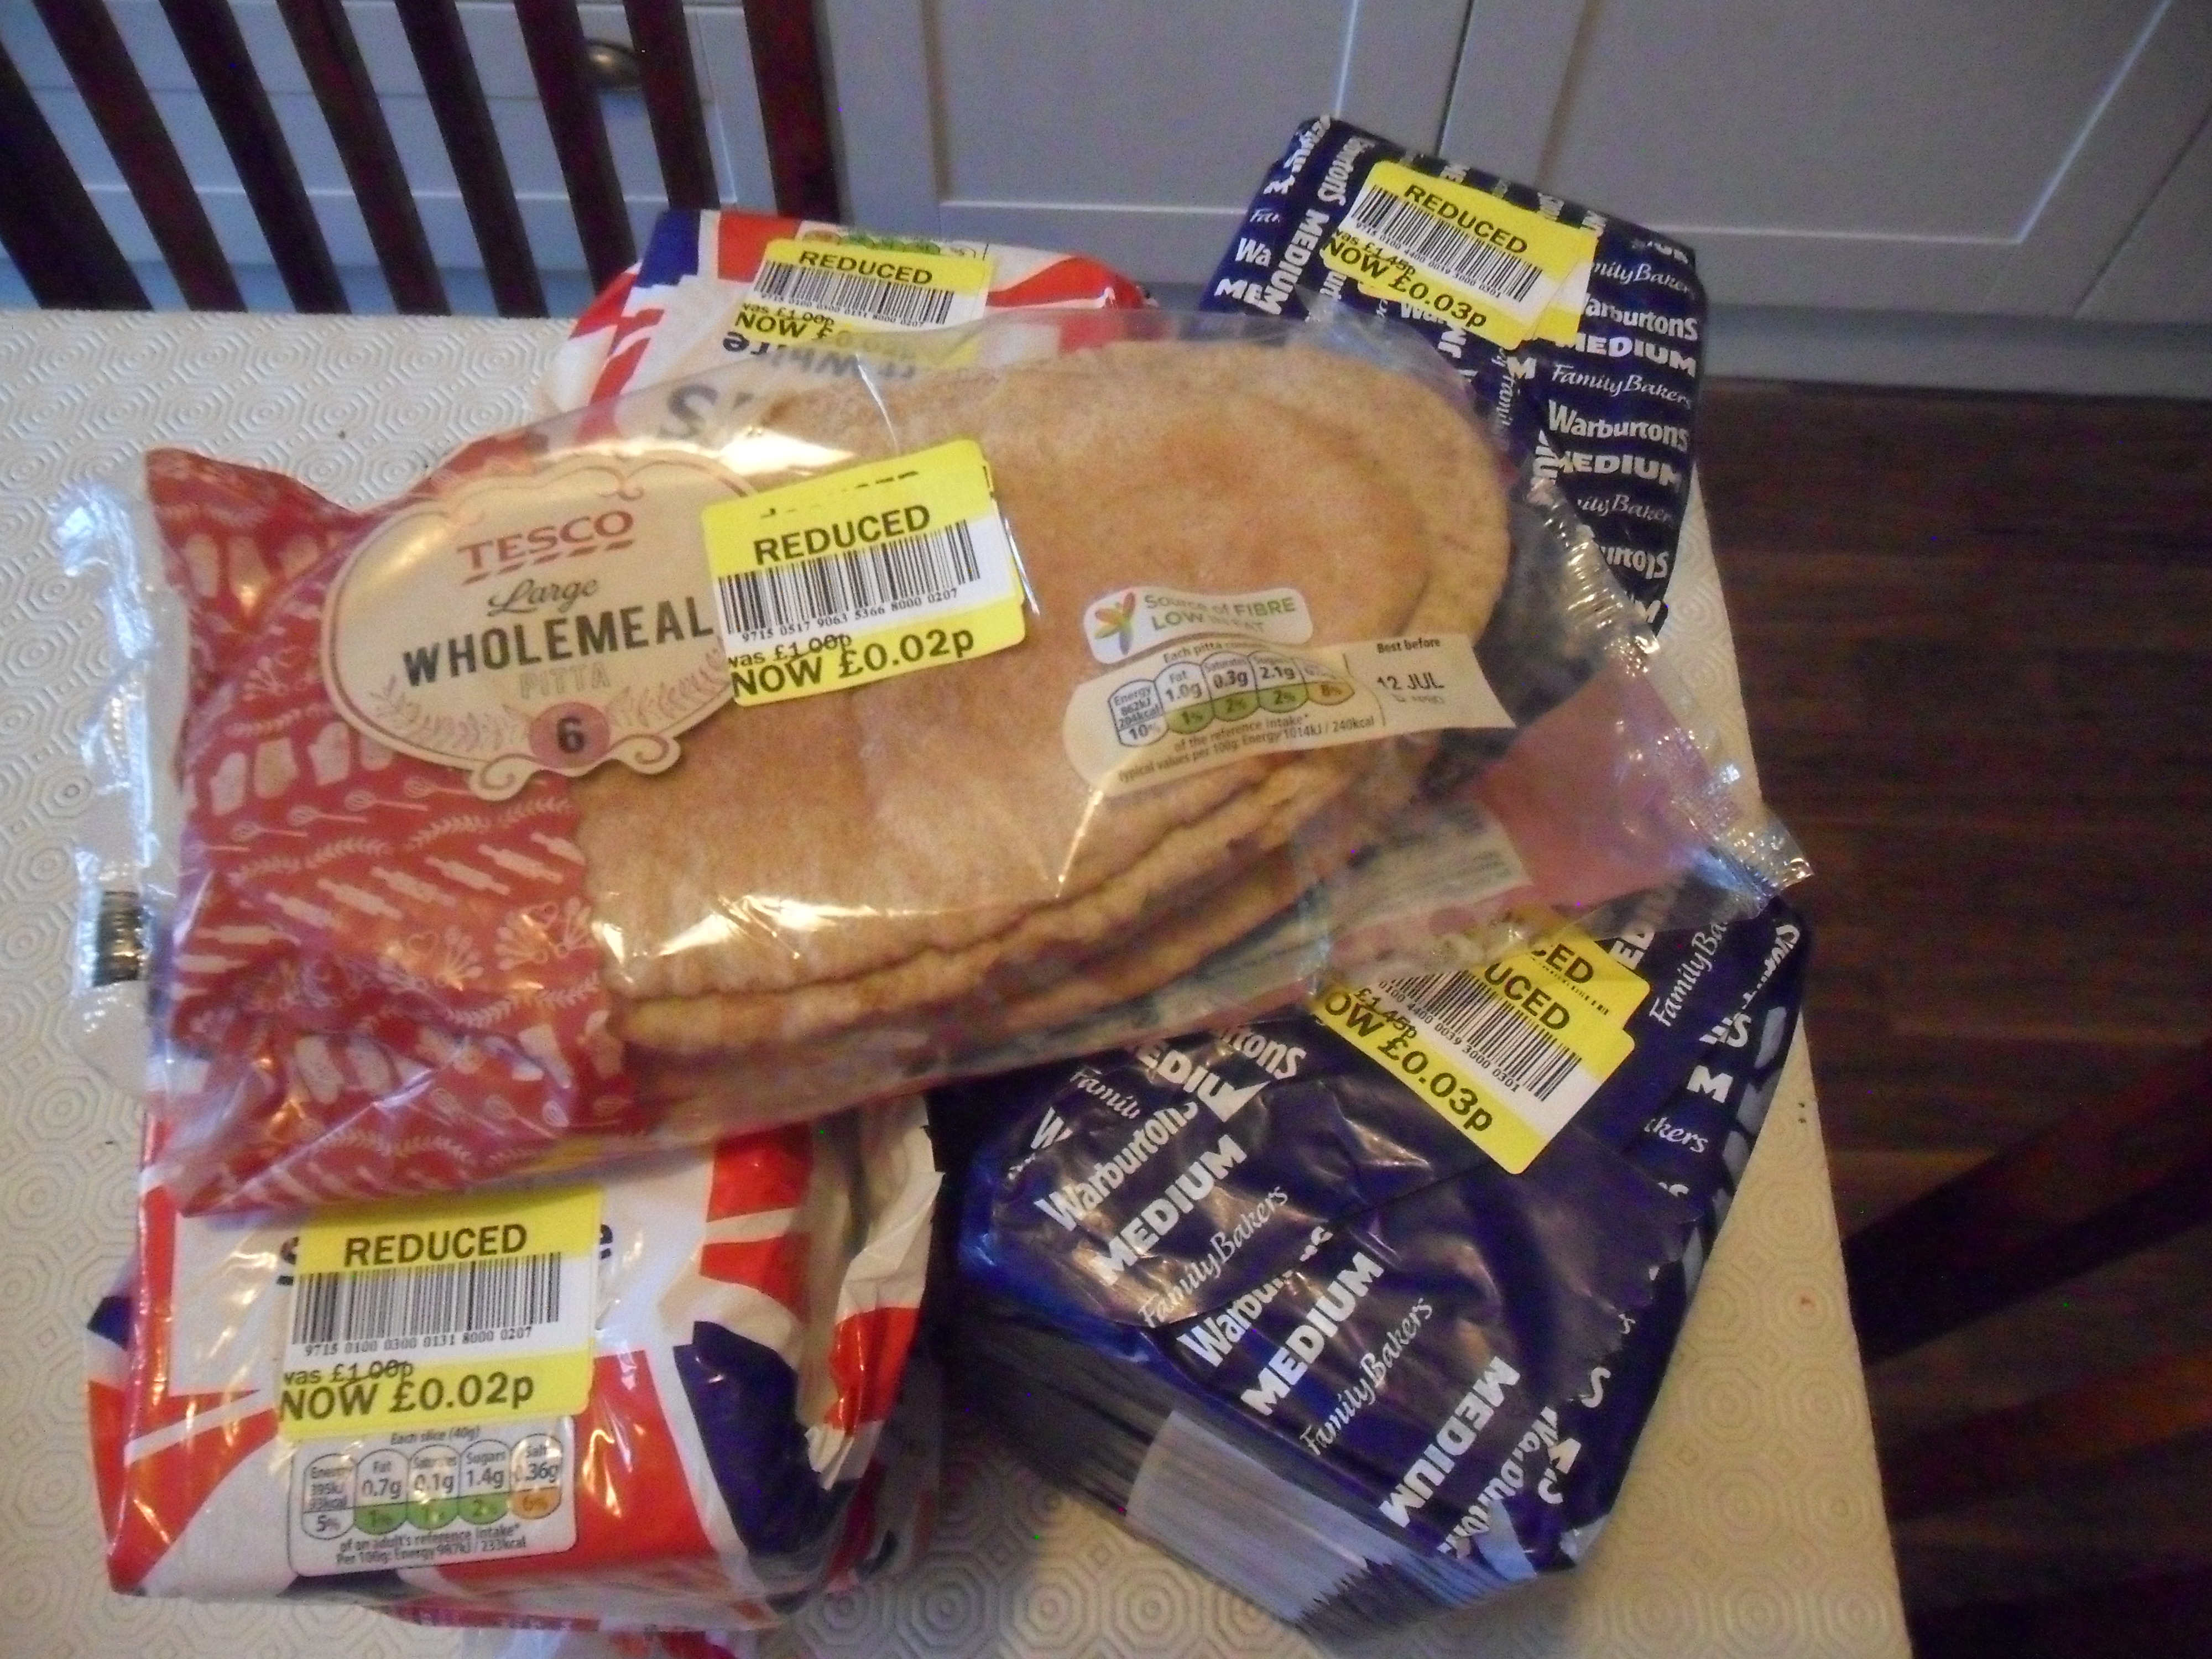
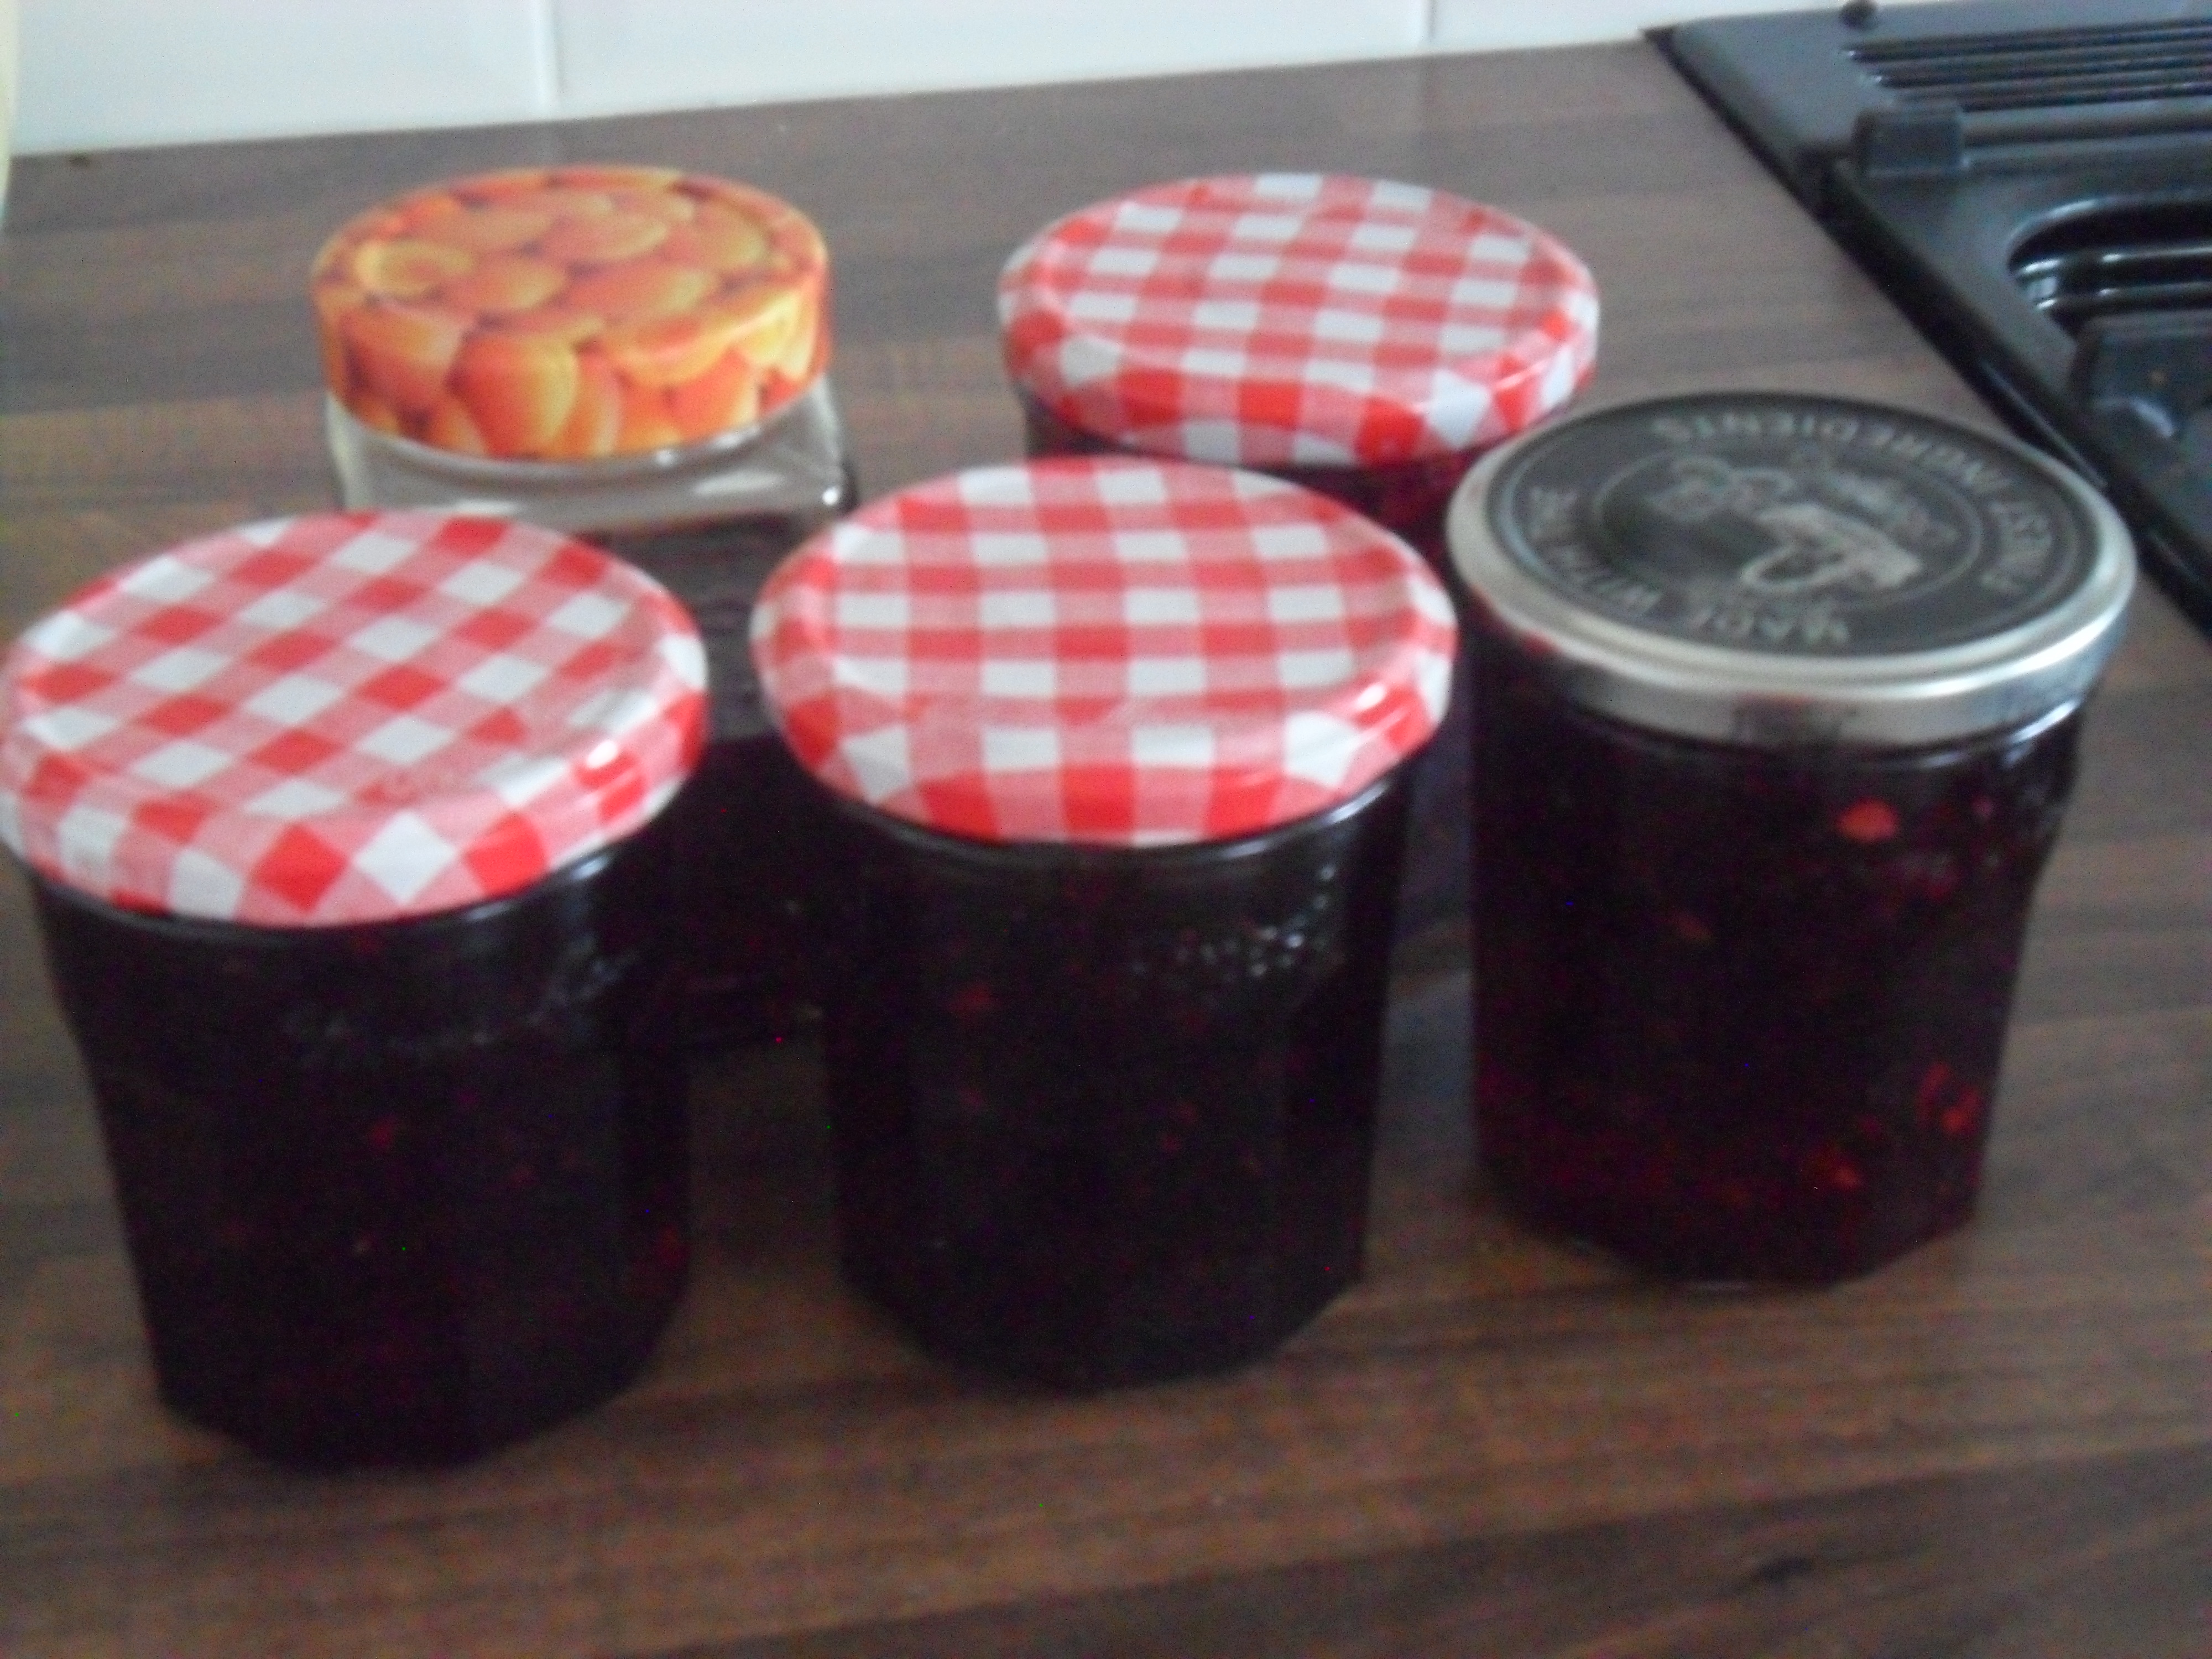
Over the Christmas period myself and Mr Thrift surprisingly managed to buy lots of ‘whoopsies’ ….for some reason we seemed to be in the supermarket when they reduced their produce to ridicuously low prices.  So over Christmas I froze whatever I could and my freezers were bursting:

SAM_2520 SAM_2521 SAM_2523 SAM_2525 SAM_2526

The last photo shows the ready cooked beetroot that was reduced.  My dad sometimes buys this and pickles it, but as I already have pickled beetroot in my pantry I decided to cut it up and freeze it on a tray.  When it was frozen I put it in a bag and this way it is easy to take a few slices out at a time to defrost for sandwiches.

I also used the reduced parsnips and Chicken drumsticks in a chicken and parsnip stew which I cooked in my slow cooker.  By cooking it in the slow cooker you find that the chicken ‘falls off’ the bones easily and tastes so moist:

.

Chicken and Parsnip Stew:

.

6-8 chicken drumsticks or thighs

2 onions peeled and roughly chopped

4 -6 medium parsnips peeled and chopped into chunks

Hot Chicken stock to cover

.

Put all the ingredients into a slow cooker making sure the hot stock covers the ingredients.

SAM_2532

Cook on ‘low’ for approximately 8 hours

Serve with vegetables of your choice:

SAM_2534

.

.

This week…

This week at home I decided to use up the mixed fruit that I had left over in my pantry.  I decided to make a fruit loaf (which I absolutely love).  It’s really easy to make in a bread maker and I used my bread slicer to cut it into nice thin slices.  This loaf freezes well so you can take a couple of slices out to defrost when required:

.

A Fruit Loaf Recipe:

1 teaspoon of Fast Action Dried Yeast

400g Strong White Flour

2 teaspoon Granulated Sugar

75g margarine or butter

½ teaspoon Salt

1 teaspoon Cinnamon

1 teaspoon Mixed Spice

2 Eggs

110ml Water

110ml Milk

300g Mixed Dried Fruit


Add all the above ingredients into a breadmaker EXCEPT the mixed fruit.

SAM_2561

Set your breadmaker to a ‘Basic bake loaf’ with raisens and add the mixed fruit when the breadmaker tells you too (that is approx. 47 mins after the start in mine but you will need to refer to your own manual).

SAM_2562 SAM_2568

Enjoy it!

IMG_2995

.

.

In the garden this week:

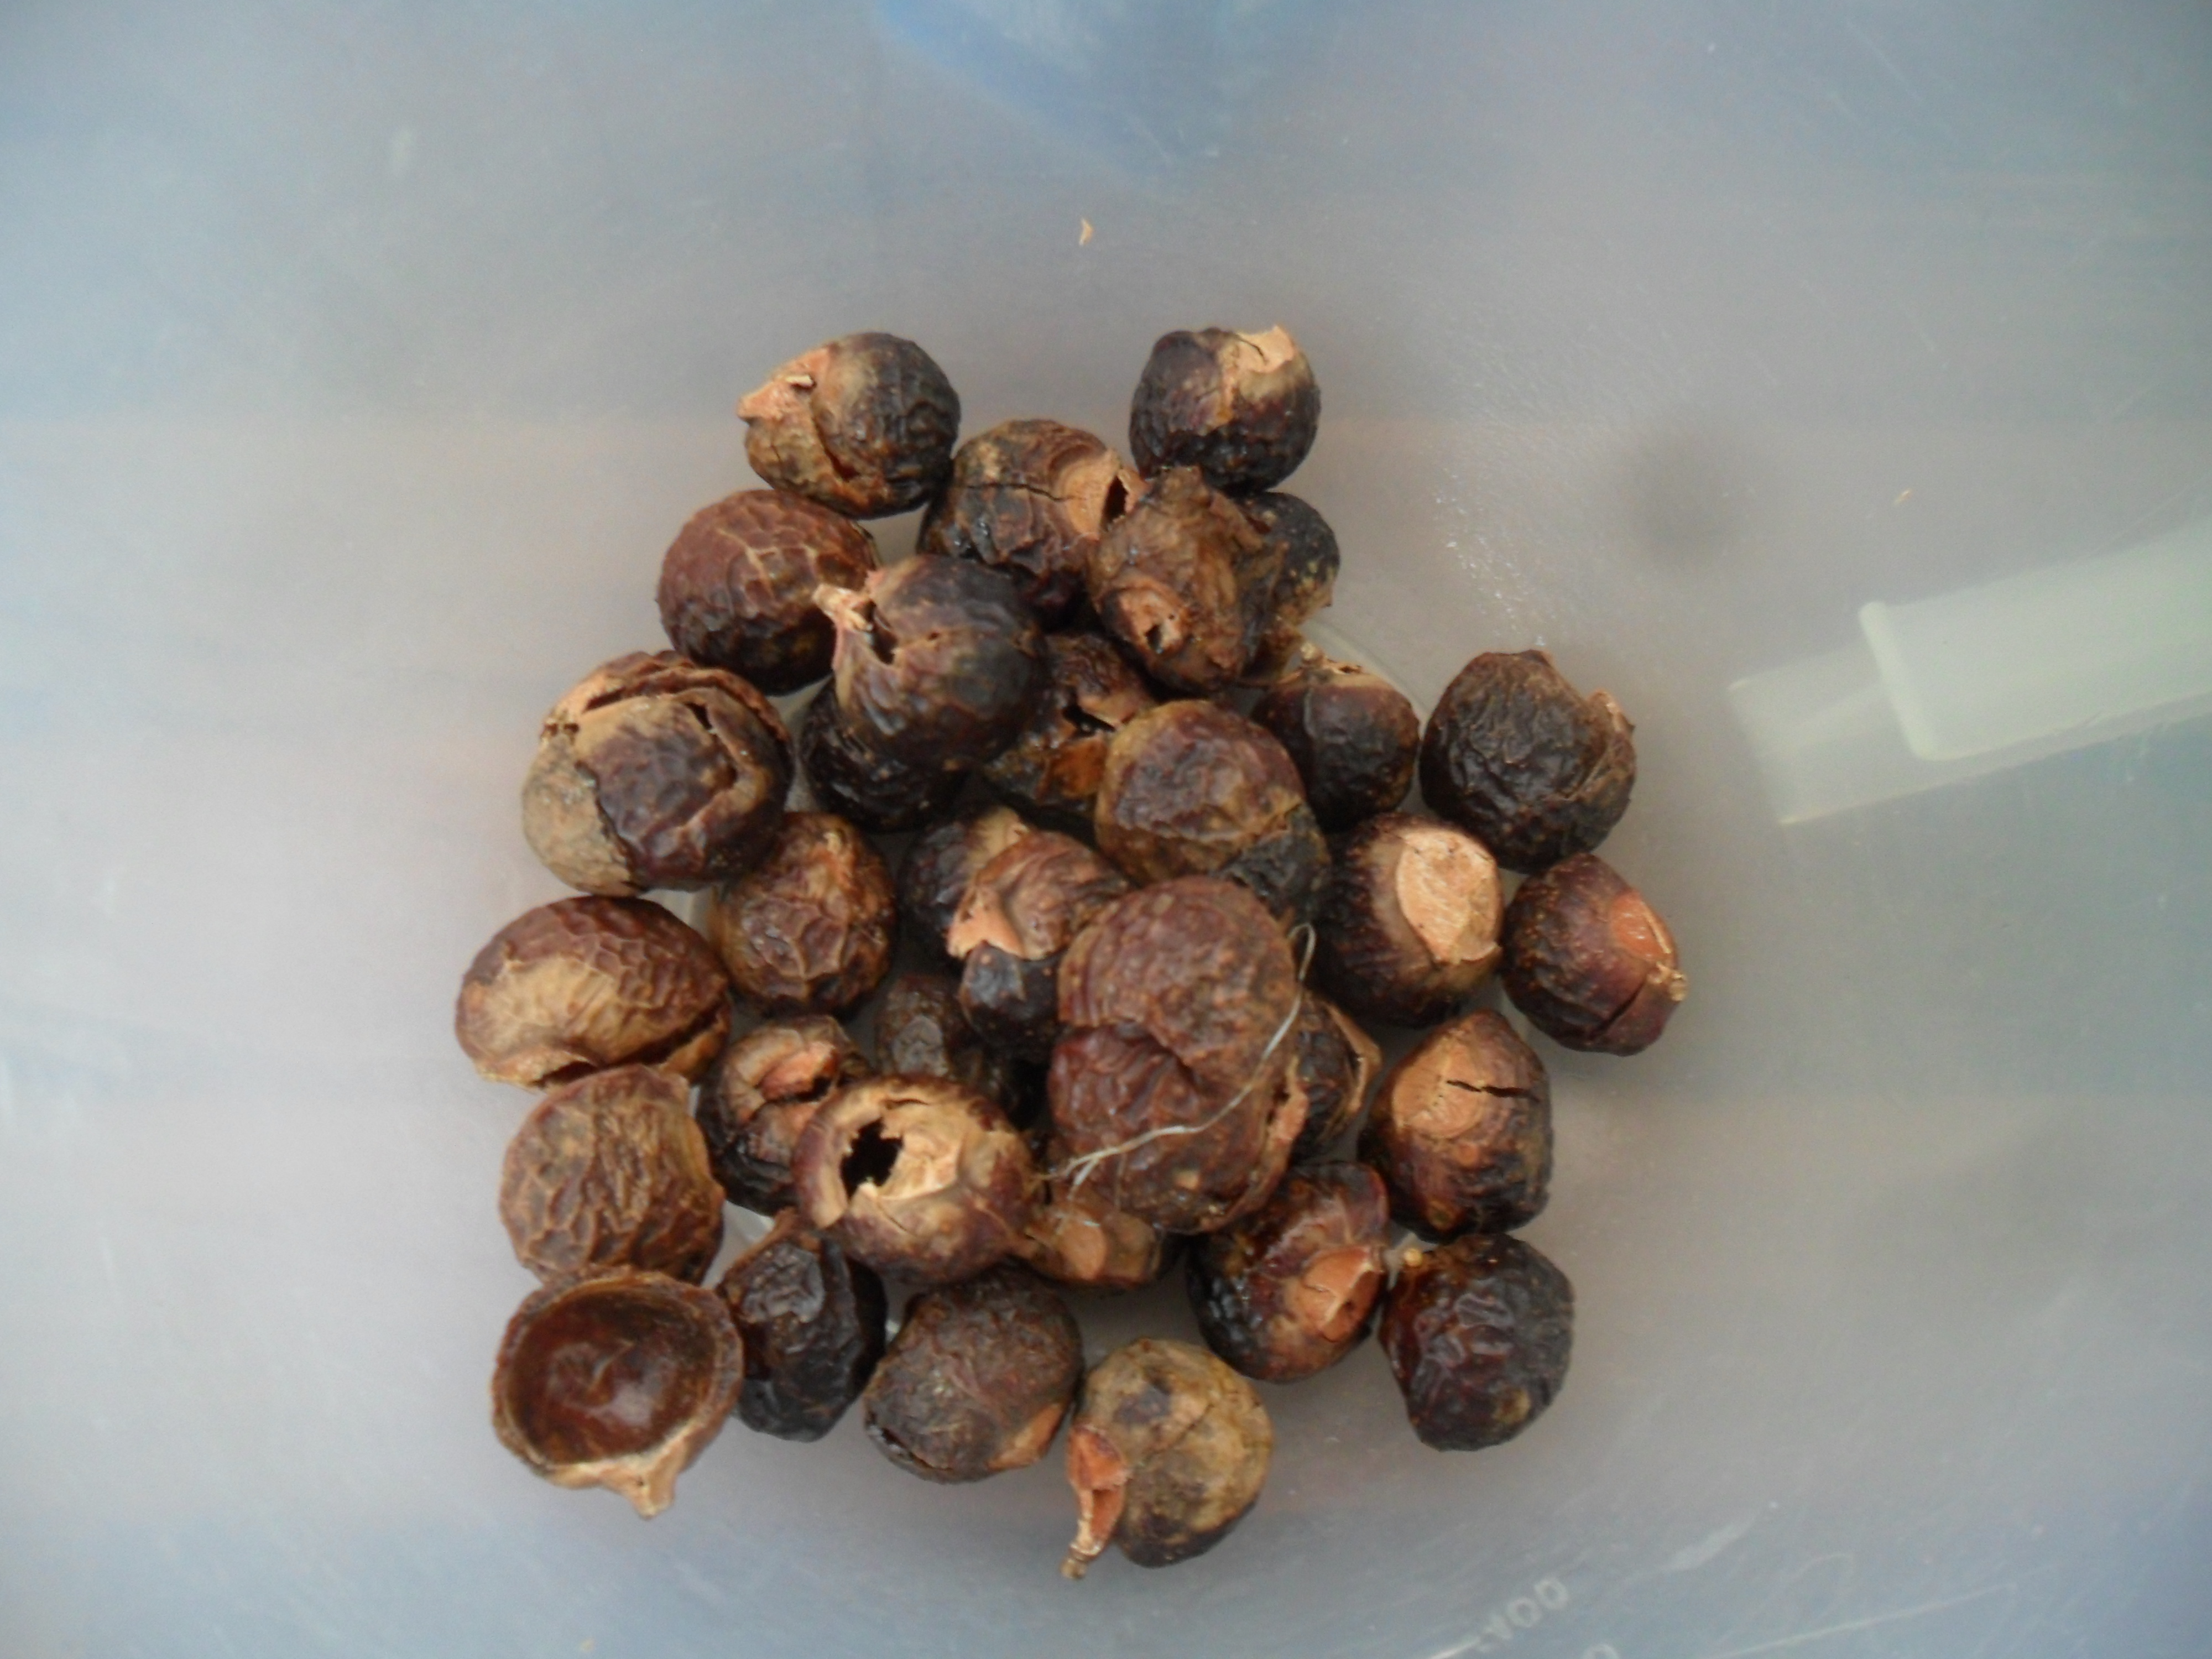
This week in the garden I dug up my parsnips.  This is the first time I have grown a crop in this area so I wasn’t sure what they would be like….but they weren’t too bad (though most of them were a lot smaller than the ones I used to grow at the allotment -probably due to the condition of my soil):

IMG_2994 IMG_2993

Parsnips next to a 30 cm ruler

Unfortunately some of the parsnips suffered from parsnip canker:

SAM_2557

.

“Parsnip Canker is a fungus that causes orange, brown, purple or black coloured rot, which usually starts at the top of the root.

I have read that the fungus is caused by drought, over-rich soil or damage to the crown, BUT I have also read that it is worse in wet, pooly drained soils as well”

.

SAM_2559

As you can see in my photo above, if the canker isn’t too bad the parsnip under the skin is usually fine to cook and eat.

.

To avoid canker:

  • Rotate your crops
  • Don’t manure your soil before growing parsnips
  • Improve your drainage
  • Grow resistant varieties such as ‘Albion’or Hollow Crown

.

As I had too many parsnips to eat in one go, I peeled and chopped them and then froze them on a tray (without blanching them).  When they were frozen I took them off the tray and bagged them up.

When I next cook a Sunday lunch I will roast them from frozen.

SAM_2560

.

.

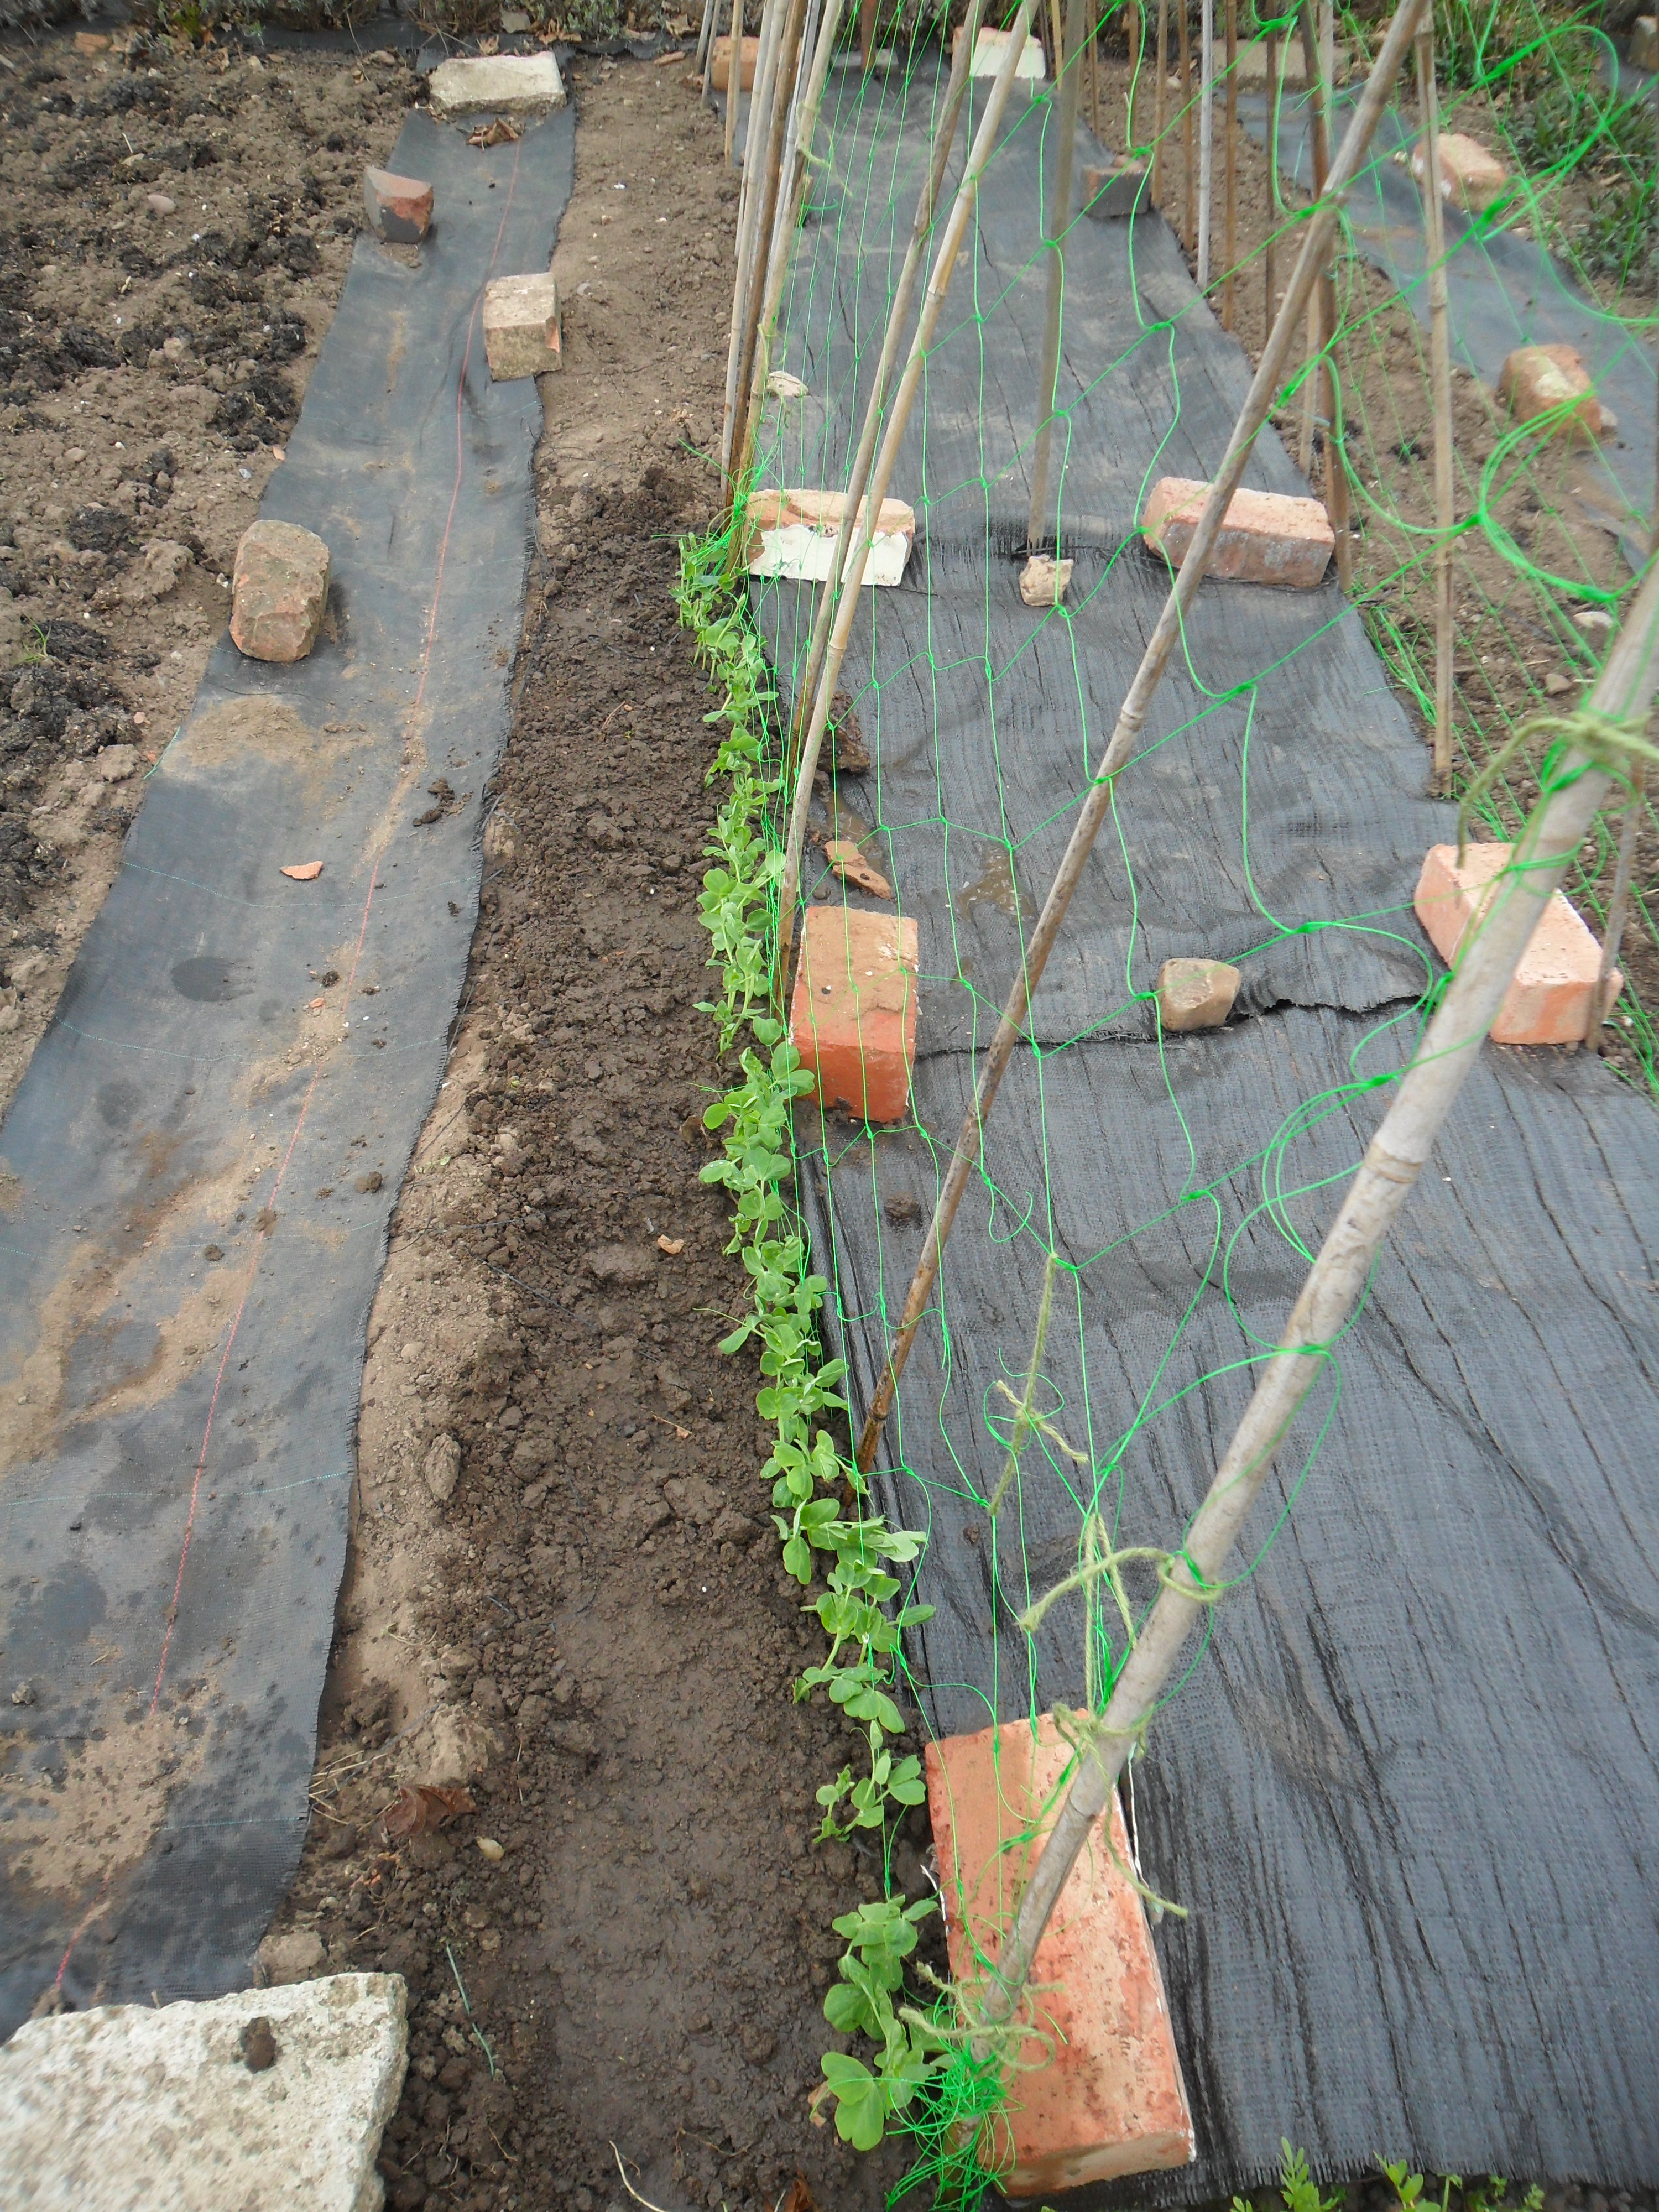
Finally this week I brought my seed potatoes.  I chose my usual ‘Marfona’ which is a second early and ‘Desiree’ which is a red main crop potato.  I also brought some ‘picasso’ to plant in my mother in laws garden, which are an early main crop.

All the potatoes are now ‘chitting’ in our bedroom…..very romantic!

IMG_3039

That’s it for this week.

  Thank you for reading my blog today, I will be back next Friday as usual.

Have a good week!


A Frugal Week And A Mixed Fruit Jelly Recipe

To start with I thought I would mention a report that I read this week from the Soil Association, which I thought was interesting:

My allotment this week

My allotment this week

It states that “new research has found that there are significant differences between organic and non-organic food.  It states that new research from Newcastle University, published on Tuesday 15 July, in the British Journal of Nutrition, has shown that organic crops and crop-based foods – including fruit, vegetables and cereals – are up to 60% higher in a number of key antioxidants than their non-organic counterparts”

A rather large cucmber from my polytunnel

A rather large cucumber from my polytunnel

“In other countries there has long been much higher levels of support and acceptance of the benefits of organic food and farming: we hope these findings will bring the UK in line with the rest of Europe, when it comes to both attitudes to organic food and support for organic farming.”

I have got to say, this is something I have suspected for a long time, especially as organically grown fruit and vegetables taste much nicer too.

If you are interested in the report you can read it here.

From my allotment this week

From my allotment this week

.

It’s been a very frugal week in the ‘Thrift household this week.  I am still picking as much as possible from my allotment….fruit, peas, salads, etc. and now my courgettes plants have started to produce too.  Mr Thrift is looking forward to his first ‘cheesy courgette scones’ of the year:

SAM_9490

I also picked my first shallots this week and pickled a couple of jars of them.  As a family, we love pickled onions.

When I pickle onions, I don’t use a salt water brine as I think this softens the onions.  I use a method that my dad taught me – I cover them in only salt overnight, to draw the water out.  This gives a nice ‘bite’ to your pickled onions.  You can see my dad’s method here if you are interested.

SAM_9511 SAM_9517 SAM_9525

I’ve also been using up leftovers from my freezer.

I made a ‘leftover Chicken and veg pie’, which is just leftover chicken and leftover vegetables mixed together in a white sauce and topped with pastry.  I love using leftovers to make a new meal.

SAM_9475 SAM_9476

When I make a pastry I always make double and freeze it ready for next time.

Also, after I have put the top on my pie I always have a bit of spare pastry, so I roll it out and put a bit of jam in it and make a small jam pasty for a treat.  My youngest daughter loves them and they can be eaten hot or cold.

SAM_9471 SAM_9472 SAM_9474

.

I have also been making some more laundry liquid using soap flakes, borax substitue and soda crystals this week.  You can find the recipe here if you are interested.  It takes just 10-15 minutes to make and it lasts for weeks.

I find it is great for every day washing and the last time I worked it out a few months ago, it cost me approximately £1.75 to make…. I managed to get 71 washes out of it, so this worked out at a staggering 2.5p per wash….the supermarkets can’t beat that!

SAM_9520

.

As I write today, I am also in the middle of making some more dishwasher liquid out of soap nuts as I find this saves a lot of money too (though I do still use a supermarket dishwasher tablet every third wash to stop the build up of grease in my dishwasher).

You can read how I make the dishwasher liquid here.

SAM_9521 SAM_9523

.

The final frugal thing I have to tell you about, was a very frugal find at our local Tesco store.  We popped in for milk and we found a crate of bread that was ‘whoopsied’ (yellow stickered).  The dates were two days away on the Warburtons bread and one day away for the Hovis bread and they were selling them off for 3 pence and 2 pence, so we bought some for the freezer, together with some wholemeal pitta bread for just  2 pence too!

It’s nice to make my own bread but at those prices I couldn’t resist buying it!

SAM_9513

It was quite strange as there was no one around but us looking at the bread and we felt like we were naughty teenagers gigling as we put it through the self-scan checkouts, lol.

.

This week at my allotment I have been picking worcester berries and dessert gooseberries (which look very similar) and white currants, red currants and a few blueberries.

SAM_9484

The blueberries were eaten by my eldest daughter within two minutes of bringing them home, however I used the rest of the fruit to make a mixed fruit jelly.

Jellies are easy to make but they do take longer than jams, as you need to let them strain over night.  I think it is worth the effort as it tastes delicious and it has no seeds in it.

.

A Mixed fruit Jelly Recipe

SAM_9487 SAM_9488 SAM_9486 SAM_9485

.

First I top and tailed the gooseberries and worcester berries and removed the stalks from the currants (I use a fork for this as it’s easier this way):

SAM_9493

I put all the fruit into my maslin pan (together with some frozen currants that I had leftover from last year).  I covered half the fruit with water and then brought the pan to the boil and simmered the fruit until it was soft (approx 15-20 mins).

SAM_9494SAM_9495

Meanwhile,  bring a pan of water to the boil and put some muslin or a tea towel in to it and boil for 3 minutes.  Take it out of the water and wring it out and then leave to cool.

Tip the fruit into the muslin.  I find it easier to put the muslin over a colander that is already over a bowl, as it’s easier to pour the fruit into it.

SAM_9496

I then I tie the muslin up over the bowl so the juice can drip down and I remove the colander.  MAKE SURE YOU DON’T SQUEEZE THE MUSLIM OR YOUR JELLY WILL BE CLOUDY.

Leave it to drip overnight or for approximately 8 hours.

SAM_9497

In the morning I measure the liquid and poor it back in my clean maslin pan.  I also put some clean saucers into my freezer to test the setting point of the jelly later on.

For every pint of liquid I have, I add one pound of normal granulated sugar and 2 tablespoons of lemon juice into the pan.

I then stir the mix over a very low heat until all the sugar has melted and there are no sugar chystals on the back of my spoon:

SAM_9498

I then boil the syrup hard stirring all the time until setting point is reached

SAM_9499

(To check the setting point has been reached, put a small drop of jam on one of the side plates from the freezer.  After a few moments, push the jelly with your finger and if it wrinkles it’s ready.  If it doesn’t wrinkle, continue boiling hard for another five minutes and test again).

SAM_6824

When the setting point is reached, take the pan off the heat and leave it for fifteen minutes.  If there is scum on your jelly, you can skim it off, but I just stir in a small knob of butter which does the same job.

SAM_9500

Sterilise some jam jars (gas mark 4 for 5 minutes)

Pour the jam into the jars and seal with lids.  I use the jars that have a sealable lid (i.e. the jars that jam is sold in, at the supermarket).  This way you don’t need to worry about wax discs to create a seal.  As the jam cools, the lids ‘pop’ and make you jump.

SAM_9501

Enjoy!

.

Thank you for reading my blog today.

I will be back next Friday as usual.

Mouldy Banana’s And Beneficial Insects

To begin with, I thought I’d show you my first broad beans of the season.  These are an over-wintering variety that I sowed in pots at the beginning of November.  As the weather was dreadful, I didn’t plant them out until February and to be honest I nearly put them in the compost bin as they were so ‘leggy’ by then.  However, I had room in my polytunnel so I put them in there, tying each one to a cane to try and stand them up.  I didn’t think they would come to anything and I have been proved wrong, so I am very pleased.

SAM_6591

The above broad beans went straight down to my father-in-law, as he absolutely loves them.  He has been very poorly recently and has only just come out of hospital again, so this put a smile on his face.

.

SAM_6568

My strawberries are finally growing well, even though they are slightly later than usual, due to the cold spring we have had.  I always lay straw around my strawberries, as this stops the strawberries from rotting when they lay on wet ground and it also helps to stop annual weeds from germinating around them.

Another job I do is to put a net over them, or the greedy birds will eat all of them.

SAM_6581

.

A long time ago, I was told I wasted space at my allotment by growing too many flowers. Yes I agree, if I didn’t grow so many flowers I would have more space for vegetable plants. However, I strongly believe I would also have fewer vegetables to harvest, as there would be less insects around to pollinate my crops.

You only needed to stand and watch my wild flower patch last year, to see the buzz of activity there. It was absolutely amazing to watch and took my breath away every time I stopped and stared.

As an organic gardener, I try really hard to encourage beneficial insects into my plot , as they keep the ‘bad bugs’ at bay. As an example, if you watch blackflies, within a few days you will see the ladybirds having a feast on them. I don’t use pesticides as these will not only kill the ‘bad’ insects, but it will also kill the ‘good’ ones too.

I try to let nature do the work for me.

SAM_3153

I try really hard to attract bees onto my plot from early spring until late autumn, by planting a continuous range of flowers. As an example, I stood amongst my poached egg plants for less than ten seconds a couple of days ago and managed to easily take photos of four separate bees:

SAM_6589 SAM_6588 SAM_6587

 After the success of last years wildflower patch, I decided to have another go.  Last month I sowed the seeds and they have started to come up now, together with seeds that self sowed themself from last year.

SAM_6584

The plants that are growing from last years seeds are far more advanced than the seeds I sowed last month and I have even got a flower on one of them:

Phacelia

Phacelia

 If this years display is half as good as last years, I will be happy.  Below are a few photo’s of last years patch:

SAM_3641 SAM_3950 SAM_4144 SAM_3640 SAM_4143 SAM_3642

.

Two Mouldy Banana’s:

If you have been reading my blog for a while, you will know that I hate waste.  However, there is always something that you find lurking at the back of the fridge or the bottom of the fruit bowl that you have to think hard about how you can use it.  So what on earth could you do with two mouldy, black bananas’ that only look fit for the compost bin?….

SAM_6528

…..I made a lovely banana cake:

.

Banana cake

2 very ripe bananas’s mashed

170g caster sugar

170g self-rising flour

170g soft margarine

3 eggs

Half a teaspoon of vanilla essence

1 teaspoon of baking powder

Plus extra margarine and flour for lining the tin

A little icing sugar for dusting.

.

Preheat your oven to gas 3 / 325F / 170C

Line a medium loaf tin by greasing the tin with margarine and dusting with flour

SAM_6530

Put all the ingredients into a bowl

SAM_6531

Mix until they are all combined and pour into your loaf tin.

SAM_6532

Bake for approximately 1 hour. 

(Test the cake is cooked by inserting a skewer into the cake and if it comes out clean then it is cooked).

Dust with icing sugar when cool.

SAM_6533

Enjoy!

SAM_6535

Thank you for reading my blog today.

I will be back on Friday at approximately 4pm.


Onion Sets, Peas And Watercress

There has been some lovely warm weather this week and I have been working at my allotment in short sleeves at last.

On Tuesday I noticed the temperature in my polytunnel rose to nearly 37C, even with both doors wide open.

It was lovely to see that bees, butterflies and other insects were coming into the polytunnel, attracted by the mizuna that I can’t bring myself to dig up yet, as it is so beautiful.

Mizuna in flower

Mizuna in flower

.

I spent this week planting my onion sets.  I started my onion sets in modules this year, as the soil was in no fit state to plant them direct last month.  I was very pleased with the result as most of them had started to sprout:

SAM_6179

I am hoping this will be a one-off though, as it takes extra time to plant the sets in modules and obviously uses extra compost.  I planted 416 onions all in all, including 80 red onions and I’ve got to say my back did ache a bit afterwards.

This year is really an experimental year with my onions, as I had a problems last year with the allium leaf miner, especially on my overwintering onions.

In autumn, I planted seed sown onions instead of sets (in the hope they would be stronger plants) and covered them in environmesh.  I have also planted summer onions that I sowed in January (again, in the hope they will be stronger plants) and two different varieties of onion sets, in the hope that one may grow stronger than the other.

The two varieties of onions sets I planted this year are ‘Turbo’ and ‘Sturon’.

SAM_6180

The allium leaf miner is a pest that was only detected in Britain in 2002.  It has been spreading rapidly since and spread to many places in the Midlands for the first time last year and unfortunately found my allotment site too.

The allium leaf miner isn’t choosy which allium it attacks.  Alliums include onions, leeks, garlic and shallots.

You can find details of the allium leaf miner here.

.

I have also been planting peas again this week.  I have planted some mangetout as my youngest daughter absolutely loves them (though she won’t eat peas, which is very strange), so I would be in trouble if I didn’t grow them. I grew them in guttering as I find I have a better germination rate this way.  You can read how I grow my peas in guttering here.

SAM_6107

I also grow a tall, climbing variety called ‘Pea shooter’, which are really sweet, large peas.  The peas were expensive to buy, so I saved some seeds last year and I am pleased to say that they germinated really well.  I made a frame out of canes tied together and draped pea and bean netting over it, so the peas will have something to climb up onto.

There is nothing like opening your first homegrown pea pod straight from the plant and eating the wonderful, sweet tasting peas inside.  It is something I look forward to every year.

My tall, climbing peas

My tall, climbing peas

As the weather is warming nicely, I decided to sow my watercress.  Eric (the gentleman who had the fourth plot before me) always grew a really good crop of watercress in a great big black pot, so last year I decided to give it a try and it worked really well.  I just sprinkled the seeds and covered them with a small amount of compost and I  just made sure I didn’t let the compost dry out.  This was the result:

My watercress in 2012

My watercress in 2012

When it began to flower, I left it to set seed and I was surprised to get a second growth of useable watercress.

This year I replaced the top inch of compost with new compost and sowed new seed.  I covered the moist compost with glass to help the seeds to germinate.

I am looking forward to the results.

SAM_6221

.

This week I have been working on this years wildflower patch, as last year I was really pleased with it.

I have been raking the area to produce a fine tilth (a fine crumbly soil) and yesterday, I mixed the wildflower seeds with horticultural silver sand and scattered it over the area, avoiding the foxgloves I had transplanted in the patch.  I raked the seeds in, covered them with net to protect them from the birds and hoped the forcasted rain would come.

SAM_6220

If the patch is only half as good as last years, then I will be very pleased:

SAM_2726

I noticed my comfrey patch is growing well now.

I use comfrey a lot at my allotment.  Comfrey is high in potash, as the deep roots of the Comfrey plants absorb the potassium from the subsoil. Therefore it’s great for using on most fruits and flowers, including tomato plants.

I add comfrey to my compost bins, as it is a great ‘free’ activator and I use it as a mulch around plants.  I also have a water butt which I use solely for ‘comfrey tea’, which I use to feed certain plants.  You can read how I make it on one of my very first posts, here.

SAM_6222

.

I thought I’d mention a few of things I have harvested this week too.

Over winter, we have been eating the cabbages I sowed last summer.  The variety is ‘Robinson’s Champion Giant Cabbage’.  They have stood through all the wet and snowy weather the winter threw at them and I am really pleased with the results:

SAM_6192

.

My purple sprouting broccolli is doing well and tastes delicious.  It takes approximately a year to grow from seed, but it is so worth the wait:

SAM_6191

.

And finally, remember I put a ‘bin’ on my rhubarb in February, to ‘force it’….

SAM_5812 SAM_6202

I removed the bin and the rhubarb was beautiful and pink.  I could actually smell the sweetness as I removed the dustbin.  I will be making rhubarb crumble tonight, as it’s my favourite.

If you want to make something different with rhubarb, you could try a Rhubarb and Ginger Cake, which is just as nice.  This recipe is here.

.

There is always some confusion about composting rhubarb leaves, as the leaves are high in Oxalic Acid, which is toxic to humans, but this is broken down and diluted in the compost heap as the leaves decompose.  So yes, it is safe to put rhubarb leaves into your compost bin.

Also, a long time ago when I pulled my very first rhubarb stalks from the ground, one of the ‘wise old allotment chaps’, saw me chopping the leaves off.  He told me to always leave part of the leaf on the stalk, so it looks like there are three claws left (like a chickens foot):

SAM_6205

When I asked why, he told me the reason for this is because the end always dries and you chop it off again when you are preparing it for cooking.  This way, you don’t waste any….and he was right!

SAM_6215

I hope you have enjoyed reading my blog today.

I will be back again on Monday at approximately 4pm.

Enjoy your gardening weekend.

Living ‘The Good Life’ and How To Make Newspaper Pots

On Friday, Ed Stagg from Radio Leicester, rang and spoke to me regarding ‘The Good Life’, as the wonderful Richard Briers had recently passed away and he was discussing ‘living the good life’, on his Saturday program.

This week Ed Stagg was joined by a model, a cook and a happiness expert.  They had quite an interesting discussion after Ed had played my phone call and if you have a bit of time spare, have a listen and tell me what you think.

You can hear the discussion here (approximately 1 hour 38 minutes into the program).

SAM_2763

.

Over the weekend I have been busy freezing my Celeriac, Turnips and the Jerusalem Artichokes that I picked last week

SAM_5785 SAM_5796 SAM_5792

If you have never used Jerusalem Artichokes before, this is how you prepare them and freeze them:

Scrub each of the Jerusalem Artichokes to remove the soil

SAM_5814

Chop the ends off each one and remove any damaged areas.

Chop into ‘roasting’ sized pieces

SAM_5815

You can then roast  them in olive oil (approximately 45 minutes, Gas mark 6) or freeze them (to roast from frozen another time).

To freeze, all you need to do is blanch them for two minutes. 

What is blanching?

….Boil a pan of water, then put the Jerusalem Artichokes into it.  Bring the water to boiling point again and then time it for 2 minutes and then drain.  Immediately plunge the vegetables into very cold water, to stop the cooking process.

Lay the Jerusalem Artichokes onto a tray in a single layer and freeze.  When they are frozen, put them in a bag.  By freezing them in a single layer on a tray, they won’t all stick together and it will be easy to take out just the required amount that you need.

.

SAM_5793

How to prepare and freeze Celeriac:

Celeriac is a bit easier to prepare as you just need to remove the skin, wash and chop into usable sized chunks.  Again, I freeze mine at this time of year, so we are never without them.

To freeze, blanch for two minutes, exactly the same way as the Jerusalem Artichokes.

SAM_5820 SAM_5822 SAM_5823

.

Turnips

I use the turnips in a different way to roasting, I use them to make a cheesy gratin as a side dish with meals.  I’ll show you how I make it another day.

I left the turnips a little bit too long in the ground and the biggest weighed 1.9kg!

SAM_5824

I froze it exactly the same as the Celeriac and the Jerusalem Artichokes above, only this time I blanched it for just one minute.

.

Newspaper Pots

SAM_5772

On Friday I promised to show you how I make newspaper pots.  My shallots are sitting happily in my cold greenhouse in the pots I made.

SAM_5813

Newspaper pots are great to make as they are extremely cheap and environmetally friendly to use, as the recycled materials decompose when you put them in the ground.  This also helps the plants that do not like root disturbance, e.g. swedes, that can be sown in the pots and then planted a few weeks later, still in the newspaper pots.

The plants find it easy to grow their roots through the damp pots when they are in the ground.

You can actually buy a ‘Newspaper Pot Maker’, it costs about £10, but I prefer to make them using either a baked bean tin, or a soya sauce bottle, depending on the size of pot that you require.  This is how I make them:

How To Make Newspaper Pots:

You need a newspaper, some masking tape and a soya sauce bottle for small pots

SAM_5760

Fold one sheet of newspaper in half and then into thirds

SAM_5761

Roll the paper around the bottle, so the newspaper is over lapping the base of the bottle

SAM_5762

Ensure you don’t roll the newspaper too tightly, or it will be hard to remove the paper from the bottle.

SAM_5763

Use a small piece of masking tape to secure the paper at the top and then fold in the newspaper over the bottom of the bottle.

SAM_5764

Secure the bottom of the pot with a small piece of masking tape.

SAM_5767

You can use different sized tins and bottles depending on the size of pot required.  For example, I use a baked bean tin to make pots ready for when I ‘prick out’ my tomato plants.

SAM_5773

I find it’s best to make the pots and use them straight away, as sometimes the masking tape becomes ‘unstuck’ if you make them too far in advance.

Also, when your plant is ready to go into the ground, make sure all of the newspaper is under the soil, or the paper will act like a wick and dry the compost out.

I love newspaper pots.

I hope you enjoyed reading my blog today.

I’ll be back on Friday at approximately 6 pm.

Parsley Sauce And Taming A Monster

Today at my allotment, I tamed my monster!….My Shark Fin Melon is now so big, it had sprawled all over the netting that covers my purple sprouting broccolli and it had actually broke the cane holding the netting up, as it was too heavy.

I moved it and chopped some of the leaves off.  It actually climbs over an arch I have too, but I didn’t quite realise how big it grows and the arch has been unearthed on one side!

You can read about the shark fin melon on my blog here.

Also at the allotment today I covered my compost heap, as it was full and I now have the new compost bins that I made last week. This is the compost bin that I filled with all my perennial weeds.

I have weighed the weed suppressant down with bricks and to make sure it doesn’t come off in the wind, I have put my two trusty old wheelbarrows on top.

I just need to wait four or five years for the wonderful compost it will make.

I finally found some cucumbers ready for picking today.  I really thought I wouldn’t get any this year, so I am very pleased.  I have put some glass around them as it’s turning cold at night now, in the hope I may get some more.

I finished by finally putting away the plastic bottles that I used back in May.  The half bottles gave my small plants a bit of protection from the cold and slugs.  The act like mini-cloches.

You can see in the picture below how I store them on top of each other on canes.  In the spring I will wash them and use them again.

.

Following on from my post on Friday regarding child poverty, (which you can read here), I have another cheap and easy family recipe.

I think a lot of people will know how to make this meal anyway, so apologies to you, but if I can help just one person who doesn’t usually cook, to feed their family more cheaply, then I will have achieved my aim.

.

Today I am writing about Fish in Parsley Sauce.

I buy skinless, boneless frozen fish fillets for convenience and I cook them separately in a foil parcel with a few splashes of lemon juice, for 25 minutes, Gas Mark 4 / 350F / 176C.

I find this way the fish keeps lovely and moist during cooking.

While the fish is cooking I make the Parsley Sauce:

.

Parsley Sauce

50 grams margarine

50 grams of plain flour

600 ml milk

2 heaped tablespoons of fresh parsley or 2 teaspoons of dried parsley

.

Melt the margarine in a milk pan.

Take the melted margarine off the heat and add the flour.  Mix in until no flour is visable.

Add a little bit of milk and beat it in, until it is totally combined.

 Keep doing this until all the milk is mixed in.  There should be no lumps.

Bring the sauce to the boil, stirring all the time.

When it has boiled mix in the parsley and simmer for two minutes.

Pour over your cooked fish.

I have worked out that the Fish in Parsley Sauce that I made today cost me less than £2.00 for a family of four.  I managed to find a readymeal of Fish in Parsley Sauce and it costs £3.99 .  I would put money on it, that it doesn’t taste as nice.

I served mine with homegrown vegetables.

.

.

Thank you for reading my blog today.

Pasta Sauce, Cheap Seeds and Planting Spring Cabbage

This morning at my allotment I planted some cabbages ready for spring.

The cabbage I picked yesterday

Two weeks ago I prepared the ground, by hoeing the weeds away and put a sprinkling of ‘Blood, fish and bone’ organic fertiliser down.

This area had my broad beans in previously.  When I removed the old bean plants, I left the roots in the ground.  The root nodules of the broad beans fix nitrogen into the ground, which is good for green leafy growth, which I knew would benefit my cabbages.

I gave it another hoe this morning and then planted the spring cabbages fairly deeply, 30cm apart.  As brassica’s like very firm ground, I always tread firmly around my cabbages with my boot.

I then gave them a quick water just to settle the soil around the roots.

The pigeons love brassica’s at my allotment (they actually seem to like anything at the moment), so I needed to net the cabbages.

You can buy those round balls with holes in, that support your canes, but I think they are expensive.  I choose to make mine out of old drinks bottles or hand wash bottles, as they are free and can be used several times before the plastic goes brittle.  You can see below how the canes fit into the bottles:

The netting I bought ages ago and I have reused it loads. The holes in the netting are small enough to keep cabbage white butterflies out and the netting is thick enough to stop the netting from ripping or becoming so tangled you can’t use it.  It was a good investment.

This is my finished cage:

.

This morning I also pulled up some carrots from one of my two raised beds.

I have never been able to grow carrots outside in my soil before, so this year I was even more determined to do this.  I used a mixture in my two raised beds of homemade compost, leaf mould and horticultural sand and have grown them under environmesh, to stop the carrot root fly.

Finally, I am glad to say…. I HAVE CARROTS!  I am very pleased.

I know that I went to a great big effort to grow these carrots, especially as carrots are so cheap to buy, but home-grown carrots do taste wonderful compared to shop brought carrots.

We will be having them for tea tonight.

.

.

I had a tip off today, that Wyevale Garden Centres were selling their seeds cheaply, if you are a gardening club member.  I joined Wyevale Garden Club as it was free to join and they have good offers every so often.

Today I found all the seed packets had been reduced to 50p, so I stocked up ready for next year, as every one of the packets were ok to be used in 2013.

50p Seed Packets

I bought the 21 packets of seeds, that you can see in the picture above.  They would normally cost £50.75 to buy, but I paid just £10.50 .  That’s an incredible saving of £40.25!

I love a good bargain.

.

Following on from my post on Friday regarding child poverty, (which you can read here), I have another cheap and easy family recipe.

I think a lot of people will make this simple meal anyway, so apologies to you, but if I help just one person who doesn’t usually cook, to feed their family more cheaply, then I will have achieved my aim.

Today I am writing about a basic Pasta Sauce.  A good quality jar can cost you anything up to £2.45 to buy and yet it is such an easy thing to make.

I cooked this sauce on Radio Leicester back in March, to demonstrate how you can make a simple cheap meal.  Back then I worked out that this sauce cost me just 80p to make when I bought all the ingredients, but as I grow most of the ingredients myself,  it only cost me 20p to make!

The recipe also doubles up as a Pizza sauce too and my pizza’s taste very similar to the pizza’s you eat at the large chain of pizza restaurants that you see on the high street (with far less salt though).  It certainly does NOT taste like the cheap pizza’s that you buy from the supermarkets.

My Olympic Pizza

When I cook this recipe I usually make a great big batch of it.  We have some of it for tea and I freeze a portion for another day.  After it has defrosted, it only takes ten minutes to heat up in the microwave, so it’s a really quick meal.

I also freeze some of it in little pots, to use on pizza’s another day.

.

Pasta Sauce

A drop of olive oil

1 onion chopped

1 garlic clove

500 grams Passata

(or a 400g can of tinned tomatoes and 2 tablespoons of tomato puree instead of passata)

190mls of vegetable stock

1 teaspoon basil

1 teaspoon oregano

Fry the onion in the olive oil for a few minutes.

Add the garlic and fry for a couple of minutes more.

Add all the other ingredients and simmer for 15 minutes

I toss some spaghetti into the sauce and I serve it with a nice homegrown salad and some homemade garlic bread.

A sprinkling of cheese on the pasta makes it even more delicious.

.

The recipe above is the basic pasta sauce,  but I always add vegetables to my sauce, e.g. broad beans, runner beans, courgettes etc.  My daughter doesn’t like vegetables in her sauce, so I puree the sauce before I serve it and she doesn’t know she is eating them and it’s full of vitamins.

If you like a sweet and sour sauce, you can add some pineapple pieces and leave out the herbs.  Also add a drop of vinegar and 1 teaspoon of sugar.

.

It’s such a cheap and easy meal to cook.

.

Calendula grown to attact bees

Thank you for reading my blog today.

Shark Fin Melon and Toad In The Hole

The cabbage I picked today

I was very pleased with a cabbage that I picked today.  It has taken a long time to grow.  In May I had nearly given up with most of my cabbages, as the flea beetle had virtually distroyed them.

This week I have been concentrating on an overgrown patch on my allotment plot number two, which is next to my ‘leaf mould’ area.

It was overgrown with brambles and weeds and I had already cut it back in the spring, with the intention of sorting it out a few weeks later.  This unfortunately never happened and this was the result.

That will teach me to do half a job!

After a morning of working hard, I managed to clear the brambles and weeds and I put a covering of weed suppressant, to stop them from growing back.

I was very pleased with the result.  The plan for this area is that eventually it will have another poly-tunnel on it, that’s when we finally manage to save up for one.

I re-used the weed suppressant that I already had around my large plum tree, on my fourth allotment plot.  It was used to kill all the couch grass around the tree by leaving it in place, since the spring.  It has done it’s job brilliantly.

.

This year I have been growing one or two unusual things.  One of the things is a ‘Shark Fin Melon’.

The ‘Garden Organic Team’ from Ryton visited Eco house in May and told us about some exotic plants to try and grow and even gave us some free seeds.

I planted the Shark Fin Melon seed in May, underneath a half cut plastic bottle and hoped for the best.  Though I have had loads of foliage growing (it’s quite a monster), I have only just found the fruit growing on it, probably due to the rotten summer we have had.  However, if I keep my fingers crossed, we may have a good autumn, (or am I wishing too much there) and it may still have time to grow.

There are details about the Shark Fin Melon here.

Shark Fin Melon

.

Following on from my post on Friday regarding child poverty, (which you can read here), I have decided to post some more cheap and easy family recipes.

I think a lot of people will make these simple meals anyway, so I apologise to you, but if I help just one person who doesn’t cook, to feed their family more cheaply, then I will have achieved my aim.

.

Toad in the Hole

(to feed a family of four, with good sized portions)

.

100 Grams Plain Flour

2 Eggs

300ml Of Milk

8 Sausages

2 Tablespoons of Olive Oil

.

Preheat your oven Gas Mark 7 / 220C / 425F

Grill the sausages until nearly cooked.

While the sausages are cooking, pour the oil into a large shallow tin and put in the oven for at least 10 minutes, so the oil is piping hot (this is the secret to a good Yorkshire pudding)

Put the milk, flour and eggs into a bowl and whisk with a hand blender until thoroughly mixed together.

When the sausages are nearly cooked, put into the hot oil and immediately pour the batter over them.

Cook for approximately 25 -30 minutes.

Toad In The Hole

I’ve worked out that the Toad in the Hole cost me just £1.16 to make.  So it’s another very cheap meal for a family of four.

Tonight I served it with home-grown vegetables and gravy, but it is equally nice with mashed potatoes and a tin of baked beans.

Today’s Harvest

Thank you for reading my blog today.

Child Poverty In The UK and Small Ways To Save Money

I thought I’d talk about something a little bit different and more serious today.

This week the BBC news reported on a survey that the ‘Save the Children’ charity had carried out.  The BBC said:

“Researchers for Save the Children surveyed more than 1,500 children aged eight to 16 and more than 5,000 parents, focusing on the lowest income groups.

The study draws on Institute of Fiscal Studies (IFS) figures which estimate that there are 3.5 million children living in poverty in the UK and predict a steep rise in the numbers in coming years”

You can read the whole report here.

Homemade bread is cheap to make

I think it is incredible that in 2012, child poverty is still happening in the UK.

It said in the report that an income of less than £17,000 was classed as living in poverty, but I wanted to find out what size family this was based on.  I found another report that you can read here, that was written in October 2011.  This report gives the following details of what is the poverty line:

WHAT IS THE POVERTY LINE?

Single adult, no children: £165 per week

Couple, no children: £248 per week

Lone parent, 1 child: £215 per week

Lone parent, 2 children: £264 per week

Lone parent, 3 children: £314 per week

Couple, 1 child: £297 per week

Couple, 2 children: £347 per week

Couple, 3 children: £396 per week

This came as quite a shock for me, as for a long time our income was less than this, with two children and a mortgage to pay.  We have never classed ourselves as living in poverty and our children have never gone without food or clothes. We chose for me to stay at home to look after our children but we never realised this put us under the so called ‘poverty line’.

Homemade Tomato Soup

We don’t smoke and hardly ever have a drink or takeaways, but we chose for me to be at home for the children and to us, this was a small sacrifice.

This report highlights that a lot of families are really struggling on low incomes now and I’m not sure what the answer actually is.  What I do know, is there are definitely ways that can help people to save money by living a more frugal, thrifty life.

I think as a country, people now take it for granted that they should have designer clothes, immaculate houses with luxury items and two cars, but this is really not the case.  These material things cost such a lot of money and if your income cannot sustain a lifestyle like this, then you will become more and more in debt.

It has also been proven time and time again that material things just don’t make you happy.  It is hard to stop thinking that they do.  It has taken me years to accept this, but still every so often I have a ‘down’ day, but I give myself a good talking to and think of all the lovely things I have in my life which money just cannot buy.

Valentine Biscuits I made for my husband

When you first start to reduce your spending it is hard, especially when you have to say “no” when you have been invited out to a social event or for a meal with family and friends.  People aren’t always so understanding and they sometimes look at you as though you have two heads as it’s not ‘normal’.  People do get used to it though after a while and your real friends will always be around for you. We also found it hard at first when people around us were buying the latest luxury items, but now I tend to think how ridiculous it is to spend that much on an item that will probably be hardly used anyway.

I know now that if we came into a large sum of money, we would probably buy some nice things, but we certainly wouldn’t waste the money.  In fact I think a lot of things would stay the same for us as I like my life.  This is because after years of craving the ‘material world’, I have finally learnt that my world now, gives me far more riches than money can buy.

I started this blog in the hope that it would help people to learn how to live more frugally, as unfortunately this information is just not passed on from generation to generation anymore.

Little changes all add up and they are things that can be easily done.  If you start small and perhaps change one thing at a time that you do, then after a while it will become second nature.

I’ve been trying to think of some of the things that we do in our family that we take for granted and do without thinking:

We don’t waste food anymore and always use up leftovers

I always, always hang my washing out when it’s not going to rain. Even in winter I hang it out so it at least dries a little bit.  If I see it is going to rain, I leave my washing until the next day.

I always use my washing machine, dishwasher, bread maker, mobile phone chargers and anything else we use on ‘economy 7’ (cheaper priced) electricity.  This means I get up early to switch them on, but you can use time switches.

I meal plan and always do a shopping list.  See how I do this here.

I cook from scratch whenever possible, as it’s much cheaper and it really does taste better.  The things I make are really not hard to do (or I wouldn’t do them) and I will continue writing cheap, tasty, recipes on my blog, in the hope it will help someone. I now have a reputation with my daughters friends, for being a good cook, but the recipes I make really are simple and easy to make.

We regularly look at bills and see if we can switch providers, to reduce them.  You’ll be amazed at how much you can save by shopping around.  We have found that we save so much by not just renewing insurance for house, contents, car, etc.  We have found that even when a renewal notice has been sent to you with a quote, if you ring them up they will nearly always give you a better quote over the phone. 

My little kitchen

I use old fashioned cleaners as they save you pounds and are far better for the environment.  You can find some details on my blog here.

We hardly ever have a takeaway now, but we do have treat nights.  My favourite is a nice homemade pizza with potato wedges and salad, all homemade and the salad and potatoes are usually home-grown.  So it is a really cheap meal that feels really special.

We plan and budget for Christmas.  We start in January.  I know exactly how much we have to spend on each present and I look for bargains through the year so I can get more for my money.  I also make homemade hampers for my family and they seem to love them.  Even something like an advent calendar can be made more cheaply.   For years we have used the same homemade advent calendar with pockets and every year I hide a tin of sweets, (bought cheaply beforehand) and put a ‘clue’ in each pocket.  My daughters have to find the tin using the clues (obviously as they get older the clues get harder).  We have a lovely time doing this and it’s far better than the ready made chocolate advent calendars you can buy at Christmas.

My Christmas Pumpkin

When my girls were smaller I bought quite a few of their toys and jigsaws from charity shops.  It’s amazing what you can find in them. Once I had given them a good clean, they were as good as new.  We have had many a night in, playing a board game that I’ve picked up for £1 or £2 from a charity shop.  You can also get some bargain clothes from there too.

I always use vouchers if I spot them but I only buy items if I will use them.  Remember it’s only a bargain if you wanted it in the first place.

Me and my daughters all love reading and books are expensive.  I really can’t see the point of buying a full price book if I can get it from the library or buy it second hand (eBay and amazon are good for this).

I always decide if I just ‘want’ or ‘need’ something before I buy it and I never impulse buy.

My daughters homemade birthday cake
(She asked for this colour)

.

Thank you for reading my blog today