Archives

Nature Is Wonderful….

This week has been another week of sunshine and showers.  It has also been quite windy at times and I have had to tie up some of my peas and sweetpeas, as the wind blew them away from their supports…..though no harm was done as you can see in the photograph below:

SAM_3477 SAM_3479

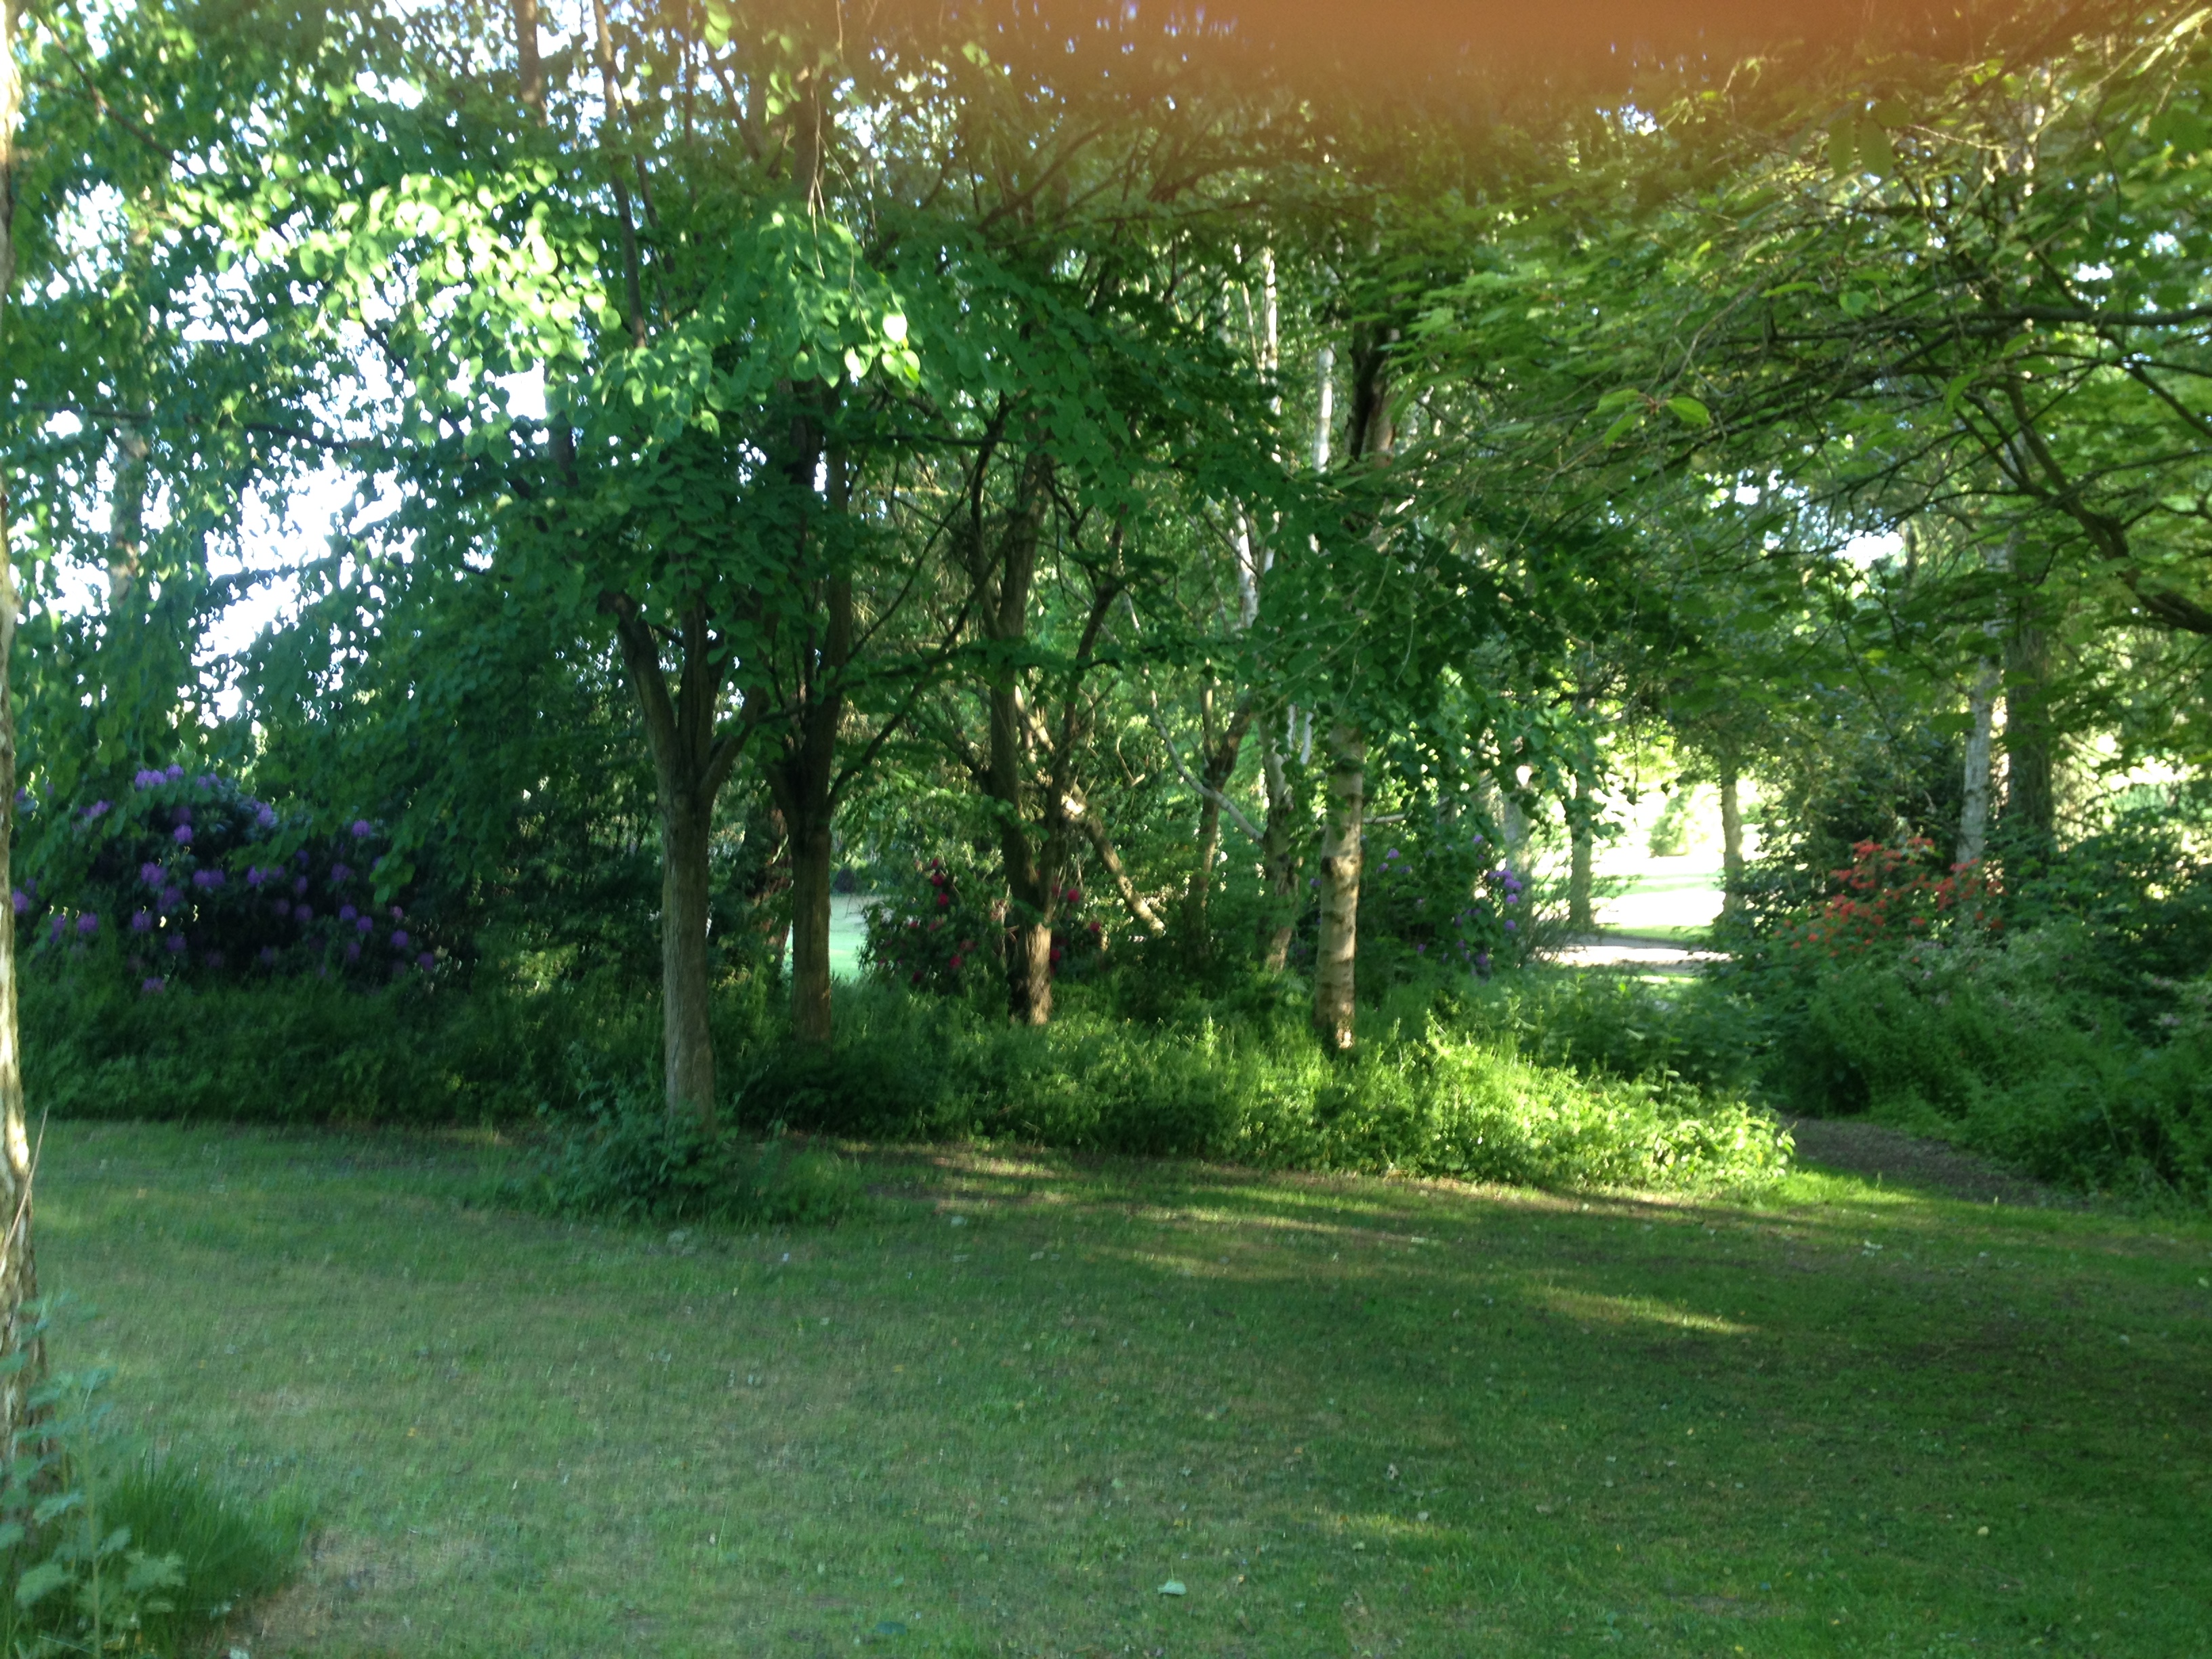
I think nature has a way of dealing with all situations and the sunshine and showers are certainly helping my plants grow.  Rain is full of nitrogen so the garden is now looking lush and green.

SAM_3475

The sunshine and showers also produced the most spectacular rainbow in the sky (though my camera doesn’t really show the pure beauty of it as well as I would have liked).

SAM_3396

 Nature really is wonderful, but it is all too easy to take it for granted….I firmly believe that global warming is happening – every gardener has already seen the changes in the seasons – but it is so easy for us all to ignore and pretend it isn’t happening…..I know a lot of people think that it is a problem that just the goverment should be dealing with and yes I do think they should be doing more… however if we all did our own little bit e.g use our cars less, buy less ‘stuff’, recycle where possible, eat less meat, be mindful about using electricity, etc. then maybe it would make a difference.

I realise people won’t agree with me and I know how hard it is when you have children / teenagers in the house wanting ‘this’ and ‘that’, but every little bit we do (even the smallest things) will all add up.

SAM_3482

.

This week in the garden:

.

This week I finally got around to using the extra comfrey feed that I made last year.  I never got around to using it as I still had some left over from the first batch that I had made last summer.

I really expected it to stink as it had been there since last year, but amzingly it wasn’t too bad:

IMG_3860

I strained it through and old rag and I managed to get three bottles of comfrey feed to use on my fruit and flowers around the garden, as it is so high in potash.  It is particularly brilliant for tomatoes.

IMG_3858 IMG_3859

As my comfrey is still growing well, I started another bucket of comfrey tea off.  It only takes a couple of weeks to make, though I do tend to leave it stewing until it is needed:

IMG_3867

IMG_3869 IMG_3878

“To make comfrey tea all you have to do is fill a bucket with the comfrey leaves and stems and weigh it down with a brick and pour over cold water.  I cover it (to stop flies getting in) and leave for approx. two weeks. Be warned, by this time the smell is revolting!  Strain the comfrey tea liquid into another container and put the remaining comfrey in your compost bin.

To use it I put 2 cups of comfrey tea into a watering can and then fill it with water and give it a good mix”

   .

.

This week I noticed that my runner beans were flowering and they look very pretty.  However, I also noticed that they had climbed to the top of their supports, so I chopped the top of each plant off:

IMG_3866 IMG_3863

By nipping off the top of each plant, they will become bushier and produce more beans lower down.

.

Now that I had harvested my last spring cabbage, I decided to plant my curly kale seedlings….but first I decided to give the area a quick weed and remove the yellow leaves from the cabbages under the same net.  The yellowing leaves can harbor pests and diseases so it is always a good idea to remove them every so often:

 IMG_3870 IMG_3871

Incidentally the cabbages are growing well this year, probably to do with all the rain we have had:

SAM_3484

After this I raked in some blood, fish and bone and then planted three curly kale plants that I had grown from seed.  Hopefully if the plants grow ok then three plants will be enough for us over winter:

IMG_3873 IMG_3874

.

I also tied up my jeruselum artichokes as one of them had fallen down……they are planted in a bottemless deep pot, to stop them from spreading and it seems to be working:

IMG_3876 IMG_3877

.

Another job I finally got around to doing was to ‘prick out’ my wallflowers that I sowed a few weeks ago (they really should have been done by now).

SAM_3390 SAM_3391

If you look really closely at the photo on the right, you will see tiny holes on the leaves…..these holes are made by the flea beetle….

“The adult flea beetle eats the leaves of most brassica’s (including wallflowers) and their larvae will eat the plant roots.

Bad infestations can kill the plants, however this is unusual.  I have found that seedlings are more suseptable to flea beatles, so if my plants come under attack I feed them regularly with a seaweed fertliser until they grow bigger and stronger.

In my experience the flea beetle will set back your seedlings, but it is very rare they don’t recover with a bit of care”

.

I also transplanted the fox gloves I sowed a month or two ago, into bigger pots to grow on:

SAM_3386 SAM_3392

  Foxgloves (digitalis) and wall flowers are both biennial plants, which simply means they grow one year and flower the next and then die.  When my plants are big enough in autumn I will plant them in the ground where they will hopefully give me a good display next year.

.

Another job I did this week was to repair a bare spot on my lawn.  I raked over the area and then spread some grass seed that I had already mixed with compost.  I then covered it with my heavy plastic propagator lid to protect it from Judy (our dog) and I have made sure it has been well watered.

Hopefully the grass will grow well:

SAM_3394

.

I have also continued to tie up my outdoor tomato plants:

SAM_3486

And I have continued to dead head all the old flowers around my garden, so they produce lots more new flowers:

SAM_3490 SAM_3489 SAM_3487

.

.

This weeks harvest:

.

The strawberries are doing well considering it is their first year (I ignore the books and don’t remove the flowers the first year and I have always had good crops).  I have had two harvests this week:

SAM_3422 SAM_3448

The courgettes have finally decided to grow and I have picked two from my two plants this week:

SAM_3449

And I am still picking broad beans from the plants I sowed in January:

SAM_3441

I noticed that some of the pods were suffering from ‘Chocolate spot’, but the beans were fine inside:

SAM_3440

“Chocolate spot is a fungus that only affects broadbeans.  It leaves red-brown spots on the plants and the pods.  It usually affects plants in damp humid conditions, so if you have space you could put your plants further apart so air can circulate around.

In my experience chocolate spot rarely affects the beans inside the pods, so I actually ignore it and don’t do anything except give the plants a liquid seaweed feed to help them along”

I froze my broad beans to use over the winter when there isn’t too much around.  I always blanch them and then open freeze them on a tray until they are frozen….then I put them into a freezer bag:

SAM_3473

.

I have also been harvesting my peas.  I have been picking my dwarf peas and my climbing tall peas (which are an old fashioned variety called ‘peashooter’).  All my peas have done well this year and there are lots more still growing:

IMG_3879 SAM_3442

SAM_3444 SAM_3443 IMG_3880

It always amazes me that a whole basket of pea pods produce so few peas….but the peas are so sweet and delicious I can’t help growing them each year!

SAM_3425 IMG_3882 SAM_3445

My eldest daughter and Mr Thrift helped me to pick the pods this year and remove the peas…….I so love my family helping as it is a time we also chat about ‘this and that’ and laugh together.  I hope my daughters remember these time fondly when they are older.

I froze the peas in the same way I froze the broad beans….but I bet the peas won’t last until winter as we all love them!

Frozen broadbeans & peas

Frozen broadbeans & peas

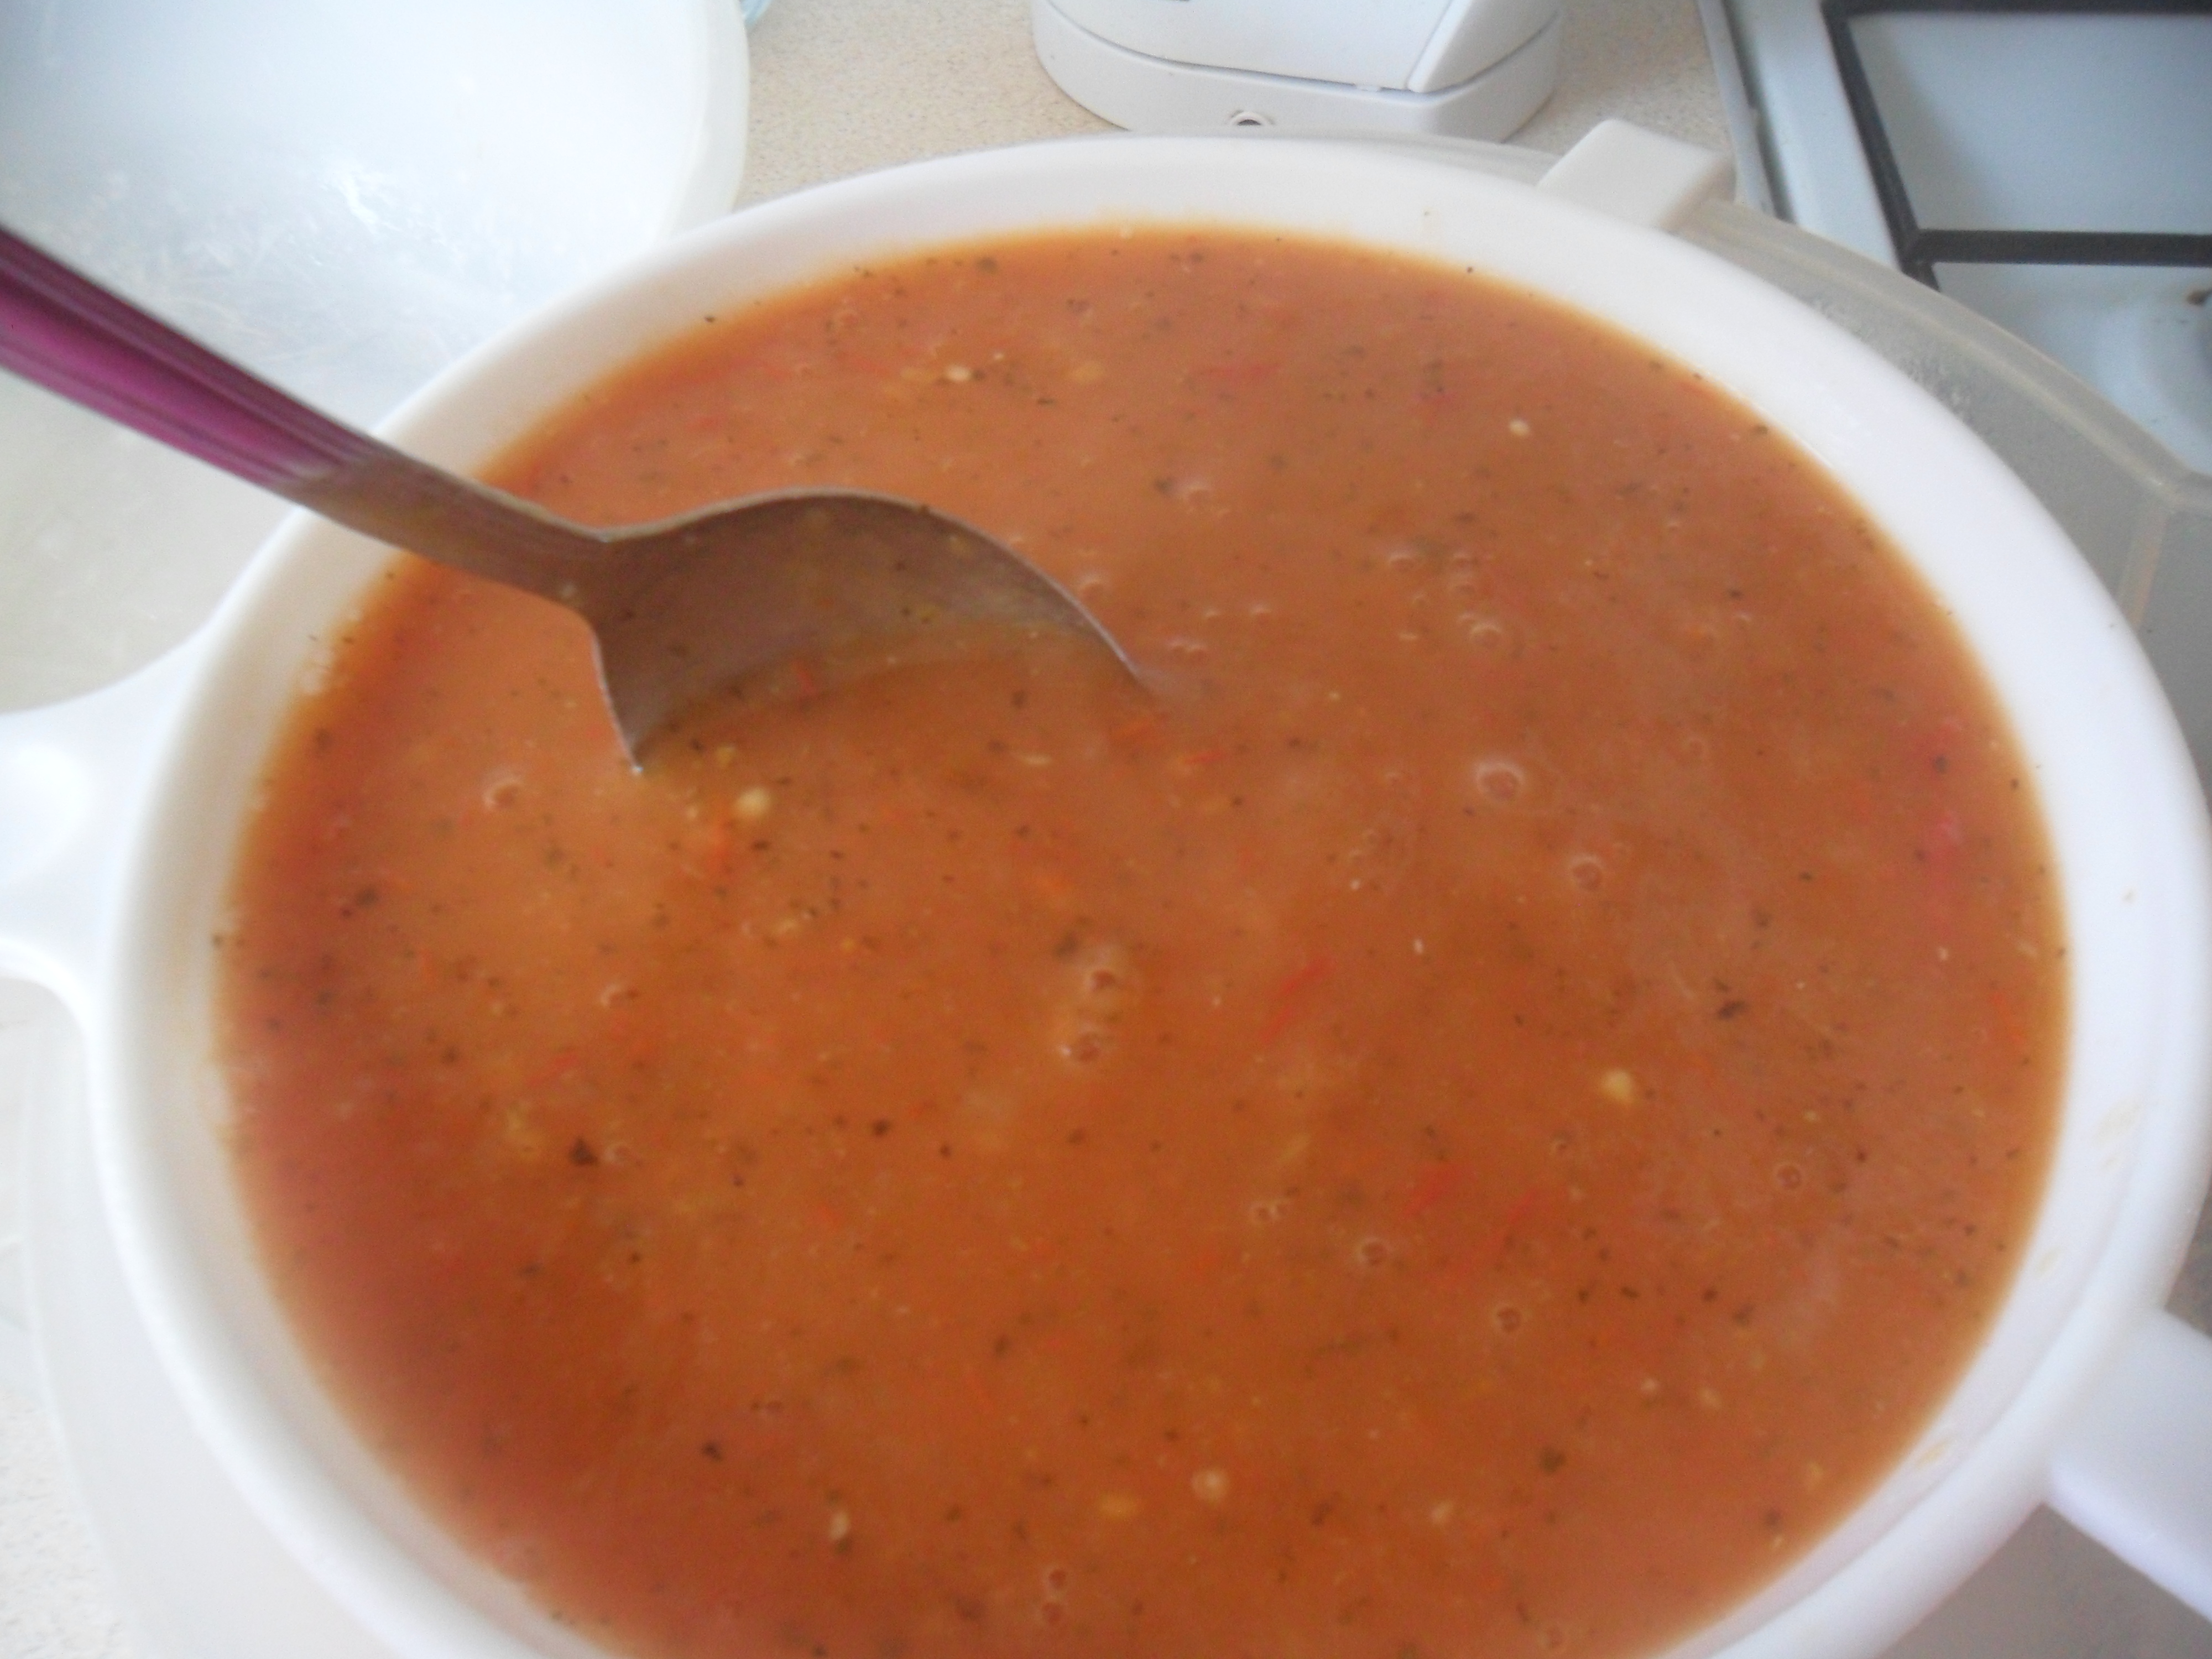
I didn’t want to waste the pea pods so I made a ‘pea pod soup’, which my daughter loves.  You can find the recipe here

SAM_3430

I used rapeseed oil this time instead of olive oil, which made a darker soup…..it tasted the same but didn’t look quite so appertising so I will use olive oil again next time:

SAM_3431

.

This week I have noticed:

.

This week i have noticed my first raspberry on my ‘autumn’ raspberries (not sure why this one decided to grow early):

IMG_3857

My first mangetout are ready to pick (my youngest daughter has already spotted this and has been picking and eating them raw this week):

SAM_3481

My ‘mini’ pumpkin plants are covering the ground around my sweetcorn well – this keeps weeds down and the moisture won’t evapourate as quick if we get any more hot days:

SAM_3476

The dahlia tubers that I grew from seed last year and then overwintered in our brick outhouse, are starting to flower:

SAM_3480


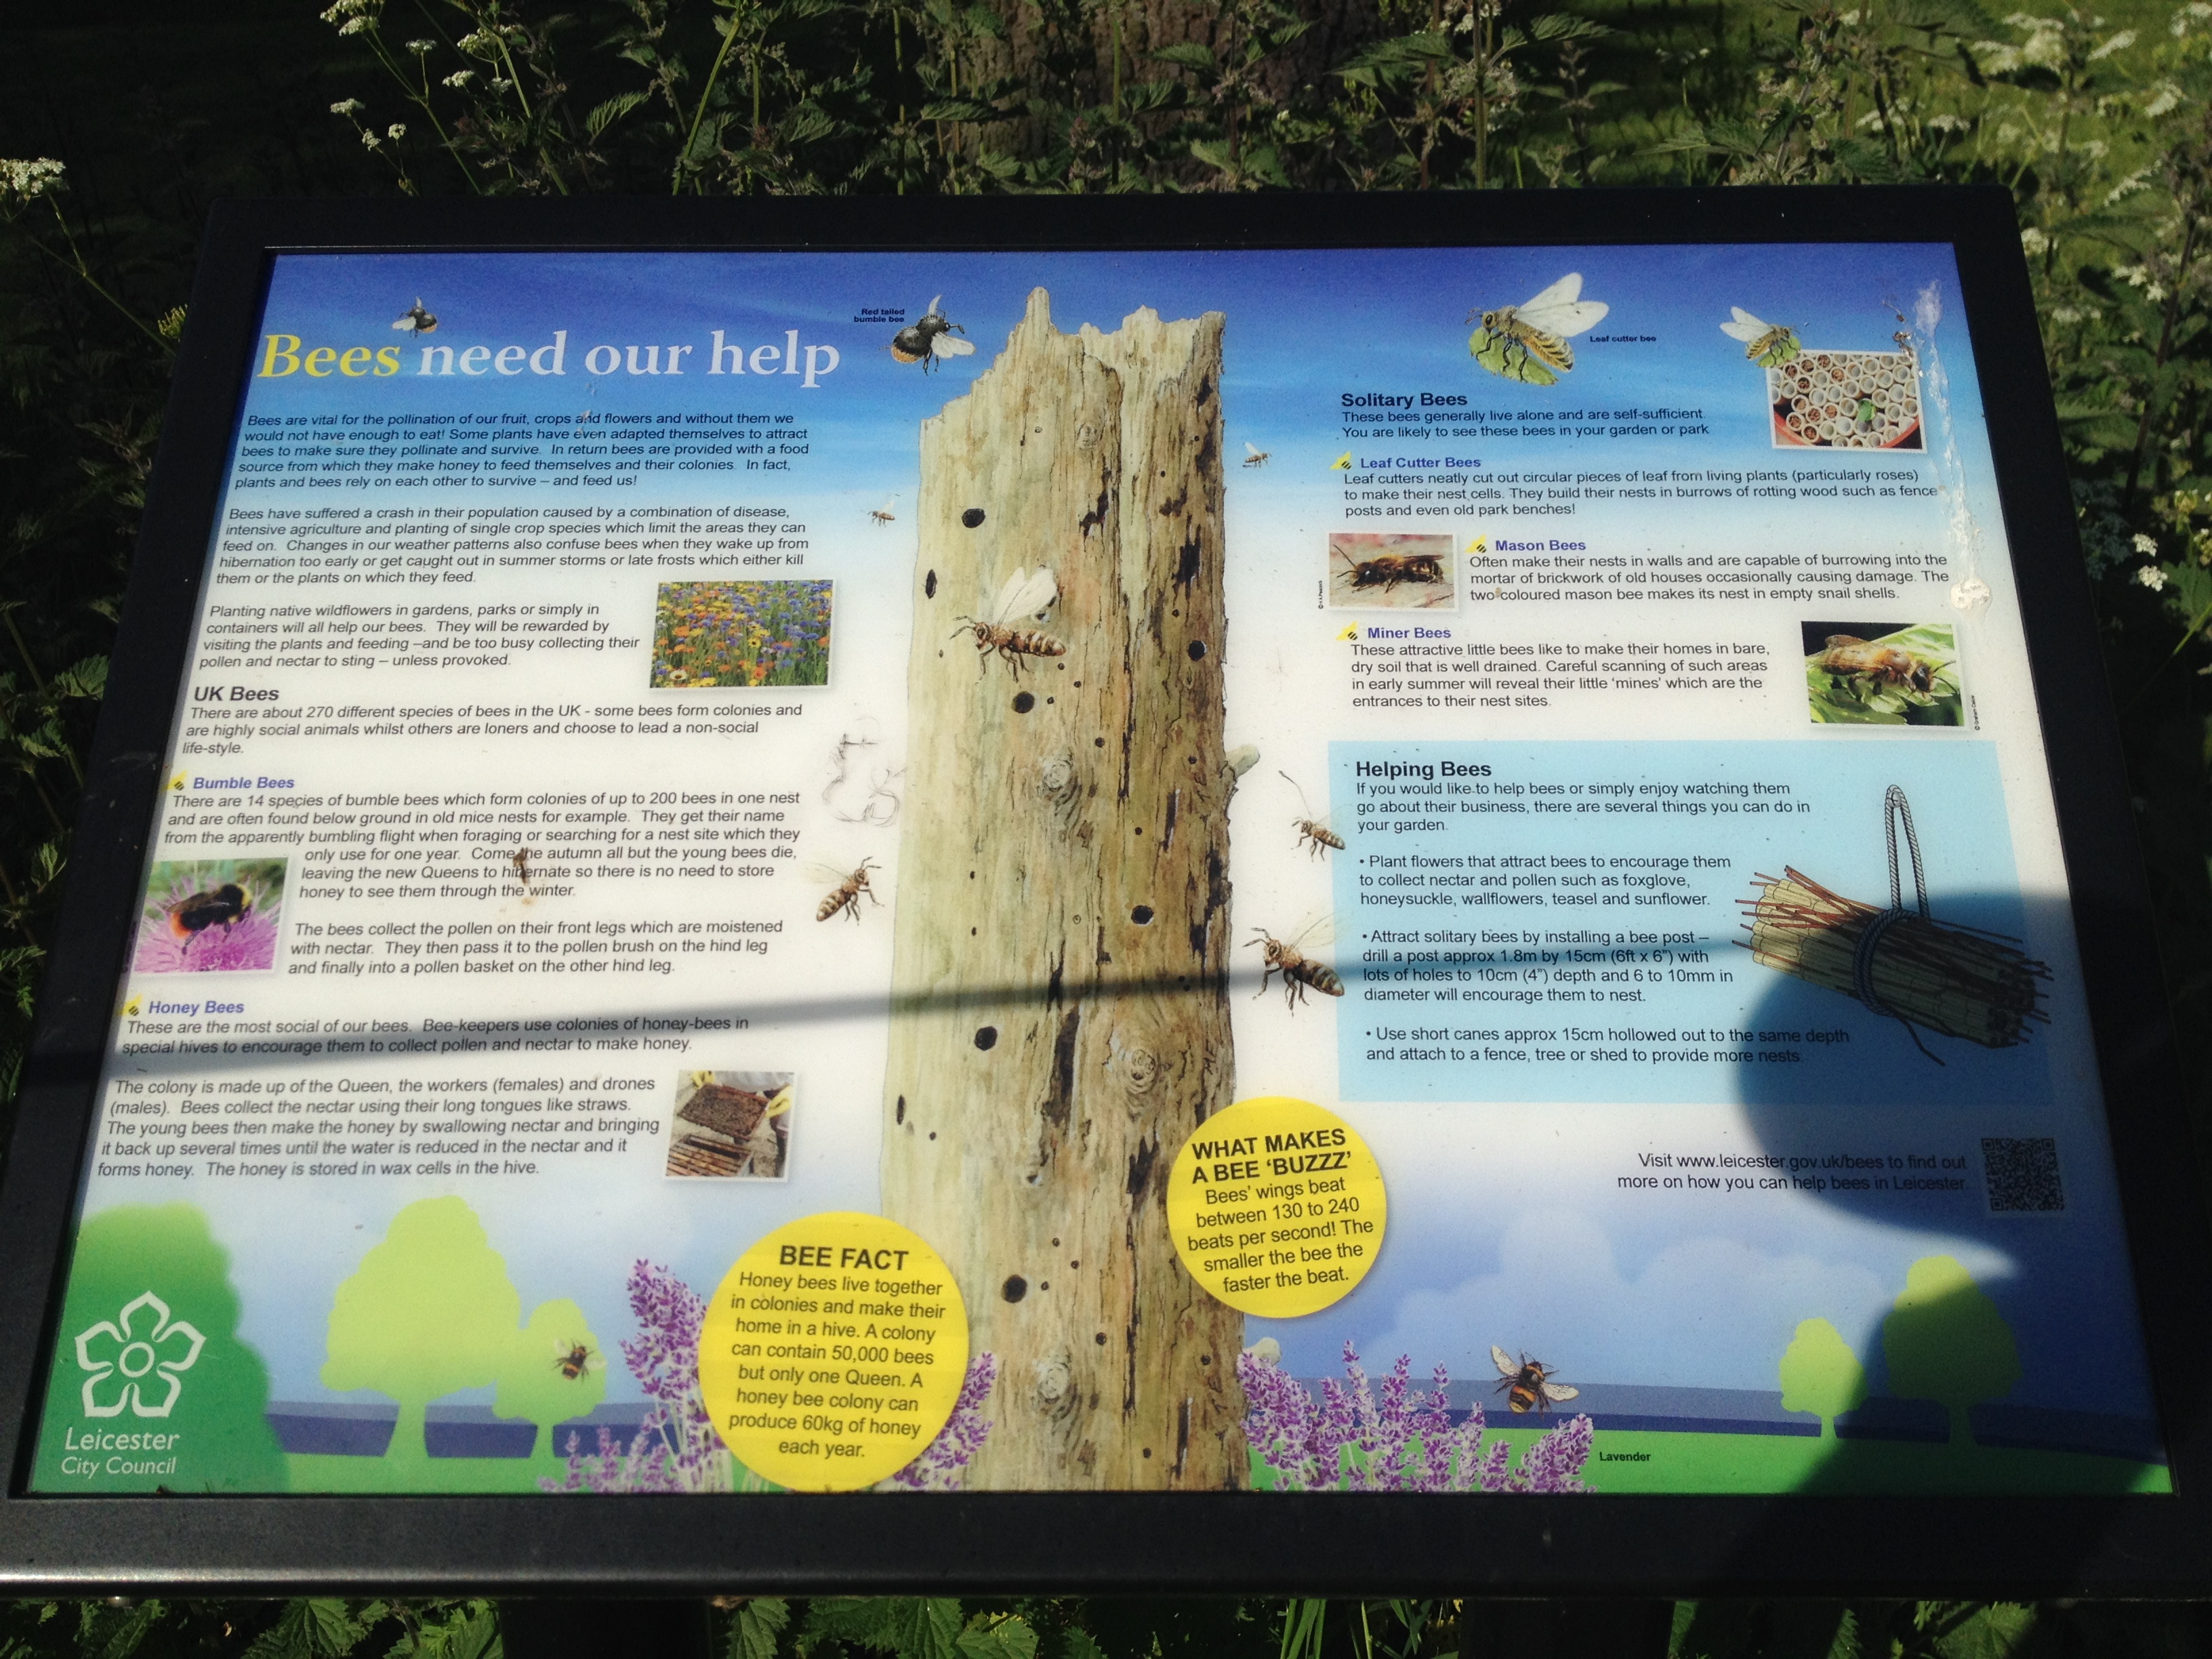
And finally this week, I have noticed that the garden has lots of different types of bees and hoverflies visiting and this week I have spotted two different little frogs:

SAM_3492 IMG_3902

This is a wonderful site to me as it shows me that my organic gardening methods are working and the beneficial insects are now coming to my garden, helping my garden to become more and more productive by polinating my crops and eating the pests, such as slugs and snails etc.

.

Thank you for reading my blog this week.

I will be decorating our bedroom over the next week or two, so I have decided to take a two week break from my blog….I hope you don’t mind.

However I will be back on the 5th August as usual.

Have a great weekend.

XXX

A Problem With My Leeks….

This week nature has produced some beautiful sites.  It started with the most beautiful red morning sky last weekend:

IMG_1438

And then a covering of snow that made everything look very pretty:

SAM_2573 SAM_2577

 I’m very pleased to say that the snow disappeared as quickly as it came and this week and I managed to get into my garden to start my winter ‘clean up’ and start my preparation for the new growing season ahead.

I started by emptying the compost bags I had in my greenhouse as I want to clean my greenhouse in the coming week.  Nothing really grew very well in these bags, but I think this was due to my watering system overwatering the compost and the dreadful, dull weather we had last year.

IMG_3041

I spread the compost over two of my beds to help improve the condition of the soil:

IMG_3044

I started to put manure around my rhubarb too, but unfortunately I ran out of it so I need to but some more.  However I did manage to surround one of my rhubarb plants:

IMG_3054

I then cut down my old runnerbeans, leaving the roots in the ground as the nodules add nitrogen to the soil, which will be good for my brassica’s which will follow them:

IMG_3048

Next I cut the tops off my jerusalem artichokes which I grew in a large bottomless pot to contain the roots.  I will dig up them next week to see if I have managed to get a crop:

IMG_3049

So this area now looks better, though I do need to tidy my utility area behind:

IMG_3050

I also turned my attention to my leeks which have been very disappointing:

IMG_3005

As you can see from the photo above they have been targeted by the allium leaf miner and some of my leeks have started to rot.  I have written about the allium leaf miner here, it is a fairly new pest in this country and only appeared in Britain in 2002.

The allium leaf miner only ever affected my onions at the allotment which lulled me into a false sense of security, so I didn’t bother covering my leeks with environmesh…..but unfortunately they were were hit hard this year, so I will have to make sure I cover ALL of my alliums from now on.

leek

I took the photo above of the small brown pupae that I found in some of them to show you.  They are approximately 3-4 mm long, embedded into the stem.The pupae will overwinter in the plant or in the soil.  In the spring, the adults will emerge from the pupae and lay eggs and the first generation of larvae will then feed in April and May. The second generation is likely to feed in mid-September.

But I am pleased to say, some of my leeks were ok, so I did get a amall crop:

IMG_3002 IMG_3004

.

This week I also tidied a bed that I had covered with environmesh in the Autumn, to give a bit of protection for my summer lettuces.  The summer lettuces had been picked a long time ago and I thought there was nothing underneath, but to my surprise I found a row of winter radishes that I had sowed in late summer and completely forgotten about:

IMG_3058 IMG_3057

They have grown lovely and so I picked one straight away and later grated it into the salad we had for tea:

IMG_3060 SAM_2596

I had a quick weed around them and then put a cloche over them to give a bit of protection:

IMG_3059

I also picked some winter purslane (sometimes know as miners lettuce) that I had been growing in a pot in my greenhouse and also added it to our salad:

SAM_2595 SAM_2597

I love being able to pick winter crops to add to salads and I am very pleased that I have acheived this in my new kitchen garden, though I want to do a lot better for next winter.

.

I also sowed my first seeds this year, which I always find exciting:

SAM_2591

I planted overwintering broadbean (Aquadulce), which over the years I have found they grow best in pots planted this month and then transplanted in the spring.  I also sowed leeks and the remaining garlic cloves that I had left over and these wil sit happlily in my cold greenhouse for the moment.  I also sowed my peppers, but these will be kept inside a propagator in the warmth of my house for the time being.

.

This Week In The Home:

.

I sat and finally sorted my seed tin as it was in a bit of a mess.  I listed down exactly what seeds I have and I worked out exactly what I want to grow this year in my garden.

I now have a plan of exactly when I need to sow my seeds and what I still need to buy.

SAM_2587 SAM_2585

I am hoping to grow even more this year in my new improved small kitchen garden.

.

I then caught up with a few things for the freezer…..each are small things that help me a lot to save time:

My daughter wanted some chocolate chip cookies, so I made them and then froze them so that I can take just a couple out of the freeze each day, so she doesn’t eat them all at once:

SAM_2579

I sliced some lemons up and froze them on a plate, ready to put in a freezer pot when frozen.  This way we have a ready supply of lemon slices to add to water when we need a drink.  As the lemons are frozen they also cool your water down without having to use icecubes:

SAM_2583

I then made a double batch of white sauce.  I froze one of the sauces in a freezer bag after it had cooled down.  Next time I need a white sauce I will just defrost it and reheat it in the microwave.  This way it is easy to use it as it is, or just add parsley for a parsley sauce or cheese for a cheese sauce.

SAM_2582

I made and froze leek and potato soup in portions.  Again I can just defrost a portion and then reheat it in the microwave for my lunch:

SAM_2584

I made the leek and potato soup using the leeks that I dug up this week:

.

A Leek and Potato Soup Recipe:

.

800g potatoes peeled and chopped small

800g Leeks chopped

1700 ml vegetable stock

800mls hot milk

.

Add the potatoes, leeks and stock to a large pan:

IMG_3008 IMG_3009

Bring to the boil and then simmer, covered for approximately 30 minutes or until the vegetables are soft.

IMG_3011 IMG_3014

Heat your milk while you use a hand mixer to blend the vegetables to make them smooth and then add the hot milk to the pan.  Bring the soup back to the boil and continue to cook for 5 minutes, stirring all the time:

IMG_3015 IMG_3017

 Serve and enjoy adding salt and pepper to taste!

IMG_3024

.

Thank you for reading my blog today.  I will be back next Friday as usual.

Have a great week!

A Chicken and Parsnip Stew & A Fruit Loaf Recipe

I thought I would start today by letting you know that Judy, (our lovely rescue dog) has made a full recovery after her illness last week and she is back to her normal, cheeky ways.

SAM_2558

We all absolutely love Judy to bits and I am so glad we didn’t give up on her like the previous three owners did.  Though I have got to be honest, when our previous ‘dog behavourist’ told us she was untrainable last February, we were very close to giving up….she had so many problems e.g. barked all the time at home, barked and lunged at dogs, people, cars, bikes, lorries, washing machine, birds etc. etc.

Nearly a year later, she still has one or two things she doesn’t like, but she is getting so much better as time goes by, thanks to our wonderful dog trainer Steven Havers.

.

Curtains for my daughter:

.

IMG_2733

I’m not sure if you remember a couple of months ago I decorated my youngest daughter’s bedroom.  I struggled to find any ready made curtains that she liked, to finish off the bedroom.  So in desparation I took her to a material shop and she found some fabric she liked, so I bought it promising to make her curtains after Christmas.

SAM_2508

The curtain material and new furniture in her bedroom was a present for her birthday and Christmas, but because of this I was a bit concerned that she wasn’t going to have many presents to actually open on Christmas day.  So during December, while she was at school I worked really hard to make the curtains so I could wrap them up for her to open on Christmas day.

She was very surprised when she unwrapped them and I must say I am very proud of them now they are up:

IMG_2909

I also had a bit of material left so I managed to make a couple of cushions for her too, which I also wrapped up for her to open on Christmas day:

IMG_3037

.

Over the Christmas holidays I decided it was time to catch up with one or two jobs that I had been putting off…..

  I started by clearing our loft and it was amazing how much rubbish we had up there.  I have since sold one or two bits on ebay and given away some other things…..but most of it was thrown away.  But the attic looks better now.

IMG_2959 IMG_2956

I also went through my bills folder…..again there was a lot in there that I didn’t need to keep.  Myself and Mr Thrift looked at every bill we pay to see if we could possibly reduce it….unfortunately we are quite ‘bill savvy’ so we didn’t manage to make any savings, but it’s good to check every so often.

IMG_2960

.

.

Over the Christmas period myself and Mr Thrift surprisingly managed to buy lots of ‘whoopsies’ ….for some reason we seemed to be in the supermarket when they reduced their produce to ridicuously low prices.  So over Christmas I froze whatever I could and my freezers were bursting:

SAM_2520 SAM_2521 SAM_2523 SAM_2525 SAM_2526

The last photo shows the ready cooked beetroot that was reduced.  My dad sometimes buys this and pickles it, but as I already have pickled beetroot in my pantry I decided to cut it up and freeze it on a tray.  When it was frozen I put it in a bag and this way it is easy to take a few slices out at a time to defrost for sandwiches.

I also used the reduced parsnips and Chicken drumsticks in a chicken and parsnip stew which I cooked in my slow cooker.  By cooking it in the slow cooker you find that the chicken ‘falls off’ the bones easily and tastes so moist:

.

Chicken and Parsnip Stew:

.

6-8 chicken drumsticks or thighs

2 onions peeled and roughly chopped

4 -6 medium parsnips peeled and chopped into chunks

Hot Chicken stock to cover

.

Put all the ingredients into a slow cooker making sure the hot stock covers the ingredients.

SAM_2532

Cook on ‘low’ for approximately 8 hours

Serve with vegetables of your choice:

SAM_2534

.

.

This week…

This week at home I decided to use up the mixed fruit that I had left over in my pantry.  I decided to make a fruit loaf (which I absolutely love).  It’s really easy to make in a bread maker and I used my bread slicer to cut it into nice thin slices.  This loaf freezes well so you can take a couple of slices out to defrost when required:

.

A Fruit Loaf Recipe:

1 teaspoon of Fast Action Dried Yeast

400g Strong White Flour

2 teaspoon Granulated Sugar

75g margarine or butter

½ teaspoon Salt

1 teaspoon Cinnamon

1 teaspoon Mixed Spice

2 Eggs

110ml Water

110ml Milk

300g Mixed Dried Fruit


Add all the above ingredients into a breadmaker EXCEPT the mixed fruit.

SAM_2561

Set your breadmaker to a ‘Basic bake loaf’ with raisens and add the mixed fruit when the breadmaker tells you too (that is approx. 47 mins after the start in mine but you will need to refer to your own manual).

SAM_2562 SAM_2568

Enjoy it!

IMG_2995

.

.

In the garden this week:

This week in the garden I dug up my parsnips.  This is the first time I have grown a crop in this area so I wasn’t sure what they would be like….but they weren’t too bad (though most of them were a lot smaller than the ones I used to grow at the allotment -probably due to the condition of my soil):

IMG_2994 IMG_2993

Parsnips next to a 30 cm ruler

Unfortunately some of the parsnips suffered from parsnip canker:

SAM_2557

.

“Parsnip Canker is a fungus that causes orange, brown, purple or black coloured rot, which usually starts at the top of the root.

I have read that the fungus is caused by drought, over-rich soil or damage to the crown, BUT I have also read that it is worse in wet, pooly drained soils as well”

.

SAM_2559

As you can see in my photo above, if the canker isn’t too bad the parsnip under the skin is usually fine to cook and eat.

.

To avoid canker:

  • Rotate your crops
  • Don’t manure your soil before growing parsnips
  • Improve your drainage
  • Grow resistant varieties such as ‘Albion’or Hollow Crown

.

As I had too many parsnips to eat in one go, I peeled and chopped them and then froze them on a tray (without blanching them).  When they were frozen I took them off the tray and bagged them up.

When I next cook a Sunday lunch I will roast them from frozen.

SAM_2560

.

.

Finally this week I brought my seed potatoes.  I chose my usual ‘Marfona’ which is a second early and ‘Desiree’ which is a red main crop potato.  I also brought some ‘picasso’ to plant in my mother in laws garden, which are an early main crop.

All the potatoes are now ‘chitting’ in our bedroom…..very romantic!

IMG_3039

That’s it for this week.

  Thank you for reading my blog today, I will be back next Friday as usual.

Have a good week!


Our Rescue Dog Judy & A Paint Job

My blog is a little bit longer than normal this week …. I hope this is ok with you.

A Bit Of Good News:

A lot of people have been asking about Judy, the rescue dog we brought home in October.

Her first day home

Her first day home looking very thin!

I have written about her a few times, but for those who don’t know, it was clear from the start that she had a lot of problems and by December she had bitten a dog and we had to contact a behaviourist for help.  We tried training her with treats, clicker training etc. and she had a ‘kalm aid’ in her food and a pheromone diffuser plugged in the house all day long.

We were beginning to think we were getting somewhere and then the next day for no apparent reason she would go backwards again and we were no further forward.  I have shed a lot of tears over this dog and I have been shouted out so many times for not controlling her (even though she was always muzzled and on a lead).

By February our behaviourist suggested we should think about re-homing her as she felt she was in the wrong environment.  However, as a last attempt to help her we decided to take her to the vets for tablets to calm her down, which did help her a lot in the home, but outside she still couldn’t tolerate cars, lorries, bikes, dogs, birds, men in dark clothes or hats etc. etc.

I have got to admit at this stage we found ourselves thinking that we couldn’t do anything to help her and we were devastated.

A 'cheeky girl' found cuddling my daughters teddies

A ‘cheeky girl’ found cuddling my daughters teddies

Then six weeks ago, a wonderful person called ‘Michelle’ from my gardening forum, emailed me to say she had just listened to ‘Steven Havers’ on Radio Leicester and he was a dog trainer / behaviourist and sounded really good.  I rang him and he visited on the 27th April.

I have been taking Judy to his classes each week since and in just five weeks, Judy will now walk along side other dogs on her extendable lead without reacting.  Mr Thrift counted twenty two dogs surrounding her a couple of weeks ago in his class and she wasn’t barking, lunging or taking any notice of them!…It is absolutely incredible to watch.

Previously in the home we had also blocked all our windows with a plastic ‘film’ to give a frosted effect so she couldn’t see out and bark at everything she saw…..this week we have also managed to remove the film and she really doesn’t bark too much at all.

We still have a long way to go, as she isn’t so good on the short lead yet and though she is better with cars she still doesn’t like the lorries and motor bikes and next doors dog is still a big problem for Judy, but we have come an awful long way in a short time.

IMG_2468

 We are very pleased with her progress and I’ve got to say Steven Havers training is brilliant….it is obvious that he has so much experience with dogs and right from the start he said that Judy wanted to learn.  He concentrates on training the ‘owner’ rather than the dog and he uses praise to reward the dog and not food treats.

Hopefully very soon we can also try and wean her off the tablets that the vet gives her.

So thank you Steven for your continued training and advice and thank you ‘Michelle’ for emailing me with his details.

SAM_1155

.

A Walk In The Park:

.

Last Sunday I woke early and took Judy for a walk in Western Park at 6.45am.

The sun was shinning, there was no one around and it was so peaceful.  I felt like I had discovered a place that no one else knew about, it was absolutely magical.  I have never heard the birds sing this beautifully before.

IMG_2456 IMG_2446

“In the 19th Century ‘Leicester Corporation’ purchased the land for £30,000 to create a park for the people of the ‘West End’ of Leicester and it is one of the largest parks in the City covering 73 hectares.  The park was opened in 1899”.

Leicester City Council work hard maintaining this park and they have recently put lots of signs around giving interesting information about the wildlife here:

IMG_2457

I have lived in this area for nearly twenty years now and it is only since October (when I have been walking Judy) that I have realised how beautiful the park is and how lucky we are to have it on our door step.

IMG_2451 IMG_2447 IMG_2449 IMG_2448

There is also a 400 year old Oak tree in the park, that is nick named the ‘Old Major’.  I have walked past this tree many times without really taking much notice…..but when I stopped and actually took the time to look at it, it is absolutely magnificient.  My photograph below doesn’t really do the tree justice:

IMG_2455

.

There are so many beautiful places around me that I have walked past without noticing or never bothered to go and see.  I feel it is time for me to take more notice of the things that are right under my nose and I will write about them as I do.

“What is this life if, full of care,
We have no time to stand and stare”.

William Henry Davis

.

.

This week in my garden:

.

I started by thinning out my kohl rabi and my beetroot.  I used a pair of scissors to just ‘snip off’ the unwanted plants:

SAM_1120 SAM_1122

My wall flowers had finally finished flowering, so I dug them up and planted the dwarf peas I was growing in guttering.  They were a bit ‘leggy’ but I’m sure they will be fine.  I am trying to plant in every area possible, so I thought the peas would grow nicely using the chicken wire fence as a support.  All I need to do now is stop Judy from destroying them!

SAM_1112 SAM_1113

This week I also planted my french beans and some more lettuces:

SAM_1115 SAM_1116

….And gave the area under my bay tree a bit of a tiny up:

SAM_1117

.

In my home this week:

.

At the beginning of the week Mr Thrift was poorly with a viral infection.  When he started to feel a little bit better, I made him a vegetable soup to get him to start eating again.

I had an ’emergency’ bag of mixed vegetables in my freezer that I used and I’m glad to say Mr Thrift enjoyed it.

SAM_1137 SAM_1138 SAM_1142

(You can find the recipe for the soup here.  I didn’t use all the vegetables in the recipe, I just used the pack of frozen vegetables together with potato and onions).

.

In the home this week I also made a big batch of pasta sauce to freeze.  I love the days when I can take something out of my freezer, defrost it and then just reheat it in the microwave and add it to pasta.

This recipe also doubles up as a pizza sauce too.

SAM_1139

.

I had also ran out of my dishwasher liquid, so I made some more.  I make it with ‘soup nuts’ and it saves me a lot of money in the long run.

You can find the recipe here.

SAM_1143

.

As you have probably guessed, I struggle to sit still and I like to keep myself busy….On Sunday I mentioned to Mr Thrift that our bathroom looked awful.  I gave it a lick of paint when we first moved into our house thirteen years ago and it hasn’t really been touched since then. The plan has always been to have a new bathroom suit as the bath, sink and tiles are really old and have seen better days, but we certainly can’t afford this for a very long time.

SAM_1127 SAM_1128

Over the years our window blind had also become discoloured in places too:

SAM_1144

…..So on Monday I decided to spruce it up a little by giving it a lick of paint….it actually took two coats in the end, but I was very pleased with the result.

I put up a new blind and changed the light and shower cords, so they looked fresh and new.

SAM_1151 SAM_1150

After I put the shelves back up I gave all the families toiletries a good sort out and put them back neatly.

SAM_1146 SAM_1147

I then put our shower curtains back up….unfortunately we have to use the curtains to stop any water from going down the side of the bath.  We have tried numerous times to seal between the tiles and the bath, but unfortunately it never works as the bath is slightly too far away from the wall!…so we have resorted in lining the shower area with two large shower curtains.  Unfortunately this area doesn’t look good, so I cover it with a ‘nicer’ shower curtain on the outside of the bath:

SAM_1152 SAM_1149

Incidentally, you can see in the photo above my handwash.  This is a Marks and Spencer ‘luxury’ hand wash bottle that I refill each time with cheap ‘value’ bubblebath…..no one ever knows and it saves me buying expensive handwash.

So overall, I am very pleased with our bath room.  It still needs ‘gutting’ in the future, but until then it doesn’t look quite as bad:

SAM_1145 SAM_1153

.

Thank you for reading my blog today.  I will be back next Friday at my usual time.

Have a good weekend!

Chewing Gum And A Homemade ‘Soup In A Mug’

I thought I would show you my daughters school trousers that she came home with this week….

SAM_0773

She had managed to sit in chewing gum at some stage during the day!….my heart sank.

I tried the usual advice of freezing the trousers, which I did overnight.  However, the chewing gum didn’t peel off in the morning at all as it was supposed to.  I had nearly given up when I read online to iron the chewing gum face down onto a piece of paper with a medium hot iron (no steam) ….the theory is the chewing gum sticks to the paper instead of the fabric when it is warmed up.

SAM_0774

So I just thought I would share this with you as it did actually work.  Though it did take me a long time and there is a tiny bit of residue on the trousers, but the trousers are thankfully now wearable again.

Afterwards

Afterwards

I hope this is useful for someone out there one day.

.

I don’t know if you remember Judy (our lovely little rescue dog) is very reactive to other dogs and goes mad when she sees one.  Unfortunately our next door neighbour decided to get a dog of their own in January and this has been causing us a big problem every time their dog is in the garden.

As there was only a wire fence between our gardens, our behaviourist advised us to block the end nearest our house off so both dogs can’t stare at each other, as in ‘dog world’ this is threatening behaviour.

So I used the weed suppressant I won last year to cover the wire.  Unfortunately it hasn’t really helped our dog and back in Febuary we were advised to block the other end of the wire fence off too.

The wire fence before

The wire fence before

So after much debate, this week we decided to give it a go and again I used weed suppressant (that I won) hung onto the wire fence with curtain hooks…and it looked awful!

Mr Thrift and I decided it was too awful to live with and so we bought some cheap brushwood to cover it.  We know that brushwood doesn’t last too long, but we are hoping it will last long enough for us to correct Judy’s behaviour…..though it hasn’t had an effect yet!  However after putting it up we actually now think the garden looks much better…what do you think?

After

After

.

Another job I finally managed to do, was the stepping stones in our grass (or what’s left of the grass).

Back in January when I cleared the shrubs at the back of our garden it was very wet and I was treading on the grass over and over, which made it extremely muddy.  We also then had workmen treading up and down the grass on the day it snowed in February, replacing the fence for us.  And to make matters worse, our dog runs up and down the grass, over and over again when next doors dog is out……so our poor grass has really taken a beating!

When it was muddy we bought some stepping stones that B&Q were selling off cheaply (as they only had a small amount left) and we just shoved them on top of the grass until the grass dried (or should I say until the ‘mud’ dried).

So I finally bedded them into the ground this week.  I know you are supposed to use sand underneath each slab, but I didn’t have any and just bedded them into the earth, but I’m sure they will be fine.

I just need the grass to re-grow now (but I doubt that will happen until we sort our dog out):

SAM_0776

.

This week I purchased two ‘garden tidy bags’ for £5.00.

Unfortunately my greenhouse has a solid concrete base and I wanted to grow more in there than I usually do, so I filled each bag with compost.

SAM_0785

One of the bags will have basil growing in it and the other I have already planted with my peppers:

SAM_0797

.

I have also been sowing seeds again.  I have sown spring onions, perpetual spinach, courgettes, patty pans and coriander.

SAM_0801 SAM_0800 SAM_0799

I also sowed swedes, in newspaper pots as they don’t like to be transplanted….when they are ready I plant the newspaper pot into the ground as well, so there is no root disturbance at all.

SAM_0798

Another vegetable I sowed was my dwarf peas and mangetout.  If you have been reading my blog since I started, you will know that I sow these in guttering, which I keep in my greenhouse until it has germinated.  This way I get a really good germination rate and it is easy to slide the plants off the guttering, provided I use only small lengths (you can read about it here if you are interested).

I use duct tape to seal each end of the guttering.

SAM_0802 SAM_0833

.

Around my new kitchen garden:

This week I noticed that the radish, beetroot and kohl rabi that I sowed directly into my soil, have started to germinate which is brilliant, however there is no sign yet of the baby turnips that I sowed at the same time:

SAM_0815 SAM_0816 SAM_0817

I have also found calendula growing in the pot where I planted my Jeruselum artichokes last month.  I thought I reconised the seedlings a few week ago, so I left them growing just to make sure.

I used some soil from my allotment in this pot, it was the soil I brought my J. artichokes home in and it obviously had some calendula seeds from my allotment.

SAM_0803 SAM_0804

I love free seeds, but I love these even more because they traveled home with me….so I have ‘pricked’ the seedlings out into new compost to grow on and plant somewhere special.

SAM_0805SAM_2281

.

Elsewhere around my new kitchen garden, the plants that I brought back from my allotment are growing well.

My rhubarb:

SAM_0812

My Globe artichokes:

SAM_0807

My black currants, white currants and gooseberries too:

SAM_0813

And I am really pleased with my autumn raspberries, as I have only two that are not growing out of the twenty three plants that I brought back home with me:

SAM_0821 SAM_0822

So things seem to be going ok so far.

.

This week I also managed another cut from the salad leaves in my greenhouse, that I sowed in March in plastic containers from the supermarket.  I also added some chives from my garden to the salad leaves too.  It feels so nice to be serving fresh, homegrown food to my family once again.

SAM_0788 SAM_0789

.

.

And Finally:

I thought I would share a bargain that Mr Thrift found a few weeks ago:

SAM_0790 SAM_0791

Carrot and swede, ready to use for just 10p per bag….he bought four bags.

I used one in my steamer and I’ve got to say it wasn’t very nice- I don’t know why, but it just didn’t taste nice.  So I froze the other four bags, not really knowing what to do with them.

A few weeks ago my daughter asked me to get her some packets of ‘soups in a mug’ for when she comes home from school and I have started to have the odd cup, so I decided to make my own with the carrot and swede:

.

Carrot and Swede Soup with Chili and Coriander:

4 x 500g bags of ready cubed carrot & swede

2 ¼ pints of vegetable stock

1 tablespoon olive oil

3 small onions

4 teaspoons of ground corianda

2 teaspoons of mild chili powder (add more if you like it hot)

Salt & pepper to taste

.

Put the olive oil and onions in a large pan and fry until soft.

Then add all the other ingredients into the pan and simmer until the carrot and swede are soft:

SAM_0792

Blend the soup with a hand blender or liquidiser until smooth:

SAM_0793

Divide the soup into ‘mug’ size portions and freeze.

I got ten portions out of my soup.

(I remove the plastic margarine pots when they are frozen, so the bags don’t take up so much room in my freezer)

SAM_0794

Defrost and then pop it into a microwave safe mug and microwave for 2 to 3 minutes on high.

Then serve your home made ‘soup in a mug’:

SAM_0796

Enjoy!

.

.

I hope you have enjoyed reading my blog today.  I will be back next Friday as usual.

I hope you have a lovely weekend!

Courgette Sponge Cakes With Mascapone Cheese & Lemon Curd

Just wanted to say a big ‘thank you’ to ‘Argiolus‘ who identified the caterpillar I mentioned on my blog last Friday.  It is in fact an Elephant Hawk Moth and he has kindly given a link to some more interesting information about the moth here.

SAM_9804

I love receiving comments on my blog, so please keep them coming with your views, questions and answers, etc. which are great for everyone who reads them.

Thank you

.

At the weekend Rowley fields allotment society in Leicester had an open day, so we went along.  We saw a wonderful plot (or should I say garden), so I took a photo to show you:

SAM_9856

How beautiful it was!

.

This week at home I have once again been thinking about storing my crops, by putting my onions away.  They have been drying nicely for the last three or four weeks in one of my mini-greenhouses.

SAM_9692

I put them in a large netted bag in my storage boxes with my potatoes and they will store nicely over winter, provided I check them every so often for any that have begun to rot.

SAM_9889 SAM_9891

.

At my allotment, my cucumelons are taking over my tomato plants and my poor tomatoes are struggling to ripen!…but dispite this, my polytunnel is heaving with produce:

SAM_9873 SAM_9876

.

This week at my allotment I have been pruning my golden gage tree.  I don’t think it has been pruned for a long time and as a result I found there were a lot of dead, diseased and crossing branches to prune away.

SAM_9882 SAM_9886

.

Also, I have been pruning my lavender bushes that looked so beautiful at the beginning of summer and attracted lots of beneficial insects.

When I attended horticultural college I was told that the council parks department use strimmers to prune their Lavender and after planting my hedge a few years ago, I also use a strimmer to prune my lavender and it works a treat.  Provided I make sure that I leave approximately one inch of the current years growth on the plant, then it grows back lovely the next year:

SAM_9885 SAM_9887

.

I have also been picking lots of tomatoes from my allotment.  I am still expecting ‘blight’ as they succumb to it each and every year unfortunately… but as yet they are still blight free for the moment.  You can read about ‘tomato blight here.

SAM_9843

As well as making tomato and basil soup (the recipe is here), I have been making passata.

Passata doesn’t usually have any seeds in it, however I think life is too short to sieve the seeds out of the sauce, so I don’t.

All I do is wash and chop them in half and then cook them in a large pan with a cup of water.  When they are soft I use my stick blender to liquidise them until there are no lumps.

SAM_9842 SAM_9844

I then poor 500 grams worth of sauce into bags in plastic pots and when it is cool I freeze the portions.  When it is frozen I remove the bags from the pots and put the nice rectangular shaped sauces in my freezer ready to defrost and use when it is needed.

I use the sauce in recipes like pasta sauce, pizza sauce or spaghetti bolognaise.

SAM_9892 SAM_9893

.

 This week I have once again been busy making jams and chutneys.  I started with a beetroot chutney to use up the last of my beetroot.  My daughter and sister love this chutney, so I make it every year.

The recipe is here.

SAM_9824 SAM_9833

I continued to use up the plums I picked by making more plum jelly and I also made plum ice cream sauce.  I made the ice cream sauce in the exact way that I made crab apple ice cream sauce here, but I just substituted the crab apples with the plums.

It is delicious drizzled over ice cream (especially the home made vanilla ice cream here).

SAM_9832

.

Unfortunately, I then realised I had nearly ran out of jars and I still have loads of fruit in my freezer to make different jams, etc.  I know if you buy new jam jars they can cost quite a bit of money, so I buy the cheapest jars from the supermarket, use the contents and then re-used the jars.

(Incidentally, I don’t buy pickle jars as the smell is hard to remove).

In the past I found ‘value’ marmalade was the cheapest, but this week the cheapest jars I could find contained ‘lemon’curd’ at just 22p per jar.

SAM_9837

I gave the contents of a couple of jars to a friend and I have been madly using the rest of them myself.

I started by making mini lemon meringues:

SAM_9834 SAM_9836

My eldest daughter made a lovely victoria sandwich with lemon curd in the middle:

SAM_9862

And finally, we went to a friends house at the weekend and I took some little lemon curd cakes and I even managed to hide a courgette in the mixture too.  They did taste good, even though I do say so myself.

You can find the recipe below:

SAM_9871

.

Courgette Sponge cakes with Mascapone Cheese and Lemon Curd:

.

6 oz of Margarine

6 oz Caster sugar

6 oz Self raising flour

3 Eggs

A few drops of Vanilla Extract

1 teaspoon of baking powder

1 medium courgette

½ Jar of lemon curd

250g tub of mascapone cheese

20g icing sugar, plus a small amount for dusting

The juice and zest from one lemon

.

Preheat the oven Gas Mark 5 / 375F / 190C

Peel the courgette, top and tail it and then grate it very finely.

Place the courgette in a sieve just to let any excess water drain away while you are making the cake mix.

SAM_9846 SAM_9848

Sieve the caster sugar, flour and baking powder in a bowl and then add the eggs, margarine and vanilla extract.  Mix until they are combined.

SAM_9849 SAM_9850

Add the courgette and mix until combined.

SAM_9851

If the mixture falls off the spoon easily (dropping consistancy), then half fill muffin cases with the mixture.

(If the mix doesn’t fall off the spoon easily then keep adding a tiny bit of water and mix until it does).

SAM_9853 SAM_9854

Bake for 20 minutes and then leave to cool.

SAM_9855

Remove the cake from the cake case and slice it in half and put a teaspoon of lemon curd in the middle

SAM_9863

Mix the icing sugar, mascopone cheese and lemon juice together and then spread it or pipe it onto each cake.

Top each cake with a small amount of lemon zest.

SAM_9861 SAM_9864

Sprinkle with a dusting of icing sugar to finish off the cakes

SAM_9869

 Enjoy!

Thank you for reading my blog today.

I will be back at my usual time next Friday.

Batch Baking, Fixed Beds And Celeriac

Before I start I thought I would show you a couple of photos that I took yesterday out of the car window, whilst my husband was driving.  I think the display of daffodils that Leicester City Council planted a few years ago, really look beautiful this year.  I think the daffodils are the variety called ‘Tete-a-Tete’ and they look stunning planted all along the central reservation.

SAM_8584 SAM_8588

.

Yesterday morning I did my usual weekend ‘batch baking’.  I love baking all in one go, as it saves me time during the week and energy as I cook things together.

This weekend I made fruit scones and weetabix chocolate brownies for lunch boxes and a chocolate cake for tea. I butter the scones before freezing them as it makes it easier in the mornings, as I just take a couple of scones out and pop them a lunch box.

SAM_8569 SAM_8572

I also made a large pot of vegetable soup to take to the allotment with me in my flask.  I love having homemade soup with a homemade roll, sitting in the sunshine at my allotment watching all the birds and insects buzzing around….and it’s full of vitamins and cheap too.

My homemade soup has whatever I fancy from the freezer when I make it.  Yesterday’s soup has my homegrown swede, turnip, courgettes, runnerbeans, broadbeans, pumpkin and leeks in it.

I just fried the leek in a tablespoon of olive oil until it was soft and threw everything else in and just covered it all with vegetable stock and left it to simmer for thirty minutes.

SAM_8567 SAM_8568

I then used my hand blender to ‘blitz’ it until it was smooth and divided it into portions which I froze when it had cooled down.

It really is an easy meal to make.

SAM_8573 SAM_8574

.

.

At my allotment this weekend I noticed lots of ladybirds appearing.  In this particular clump of overgrown grass there were loads of them together, though the photograph actually only shows three.

SAM_8582

.

I have ‘fixed beds’ at my allotment, which just means I have paths either side of my beds so I don’t need to walk on them.  This makes it far easier for me to manage the soil, as I can just lightly ‘fork’ over my beds if I need to.

I chose not to have raised beds as I couldn’t afford the wood for raised beds (as I have four plots) and I would also need to buy in the top soil to fill them.

My top soil is nice and deep and I don’t think raised beds would be an advantage for me.  The only exception is my one raised bed that I use to grow my carrots in, as I can not grow carrots in my very heavy soil.  This one and only raised bed is made up each year of my homemade compost, leafmould and a bag of sand and this is the only way I have managed to grow carrots.

SAM_2465

So this week I have been busy finishing the weed suppressant paths that I talked about here and I have been ‘forking’ over this area ready for my legumes.

I think this area looks much better without the bricks holding the weed suppressant down and it will be lovely not to have the weed suppressant ‘fraying’ all over the place as it gets caught up in my fork, which is very annoying as it makes the job harder to do.

SAM_8557

There was one area that I had been treading on all winter, as I had put the prunings that I took from my plum tree late last summer there.  This wasn’t a wise move as it was really hard work forking the soil over, as it had all compacted and the water was slow to drain from this area.

  I thought I would show you the difference between the soil that I had trod on lots over the winter and the soil that I hadn’t trod on.  Both photos were taken when I had turned the soil over with my fork.  You can see the soil structure where I hadn’t walked, in the right hand photo. This was far better than the soil on the left hand photo, where I had walked.  So this is really enough proof to me that my ‘fixed’ beds do actually work.

SAM_8555SAM_8556

.

This weekend I had been transplanting some of my plants at the allotment.  I have divided my chysanthemums and planted them through my weed suppressant next to the boxes that I made last week to edge my plot:

SAM_8564

I have also been transplanting some of them to the outside of my woodland area, together with foxgloves that have self seeded around my plot.  Hopefully they will look lovely when they flower.

SAM_8563 SAM_8562

And finally, I transplanted some Michaelmas daisys that had outgrown their spot, to the back of my plot around the Hazel trees which I coppiced this winter…

SAM_8550

…I do already have Lavatera and Buddlia growing at the back of the Hazel, so hopefully with the  Michaelmas daisys,   this area won’t look so bare whilist the Hazel is growing back.

SAM_8551 SAM_8553

.

One last thing, I picked the last of my celeriac this weekend.  I don’t usually leave it in the ground overwinter, but I somehow over looked it….but I have got away with it as it has been so mild.  The celeraic does have one or two slug holes in, but I am really pleased with it overall.

So my next job is to freeze it this week.

SAM_8565

.

I hope you have enjoyed reading my blog today.

I will be back on Friday at my usual time.

An Onion Trial, Tomato Soup And Freezing Parsley

Hi all, I hope you had a good weekend.

Since the New Year, I have only been blogging twice a week and I am finding it really hard to cover everything I actually do in just two posts a week.  So I try and cover as much as possible, but I do miss out a lot, so I would like to apologise for that.  If there is anything you would like me to write about, or anything that puzzles you, please let me know.

.

SAM_7234

.

The weather was good here yesterday, so I managed to dig up two more rows of potatoes and dry them ready for storing.  These potatoes are a variety called ‘Piccasso’ which I have grown a lot over the years.  They are great for roasting, mashing and baking and I find they boil and hold their shape well.  So they are a good all rounder, which are great for storing over the winter.

My potatoes drying in the sun

My potatoes drying in the sun

.

A couple of weeks ago, I took up my over-wintering onions.   This is a job I usually do in July, but this is another crop that was behind due to the cold spring we had.

My over-wintering onions last year didn’t do very well at all, due to an attack of the ‘allium leaf miner’.  So in autumn last year, I planted seed sown over-wintering onions (rather than sets), in the hope that they would grow stronger than the sets I usually plant.  I also covered them in environmesh to protect them.

My onions growing under environmesh

My onions growing under environmesh

.

The allium leaf miner is a pest that was only detected in Britain in 2002.  It has been spreading rapidly since and spread to many places in the Midlands for the first time two years ago. 

The allium leaf miner isn’t choosy which allium it attacks.  Alliums include onions, leeks, garlic and shallots.

You can read more about the pest here.

.

I am really pleased with the results, as none of them suffered from the allium leaf miner and this year I have lovely, large onions, which are now drying in my mini greenhouse ready for use:

My onions drying in my mini-greenhouse

I will use my over-wintering onions first, as they don’t store for as long as summer onions do.  I usually chop them up and freeze them, ready to use when my summer onions have ran out.  However, as it’s been such a good growing year, I am struggling with space in my freezers.

.

Yesterday, I also managed to pull up my summer onions.  I planted a variety of onions this year so I could compare them and find out if one variety was more resistant to the allium leaf miner than the others, as my summer onions also suffered badly last year from this new pest.

  I sowed some seeds back in January called Bedfordshire Champion and in March I planted two different varieties of onions sets, one variety called ‘Sturon‘ and another called ‘Turbo‘.  Incidentally, both of these onion sets have been awarded the RHS Award of Garden Merit (AGM).

My onion patch at the beginning of July

My onion patch at the beginning of July

The results (drumroll please)…..

I didn’t suffer very badly this year at all with the allium leaf miner, even though my summer onions weren’t covered in environmesh.  However, a few onions were affected on all three varieties, so I can safely assume that the allium leaf miner is not fussy about which onion variety it chooses and it didn’t make a difference whether the onion was grown from a seed or sets.

I don’t know yet which onion I prefer, as I need to taste them first and I would like to see how well they all store over the winter.  But on first impressions, it’s definately ‘Sturon‘ that has given me the biggest onion.

I have now set out my onions to dry for a few weeks, ready for storing over the winter:

SAM_7239 SAM_7240 SAM_7241

.

Last week I sowed a green manure called ‘Phacelia’ and I am pleased to say that it has germinated and growing well now.  I like using this particular green manure as I don’t need to worry about my rotational beds as it isn’t a brassicca, legume, allium or part of the potato family.  I usually sow it at this time of year in any areas that become available.

SAM_7197SAM_7237

.

‘Phacelia tanacetifolia’ is good for sowing between March and September and it takes between one and three months to grow depending on growing conditions.

It is a green manure that tolerates most soils, which is why I chose it, as I have a heavy clay soil.

If you leave phacelia to flower, it is a beautiful lavender colour that the bees absolutely love, which is why I grow it in my wildflower area.  The one drawback is that if you leave it to flower it self seeds like mad.

As I am sowing it as a green manure, I will chop it down and fork it in to the soil before it flowers, so it doesn’t grow and become a weed to me next year.

Phacelia in flower

Phacelia in flower

.

I just thought I would tell you about the winter salads that I mentioned on Friday’s blog post.  I am amazed to tell you that the winter lettuce (arctic king) and my mizuna have germinated in just four days!  I am amazed by this.  These will go into my polytunnel when I have a space in a few weeks time:

SAM_7242

.

I’ve been busy in my kitchen this week too, blanching and freezing my crops.  One of the things I have frozen is my parsley.  I don’t bother drying it, as I only really use it in a handful of recipes, including homemade garlic bread (you can find the recipe here).

It is really easy to freeze parsley:

SAM_7208

Start by chopping all the leaves off the stalks and wash them

SAM_7209

Leave the  leaves to drain so the leaves are not too wet when you freeze them.

Pop the leaves in a freezer bag and put the bag in your freezer.

SAM_7210

Use the frozen parsley straight from the bag.  You will find it crumbles easily ready for use when it is frozen.

.

.

SAM_2975

My tomatoes are ripening well now, both inside my greenhouse and outdoors at my allotment:

SAM_3761

I decided it was time to make my tomato soup as my daughter loves it.  This is how I make it:

.

Tomato and Basil Soup

.

1400g ripe tomatoes cut in half

2 medium onions chopped

2 medium potatoes chopped small

2 tablespoons of olive oil

550ml of vegetable stock

2 garlic cloves chopped

3 teaspoons of dried basil

Salt and pepper to taste

 .

Gently heat the olive oil in a large pan, add the onion and potato and soften for approximately 15 minutes, without it all browning.

SAM_7215

Add the tomatoes and cook for a couple of minutes.

SAM_7216

Add the stock, garlic and basil.  Cover and simmer for 25 minutes.

SAM_7218

Use a hand blender to blend the soup roughly and then pass the whole lot through a sieve to extract the seeds.  Throw away the contents of the sieve.

SAM_7219 SAM_7221 SAM_7222

Re-heat the soup and serve.

SAM_7224

.

I hope you have enjoyed reading my blog today.

I will be back on Friday at approximately 4pm.

Have a good week!

What Do You Do With Hundreds Of Courgettes?

I always look forward to the first courgette of the year as it means summer really is here.  I get excited watching it grow, waiting for the day I can pick it:

SAM_2741 SAM_2742

When I do pick it, I nearly always use it in a lovely courgette, onion and cheese omelette and we always comment on how lovely it is to have the courgettes at last, as it seems such a long time since we last picked them the year before.

SAM_2629

The first couple of weeks are like a ‘courgette honeymoon’, as it’s so lovely to use them in our summer meals.

Every day I check for more courgettes on my plants and the plants keep producing them.  They just keep coming…

SAM_7075

…and coming…

SAM_2627

…and coming…

SAM_2246

…and coming!

In fact by mid-summer they seem to be laughing at me and ‘popping out’ overnight from where they have been hiding and every basket of goodies havested at the allotment has a least a couple of courgettes in:

SAM_7119 SAM_7097 SAM_3398 SAM_3968 SAM_2763

.

So what on earth can you do with all the courgettes that you pick?

.

I have read quite a few articles in books and magazines on this subject, but half the recipes I’ve read are not really realistic for everyday meals, or are really time consuming recipes (and I haven’t got too much time to cook the courgettes as I’m too busy picking them).

So I thought I would talk about what I do with the millions of courgettes that I grow:-

.

I use courgettes in everyday meals like pasta bolognaise, curries and chilli’s…

Pasta Bolognaise

Pasta Bolognaise

.

I also use them in pies like my Chicken, Courgette and Broccoli Pie.  You can find the recipe here.

Chicken, Courgette and Broccoli Pie

Chicken, Courgette and Broccoli Pie

.

Courgette Frittata’s are nice too.  The recipe is here.

Courgette Frittata

Courgette Frittata

.

I also add them in the Pasta / Pizza Sauce recipe I make.  After it is cooked I whizz the sauce up with my stick blender and no one ever knows and then I use my sauce as normal.  You can find my pasta / pizza sauce recipe here.

SAM_2440

.

Courgette chutney is one of my favourite chutneys.  I use this recipe, but replace the scallopini’s (patty pans) with courgettes.  It keeps for ages and is lovely served with cold meats and on sandwiches.

Courgette Chutney

Courgette Chutney

.

I also use courgettes to make savoury scones.  Cheese and courgette scones are absolutely delicious and can be frozen ready to pop into lunch boxes in the morning, before work and school.  The recipe for cheese and courgette scones is here.

Cheese and Courgette Scones

Cheese and Courgette Scones

.

One of the favourite things I make with courgettes is a Chocolate Courgette Tray Bake Cake.  No one ever knows the cake has courgettes in and this way the kids get a few extra vitamins, without realising it.  The recipe is here.

Chocolate Courgette Tray Bake Cake

Chocolate Courgette Tray Bake Cake

.

One other thing I do with my courgettes is to freeze them.  I have a bag of sliced courgettes and diced courgettes which I open freeze on trays before bagging up, so they don’t stick together.  I never blanch my courgettes first and they always seem to be ok for use over the winter.

I also bag up grated courgettes in the exact quantities ready to make the courgette cheese scones.  This way I can just take a bag out of the freezer the night before, to defrost ready to make the scones.

Courgettes sliced and diced ready for freezing

Courgettes sliced and diced ready for freezing

.

Finally, I use the courgettes in different soups.  A particularly nice soup is a Courgette, Potato and Cheese soup.  The recipe is below:

.

Courgette, Potato And Cheese Soup

.

500g potatoes, peeled and chopped into small pieces

1 pint of vegetable stock

1 kg of courgettes, washed and chopped into small pieces

1 bunch of spring onions, washed and sliced small

100g grated cheese

Salt and pepper

Ground nutmeg to serve.

.

Put the potatoes into a large pan, cover with the vegetable stock and bring it to the boil.  Simmer for 10 minutes.

Add the courgettes and simmer for a further 15 minutes, stirring occasionally.

SAM_7104 SAM_7105

Put a few spring onions aside to garnish the soup when you serve it.  Put the remaining spring onions in the pan and simmer for a further 5 minutes.

SAM_7103 SAM_7106

Add the cheese, stirring it until it has melted.

SAM_7107

Take the pan off the heat and use a stick blender or liquidiser to smooth the soup.

SAM_7108 SAM_7110

Return the pan to the heat and bring back to the boil, adding salt and pepper as required.

Serve the soup with a sprinkling of ground nutmeg and garnish with the remaining spring onions.

SAM_7112

.

I hope you enjoyed my blog today.  If you do anything different with your courgettes, it would be lovely to hear from you, so please leave a comment at the bottom of this post.

I’ll be back on Friday at 4pm.

Have a good week.

How To Grow Watercress And A Watercress, Leek & Potato Soup

I hope you all had a lovely weekend.

Before I start today, I thought I would show you the hidden treasure I dug up yesterday:

SAM_6698

These potatoes are a second early variety that I grow every year called ‘Marfona’.  As the potato plants were flowering I thought I would have a root around and see what I could find.

They tasted absolutely wonderful.  I made a homemade lasagne to go with the potatoes and served it with a homegrown salad (except for the cucmber as mine aren’t ready yet).

SAM_6701

Afterwards we had freshly picked home grown strawberries served with natural yoghurt…what bliss!

SAM_6704 SAM_6705

.

Today I thought I would talk about Watercress.

I always thought that you needed running water to grow watercress, until my old allotment neighbour showed me how he always grew it in a great big black pot that he had on his plot.

Sadly, my neighbour gave up his plot up in December 2011 and so I decided to take the plot on myself.   I inherited the old black pot and I also tried to grow watercress in it and it worked really well.   All I did was to replace the top inch of compost with new compost, sprinkle the seeds over it and cover them with a small amount of compost.  I just made sure the compost didn’t dry out and this was the result:

My Watercress 2012

My Watercress 2012

.

When my watercress began to flower, I left it to set seed and I was surprised to get a second growth of useable watercress a few weeks later.

This year I sowed the seeds in the same way, but as our Spring was cold, I placed a pane of glass over it to help with the seed germination and it has grown well again.  I actually only sowed half the big barrel as this really is enough for us.

SAM_6677

.

Watercress is fabulous as it has more than fifteen essential vitamins and minerals.  Apparently, it contains more vitamin C (gram for gram) than oranges, more calcium than milk and more iron than spinach.

Another wonderful thing is that it only contains 11 calories per 100g of raw watercress.

.

I noticed on Friday that my Watercress is starting to go to seed (even though I have been adding loads of it to our salads), so I needed to use it up fairly soon.  Last year I made a Watercress and Potato soup, but one of my daughters didn’t like it as she said it was too ‘silky’ (whatever that means).  So over the weekend, I made a different soup with less watercress and this time I used leeks from my freezer….I’m pleased to say, she loved it:

.

Watercress, Leek and Potato Soup Recipe:

.

100g Watercress

450g Leeks

425g Potatoes (weight after peeling)

1 pint of vegetable stock

½ pint of milk

1 tablespoon olive oil

Salt and pepper to season

 .

Slice the leeks and chop the potatoes into small pieces.

Heat the olive oil in a large pan and then fry the leeks over a low heat until they are soft.

SAM_6681

Add the potato and watercress and ‘sweat’ for approximately five minutes, stirring occasionally to make sure it doesn’t burn at the bottom of the pan.

SAM_6682

Add the vegetable stock and season with salt and pepper to your taste.

SAM_6683

Simmer for approximately 20-25 minutes, until the potato is soft.

Heat the milk until it is starting to boil.

SAM_6686

While the milk is boiling, puree the soup with a hand blender or a liquidiser.

SAM_6684

Add the milk to the pan of soup and bring the soup back to the boil, stirring continuously.

SAM_6688

Serve the soup with a swirl of natural yoghurt.

SAM_6691

Enjoy!

.

I hope you enjoyed reading my blog today.

I will be back on Friday at approximately 4pm.