Archives

A Fox In The Garden And Planting Cabbages

I have been concentrating on my kitchen garden this week, especially as we have had some nice weather. However I did notice that we have also had a couple of frosts this week, which shows that it really is too early to be planting out anything that isn’t frost hardy.

.

Last week I noticed a deep hole had been dug in one of my beds and this week it happened again:

IMG_3366

We have lots of squirrels in our garden, but the hole just seemed too deep to have been dug by a squirrel.  I also noticed that my bird bath kept being knocked to the ground as well.

I thought at first it could possibly be a cat causing the damage so I put a few pieces of welded wire over the bed that was being dug:

IMG_3475

But the next day I found some muddy paw marks on my weed suppressant which looked very much like a fox.  I also noticed the string I had put around my broad beans had been cut, which definately confirmed to me that it was a fox, as this used to happen regularly at my allotment.  I have also been using blood, fish and bone recently in my garden which always used to attract foxes at my allotment too:

IMG_3432

My bird bath is in the corner of my garden and I suspected the fox was entering my garden by jumping on my neighbours compost bin (directly the other side of the fence) and then using my bird bath to vacate the garden, knocking it over in the process.

To stop this from happening I have attached a thick piece of welded wire over this piece of the fence, so I will just have to wait and see if it works and actually stops the fox from coming into the garden:

IMG_3431

.

This week I gave my lawn it’s first cut.  I don’t know if you remember but I lifted slabs in this area in September last year, prepared the soil and then laid a new lawn here.  The grass looked marvelous after it was laid.

Unfortunatey over the winter our fence blew down and the grass was trampled on when it was very wet while the fence was being repaired and also Judy (our dog) used to run around madly, reacting to the dog next door when it cames out…..so our grass has gone from a lovely thick lawn to a lawn with bald patches:

SAM_2036 IMG_3378

I am not mowing it too closely in the hope that the grass will start to thicken up a little bit now, though some places may be past that stage.  One thing I am pleased with is there are no yellow patches from my dogs urine….we have made sure that everytime Judy goes toilet we sprinkle water from a watering can over the area that she has wet and it seems to be working.

I have also neatened the area around my bay tree and transplanted three or four plants that were growing in the wrong places in my garden:

IMG_3370 IMG_3377

 .

This week I planted some aubrietia plants that I grew from seed last year and overwintered in my cold greenhouse.  I thought they would look nice flowering over the rocks along the middle of my garden in years to come when they get a bit bigger:

IMG_3372

This week I also planted some sweetpea plants to grow up my new trellis, in the hope they look pretty and attract beneficial insects to my vegetable garden:

IMG_3380 IMG_3381

.

I noticed the fruit bushes that I planted along my fence are beginning to grow.  I always feel a sense of relief  when new bushes start to grow as I then know that I haven’t wasted my money on them:

IMG_3490 IMG_3489

A couple of weeks ago I saw a strange growth between two of my fruit bushes and I hadn’t got a clue what it was.  I looked at our old garden photos to find out what was growing in this place before and it was an area underneath our old holly tree that was covered in ‘Vinca’ (periwinkle)….so I was completely puzzled.  The growth looked a bit like a ‘bleeding heart’ (dicentra), so I decided that I would dig it up and put it in a pot just in case.

The plant has grown a bit now and it definately is a ‘bleeding heart’……I haven’t a clue how it got there, but I will definately keep it:

IMG_3478

.

This week I finally finished planting my onions.  I started growing the sets at the beginning of March in my cold greenhouse, so they were all growing well and the roots were beginning to grow through the newspaper pots.

I planted my onions very closely as I will harvest some of them as spring onions, leaving the others to grow bigger in order to get a double crop out of this area.  This worked well last year.

My onions have all been covered in environmesh to stop the allium leaf miner:

IMG_3435 IMG_3437

I also planted the white cabbages that I sowed on the 25th February.  Brassicas like firm soil so I firmed round each plant with my boot.  I also placed a cabbage collar around each plant to stop the cabbage root fly laying its eggs at the base of each plant….the larvea then eat the roots and kill the plants.

I don’t buy cabbage collars as they are easy to make using cardboard cut into squares with a cross cut in the middle:

IMG_3449 IMG_3452

I also covered the cabbages with netting to stop cabbage white butterflies from laying eggs on the leaves….it’s the resulting caterpillars that quite quickly strip all the leaves off the plants.

The net I used is very tall beacuse I will be planting my curly kale here when we have eaten all the spring cabbages:

IMG_3457

.

Another job I did was to mulch around my fruit trees using homemade compost from last year.  This compost was made using plants and grass that I dug up at the beginning of last year when I was creating my kitchen garden, mixed in with a few kitchen peelings etc.  It made a wonderful mulch:

IMG_3438 IMG_3444

IMG_3439 IMG_3440

I also brought two new wall planters for the new herbs I brought last week.  Last year I placed my herbs at the bottom of my garden, but unfortunately our local squirrels decided to keep digging the plants up to bury their nuts in the pots and eventually the herbs all died as the roots kept drying out.  So this year I decided to keep my herbs next to our house, which will also be much more convenient for us to use.

I am quite pleased with how they look and I have moved my mint and rosemary underneath them too:

IMG_3494 IMG_3428

.

I am still deadheading my daffodils in the garden and as they finish flowering I give them a feed of blood, fish and bone.

IMG_3434

But as the daffodils are finishing flowering, elsewhere in the garden there are other flowers for the bees to enjoy:

  I noticed the plum tree that I have in a pot has begun to flower:

IMG_3470 IMG_3471

And the wallflowers I grew from seed last year are about to flower any day now:

IMG_3486

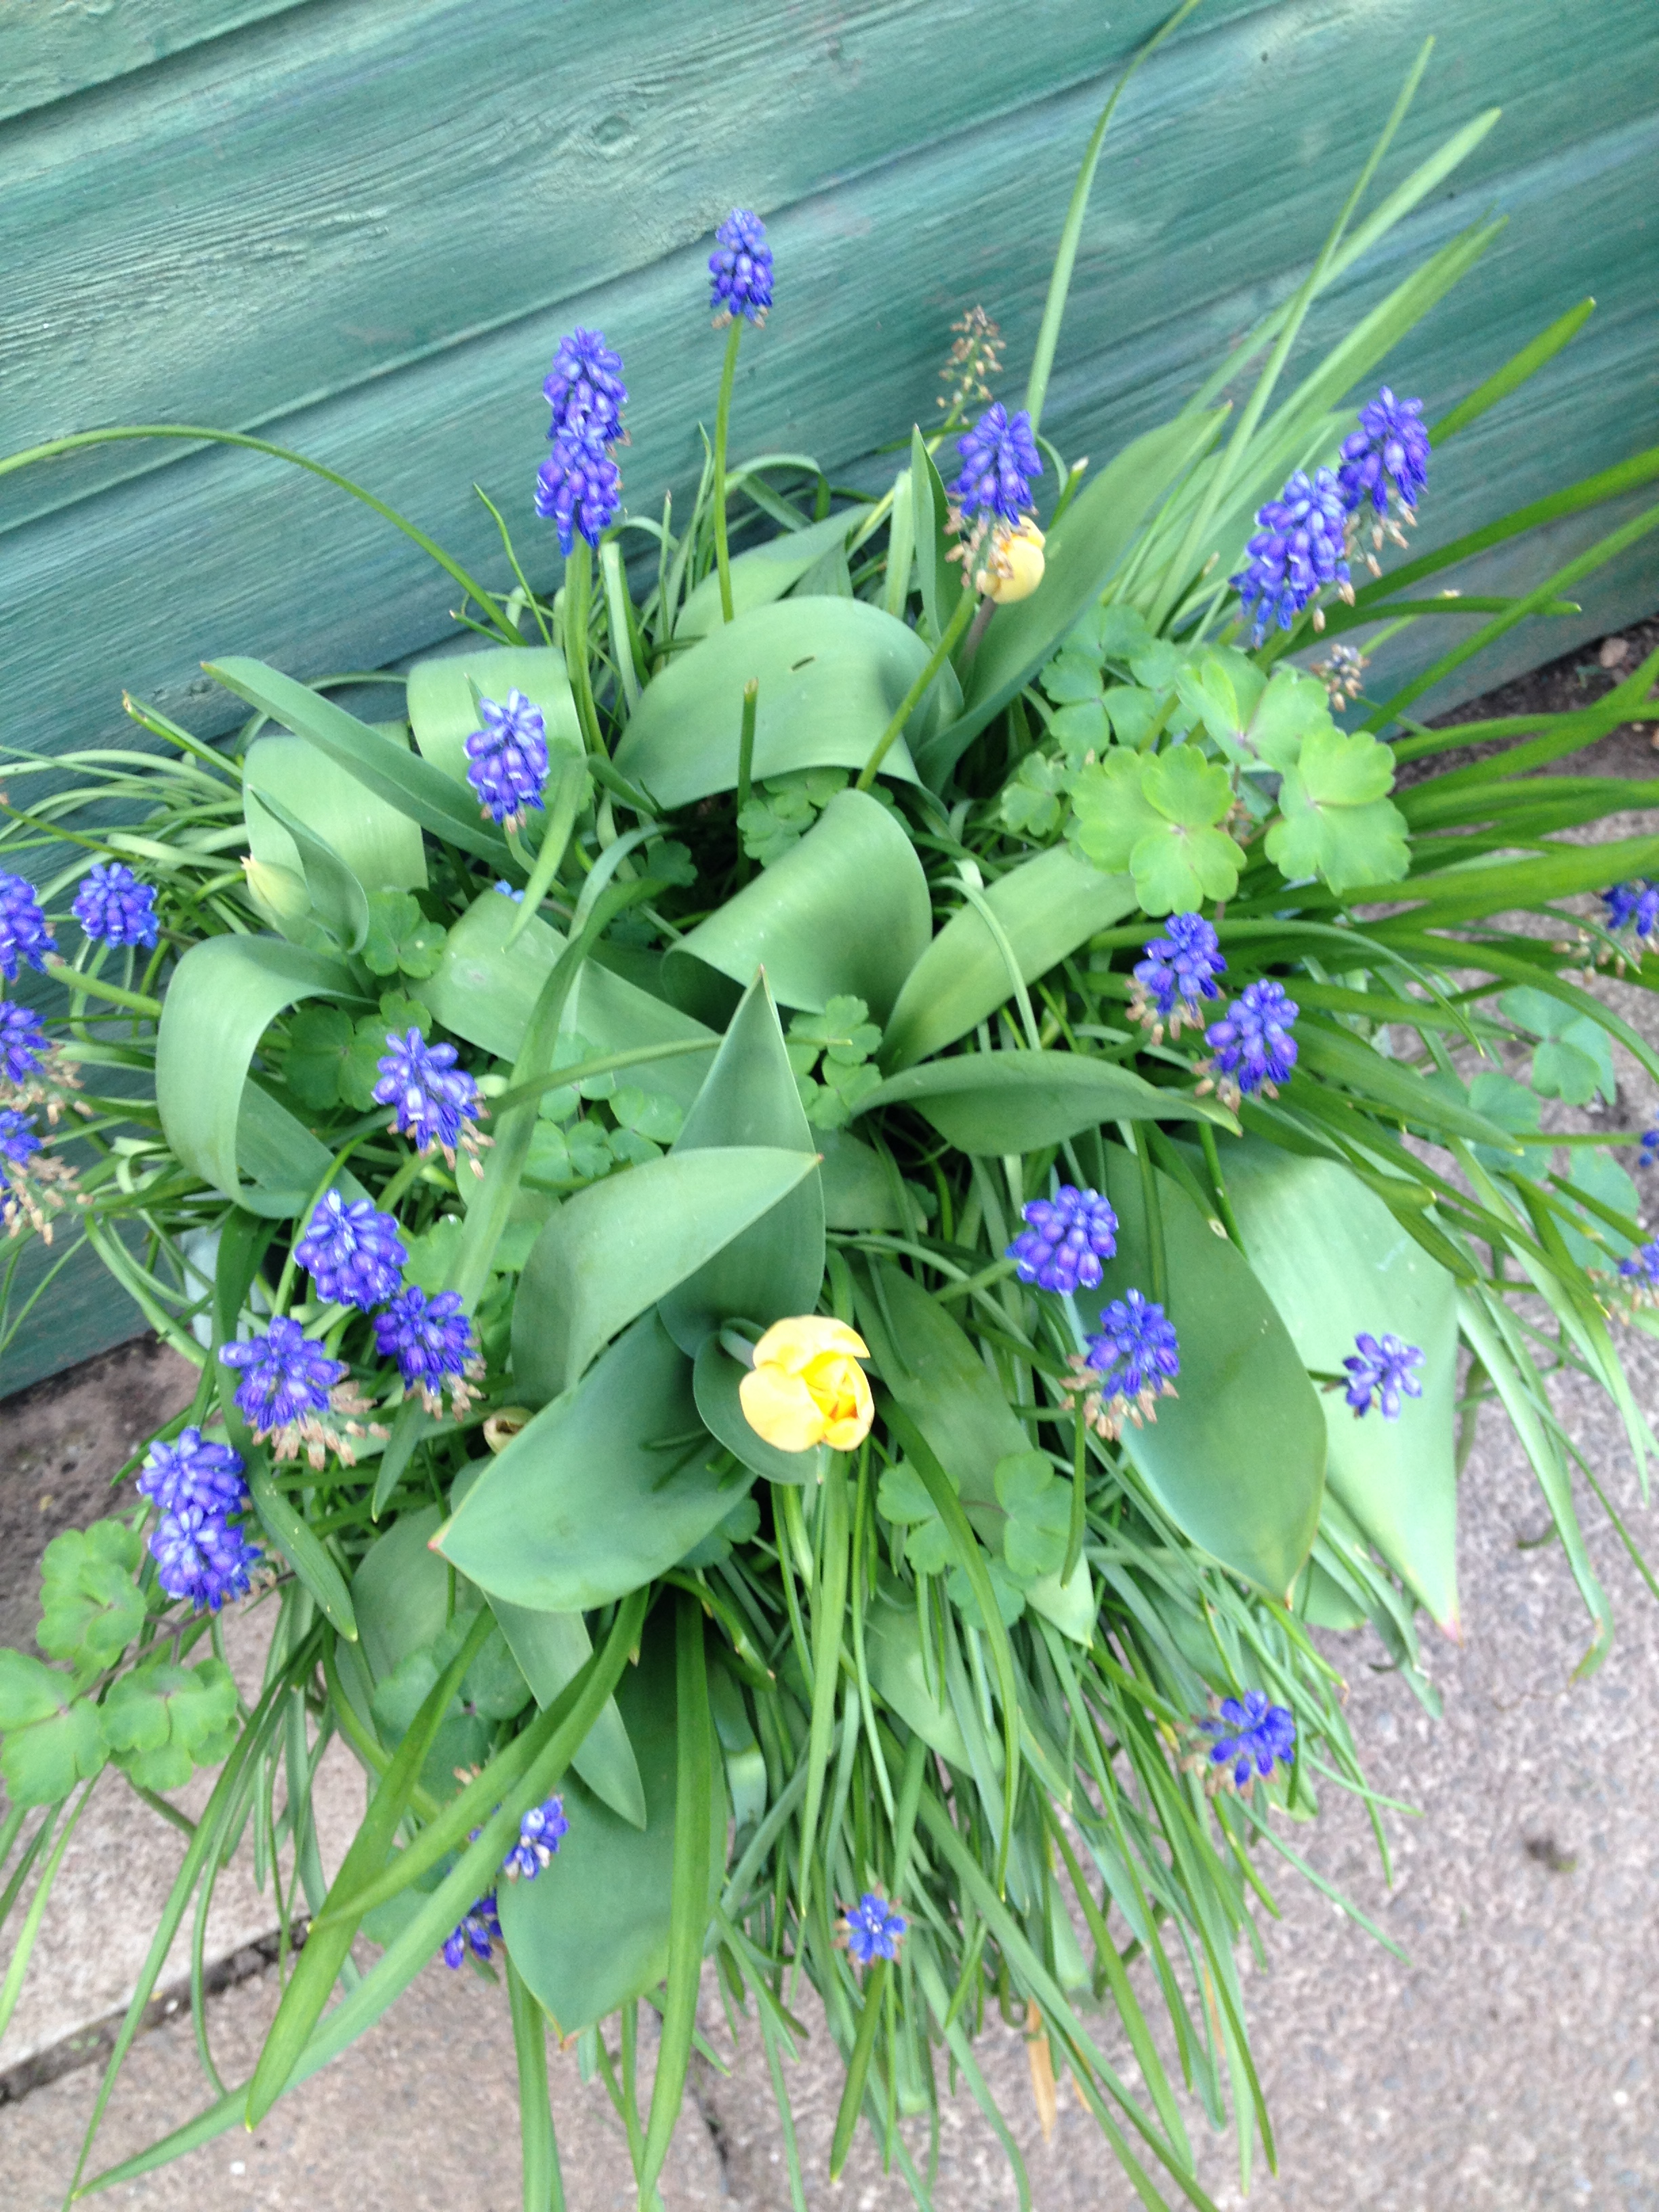
And my pot of bulbs that has had daffodils flowering for weeks, now has with grape hyacinth (muscari) flowering beautifully and any day now the Tulips will also burst into flower.

Spalding bulbs sent me these bulbs free in Autumn 2012 and since I planted them I can honestly say I have done absolutely nothing to them except move the pot out the way after it has finished flowering….maybe this year I should make an effort to feed them!

IMG_3467

 .

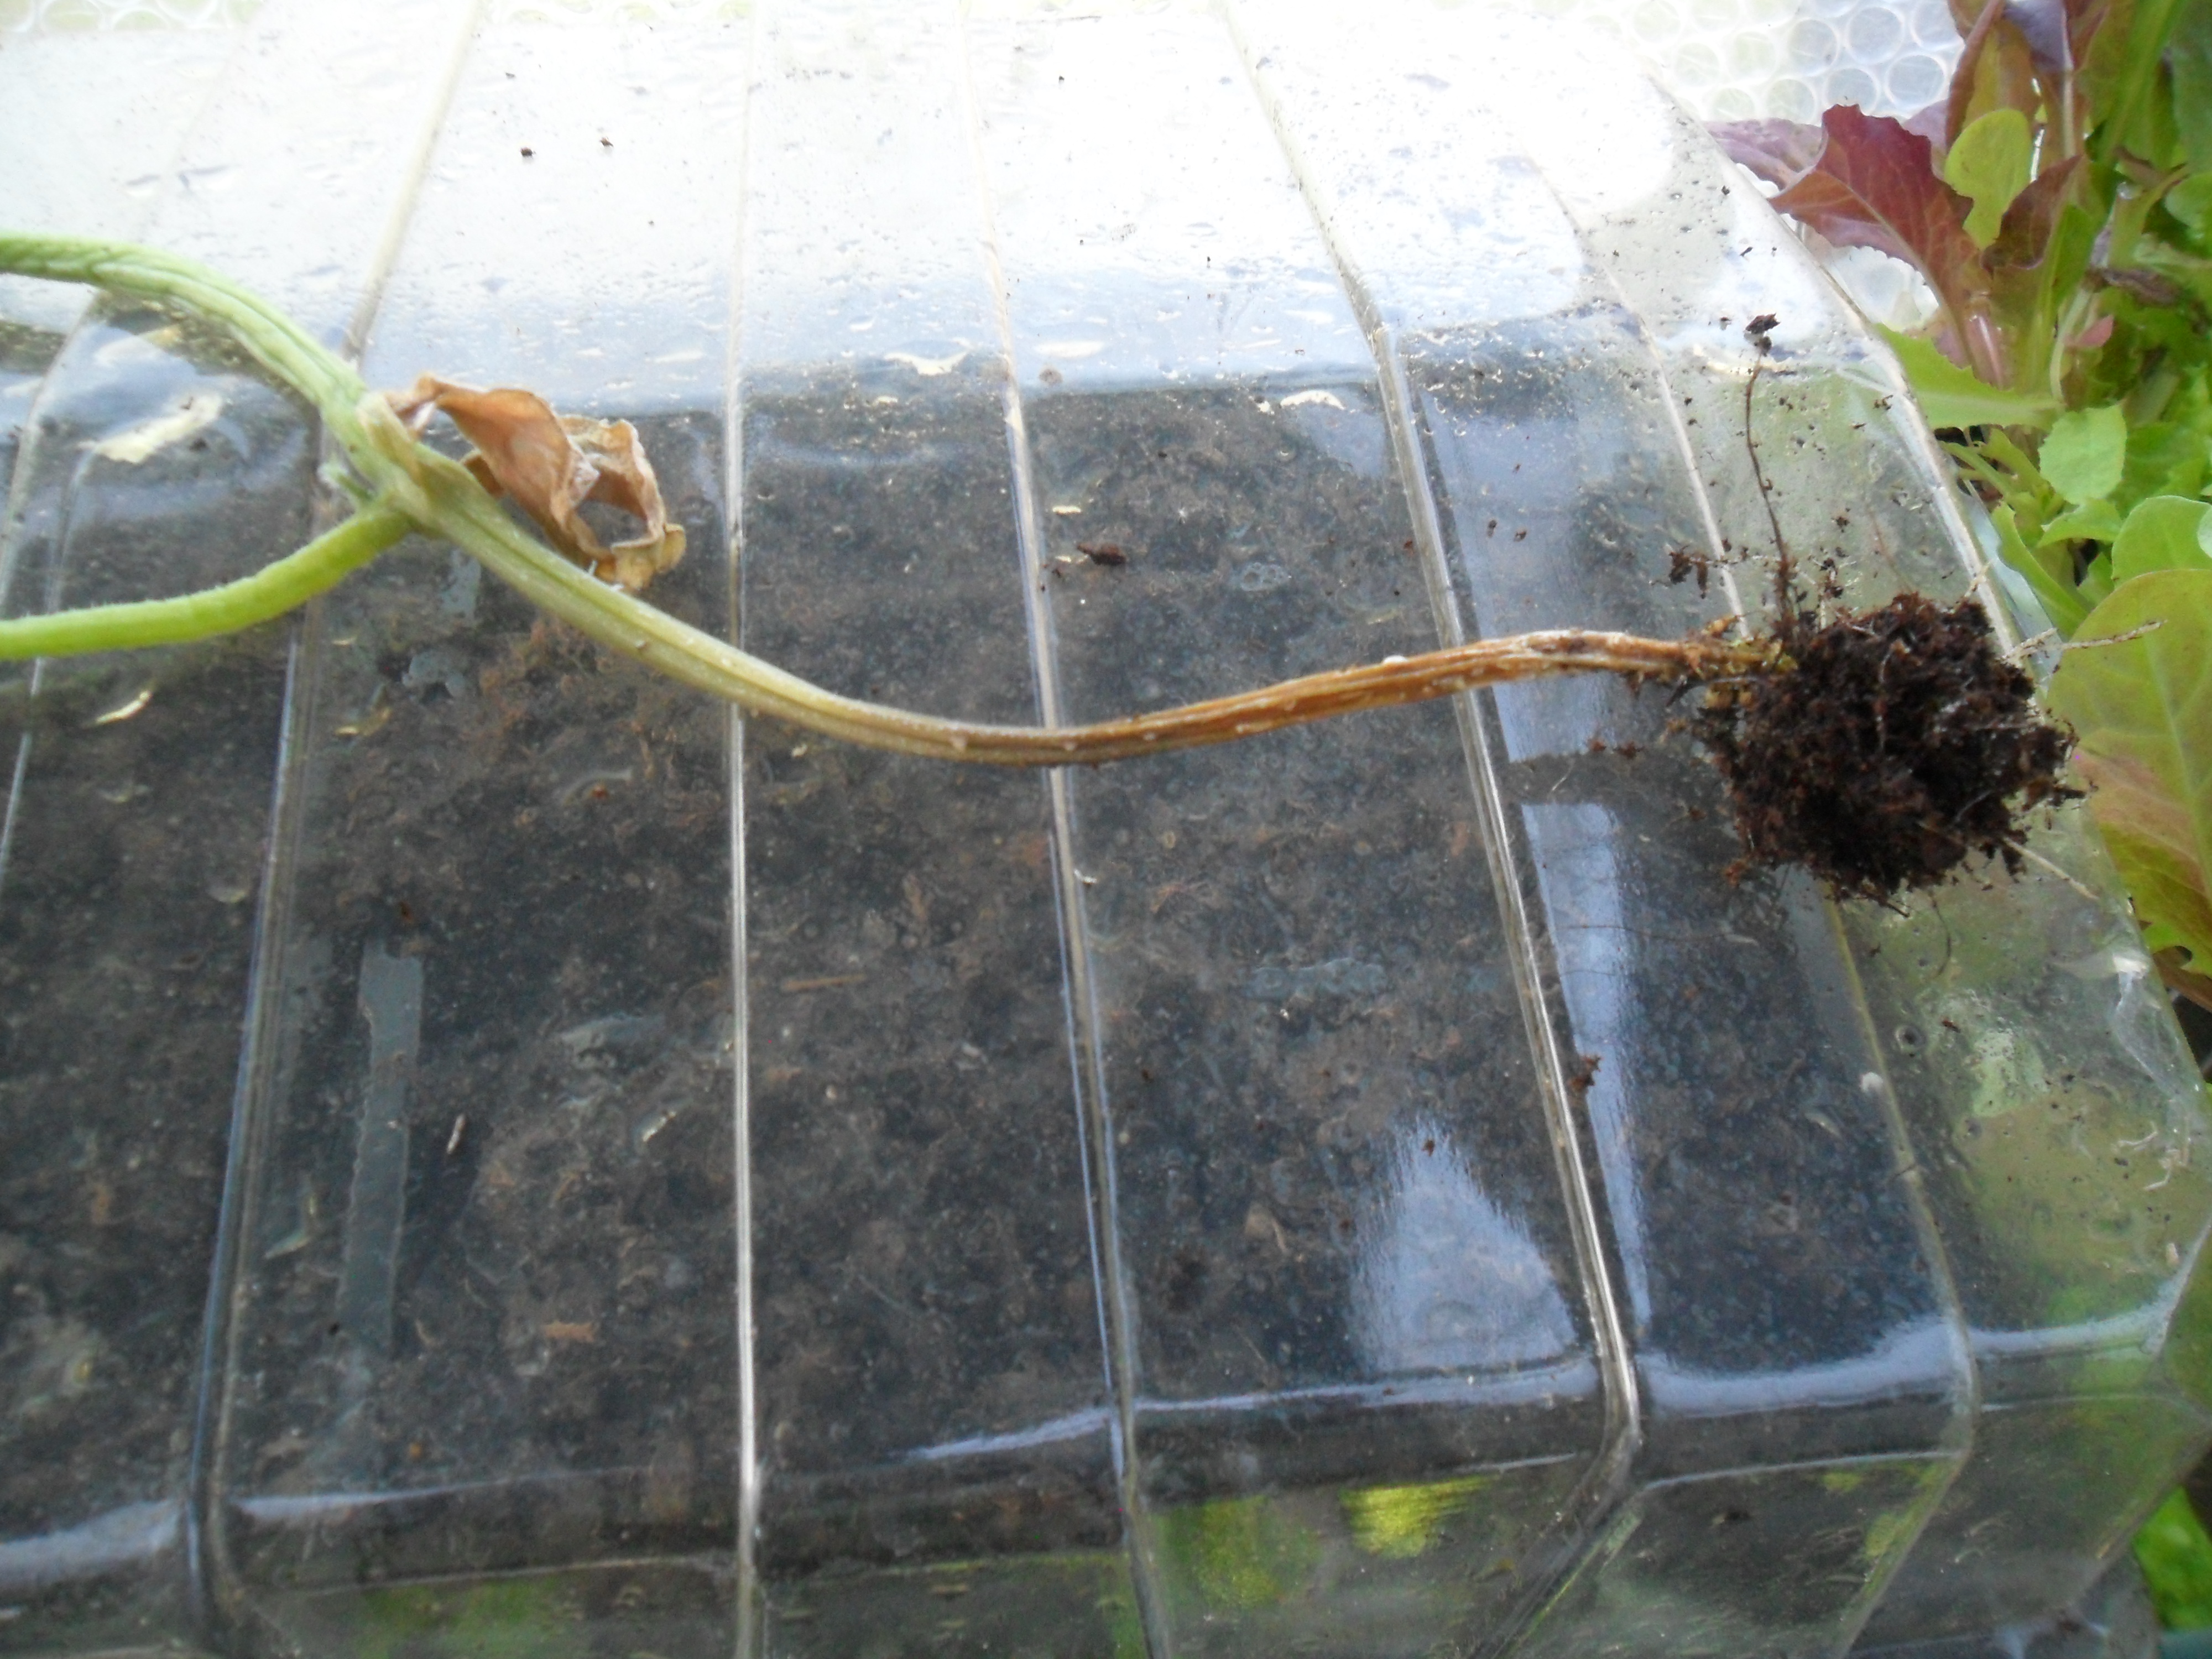
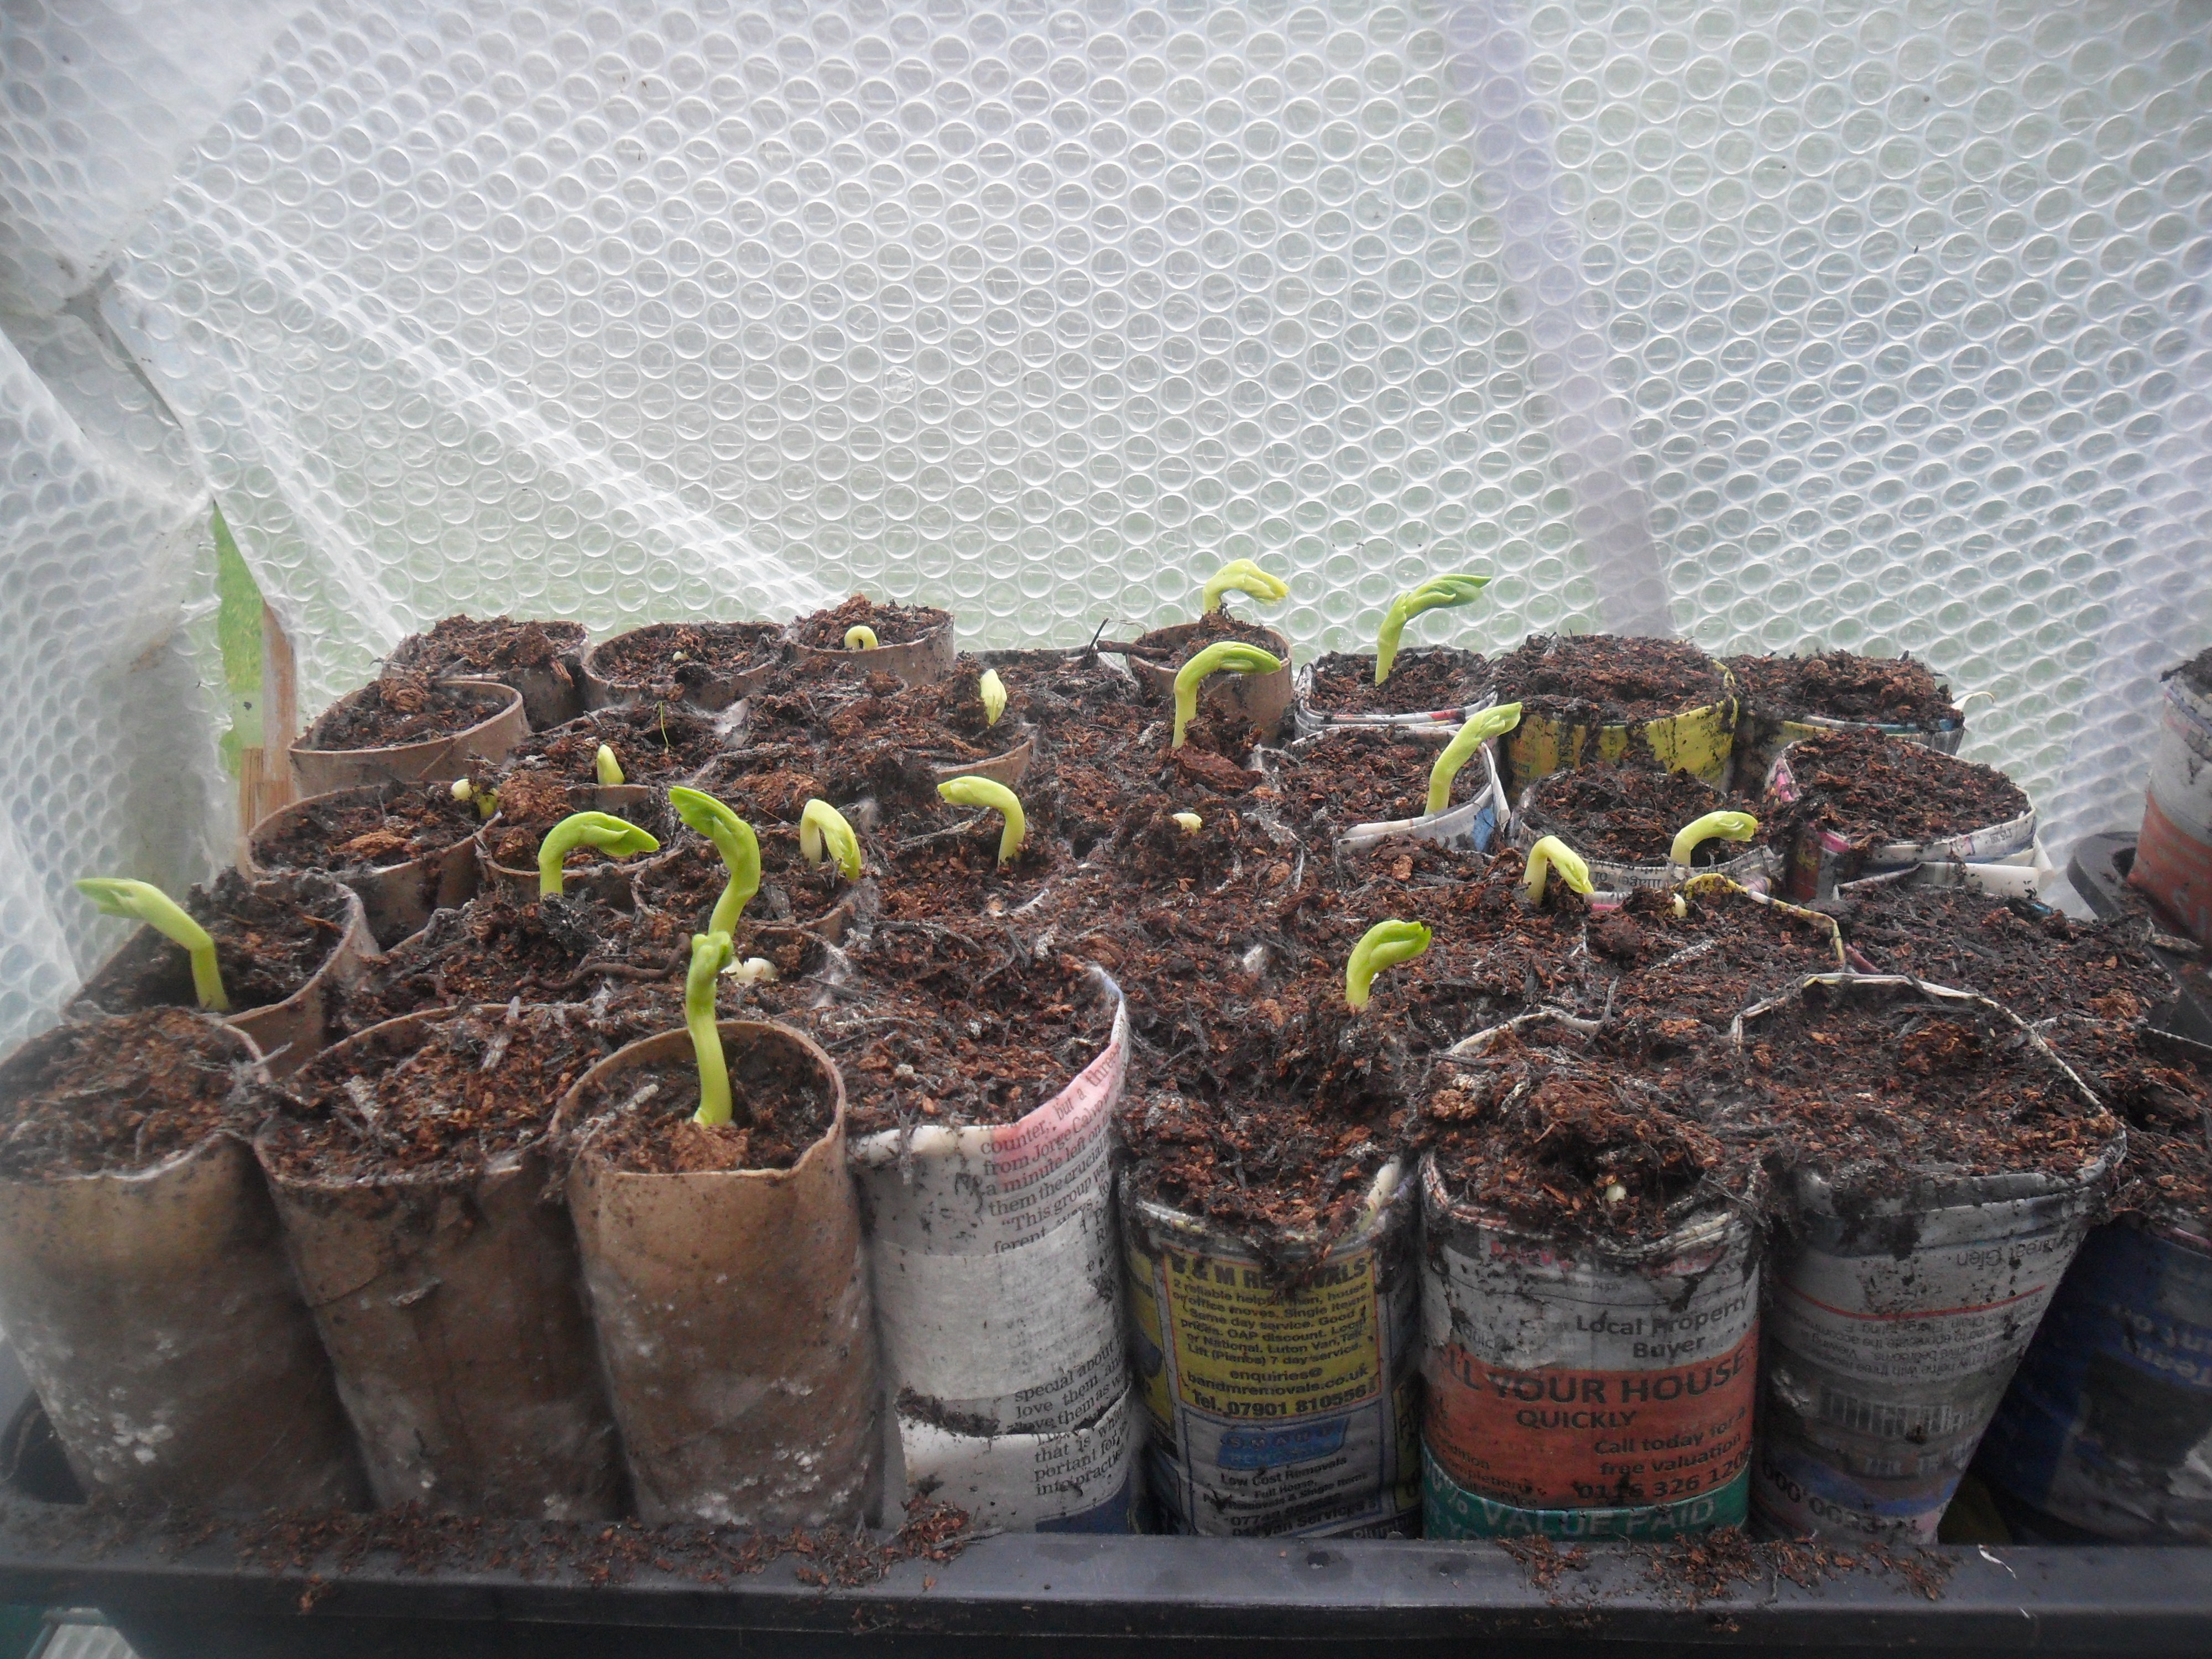
In my greenhouse that is now heated to keep the temperature above 10C, things are doing well.  My different seedlings are growing strongly and this week my climbing peas which I planted two weeks ago have germinated well.  I saved these seeds in 2012 from plants I was growing at my allotment, so I was praying they would still germinate:

IMG_3480

My cut and come again salads are also growing well and next week I will be taking my first cut.  The radish are also nearly ready that I have been growing around the edge of the salads:

IMG_3482

I also saw a tiny little shoot coming from one of the dahlias that I grew from seed last year.  I kept the pots in our cold brick outhouse overwinter as a trial to see if they would survive and it appears they have.  I brought them out a couple of weeks ago and placed them in my greehouse, giving them a good watering first:

IMG_3484 IMG_3483

.

In my kitchen I have a few seeds that needed a higher heat to germinate than my heated greenhouse can offer.  I sowed these seeds two weeks ago and nearly all of them need pricking out now…this will keep me busy over the next few days!

IMG_3464 IMG_3465 IMG_3466

I must say I am now looking forward to clearing my kitchen of seeds so we can get back to normal:

IMG_3420

Anyway, that’s enough for this week.  I will be back next Friday as usual.

I hope you have a lovely weekend!

Path Edging And A Few Odd Jobs

After our fence was blown down in the gales last week, I had to wait until it was fixed by our lovely neighbour before I could continue with my new vegetable patch.

In the mean time I caught up with a few little jobs that I hadn’t quite got around to:

I first labled my homemade wine:

SAM_2375 SAM_2373

I then finally sorted the basil that had been hanging in my kitchen drying for ages:

  In the summer my dad gave me a pot of basil from the supermarket and as I didn’t use it up I hung it in my kitchen to dry.  After a couple of weeks I transferred it into a paper bag so the bits didn’t go everywhere as it dried:

SAM_2205 SAM_2206 SAM_2393

The result was lovely dried basil, which I crunched between my fingers to remove the big stems and then I passed it through a seive to remove any remaining twigs:

SAM_2395 SAM_2397 SAM_2398

As there was only a small amount of dried basil I just topped up the jar of shop brought basil I had in my pantry:

SAM_2400

I also then turned my attention to Christmas and made sure that I had everything I needed for my Christmas presents. I only had the odd thing to buy as I tend to buy presents through out the year, either in the sales or if I find something unusual that I know someone would like.

After this I sat down with some lovely Christmas music in the back ground and wrote all my cards.  I like to take my time to do this as I have a few people that I only write to once a year, so I like to tell them what has been happening in our lifes:

SAM_2378

And finally I sliced an orange to dry, ready for my Christmas decorations. I arranged the slices on a piece of greaseproof paper over my radiator and I find they dry in a week or two without needing to put them in the oven.  I usually put a little hole in each one when they are nearly dry so I can thread some wire or ribbon through it.

SAM_2391 SAM_2392

I absolutely love to see dried oranges around the house at Christmas.  The photo below shows the arrangement I made last year for our mantle piece:

SAM_7938 SAM_7937

.

I was pleased to say that our lovely neighbour finished fixing our fence at the weekend and we now have some concrete posts that have been cemented into the ground, to strengthen our fence.  Hopefully this will withstand any further gales we have:

IMG_2826 SAM_2377

SAM_2389

So I removed the rubble from the old concrete and took it to the tip and then I had a general garden tidy, clearing away the bits and bobs I had laying around.  You can also see in the photo above that I put my old chair back in to position ready for next summer too:

IMG_2829

It’s funny what gets dug up when you have work done in your garden isn’t it…..I found a ‘pig with wings’ that I had completely forgotten about, which must be thirteen years old!….I’ve got to be honest I don’t know how or even why I have him, but I’m sure I’ll find a place somewhere for him to go.

IMG_2830

.

So now the fence was complete I could carry on with my new vegetable patch:

The ground wasn’t very level as I had dumped the old grass in a pile when I laid my new lawn in September, so I had to move that before I could start.  I had covered the grass with weed suppressant back in September to kill it, so I just spread it over my new area and I will just dig this into the soil for now and it will probably be rotted away completely by Spring time:

IMG_2839

I had already decided to have wood chip paths inbetween my new beds, as this would be cheaper than buying slabs.  However, I needed something to stop the woodchips from spreading into my beds…..so I brought some wood sawn treated timber to edge the beds and I set about making them:

SAM_2387 SAM_2385 SAM_2388

I have quite simply screwed them together using corner braces and screwed on bits of wood to secure them into the soil.

I didn’t think there was a need to have raised beds as the soil I have is good and it would just be a waste of money to ship in top soil.

I then forked over the area where the first edging was going to sit, removing any weeds as I dug and then I fitted the first edging making sure it sat level and in the right place:

IMG_2846

I then fitted the next edging and repeated the above to make a third bed too:

IMG_2848 IMG_2851

And that is as far as I’ve managed to get this week.

I have two more beds to complete and unfortunately for Mr Thrift, I have three or four more slabs to lay next week (so I need to sweet talk him into helping me again).

.

I hope you have enjoyed reading my blog today.  I will be back next Friday as usual.

Have a great week!

Farm Visits & Growing Herbs

Before I start today I wanted to remind anyone that is interested, that my usual monthly blog post of

‘What To Do In The Kitchen Garden In June’ can be found here.

There is loads of information in this post e.g. weather conditions expected, what to sow / plant / harvest in June, jobs to do and pests / diseases that you may encounter this month.

I hope it helps someone out there.

My 'free' azalea that I have grown from a tiny little plant

My ‘free’ azalea that I have grown from a tiny little plant

.

.

I have loads to talk about this week, but firstly I want to say an enormous “thank you” to all the people that commented on my blog last week after my ‘blog wobble’.  I was absolutely overwhelmed by the lovely things you all said and it really has spurred me on to keep blogging.

All I can say is I am very lucky to have your continued support…thank you for this.

IMG_2426

.

Out and about during the week:

.

Last weekend I visited two working organic farms with my friends from the ‘Western Park Organic Gardening Forum’.

Firstly we went to Oakley Grange which is a 660 acre farm, just outside Hathern in Leicestershire and a gentleman called Richard gave us a guided tour and it was most interesting to hear about his farm.

We had a lovely lunch too in his cafe.

You can read about the farm here.

Picture1SAM_1069

.

We also visited Manor Organic Farm in Long Whatton, Leicestershire:

“We have been farming organically since 1989 and believe that organic farming is a positive philosophy, and is more than just avoiding the use of artificial chemicals and fertilisers. It is a sustainable approach to farming which views the farm as a whole system in harmony with the natural surroundings and nature itself as well as the local community”.

SAM_1091

The farmer (Graeme) again showed us around the farm and told us all about his animals and the meat they sell.  One of the things he said really stuck in my mind……he said when he goes out for a meal he will only eat vegetarian meals as he doesn’t know how the animals have been treated by other people.  He said he only eats the meat that he has produced, so he knows that the animals have been treated well.

The butcher in their shop was also very knowledgable about the meat they sell and spent time showing me what I could buy and how much it would cost me.  Organic meat is a lot more expensive to buy, but I can now see the benefits of buying it……the hard bit will be convincing my family, so I need to think about this.

This farm also had a cafe and we all had a lovely drink and cake to finish the day off.

SAM_1078 SAM_1088

I enjoyed both farm visits immensly and it was great getting so close to the animals.

.

.

In my Kitchen Garden:

As it’s June I have been planting some of my more tender plants outside…..I started with my two butternut squash plants.

Our family love butternut squashes and I had the luxury at the allotment of growing lots of these as I had plenty of space:

SAM_0158

However, it would be impossible to grow this amount in my new kitchen garden, but I wanted to try and grow at least a couple of plants.  I decided to have a go at growing them up the post that holds my washing line.  So a few a weeks ago I tied some chicken wire around the post and dug some organic manure into the soil.  This week I planted two plants at the base of the post and as it was still quite cool at the beginning of the week, I placed a bottle over the plants to act as a mini cloche to help them establish:

SAM_1026 SAM_1028

As the plants grow I will tie them to the support…..I will keep you informed on how they are doing.

.

I have also planted out the tagetes that I grew from seed, along the edges of my paths.  I think they look good when they are in flower and their smell helps to confuse pests, which help to protect my vegetables.

SAM_1049

.

I had a few outdoor tomato plants left, so I decided to put these in pots as I couldn’t bare to throw them away.  I didn’t really want too many pots around my garden as it means daily watering, but I do love tomatoes so I decided to keep them:

IMG_2436

.

This week I planted some more spring onions that I grew from seed.  Again I sowed a few seeds together in modules and didn’t bother to thin them out, as they ‘push’ apart as they grow:

SAM_1033 SAM_1035

The first spring onions are not yet ready to eat, but we have started to eat the onion sets that I planted closely together in March.  I don’t know if you remember but I  planted 66 onions very close together in the hope that I could harvest them over a longer period, by picking some when they reached ‘spring onion’ size and leaving the remaining onions to grow to a good size:

SAM_0688

Well I’m pleased to say my plan worked and I have been picking some lovely onions to put in our salads:

SAM_1098 SAM_1101

.

Herbs:

This week I also planted the parsley that I grew from seed.  I love parsley as it’s easy to grow and I like to freeze it to use for the garlic bread I make in the winter months.

SAM_1048

The apple mint that I also brought home from my allotment has finally began to put on some growth.  I will leave it in its pot so the roots are contained and don’t become invasive.

SAM_1105

My daughter likes to put mint in her drinks to make them refreshing and I must say it’s nice now for her as she can just nip outside to pick a few leaves instead of having to remind me constantly to bring some home from the allotment:

SAM_1108

.

I wanted to include lots of herbs in my new kitchen garden but I didn’t want to use the small amount of ground that I have to grow them – so I have been wondering what to do with them for a while and then I found these pots in Poundstetcher a couple of weeks ago:

SAM_1037SAM_1038

As you can see the pots only cost me 74p, but when I got them home I found that they did look really cheap and nasty when I put them up.  So after a bit of thought I got some old white, outdoor paint from my shed and sponged it on lightly to make the pots look a bit older….and I think it worked and they now look a lot better:

SAM_1045 SAM_1046

I then bought some herbs from my local garden centre and planted them in my new pots.

So I now have oregano golden french, marjoram gold, oregano country cream, thyme compact, sage and dill in the pots – though I do know that some of them will need to be moved when they grow larger in a year or two.

I also have lavender and rosemary in bigger pots in between my fruit trees:

SAM_1110 SAM_1109

And I have chives growing along my path, which are looking beautiful at the moment as they are in flower and the bees love them…..and the flowers are adding a lovely colour to my salads:

SAM_1107 SAM_1103

.

This week in my kitchen garden I also planted out the calendula that had self seeded in the compost that I brought back from my old allotment.

Calendula looks beautiful when they are flower and the bees love them and you can also eat the flower petals too.  They look great in salads or sprinkled on pasta.

IMG_2435SAM_2281

And finally in my kitchen garden this week I removed the top couple of inches of growth on my broad bean plants.  I do this when the first tiny beans are visable on the plants.

Blackfly absolutely love the top, soft growth on broad bean plants and this stops them:

SAM_1051 SAM_1053

.

.

In My Home:

This week I decided to do a job that I have been putting off for some time….I have been cleaning the top of my kitchen cupboards for the first time since they were installed 18 months ago….so they were very dirty!

I used white vinegar and a scubber to clean them and they cleaned up well:

SAM_1056 SAM_1058

I really don’t want to put this amount of effort into cleaning my cabinets like this again, so I have lined the tops with a sheet of newspaper.  When the paper is dusty and dirty I will remove it and replace it quickly with another one, without having to do any hard work:

SAM_1059

Since we have had the new kitchen I have thought the area above my cupboards looks quite bare, so this week I put some old baskets on the top of the cabinets and I have used some cheap wooden hearts to decorate them….and it now looks much more homely (and I have somewhere to store my jars for jam making too):

SAM_1060 SAM_1104

.

Thank you for reading my blog today.  I will be back next Friday at my usual time.

Have a good weekend!

‘Hardening Off’ & Homemade Yoghurt

I love May in the garden as all the new shoots growing are so fresh, green and vibrant.

In my garden at home the dicentra is flowering, the euphorbia looks stunning and my hardy geraniums are beginning to flower too.  The wall flowers I transplanted from my old allotment are still looking stunning as well, giving the bees some welcome ‘spring’ pollen.

SAM_0954 SAM_0953 SAM_0952 SAM_0940

This year however, it has felt like we have been having ‘April showers’ and ‘March winds’ in between some beautiful sunny ‘May days’…..with global warming I expect we will see more strange weather patterns over the coming years.

Nevertheless I have been harding off my plants ready for the threat of any frost to pass (usually at the end of this month where I live).

My hanging baskets and pots sit out all day now and are growing well….

SAM_0942 SAM_0948

…And some of my plants are harding off on my table in the day time and are brought inside in the evening….

SAM_0946

….And some are left in my cold frame all day and I close it at night:

SAM_0951

.

Hardening off plants:

“Hardening off” plants allows them to adapt to outside conditions before they are planted in their final positions.  There are two ways to do this:

1) Put your plants in a cold frame and gradually open the window of the cold frame more each day until it is fully opened or

2) Bring your plants outside for an hour or two for the first day and then gradually increase the time they spend outside each day.

The RHS suggest that hardening off plants properly takes approximately two to three weeks and Monty Don from Gardeners World says one week…..I usually aim for two weeks.

.

Whatever stage of ‘hardening off’ you are at, it is important to keep checking the weather forecast in your area, as frost tender plants need to be brought in at night (or covered over) if a frost is forecast.

***************

.

In my greenhouse this week:

You will remember last week that one of the cucumbers that I grew from seed died due to ‘stem rot’  (cucumbers are suseptible to this when you over water them so I only have myself to blame).

SAM_0886

This week I went out and bought a replacement from my local nursery for 60p and planted it in a tub next to my remaining cucumber grown from seed:

SAM_0930 SAM_0931

This week I also planted the basil that I sowed from seed on the 5th April, into it’s final growing place in my greenhouse next to the peppers that I also grew from seed on the 3rd March.

SAM_0933 SAM_0935

  The bags they are growing in were bought from the supermarket as ‘garden tidy bags’, so it was a cheap way to grow crops in my greenhouse (which has a concrete floor).

.

I have also planted my melons in larger pots, ready for them to grow.  When they are bigger I am hoping to train them along the top of my greenhouse, over my tomato plants.  Incidentally the melons were sown in newspaper pots so it was very easy to transplant them without any root disturbance, as I planted the newspaper pot straight into the compost:

SAM_0929

.

Another job was to transplant my butternut squash plants into larger pots.  I will leave them in the greenhouse for a few days and then I will also start to harden these off ready for planting out at the beginning of June:

SAM_0932

.

Finally in my greenhouse, I noticed the first tomato on one of my plants…..this means it is time to start the feeding once a week.  Previously at my allotment I would use a homemade ‘comfrey feed’ which is high in potash which is great for fruit and flowers….(you can read how to make a ‘comfrey feed’ here).  Unfortunately as I transplanted my comfrey only a couple of months ago, it isn’t ready to use yet, so I will be using a commercial organic tomato feed.

SAM_0955

.

.

Outside my greenhouse in my kitchen garden:

This week I have been planting my courgettes in the large pots I brought back from my allotment.  You may remember I planted some lettuce plants around the edges of the containers and they are doing well.  Hopefully the lettuces will be fully grown before the courgettes need the space:

SAM_0926 SAM_0928

At the moment I am keeping them covered with the glass, just to give them an extra bit of heat to get them growing well.

.

I have again thinned out the leeks that I sowed way back in March.  This is later than I normally sow my leeks and they are still small, so I am using the area where they will eventually be grown, to plant my lettuces.  I am growing them in succession so we have a good supply to eat over the summer months:

SAM_0950 SAM_0936

As you can see in the photograph above, I covered the first lettuces that I planted to protect them from the pigeons (they used to eat the lettuces at my allotment if they weren’t covered).  This time I decided to not cover the newly planted lettuces to see what happens in my new kitchen garden – I will be watching the pigeons carefully!

.

Finally in the garden this week I planted the cherry tomatoes that I sowed on the 5th April.  They are a variety call ‘Minibel’ which are supposed to be suitable for pots, containers and baskets….so I have taken their word and planted them in a hanging basket….I will let you how I get on over the weeks:

SAM_0949

.

.

At Home This Week:

This week I have had a big sort out of my three freezers.  I am not sure if I will still be using all three of them in the future, but at the moment they are still full of homemade goodies and homegrown fruit and vegetables.

I make sure I check what is in my freezers regularly as this helps when I plan my meals and it makes sure that everything is used and not forgotten about.  Just incase anyone is interested, I wrote and article about freezing crops here.

One of my three freezers

.

I managed to get some ‘whoopsied’ brussells and banana’s this week from the supermarket, so I also froze the brussells for another day and I made a couple of banana cakes to slice and freeze too and I also made some banana and chocolate lollies.  I will share the recipes with you another time.

 SAM_0945 SAM_0944

I also make rolls to freeze for the week ahead.  I bake the rolls as usual and when they are cool I slice them in half and then pop the rolls in the freezer.  This way I can take a roll out of the freezer in the morning and pop the filling inside and it will defrost in my familys lunchboxes ready for them at dinner time.

SAM_0924

.

I also use my freezer for homemade ice cream too.  I made some nice and easy vanilla ice cream this week (the recipe is here).  You don’t need an ice cream maker to make ice cream, but it does take the hard work out of it….I bought mine from a charity shop for just £10 and it had never been used and was still in the box when I purchased it.

SAM_0917 SAM_0918

.

This week we had family round for Sunday lunch.  I made a nice Rhubarb and Ginger cake for pudding, thanks to My friend Jeff who has brought me some rhubarb from his allotment and the wonderful person that left some Rhubarb on my doorstep when I was out last Saturday …I still haven’t managed to find out who it was, so if you are reading my blog this week – thank you.

Unfortunately my rhubarb in my new kitchen garden isn’t ready to eat, as it takes a year or two for it to establish properly before it can be picked.

The recipe for the Rhubarb and Ginger cake is here and it went lovely with a spoonful of the homemade vanilla ice cream:

SAM_0919

.

Finally this week I made some plain yoghurt.  I haven’t made yoghurt for a while and Mr Thrift likes to take it to work for his lunch, so I dusted my yoghurt maker down and finally made some.

A few years ago I was given an Easiyo Yoghurt maker.  You can see a similar one here.  The idea of an Easiyo Yoghurt maker is to use sachets of the Easiyo yoghurt mixes which you buy.  I don’t do this, as I think they are expensive and I like to make mine from scratch.

.

This is an easy way to make yoghurt:

.

You will need skimmed milk powder

UHT Milk

A yoghurt starter (see below)

.

The first time you make yoghurt, you will need to buy a small amount of ‘live’ natural yoghurt, or ‘probiotic’ natural yoghurt.  This will give your yoghurt mix, the bacteria that it needs to make yoghurt.  Each time you make your own yoghurt, save 3 heaped tablespoons of yoghurt ready to start your next batch of homemade yoghurt.  Your starter can be frozen until needed.  I do this up to four or five times only, as the bacteria seems to weaken each time.

Put 3 heaped tablespoons of skimmed milk powder into your yoghurt maker canister.  Half fill the canister with UHT milk and give it a good shake.

Put 3 heaped tablespoons of ‘Yoghurt starter’ into the canister.

Top up the canister with UHT milk and give it another good shake.

Put boiling water into the Easiyo flask and then add the canister.

 Put the lid on and leave for approximately ten hours.

Take the canister out of the Easyio flask and then put it in the fridge to finish setting.

I then save 3 heaped tablespoons of the yoghurt and pop it in the freezer as a ‘yoghurt starter’ for the next time I make it.

SAM_0943

Enjoy the yoghurt plain, or with fruit mixed in.

.

Thank you for reading my blog today.  I will be back next Friday as usual.

Have a good weekend!

How To Plant A Bare-Rooted Tree And The Humble Cress Seed

Parts of the country have been battered by storms this week and my heart goes out to the people that have had to be evacuated from their homes due to flooding.

I have also seen some pictures this week of allotments that have flooded around the country.  I really feel for the people this has happened to, as I know I would be devastated if this happened to mine.  I also can’t imagine how the farmers in Somerset must be feeling as some of their fields have been under water for weeks now.

Thankfully, it hasn’t been quite so bad here.  The ground is very wet but we don’t have any major flooding and our families, homes and gardens are safe.  In fact despite the wet, the garden is beginning to wake up and I have noticed it is a little bit lighter in the morning and it stays lighter in the late afternoon now too…so hopefully Spring will be on it’s way soon.

SAM_8234

The Snowdrops at my allotment are flowering beautifully now and I am really pleased with them.  Hopefully they will spread in a few years around my woodland area.

SAM_5777

And so too are my primroses

SAM_8232

The ground underneath my old plum tree, in my woodland area isn’t too soggy, so I have been transferring some ‘For-get-me-nots’ around the tree.  Again, this will remind me not to forget my good friend that died a year ago this month.  Hopefully they will self-seed this year and I will have more next year.

I keep transplanting as many plants as possible into this area, as the more ground cover I have, the less weeding I will have to do in the warmer months.

SAM_8221

.

The Poached egg plants (Limnanthes douglasii) that line my central path, self seed like mad.  You can see in the photgraph below how they spread.  So at this time of the year I always dig in the plants that I don’t want, as it acts like a green manure.  But before I do that I transplant some of the plants to other areas on my allotment.

SAM_8152 SAM_8154

This year I have started to transplant some of them into my woodland area too.

I have so much of this plant growing at my allotment, as it is great for attracting Bees and other beneficial insects to my plot.  The bees will pollinate my crops and also insects like hoverflies and ladybirds that are attracted to the plants, will then eat the blackflies that are attracted to my crops too.

And not forgetting they also look pretty when they are in flower.

SAM_8151

.

At home my seeds are beginning to show.  The broad beans that I planted on the 28th January are already showing, but unfortunately the ones I planted on the 21st January aren’t for some reason.  Even though they are all a variety called ‘Aquadulce’, I used a different packet of seed for each tray so I’m wondering if I have a bad pack?…I’ll have to wait and see.

SAM_8242 SAM_8243

The leeks I planted on the 21st January are also showing now:

SAM_8245

The garlic that I sowed in modules in my greenhouse on the 21st January is now also racing away.  I will plant these out as soon as the ground is workable at my allotment:

SAM_8241

The onions that I sowed on the 28th January are just showing through now too.  They have been kept in my house where it is warm:

SAM_8244

.

I received my order from Garden Organic as well this week.  I only ordered one pack of seeds from their ‘Heritage seed Library Catalogue, as this is all I needed.

SAM_8248

I planted these cauliflowers last year and they have overwintered well.  They will hopefully give me a good early crop of cauliflowers in April/May this year and if I sow my new seeds in Spring, then I will hopefully get a good crop again next year.

.

Don’t forget the humble packet of ‘Cress’ seeds.

Last week I sowed some ‘Cress’ seeds.  I remember doing this as a child in an old margarine pot.  I did it exactly the same way now.  It’s easy to forget about this really easy seed to grow.

All I did was line the pot with a folded tissue and wet it (pouring away any excess water) and I sprinkled the cress seed thickly on top of the tissue.  I put the pot in a cupboard (so it’s dark) and waited for the seeds to germinate, being careful to not let them dry out.

As soon as they germinated, I put the pot on the window sill and I just watered them when they needed it.

In a couple of weeks I have lovely cress to add to my salads or egg sandwiches:

SAM_8247

.

I also picked up a bargain this week.  I wanted to buy an oregano plant as it’s a herb we eat a lot of it in our house and I was lucky enough to spot a bargain, healthy plant at Wilkinsons this week.  I only paid £3 for it which I was really pleased with.  I will leave the plant inside for a while yet though.

SAM_8246

.

I don’t know if you remember, but back in the autumn we moved my shed from one place at my allotment to better place.  I have been left with a bare bit of ground that is sheltered and very sunny and I have spent the winter wondering what to plant there.

I finally decided to buy and plant a bare-rooted Quince tree.  Bare-rooted trees are perfect to plant at this time of year (unless your ground is soggy of course).  The advantage of bare-rooted trees is that they are usually cheaper than pot grown trees, but they can only be planted while the tree is dormant.

A couple of years ago, Rob Carter (the head gardener at Eco House in Leicester), gave me some Quinces to try and I made Quince jelly and it was wonderful.  So this was my inspiration for buying the tree.

SAM_8217

I actually bought the tree on Ebay from ‘Beechwood Nurseries’ for £19.99.  I had recently been selling one or two things on ebay and I decided to treat myself with the proceeds.

The tree arrived and when I had finally unwrapped it (I have never seen so much wrapping in all my life), the tree appeared to have a good root system.

For those that have never planted a bare-rooted tree before, this is how to do it:

.

Planting a bare-rooted tree

It’s important not to let the roots dry out, so as soon as I unwrapped the tree, I then soaked the roots for a few hours in water.

SAM_8207

I dug a hole large enough to spread the roots out and deep enough so the soil sits just below the ‘bulge’ where the top part of the tree (the scion) was grafed onto the rootstock.

SAM_8208

I then made holes with my fork, all over the area at the bottom of the holes to help with drainage.

SAM_8209

At this stage you can coat your tree roots with ‘mycorrhizal fungi’ which you can buy from most garden centres.  This helps the tree roots to establish better, but I’ve got to say I never bother with it.

I then put the tree in the hole and positioned the tree stake.  I find it better to put the stake in now, so I don’t damage the roots by hammering it in later.

I then fill the hole with a mixture of the soil I had taken out of the hole and lots of my homemade compost.

After half filling the hole, I tread all around the tree to make sure there are no air pockets

SAM_8210

Then I continue to fill the hole and repeat with my foot when it is full.

I then give the tree a good watering to allow the compost/soil to settle around the tree

SAM_8214

I then use a tree tie to secure the tree to the stake.

SAM_8212

And then I gave it a quick prune.

There is some really good advice about ‘formative pruning’ here on the RHS website.

Please remember, you can’t prune plum or cherries at this time of year.

And now I look forward to lots of Quinces in a few years.

.

Thank you for reading my blog today.

I will be back on Monday at my usual time.

A Lavender Lemonade And A Lavender Fairy Cake Recipe

My lavender hedges that line my two paths either side of my plot, are flowering beautifully at the moment.  The variety is ‘Munstead’, which is an old english variety.

SAM_6844 SAM_6849

The bees and butterflies are loving the flowers and I didn’t have to wait for long to take a photograph of the butterfly below:

SAM_6880

Lavender is a herb which has been documented for use for over 2500 years.  It was used by ancient Egyptians for mummification and perfume.

Lavender has a calming effect and can aid sleep.

.

Using Lavender:

I think it is really important to make use of everything that our garden gives to us.

This week I picked some bunches of lavender and hung them in my kitchen to dry out. It’s best to pick lavender in the late morning after all the morning dew has evaporated.

I am hoping to use the dried flowers for my christmas hampers, but I’m not sure yet what exactly I will do with them.

SAM_6861

.

Lavender flowers are perfectly edible provided that you are 100% sure they haven’t been sprayed with harmful chemicals.   I always give them a quick wash under a cold tap before I use them.

 As my lavender is flowering so beautifully at my allotment, I decided to make some Lavender Cakes and Lavender Lemonade.

SAM_6845

.

Lavender Cakes

.

2 tablespoons of lavender flowers

125g Self raising flour

125g Caster sugar

1 teaspoon baking powder

125g margarine or softened butter

2 eggs

A drop of milk

Icing sugar and more lavender flowers to decorate.

.

Put the lavender flowers, flour and sugar in a blender and grind the flowers for a little bit.  Sieve it all into another bowl discarding the left over bits of lavender.

Add baking powder, eggs and margarine and beat until combined.

Add a drop of milk until the right consistancy is reached (i.e. drops off the spoon easily).

Half fill cake cases with the mixture and then bake for approximately 15 minutes at gas mark 5 / 375F / 190C

SAM_6851

When the cakes have cooled, decorate with white icing and a bit of lavender.

SAM_6857

The cakes taste really nice as they don’t have an overpowering lavender taste, just a ‘hint’ of it and they are a bit of a novelty if you have friends round for ‘afternoon tea’.

I do choose to take the lavender off the top of the cakes before I eat them, as I find this tastes too strong for me.  You may think differently, please let me know if you do.

.

SAM_6921

My next recipe is for a thirst quenching Lavender Lemonade, which is my eldest daughters favourite drink.

.

Lavender Lemonade

.

870ml water

2 tablespoons of lavender flowers

100g granulated sugar

120ml lemon juice

.

Put approximately a third of the water into a pan and bring it to the boil

Pour the boiling water over the lavender flowers and leave to ‘steep’ for ten minutes.

SAM_6914

Strain the water and add it to the pan again.

SAM_6916

Add the rest of the water, sugar and lemon juice and bring back to the boil, stirring continuously.

SAM_6919

When it has boiled, take off the heat and chill.

SAM_6920

Dilute the lavender lemonade with water to your taste.

I added ice cubes with borage frozen inside them for an extra pretty twist.

SAM_6926

.

I hope you have enjoyed reading my post today.

I will be back on Friday at 4pm.  I hope you will join me then.

SAM_6847

Still Planting And A Walk Around My Allotment

I have usually planted most of my seedlings by now, but as this isn’t a normal year (due to the cold Spring we had), I still have some to plant.

This week I have been busy planting various things and I must say my allotment is getting pretty full.

SAM_6645

I started by planting some more cauliflowers.  As usual I prepared the ground by raking in some blood, fish and bone a couple of weeks ago and then just before I planted them I trod over the area and jumped and danced on it.  Brassica’s all need firm soil and you may remember that I also did this with my brussels a few weeks ago.  One of my readers (Paula) said I had invented the ‘Brussell Sprout Stomp’, which made me laugh.

One of the main reasons for cauliflowers ‘blowing’  (loose heads, where the curds don’t grow together) is the soil isn’t firm enough.  So I suppose you could now name the dance ‘ The Cauliflower Stomp’.

I covered my cauliflowers with environmesh:

SAM_6654

.

This week I planted my ‘outdoor’ cucumbers.  They are a variety called ‘Burpless Tasty Green’, which I have grown for a few years now with great success.  The skin is slightly prickly so I do peel them before eating.  They taste lovely, with no hint of bitterness, which some cucumbers have.

SAM_6653

.

I also planted some more spring onions, as we eat loads of these and I like to make sure we have some available for a long as possible over the summer…

SAM_6655

…and some beetroot and parsley:

SAM_6656 SAM_6660

.

Finally, I planted some Nasturtiums next to my runner beans.  These are great companion plants as they attract blackfly.  The blackfly prefers the nasturtiums to the runner beans, so the nasturtiums act as sacrficial plants.

Nasturtiums next to my runner beans

Nasturtiums next to my runner beans

.

The broad beans in my polytunnel are still producing some lovely pods for picking…

SAM_6670

…and I had a lovely surprise this week as I found my first two strawberries ready for picking.  I took them home and me and my daughters all savoured the lovely, juicy, sweet strawberries together.  There really isn’t anything that tastes as good as freshly picked strawberries.  If you have never eaten homegrown strawberries, you really do not know what you are missing as they taste nothing like supermarket strawberries, that are only bred for a long shelf-life.

SAM_6648

.

.

Now we have had some warm weather and some rain, things have begun to grow nicely.  I had a walk around my plot yesterday and I noticed a few things.  The dahlias that I grew from seed have begun to flower:

 SAM_6676 SAM_6675

The apples and plums are beginning to form nicely:

SAM_6680 SAM_6678

My second early potatoes have begun to flower:

SAM_6674

My spring cabbages are finally ‘hearting up’:

SAM_6673

The first peas that I sowed this year are nearly ready:

SAM_6671

My polytunnel is growing well:

SAM_6667

And the lavender that edges both of my paths, is nearly in flower:

SAM_6663 SAM_6664

The bees will love the lavender after my poached egg plants have stopped flowering.  When I stand amongst the poached egg plants there is still such a buzz of activity there:

SAM_6665

.

.

Finally I thought I would show you what I do with lettuces after I have picked them, if I don’t use them all at once.  After taking off the few leaves I need at the time, I pop the rest of the lettuce into an old pot full of water.  Just like flowers in a vase, the lettuce stays lovely and fresh for quite a few days.

SAM_6647

.

I hope you enjoyed reading my blog today.

  I will be back on Monday at approximately4pm.

My Back Garden And My Allotment Too

I have finally taken some time this week to do some weeding in our back garden.  Unfortunately, I don’t spend as much time as I should in our back garden as i’m always at my allotment.  So the garden really has to look after itself.

SAM_6438

We are very lucky as our house isn’t overlooked and there is a lovely view from my daughters bedroom window:

SAM_6441

You can see from the photo above that the lilac tree is in full flower.  I love lilac trees, they remind me of the first house I owned, as it had one in the back garden too.

If you look closely at the photo below, you can see my ‘clematis montana’ climbing through the photinia ‘red robin’.  I planted the clematis about five years ago and I had forgotten all about it until I spotted it this week.

What a lovely surprise:

SAM_6440

 .

This week at my allotment I have been earthing up my potatoes.  I have twelve rows to do altogether and as I find it such hard work I earth up one row a day:

SAM_6420

.

I planted some spring onions that I have grown in modules.  I always had a problem getting spring onion seed to germinate in my heavy clay soil, so now I grow them in modules filled with compost.  I put a small pinch of seed into each module and I don’t bother to thin the seedlings out, as the spring onions grow in a bunch.

When the spring onions are large enough, I transplant them:

Spring onions transplanted next to my garlic

Spring onions transplanted next to my garlic

.

This week I have planted my runner beans.  I sowed the seed at the beginning of May and I have been hardening the plants off.  As it is still quite cold for this time of year, I have put old panes of glass around them to give a bit of protection.

If you have been reading my blog for a while, you will remember I dug trenches in the autumn and filled them with all my old peelings, etc until they were full and then I covered them over with soil again.  My runnerbeans were planted exactly where the trenches were, so this soil will now hold the moisture and runner beans like to grow in moist soil.

The runnerbeans I planted this week

The runner beans I planted this week

A runnerbean trench

My runner beans trench in autumn

.

As my comfrey was coming into flower, I cut it all down and added it to my compost bins.

Comfrey is a fantastic compost activator and anything that speeds up compost making, is good to me.  What is even better is, it is free!  You can read about growing comfrey and making ‘comfrey tea’ here.  (Comfrey tea is a fabulous organic feed that is high in potash, which means it is good for fruits and flowers e.g. tomatoes)

SAM_6416 SAM_6417

.

I also chopped some of my chives down this week.  My daughter used to love chives so I dedicated a whole bed to them….yes you have guessed it…she doesn’t like them now, a typical teenager!

I haven’t dug them up as we still use loads of them and the flowers are so pretty and the bees love them.

I have three rows altogether and I find if I chop them down after they have flowered, then they start to re-grow again.

As my three rows were about to flower, I decided to chop two rows down and leave the middle row for the bees.  I will chop this after the flowers have gone over, so I can stagger the crop.

SAM_6408

Just before I did this, I managed to take a photo of the female blackbird that has been following me around for the last couple of months at my allotment.  She must have a nest nearby.  She comes so close to me sometimes that she makes me jump.  She doesn’t seem scared of me at all, which is unusual for a blackbird.

My blackbird friend

My blackbird friend

.

I repotted my mint a few weeks ago and I finally planted the pot back into the ground.  I find it is better to keep mint in a pot as it helps to stop the plant from taking over, as it does spread rather a lot.

I have two mints, a normal mint and an apple mint.  I also planted an oregano plant that my local garden centre was giving away free a few weeks ago:

SAM_6422

.

I have given my strawberry patch a good weed this week.  These strawberries are three years old now, so I I have planted some new ones in a different place.  Strawberries usually only last three to four years, as their yields become less after this time due to a build up of pests and diseases.

My daughter loves strawberry jam, so I grow loads.

They are flowering well now.  I will shortly buy a bale of straw and put it all around the fruit.  The straw acts as a mulch, so the fruit isn’t sitting on cold wet soil and it also helps to keep the weeds down.  I will then net the plants so the birds don’t eat all the lovely fruit.

SAM_6435

One of the last jobs I have done this week, is to refill a plum moth trap on my big old plum tree.  The picture below shows the sticky paper that trapped all the plum moths last year.  As you can see there is obviously a problem on this tree:

SAM_6418

.

To finish off I thought I would show you a few pictures of my woodland area.  This area was part of my fourth plot that I took over in January 2012 and it was covered in overgrown couch grass.  I covered the area in weed suppressant straight away to kill the couch grass and by autumn it had worked well.  From then on, I planted loads of bulbs and transplanted different flowers that I had.  Afterwards, I covered the whole area in leaves to suppress any weed seeds from growing.

This is how it looks today:

SAM_6427

The bulbs have nearly all finished flowering now, but there are still a few around.  I have noticed it’s now the turn of the aquilegia’s, together with my wallflowers and the English bluebells (that I bought in the autumn with my birthday money).  I’m very pleased with my woodland area so far, but it still has a long way to go:

SAM_6428 SAM_6431 SAM_6432 SAM_6430

.

Thank you for reading blog today.

I will be back on Monday.