This week in my kitchen I have been busy using all the home grown produce that I have picked. I always have a lovely sense of satisfaction when I use my organic fruit and vegetables, as I know one hundred percent that no chemicals have been used to grow them and I think this also makes them taste better.
.
This week my outdoor tomatoes have started to ripen and I have begun picking them daily. They are a variety called ‘outdoor girl’ which are usually a little bit earlier than other outdoor varieties, however for some reason they are a little bit later than usual this year.
I am constantly checking for tomato blight as my tomatoes have only escaped once over the years. You can see photos of tomato blight here, together with lots of information on what to do when you first notice it on your tomatoes, as some of your crop can be saved if you act quickly.
.
With my first batch of tomatoes I made a big pot of tomato and basil soup, which we had for lunch with a loaf of warm, crusty homemade bread. It was far nicer than any soup you can buy in a tin and it only cost me a few pennies to make as nearly all the ingredients were from my allotment.
You can find the recipe here.
.
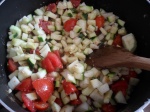
I am also still using all of the courgettes that my plants are producing. This week I made my favourite courgette chutney….
.
Courgette Chutney Recipe:
.
2 onions chopped
500g tomatoes chopped
500g courgettes diced
300ml white wine vinegar
2 cooking apples peeled and diced
250g brown sugar
2 teaspoons mixed spice
1 tablespoon of mustard seeds
Thumb sized piece of root ginger grated
4 garlic cloves crushed
.
Put all the ingredients in a large pan and bring to the boil slowly, stirring continuously.
Simmer for 2 hours uncovered, until it is dark and looks like chutney.
Pour into hot sterilised jars.
( To sterilise jars, pop them in an oven for five minutes, gas 4 / 180C / 350F )
Leave for 3 weeks before eating.
.
.
This year at my allotment I had a bumber crop of strawberries.
At this time of year I usually tidy the plants up a bit…. I remove the straw that I lay around the plants in the spring and put it into my compost heap. I then cut the strawberries back to approximately 3 inches (8 cms) from the crowns. It always looks harsh but they grow back really well.
Cutting the strawberries back in this way helps the plant produce more fruit the following year, as the plant then puts all it’s energy into producing a strong root system.
This is the second year my plants have fruited so I am not keeping any runners, so I cut them all off.
If I wanted to increase my stock I would just peg down the runners with a large stone or wire, so that the new plantlets are in contact with the soil. When they have good roots on them at the beginning of September, I cut each runner from their parent and replant it where I want it to grow. This way they are settled before the winter and produce fruit the following year.
.
Incidentally, I found this little fella under the old straw around my strawberries:
I have been told he is a ‘death head hawk moth’ caterpillar. He looks quite evil doesn’t he, but I left him alone as moths are hugely important for the food chain and some of them are great plant pollinators.
.
This week I have been picking ‘Cucamelons’. It’s the first time I have grown them and they seem to have taken ages to become established….and now they are taking over my polytunnel!
When I was researching the cucamelon, I found some people loved them and some people hated them, so I thought I would try them for myself…..I’ve got to say I am somewhere in between.
I think they taste like a cucumber, but with a crunchy skin. The plants have certainly given me a good crop, but after we all tried them, we decided we like normal cucumbers better….so this is one I won’t bother growing again (sorry James Wong).
However this year they will go to good use in salads, with a drizzle of olive oil, lemon juice and a pinch of salt:
.
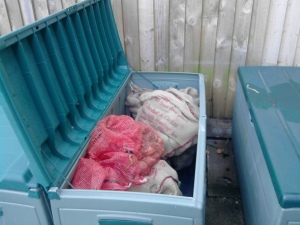
At this time of year I am thinking about storing my crops ready for the winter. My potatoes have all been dried and they are now storing in sacks.
My french beans are doing well at my allotment this year and I have been busy blanching and freezing them, together with the runnerbeans that I am still picking:
.
If you have been reading my blog for a while, you will remember that this time last year I gave the old tree in my woodland area a real good prune as I don’t think it had been pruned for years. I had been told by a couple of people that I would be better off chopping the tree down as it never has fruit on it….but I decided to give it a chance.
I prunned away approximately a third of all the dead, diseased and crossing branches and I will continue doing this every August until it is back to how it should be.
….And after just one year of pruning it has rewarded me with a bumper crop…..
The gentleman that rented the plot before me (my dear friend Eric) told me that the tree was not a damson tree, but he didn’t know what it was. I think the tree is a ‘purple bullace tree’….I may be wrong, but it doesn’t really matter as the fruit makes a great fruit jelly…which I have been making this week, ready for my Christmas hampers:
.
A Wild Plum, Damson or Bullace Jelly Recipe:
.
First cut your plums in half just to make sure they haven’t been infected by the plum moth (discard any that have). Don’t bother removing the stones.
Put the plums into a maslin pan or a large jam making pan.
Cover the plums half way up with water.
Slowly bring the plums to the boil and then simmer until they are soft (approx. 15-30 mins).
Meanwhile, bring a pan of water to the boil and place some muslin or a clean tea towel into it and boil for 3 minutes. Take it out of the water and wring it out and then leave to cool.
Tip the fruit into the muslin and let it drip overnight or for approximately 8 hours. I find it easier to put the muslin over a colander that is already over a bowl, as it’s easier to pour the fruit into it.
In the picture below, you can see how I suspend my muslin bag over a bowl. I have read that an upside down stool can be helpful to do this, but I have never tried it.
The next day put some side plates or saucers in the freezer to check the setting point of your jelly later on.
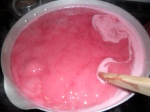
Measure the juice. For every 1 pint of juice, measure 1lb of granulated sugar. Put the juice and sugar back into a large pan and bring it to the boil slowly, over a low heat, until the sugar has dissolved.
Also, as I don’t use jam sugar I add two tablespoons of lemon juice for every one pint of juice.
When you can see no sugar crystals on the back of your wooden spoon, turn the heat up and boil hard until the setting point has been reached. This can take quite some time.
(I always continuously stir my jams and jellies to stop them from burning at the base of the pan, however I have never seen a recipe tell you to do this, so it’s up to you).
To check the setting point, put a small amount of jelly on a saucer from the freezer and wait for a few moments, push the jelly with your finger and if it wrinkles then the setting point has been reached, if not just continue boiling for a further five minutes and then check again.
When the setting point has been reached, take the pan off the heat and leave it for fifteen minutes. If there is scum on your jelly, you can skim it off, but I just stir in a small knob of butter which does the same job.
Sterilise some jam jars (gas mark 4 for 5 minutes)
Pour the jelly into the jars and seal with lids.
Enjoy it for months to come!
Thank you for reading my blog today.
I will be back next Friday at my usual time.


