Archives

Holidays And A Good Harvest

It’s lovely to be back blogging again and I have so much to tell you, but equally I have had a lovely break.

At the beginning of the school holidays we went to Scarborough and had a wonderful time.  We stopped in a Travelodge again for six nights and it cost us just £230 for two adults and two children with breakfast included…..what a bargain!

We were so lucky with the weather, as it was really hot the week we were there and we spent every day on the beach.  The sea was so calm and clear, we could even see little fishes swimming around in it.  With the heat, it felt like we were abroad.

SAM_7007 OLYMPUS DIGITAL CAMERA OLYMPUS DIGITAL CAMERA OLYMPUS DIGITAL CAMERA OLYMPUS DIGITAL CAMERA SAM_7024

.

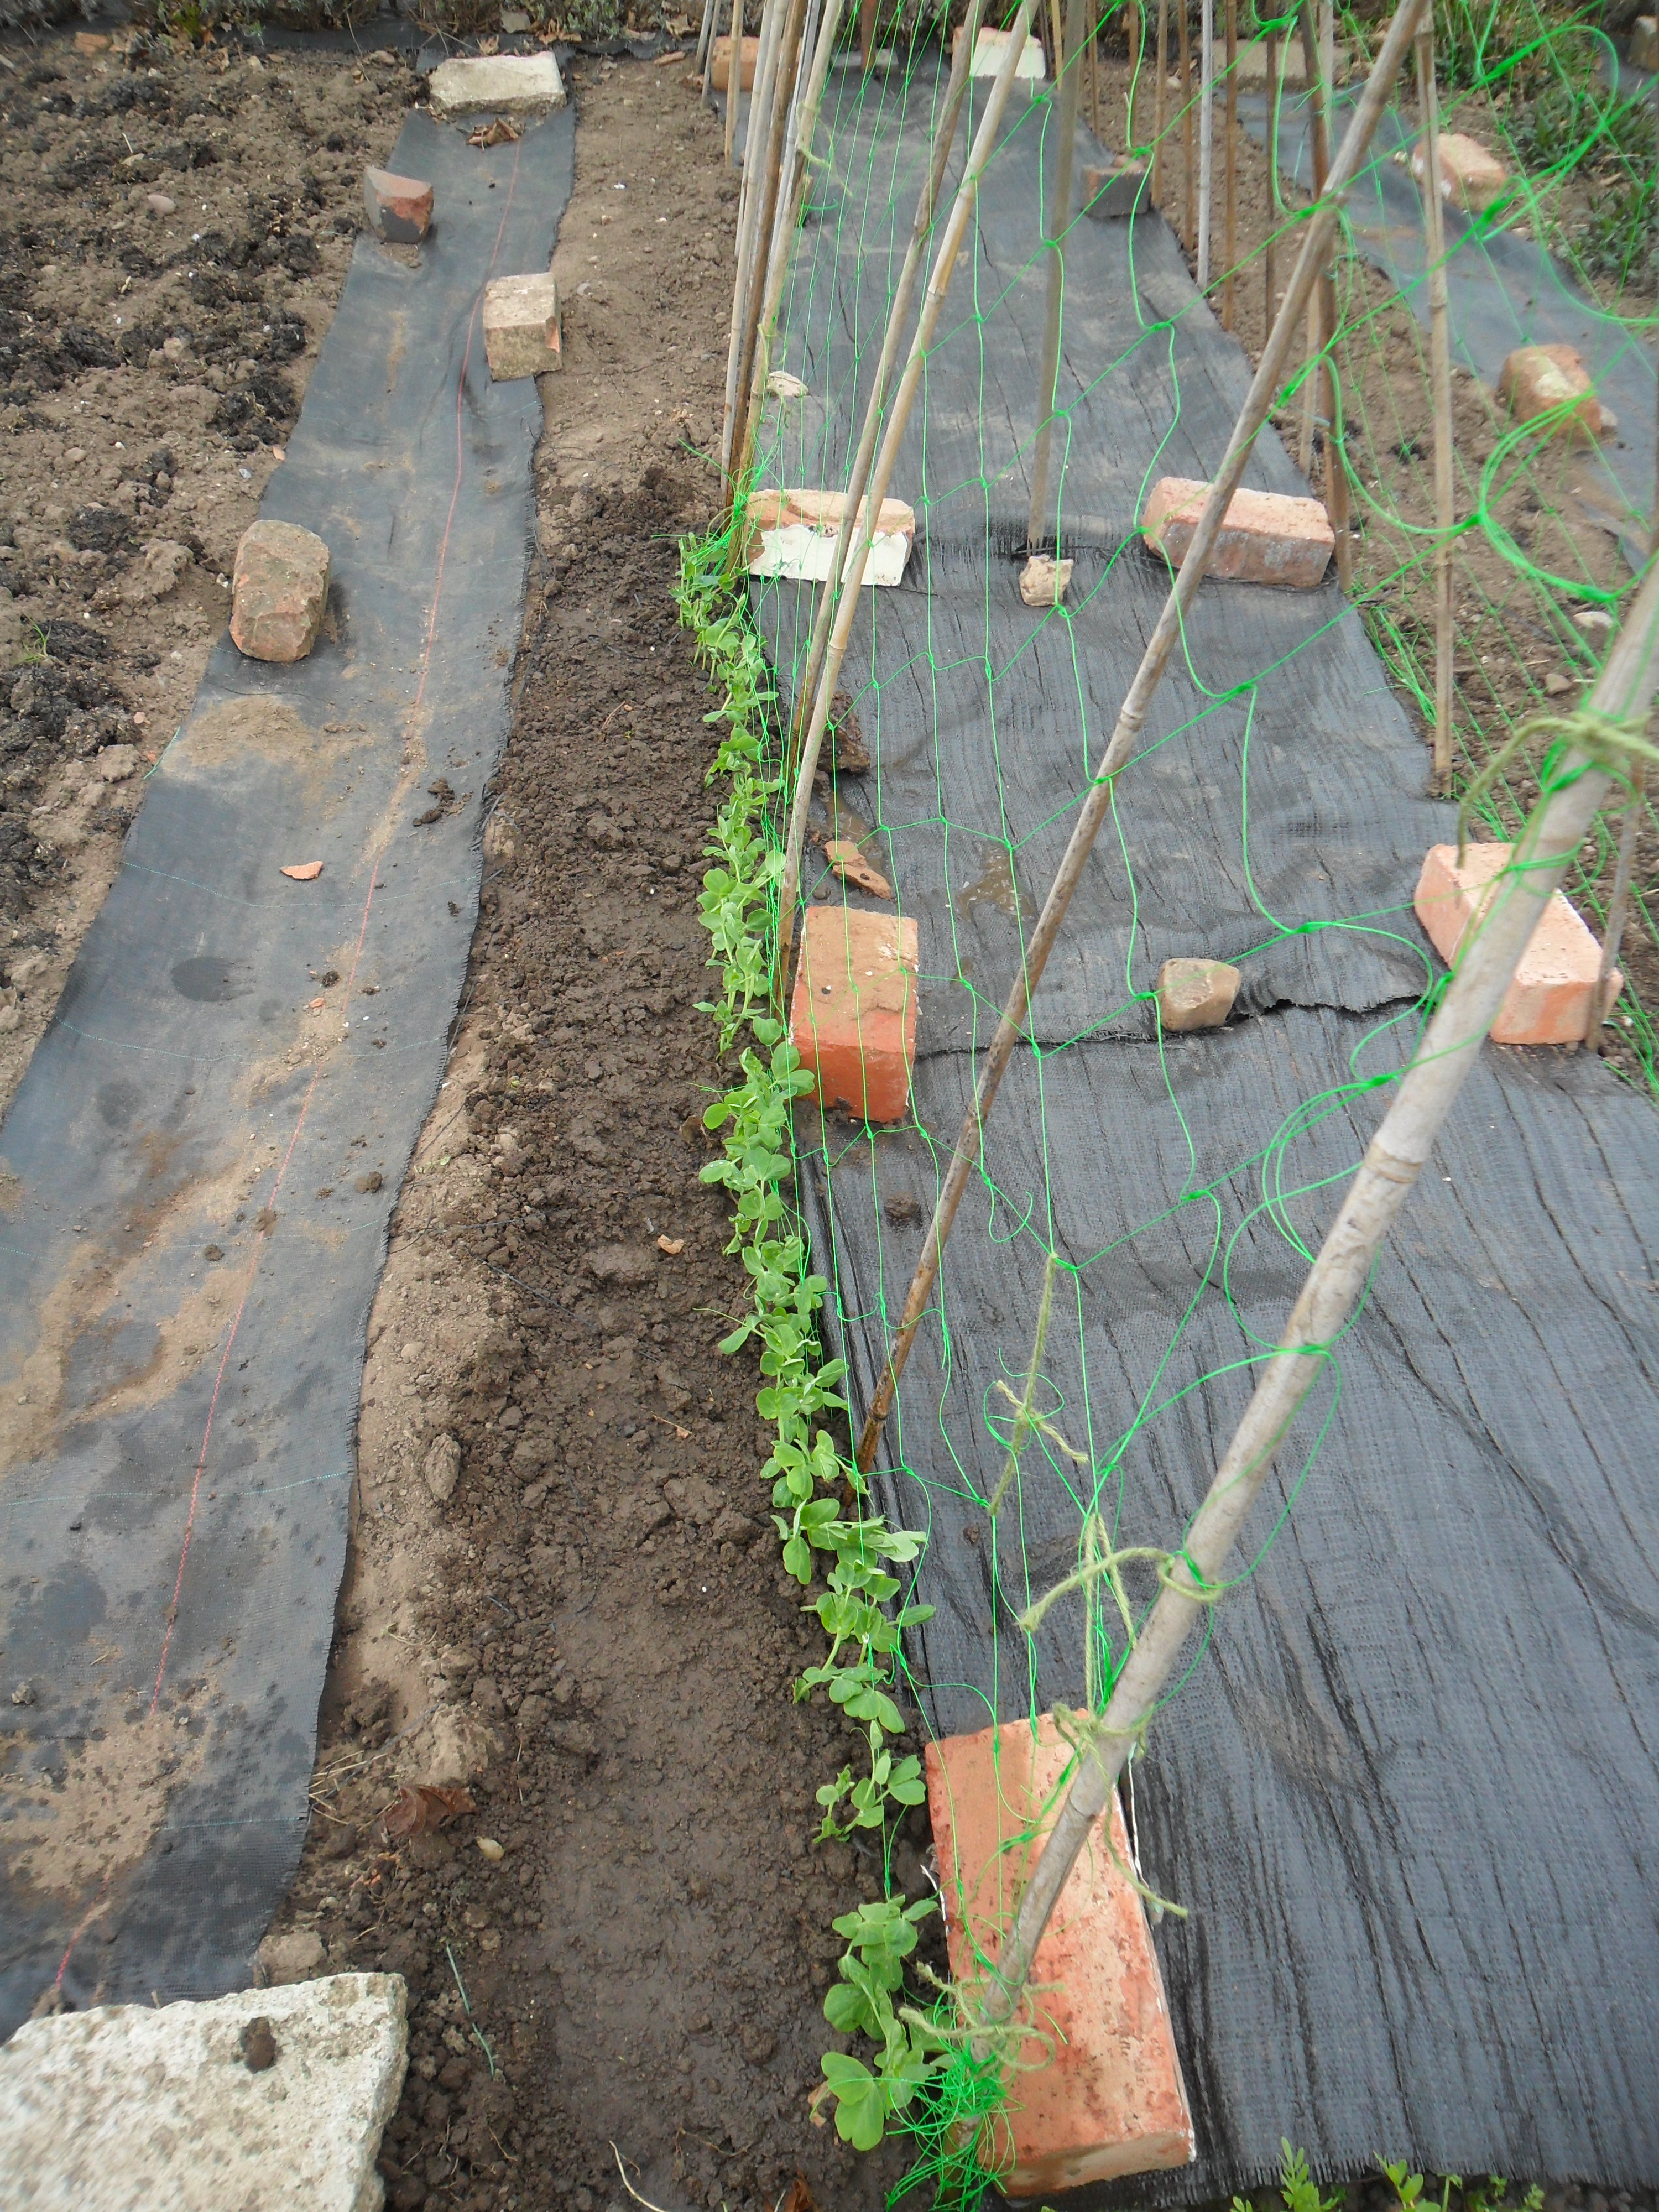
My friend at my allotment watered my polytunnel for me while I was away and he did a grand job, but I must say I was worried about my other crops as it was so hot and I had told him not to bother watering them, but they all seemed to be ok.  I was very pleased that I had planted my runner beans on top of a runner bean trench, that I had filled with old peelings, etc. during the winter, as this would certainly have helped to retain the moisture.

My Runnerbean Trench

My Runnerbean Trench

You can read how I made my runner bean trenches here.

.

Since we came back from our holiday I have been frantically harvesting all my crops at the allotment.  What a difference a year makes!  This time last year it was really wet and crops were struggling to grow, but this year is a bumper year for most things, though I have found that some things are still behind due to the cold spring we had e.g. pumpkins, butternut squashes and my early apples.

.

I’ve tried to remember to take photos of the things I harvested over the last couple of weeks, but I did keep forgetting.  So here are the few pictures that I did take:

SAM_7097 SAM_7099 SAM_7095 SAM_7096 SAM_7088 SAM_7089 SAM_7091 SAM_7076 SAM_7074 SAM_7069 SAM_7050 SAM_7049 SAM_7047 SAM_6906 OLYMPUS DIGITAL CAMERA OLYMPUS DIGITAL CAMERA

.

Remember the ‘cauliflower stomp’ I do before I plant my cauliflowers, to tread the ground down so it is firm (as this helps to stop cauliflowers from ‘blowing’)…. I thought I would show you proof that it works:

I'm very proud of my cauliflowers

I’m very proud of my cauliflowers

.

My runner beans have been doing well too.  I thought I would show you a picture of some of the beans the plants have produced as I think they are amazing.  One of them measured nearly 15 inches, which I know isn’t a prize winner, but I think it’s great for every day runner beans.  This variety is called ‘Enorma’, which is supposed to be one of the most successful exhibition runner beans, which has been given the R.H.S. Award of Merit.  I can see why, as they not only grow to a good length but they also taste delicious :

SAM_7156 SAM_7170

I don’t know if you remember, I planted Nasturtiums next to my runner bean plants, as blackflies prefer Nasturtiums to the beans.  My runner beans are showing no sign what so ever of blackflies, but the nasturtiums are covered.  This shows that companion planting really does work, as I really don’t need to spray my runner beans with any pesticides:

SAM_7155

.

My second early potatoes were ready when I got back from holiday, so I dug them up and brought them home.  Early potatoes won’t store as long as late varieties, so I make sure we eat them first.  As I couldn’t stay too long at my allotment, I brought them home and laid them on my table to dry out and then I put them in sacks ready to store until we use them:

SAM_7159

I noticed my early potatoes did have a lot of slug holes again, though they can still be used.  I wonder if there were so many slugs around in the soil after last year, that we are bound to see lots of holes?  I would love to hear how your potatoes are and if your earlies have also suffered from slug holes?

.

My flowers have been beautiful this year too and have the added bonus of attracting beneficial insects onto my plot:

SAM_7148 SAM_7140 SAM_7150 SAM_7151 SAM_7152 SAM_7149 SAM_7122 SAM_7123 SAM_7048 SAM_6907

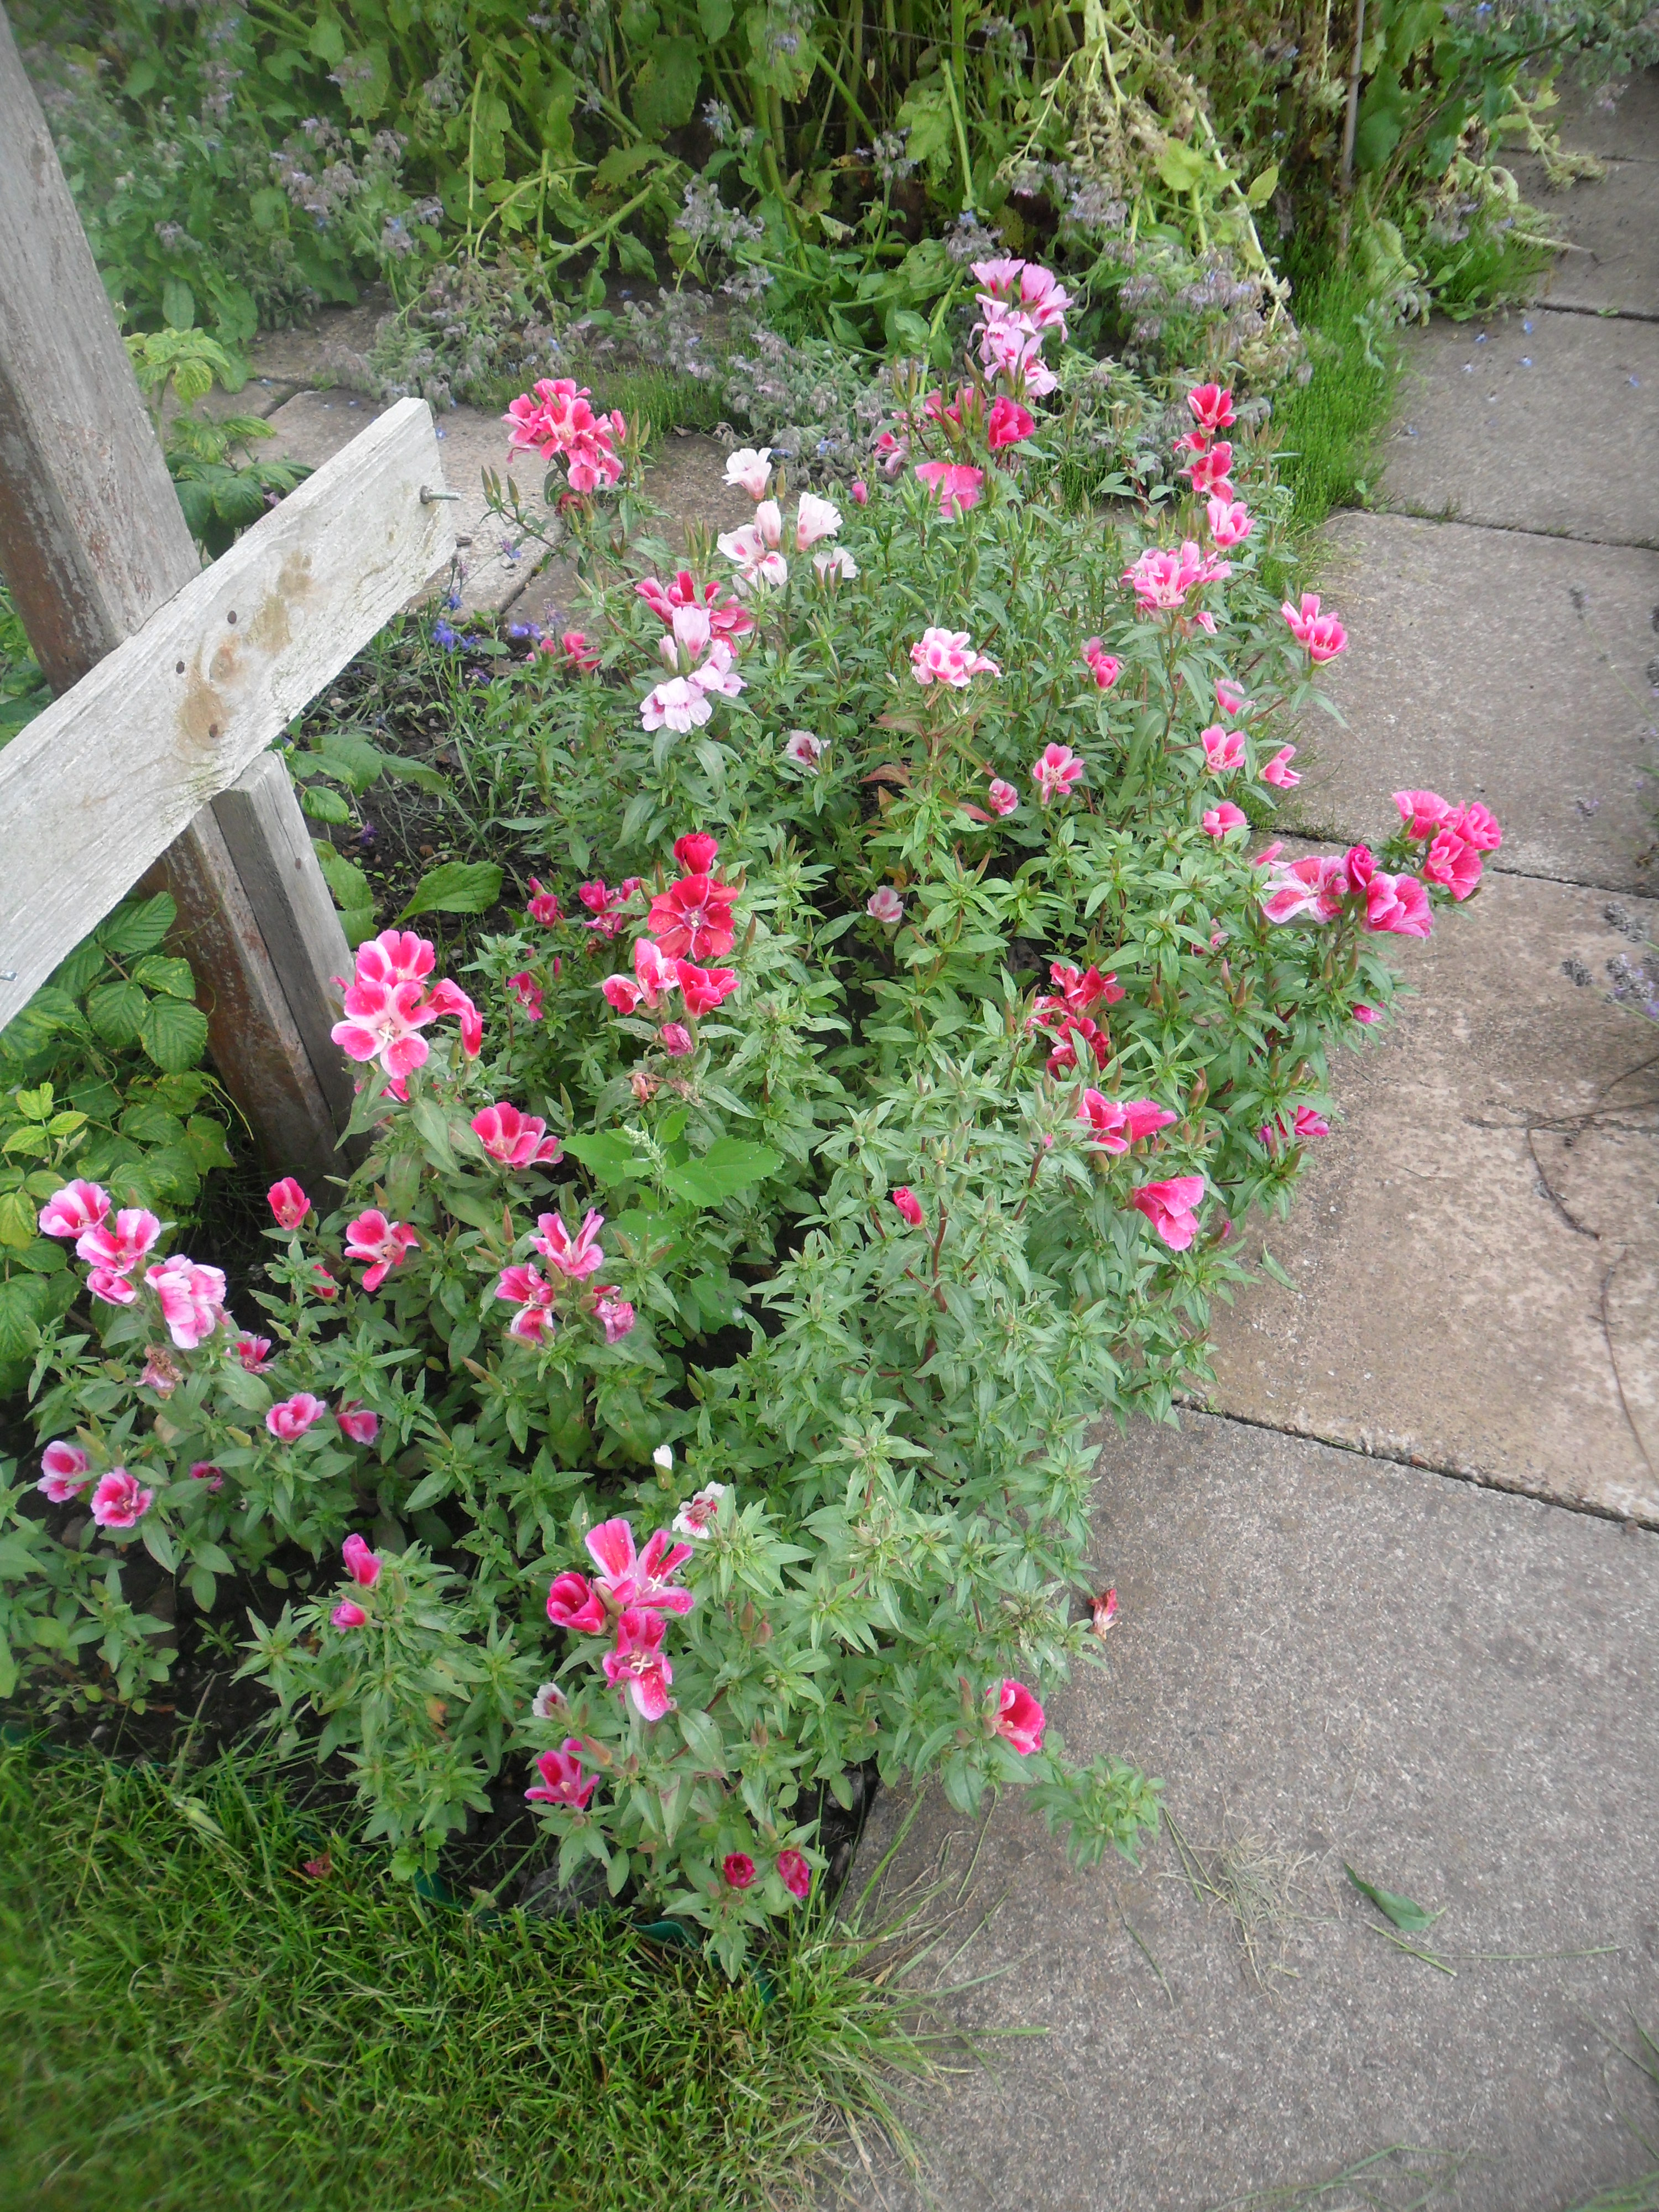
It’s been a pleasure taking some cut flowers home too:

OLYMPUS DIGITAL CAMERA OLYMPUS DIGITAL CAMERA

.

The only job I have really done at the allotment over the last few weeks other than watering and picking, is to plant a few more lettuces in my polytunnel, to keep us from running out:

SAM_7137

I’m really amazed I managed to get them to fit in my polytunnel as it’s full to bursting point inside of it:

SAM_7138

.

I still have so much to share with you, but I think I better finish for today.

I really hope you have enjoyed reading my blog.  I will be back on Monday as usual.

Completing Planting And A Bumper Harvest

I have so much to write about today, as I have been working so hard at my allotment this week.  I wanted to finish planting all my crops before the long school holidays begin, in exactly one weeks time.  The schools here in Leicestershire break up earlier than the rest of the country.

I started by planted some more perpetual spinach:

SAM_6807

….And some more spring onions.  I sow my spring onions in modules as I always had a very bad germination rate when I sowed them straight into the ground (though I don’t know why as they are supposed to be an easy plant to grow).  By sowing a few seeds in each module, I find it almost guarantees a high germination rate.  I don’t thin the spring onions either, I just plant them as they are when they are ready:

SAM_6805 SAM_6806

In the right hand photograph above, you can just see the newly planted spring onions and you can see the ones I planted out three or four weeks ago growing nicely behind.

.

I also planted out my spring broccoli, curly kale and some more khol rabi.  All of the brassicas were planted in firm soil which I had dug and manured last autumn.  I also walked over the area before planting.

SAM_6769 SAM_6768 SAM_6776

As the ground was dry when I planted the brassicas out, I dug a hole for each plant and filled it with water.  When the water had drained away, I then planted them.  This allows the water to go deep into the ground to encourage the roots to also grow deep to find the water.  It also helps to stop the water from evaporating quickly after planting.

SAM_6774

I also planted some quick growing turnips too, but you may have to enlarge the photograph below to see them:

SAM_6777

All my brassicas have nets over, to stop the dreaded pigeons eating them.

While I was working in my brassica patch, I removed any yellowing leaves from my remaining spring cabbages. This will help to stop the build up of any pests or diseases lurking in them.  These cabbages were planted a month after my first spring cabbages and they are now starting to heart up nicely, so I will start to use these now.

SAM_6772 SAM_6773

.

I have now officially ran out of room in my brassica beds and so I can finally say I have finished my summer brassica planting:

SAM_6779

.

This week I cut my comfrey down.  I prefer to cut my comfrey down before it flowers, but I just wasn’t quick enough this month.  If you have been reading regularly, you will know that I have already made comfrey tea this year (which incidentally is a wonderful high potash fertiliser used for all fruit and flowers e.g. it is a great tomato feed).  You can read how to make comfrey tea here.

SAM_6788 SAM_6792

I have also added a vast amount of comfrey to my compost bins already this year.  So when I cut it down at this time of the year, I lay it down between my main crop potatoes instead.  This acts as a mulch to help to stop water evapourating from the ground and also helps to stop annual weeds from germinating.  When the comfrey breaks down, I just dig it into the ground to add nutrients to the soil.

I think comfrey is a wonderful plant!

SAM_6789

.

This week  I also cleared my old perpetual spinach that had ran to seed and planted my french beans in it’s place:

SAM_6786

I cleared my broad beans in my polytunnel that had finished producing beans:

SAM_6793

And I cleared my poached egg plants that had finally finished flowering either side of my path.  I transplanted some self seeded calendula plants in it’s place, though it looks quite bare at the moment it will soon grow and look pretty and be a bonus for the bees:

SAM_6754 SAM_6771

Another thing I have started to do is to ‘nip’ the tops of my runnerbeans off as they reach the top of their supports.  This helps the plants to ‘bush out’ further down and produce more beans:

.SAM_6795

.

This week’s harvest:

Plants have been growing slowly due to the cold spring we have had.  However, the plants are finally now producing and I seem to be having a bumper harvest.

I’ve started to pick my outdoor broadbeans this week and I have needed to pick them every other day:

SAM_6739 SAM_6760

I have found my peas are just great, even though they a month behind.  My back has ached just picking them:

SAM_6809

So too is the mangetout (even though some are a little larger than I would have liked, as I didn’t notice they were ready):

SAM_6799

My potatoes taste delicious (especially with a knob of butter) and we are eating lots of lettuces, watercress and spring onions….I love summer so much.

SAM_6794

And my strawberries…well what can I say other than it really is a bumper crop and I’m picking carrier bags full every two days:

SAM_6804 SAM_6736 SAM_6766

.

Of course the down side is that I had to defrost my freezer ready for all the fruit and vegetables that I have been bringing home….

SAM_6783

.,….but it will be worth it when we are still tasting ‘summer’ in the long cold winter months.

SAM_6798 SAM_6797

I hope you enjoyed reading my blog today.

I will be back on Monday with some Jam making tips.

Hope you have a good weekend.

The Harvest Begins And I’m Still Planting

We have had some beautiful weather this week (up until today) and it’s been a pleasure to work at my allotment.

I am still harvesting my strawberries and they taste delicious:

SAM_6736

I have also harvested the last broadbeans in my polytunnel:

SAM_6739

My outdoor broadbeans are just about ready to pick now too.

.

My daughter came with me this week to pick the strawberries (and eat them).  I also caught her picking and eating my mangetout when she thought I wasn’t looking, which made me laugh.  It’s a good job she did though, as I hadn’t realised they were ready:

SAM_6728 SAM_6712

.

I finally finished planting my last set of peas and mangetout this week.  I have tried really hard to successionally grow my peas and mangetout, so they aren’t all ready to eat at the same time.  So far it seems to be working.

SAM_6711 SAM_6710

A little bit later I found my daughter under one of my D-I-Y fruit cages (made out of canes and bottles).  She really makes me laugh as she thought I wouldn’t notice that she was pinching my gooseberrys.  I used to love eating raw gooseberrys when I was her age, but now I can only eat them when they are cooked and sweetened.

SAM_6714

.

I have been planting some more lettuces this week, in the hope that we don’t run out.  I try and sow seeds every three or four weeks and plant them out when they are ready.

I am struggling with space now at my allotment, so I planted some next to the peas I planted this week and some in between my courgettes and patty pans.  Hopefully I will harvest them before they run out of room.  The ‘posh’ word for this is ‘intercropping‘.

SAM_6709

.

I have also planted some more cauliflowers under environmesh.  After planting I did my usual ‘cauliflower stomp’ to firm the soil around them, to stop them from ‘blowing’:

SAM_6747

I had some small kohl rabi’s to plant, but as I was short of space, I have planted them in between my cucmbers in my polytunnel:

SAM_6756

.

As usual I have hoed all around my plot.  I find if I hoe everywhere once a week on a dry day, it keeps the weeds down a treat.

SAM_6645

.

This week I checked out the flowers in my wildflower area and they are starting to attract lots of bees and insects.  Already there is the sound of ‘buzzing’ when you stop and listen.  It isn’t yet in full flower and there are still lots of smaller plants still to put on growth:

SAM_6718

SAM_6719

.

The flowers all around my plot are starting to open now that we have had a bit of sun:

SAM_6734 SAM_6733 SAM_6715 SAM_6717

It makes me feel glad to be alive!

Thank you for reading my blog today.  I will be back on Monday at approximately 4pm.

How To Grow Watercress And A Watercress, Leek & Potato Soup

I hope you all had a lovely weekend.

Before I start today, I thought I would show you the hidden treasure I dug up yesterday:

SAM_6698

These potatoes are a second early variety that I grow every year called ‘Marfona’.  As the potato plants were flowering I thought I would have a root around and see what I could find.

They tasted absolutely wonderful.  I made a homemade lasagne to go with the potatoes and served it with a homegrown salad (except for the cucmber as mine aren’t ready yet).

SAM_6701

Afterwards we had freshly picked home grown strawberries served with natural yoghurt…what bliss!

SAM_6704 SAM_6705

.

Today I thought I would talk about Watercress.

I always thought that you needed running water to grow watercress, until my old allotment neighbour showed me how he always grew it in a great big black pot that he had on his plot.

Sadly, my neighbour gave up his plot up in December 2011 and so I decided to take the plot on myself.   I inherited the old black pot and I also tried to grow watercress in it and it worked really well.   All I did was to replace the top inch of compost with new compost, sprinkle the seeds over it and cover them with a small amount of compost.  I just made sure the compost didn’t dry out and this was the result:

My Watercress 2012

My Watercress 2012

.

When my watercress began to flower, I left it to set seed and I was surprised to get a second growth of useable watercress a few weeks later.

This year I sowed the seeds in the same way, but as our Spring was cold, I placed a pane of glass over it to help with the seed germination and it has grown well again.  I actually only sowed half the big barrel as this really is enough for us.

SAM_6677

.

Watercress is fabulous as it has more than fifteen essential vitamins and minerals.  Apparently, it contains more vitamin C (gram for gram) than oranges, more calcium than milk and more iron than spinach.

Another wonderful thing is that it only contains 11 calories per 100g of raw watercress.

.

I noticed on Friday that my Watercress is starting to go to seed (even though I have been adding loads of it to our salads), so I needed to use it up fairly soon.  Last year I made a Watercress and Potato soup, but one of my daughters didn’t like it as she said it was too ‘silky’ (whatever that means).  So over the weekend, I made a different soup with less watercress and this time I used leeks from my freezer….I’m pleased to say, she loved it:

.

Watercress, Leek and Potato Soup Recipe:

.

100g Watercress

450g Leeks

425g Potatoes (weight after peeling)

1 pint of vegetable stock

½ pint of milk

1 tablespoon olive oil

Salt and pepper to season

 .

Slice the leeks and chop the potatoes into small pieces.

Heat the olive oil in a large pan and then fry the leeks over a low heat until they are soft.

SAM_6681

Add the potato and watercress and ‘sweat’ for approximately five minutes, stirring occasionally to make sure it doesn’t burn at the bottom of the pan.

SAM_6682

Add the vegetable stock and season with salt and pepper to your taste.

SAM_6683

Simmer for approximately 20-25 minutes, until the potato is soft.

Heat the milk until it is starting to boil.

SAM_6686

While the milk is boiling, puree the soup with a hand blender or a liquidiser.

SAM_6684

Add the milk to the pan of soup and bring the soup back to the boil, stirring continuously.

SAM_6688

Serve the soup with a swirl of natural yoghurt.

SAM_6691

Enjoy!

.

I hope you enjoyed reading my blog today.

I will be back on Friday at approximately 4pm.

Still Planting And A Walk Around My Allotment

I have usually planted most of my seedlings by now, but as this isn’t a normal year (due to the cold Spring we had), I still have some to plant.

This week I have been busy planting various things and I must say my allotment is getting pretty full.

SAM_6645

I started by planting some more cauliflowers.  As usual I prepared the ground by raking in some blood, fish and bone a couple of weeks ago and then just before I planted them I trod over the area and jumped and danced on it.  Brassica’s all need firm soil and you may remember that I also did this with my brussels a few weeks ago.  One of my readers (Paula) said I had invented the ‘Brussell Sprout Stomp’, which made me laugh.

One of the main reasons for cauliflowers ‘blowing’  (loose heads, where the curds don’t grow together) is the soil isn’t firm enough.  So I suppose you could now name the dance ‘ The Cauliflower Stomp’.

I covered my cauliflowers with environmesh:

SAM_6654

.

This week I planted my ‘outdoor’ cucumbers.  They are a variety called ‘Burpless Tasty Green’, which I have grown for a few years now with great success.  The skin is slightly prickly so I do peel them before eating.  They taste lovely, with no hint of bitterness, which some cucumbers have.

SAM_6653

.

I also planted some more spring onions, as we eat loads of these and I like to make sure we have some available for a long as possible over the summer…

SAM_6655

…and some beetroot and parsley:

SAM_6656 SAM_6660

.

Finally, I planted some Nasturtiums next to my runner beans.  These are great companion plants as they attract blackfly.  The blackfly prefers the nasturtiums to the runner beans, so the nasturtiums act as sacrficial plants.

Nasturtiums next to my runner beans

Nasturtiums next to my runner beans

.

The broad beans in my polytunnel are still producing some lovely pods for picking…

SAM_6670

…and I had a lovely surprise this week as I found my first two strawberries ready for picking.  I took them home and me and my daughters all savoured the lovely, juicy, sweet strawberries together.  There really isn’t anything that tastes as good as freshly picked strawberries.  If you have never eaten homegrown strawberries, you really do not know what you are missing as they taste nothing like supermarket strawberries, that are only bred for a long shelf-life.

SAM_6648

.

.

Now we have had some warm weather and some rain, things have begun to grow nicely.  I had a walk around my plot yesterday and I noticed a few things.  The dahlias that I grew from seed have begun to flower:

 SAM_6676 SAM_6675

The apples and plums are beginning to form nicely:

SAM_6680 SAM_6678

My second early potatoes have begun to flower:

SAM_6674

My spring cabbages are finally ‘hearting up’:

SAM_6673

The first peas that I sowed this year are nearly ready:

SAM_6671

My polytunnel is growing well:

SAM_6667

And the lavender that edges both of my paths, is nearly in flower:

SAM_6663 SAM_6664

The bees will love the lavender after my poached egg plants have stopped flowering.  When I stand amongst the poached egg plants there is still such a buzz of activity there:

SAM_6665

.

.

Finally I thought I would show you what I do with lettuces after I have picked them, if I don’t use them all at once.  After taking off the few leaves I need at the time, I pop the rest of the lettuce into an old pot full of water.  Just like flowers in a vase, the lettuce stays lovely and fresh for quite a few days.

SAM_6647

.

I hope you enjoyed reading my blog today.

  I will be back on Monday at approximately4pm.

Onion Sets, Peas And Watercress

There has been some lovely warm weather this week and I have been working at my allotment in short sleeves at last.

On Tuesday I noticed the temperature in my polytunnel rose to nearly 37C, even with both doors wide open.

It was lovely to see that bees, butterflies and other insects were coming into the polytunnel, attracted by the mizuna that I can’t bring myself to dig up yet, as it is so beautiful.

Mizuna in flower

Mizuna in flower

.

I spent this week planting my onion sets.  I started my onion sets in modules this year, as the soil was in no fit state to plant them direct last month.  I was very pleased with the result as most of them had started to sprout:

SAM_6179

I am hoping this will be a one-off though, as it takes extra time to plant the sets in modules and obviously uses extra compost.  I planted 416 onions all in all, including 80 red onions and I’ve got to say my back did ache a bit afterwards.

This year is really an experimental year with my onions, as I had a problems last year with the allium leaf miner, especially on my overwintering onions.

In autumn, I planted seed sown onions instead of sets (in the hope they would be stronger plants) and covered them in environmesh.  I have also planted summer onions that I sowed in January (again, in the hope they will be stronger plants) and two different varieties of onion sets, in the hope that one may grow stronger than the other.

The two varieties of onions sets I planted this year are ‘Turbo’ and ‘Sturon’.

SAM_6180

The allium leaf miner is a pest that was only detected in Britain in 2002.  It has been spreading rapidly since and spread to many places in the Midlands for the first time last year and unfortunately found my allotment site too.

The allium leaf miner isn’t choosy which allium it attacks.  Alliums include onions, leeks, garlic and shallots.

You can find details of the allium leaf miner here.

.

I have also been planting peas again this week.  I have planted some mangetout as my youngest daughter absolutely loves them (though she won’t eat peas, which is very strange), so I would be in trouble if I didn’t grow them. I grew them in guttering as I find I have a better germination rate this way.  You can read how I grow my peas in guttering here.

SAM_6107

I also grow a tall, climbing variety called ‘Pea shooter’, which are really sweet, large peas.  The peas were expensive to buy, so I saved some seeds last year and I am pleased to say that they germinated really well.  I made a frame out of canes tied together and draped pea and bean netting over it, so the peas will have something to climb up onto.

There is nothing like opening your first homegrown pea pod straight from the plant and eating the wonderful, sweet tasting peas inside.  It is something I look forward to every year.

My tall, climbing peas

My tall, climbing peas

As the weather is warming nicely, I decided to sow my watercress.  Eric (the gentleman who had the fourth plot before me) always grew a really good crop of watercress in a great big black pot, so last year I decided to give it a try and it worked really well.  I just sprinkled the seeds and covered them with a small amount of compost and I  just made sure I didn’t let the compost dry out.  This was the result:

My watercress in 2012

My watercress in 2012

When it began to flower, I left it to set seed and I was surprised to get a second growth of useable watercress.

This year I replaced the top inch of compost with new compost and sowed new seed.  I covered the moist compost with glass to help the seeds to germinate.

I am looking forward to the results.

SAM_6221

.

This week I have been working on this years wildflower patch, as last year I was really pleased with it.

I have been raking the area to produce a fine tilth (a fine crumbly soil) and yesterday, I mixed the wildflower seeds with horticultural silver sand and scattered it over the area, avoiding the foxgloves I had transplanted in the patch.  I raked the seeds in, covered them with net to protect them from the birds and hoped the forcasted rain would come.

SAM_6220

If the patch is only half as good as last years, then I will be very pleased:

SAM_2726

I noticed my comfrey patch is growing well now.

I use comfrey a lot at my allotment.  Comfrey is high in potash, as the deep roots of the Comfrey plants absorb the potassium from the subsoil. Therefore it’s great for using on most fruits and flowers, including tomato plants.

I add comfrey to my compost bins, as it is a great ‘free’ activator and I use it as a mulch around plants.  I also have a water butt which I use solely for ‘comfrey tea’, which I use to feed certain plants.  You can read how I make it on one of my very first posts, here.

SAM_6222

.

I thought I’d mention a few of things I have harvested this week too.

Over winter, we have been eating the cabbages I sowed last summer.  The variety is ‘Robinson’s Champion Giant Cabbage’.  They have stood through all the wet and snowy weather the winter threw at them and I am really pleased with the results:

SAM_6192

.

My purple sprouting broccolli is doing well and tastes delicious.  It takes approximately a year to grow from seed, but it is so worth the wait:

SAM_6191

.

And finally, remember I put a ‘bin’ on my rhubarb in February, to ‘force it’….

SAM_5812 SAM_6202

I removed the bin and the rhubarb was beautiful and pink.  I could actually smell the sweetness as I removed the dustbin.  I will be making rhubarb crumble tonight, as it’s my favourite.

If you want to make something different with rhubarb, you could try a Rhubarb and Ginger Cake, which is just as nice.  This recipe is here.

.

There is always some confusion about composting rhubarb leaves, as the leaves are high in Oxalic Acid, which is toxic to humans, but this is broken down and diluted in the compost heap as the leaves decompose.  So yes, it is safe to put rhubarb leaves into your compost bin.

Also, a long time ago when I pulled my very first rhubarb stalks from the ground, one of the ‘wise old allotment chaps’, saw me chopping the leaves off.  He told me to always leave part of the leaf on the stalk, so it looks like there are three claws left (like a chickens foot):

SAM_6205

When I asked why, he told me the reason for this is because the end always dries and you chop it off again when you are preparing it for cooking.  This way, you don’t waste any….and he was right!

SAM_6215

I hope you have enjoyed reading my blog today.

I will be back again on Monday at approximately 4pm.

Enjoy your gardening weekend.

A Cheap Fruitcage, Potatoes And A Flower Patch

This week, I have noticed that it has been slightly warmer in the afternoons and the weather forecasters are promising that it is going to warm up over the weekend.  I really hope it does, as up to now it feels like ‘Spring’ has been on hold.

The only positive thing about the colder weather, is the weeds haven’t started to grow vigorously yet, so I’m not using my hoe every week, as I did this time last year.

SAM_6091

The daffodils are flowering beautifully now.  This inspired me to do a bit of work on my flower patch.  Up until a few weeks ago, there was a swing next to my flower patch.  As my daughters don’t use the swing anymore, I moved it.  This week, I dug the grass up where it stood, so my flowers patch is now an ‘L’ shape and will look much better when I have finished planting it up.  I will be looking out for some cheap plants to buy now.

My flower patch, winter 2012

My flower patch, winter 2012

My flower patch today.

My flower patch today.

.

This week I put my two fruit cages up, over my fruit bushes.  I love my ‘cheap’ fruit cages, as this is the third year I have used them and they work a treat.  They are made out of canes and old hand wash bottles.  I find hand wash bottles are ideal to use, as they are made out of a softer plastic that doesn’t become brittle over time.  I bought the nets from ebay three years ago, for approximately £40 for both cages, but this is far cheaper than buying a ready made fruit cage and I can easily take my cages down when the plants have stopped fruiting.  You can see my fruit cage below:

SAM_6089

.

This week I have also planted my second early potatoes.  The variety I like is ‘Marfona’, which produce a high yield of large potatoes, suitable for boiling, mashing and baking.  I love the first potatoes of the year, boiled and dressed with lots of butter.  My mouth is watering just thinking about it now.

I struggle to dig trenches and line it with manure, before I plant my potatoes, as it’s such hard work.  I have tried different ways to plant my potatoes, but the best way for me is to fork manure into the ground over the autumn / winter and then plant the potatoes with a bulb planter, dropping them in the hole and then covering them up with soil again.  I then earth them up as normal when they are about 10cm high:

SAM_6080 SAM_6082

Afterwards I used my bulb planter again to plant some galdioli’s that I had bought form Wilkinson’s:

SAM_6085

.

In my polytunnel, the weeds are starting to grow now and so I gave it a good hoe.  I then planted out some lettuce that I had grown from seed in March.  The variety is ‘Webbs wonderful’ which my family really like.  I also sowed two rows of carrots and a row of radish.  I’m keeping my fingers crossed that it will be warm enough at night, for the seeds to germinate.

SAM_6079

.

Another job I managed to do was dig over my wildflower patch ready to sow my wildflower seeds next month.  Just in case you haven’t seen the photo’s from my wildflower patch last year, you can see them here.

SAM_6100

.

Finally, I planted my shallots (over a month later than I normally plant them out due to the cold weather).  My shallots were growing in newspaper pots and they had all rooted well.  I planted the shallots together with the newspaper pots, making sure that none of the newspaper pots were showing above the ground.  If a newspaper pot is above the soil level, it acts like a wick and the plant dries out.

I am really pleased they are finally in the ground now.

My shallots finally planted

My shallots finally planted at my allotment

It has been another busy week at the allotment and I still have loads to do, but that’s what’s so wonderful about gardening, your work is never finished.

OLYMPUS DIGITAL CAMERA

Thank you for reading my blog today.

I’ll be back on Monday at 4pm.  Have a good weekend.

A Busy Easter Holiday, Mincing And Sowing Parsnips

Hi all, I hope you had a lovely, restful Easter.

My pots of bulbs, courtesy of 'Spalding Bulbs'

My pots of spring bulbs, courtesy of ‘Spalding Bulbs’

.

I had fun with my two new gadgets over Easter:

First was the meat mincer (with a sausage making attachment) that I told you about here.  I was disappointed to find that there were no instructions in the box, but I did manage to easily work out how to mince the beef that I had bought, thanks to the pictures on the box.  I am yet to make sausages.

SAM_5962

I wanted to work out if it was cheaper to mince my own beef, rather than buy the ready minced beef.  I spoke to the butcher at Morrisons (as we don’t have a local butcher) and I’ve got to say he was extremely helpful.  He told me that brisket is usually the cheapest cut of meat that can be used for mincing and it is fine to use, however he pointed out that ‘topside’ of beef was actually half price and worked out cheaper  per kg, than the brisket.  So I paid £10.69 for a lovely joint of beef.

The beef was beautiful.  It only had the smallest bit of fat on, which I cut off before I chopped it into chunks.  I then put it through the mincer.

SAM_6036

I must say though, my arm did ache by the end of it, but I managed to get eight bags of mince beef, all weighing 250 grams, which I froze.

I worked out that it would have been cheaper to buy the prepacked ‘value’ minced beef, but it was certainly cheaper than buying prepacked ‘lean minced beef’ and I had the benefit of knowing what is actually in the mince beef we are eating.

I was very pleased with the meat mincer I bought and I will definitely be mincing my own beef from now on.  I will now be looking out for bargain beef joints.

SAM_6039

.

My 2nd ‘gadget’ is something I have been wanting for a while….a bread slicer.  I have never been very good at slicing my nice homemade bread, which sometime spoils the overall look of it.

SAM_6028

Normally these slicers retail at nearly £90 (which I certainly could never justify), but we were killing time one day a couple of weeks ago and found Debenhams had a half price sale and had reduced it to £40.  They only had one left, which was in an extremely bashed box and my wonderful husband managed to haggle them down to just £35.

This was such a bargain and I am really pleased with it.  It cuts my bread beautifully and I have also sliced ham with it and it cuts it as perfectly as the ready cut ham, that you buy from the supermarket.

SAM_6031

.

Over Easter I had another jam making session.  This time I made rhubarb jam (my favourite), with rhubarb I still had in the freezer from last year.

I also made some crab apple jelly and crab apple ice cream syrup, from a bag of crab apples that I had frozen last year.  You can find the recipes here and here.

SAM_6041

.

I also finally opened my Wilkinsons ‘Starter Wine Kit’ that I had purchased in the New Year sales for £10.  Unfortunately some of the items were missing from the box and we didn’t have the receipt.  However, Wilkinson’s were fantastic and changed it anyway for a more expensive kit and gave us the remaining items from the old kit as a goodwill gesture, which we thought was fabulous customer service.

SAM_6026

I have never made wine before, so it is all new to me, which is why I chose a starter kit.  Hopefully when I have sussed it out, I can use some of the grapes from the vines I planted at my allotment last year, when they are established and fruiting well.

So it is now bubbling away nicely.

.

SAM_6075

I’ve also been ‘pricking’ out my seedlings and they are sitting nice and snugly in my heated greenhouse.  I try to stop the temperature falling below 10c, but unfortunately it has been dropping to approximately 8c on the cold nights we have been having.

My peas that I sowed on the 22nd March in guttering, are doing well now too, they will soon be ready to plant out:

SAM_6067

The peas have a bit of protection in my coldframe.

.

The lettuces I sowed on the 17th March are doing nicely and I will be planting these in my polytunnel this week:

SAM_6069

.

I also sowed my parsnips on Saturday:

SAM_6065

I have always had such a problem with my parsnips ‘forking’ when I sow them direct, or not germinating.  I have dug trenches and filled with compost, I have filled holes with compost and sown into them, but nothing seemed to work until I came up with the idea of sowing the seeds in kitchen roll tubes.

I fill the tube with compost and sow three seeds in each and keep the tubes on my windowsill.  As soon as the seeds germinate, I move them outside into my coldframe and then a few days later I plant the whole tube into the ground.

This way I get straight parsnips nearly every time.

I have been asked in the past if this works with toilet rolls, but it doesn’t.  The reason for this, is the tap root on a parsnip is very long and grows down a long way before the seedling shows above the compost.  Therefore the tap root hits the bottom of the toilet roll tube, which causes it to ‘fork’.  However, as the kitchen roll is longer, the tap root has a longer distance to grow before it hits the bottom.

My parsnips

My parsnips

.

Finally, over Easter, I decided to plant my onion sets into seed trays to start them off, as the weather showed no sign of changing.  This will give me a little bit of breathing space before I need to plant them in the allotment.  At least they will have developed some roots and this will help to stop the birds from pulling them up.

SAM_6035

.
So all in all, it has been a busy, but enjoyable Easter.

OLYMPUS DIGITAL CAMERA

Thank you for reading my blog today.

I will be back again on Friday, at approximately 4pm.

I hope you have a good week.